

How to create a macOS 12 Monterey installer on an external drive

This tutorial goes through the process of creating an install drive from the newly-released macOS 12 Monterey Beta application. Having an external drive allows you to install the OS to multiple computers without re-downloading it, perform clean installs instead of initiating them from within an existing OS, and boot to the installer’s built-in recovery for troubleshooting tools.
To get started you’ll need the Install macOS 12 Beta application and an external storage drive of 16GB or larger. A USB stick is usually best for this, but you could also use an SD card (if your Mac has an SD card slot), a partition on a larger external hard drive, or another kind of external storage drive.
Note: macOS Monterey is currently a developer-only beta. A public beta will be released in the next month or so, which you can sign up for with Apple. This guide currently describes the installer creation process for the developer beta, and will be updated for the normal Mac App Store release in the future, when it is available. As usual, all beta testing is at your own risk.
Do not install beta operating systems to work-critical machines, especially without making full backups first.
How to create a macOS Monterey beta installer
1) Download a copy of the Install macOS 12 Beta application.
Users with a paid Apple Developer account can download the Beta Access Utility from the downloads section of their Apple Developer account page. Once installed, open System Preferences, Software Update to view and download the beta.
Other users will have to find a copy elsewhere. They can join the Public Beta for free, but will have to wait longer for beta releases. Public Beta users will be provided with a slightly different version of the Beta Access Utility. Once installed, open System Preferences, Software Update to view and download the beta.
2) Once your download is complete, your Mac will launch the macOS 12 installer app. We do not want to install it now, so quit it, open your /Applications folder and locate the installer in there. Don’t rename it or move it out of /Applications.
3) Format your >=16GB drive to GUID Partition Map and Mac OS Extended (Journaled) in Disk Utility. This guide explains how, if you are not familiar with the method.
Note: All data on the external drive will be erased.

4) Name the newly formatted drive USB, for ease.
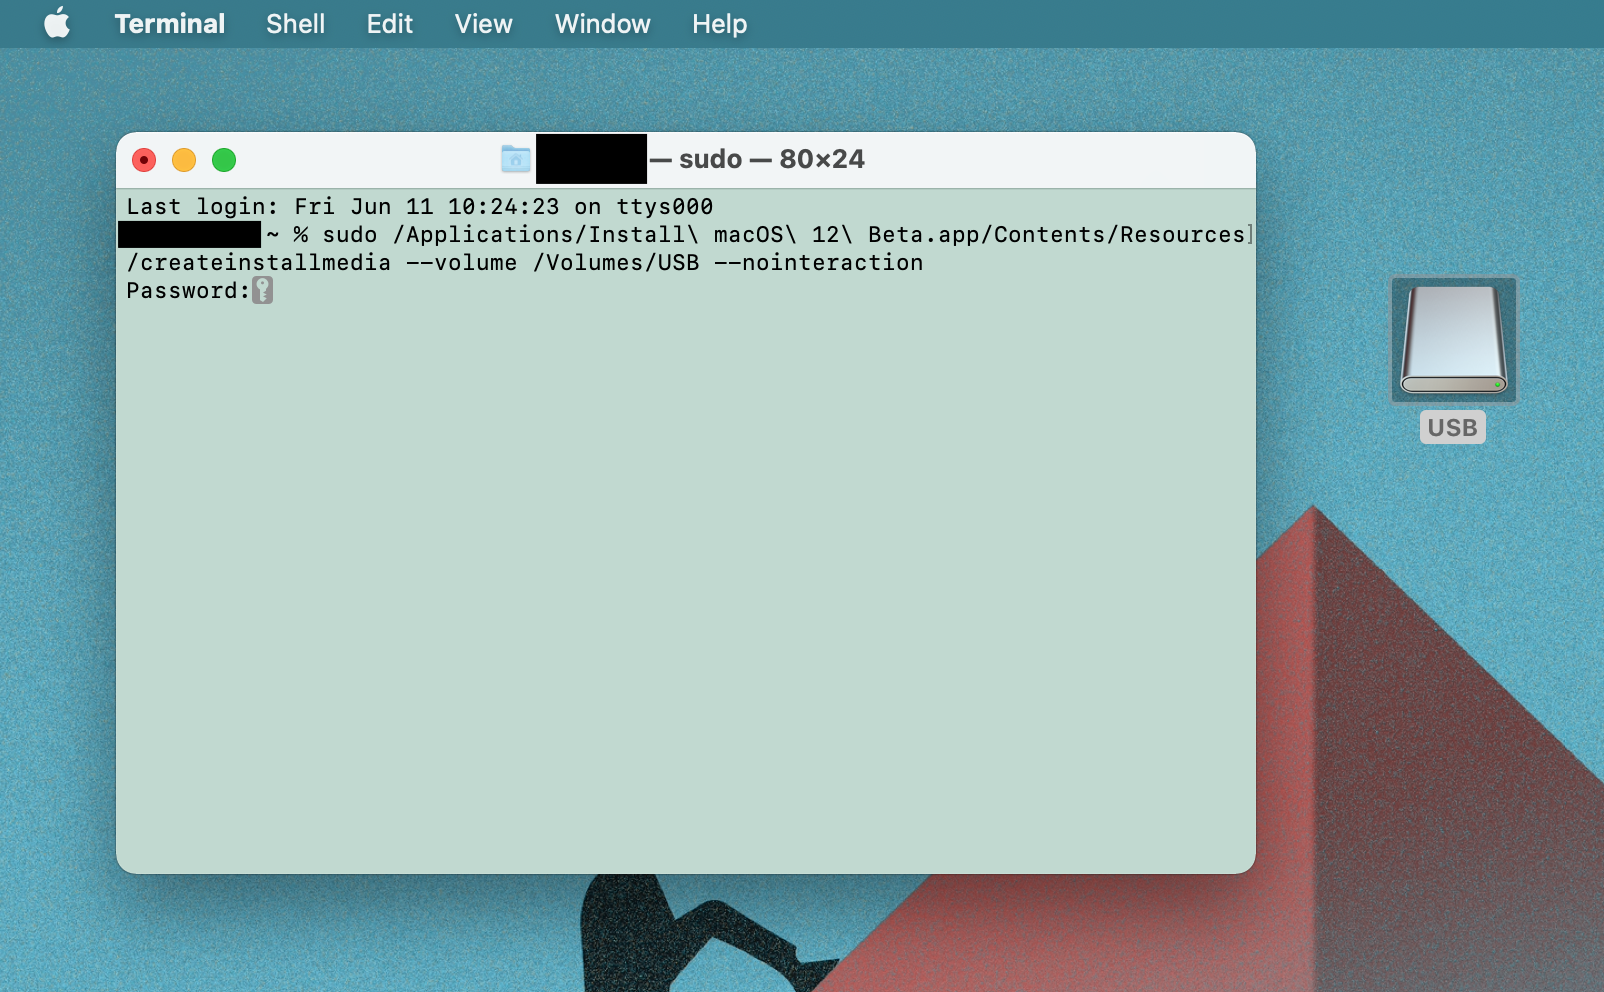
5) Next, launch the Terminal application and paste in this command:
sudo /Applications/Install macOS 12 Beta.app/Contents/Resources/createinstallmedia --volume /Volumes/USB --nointeraction
- Remove “–nointeraction” from the command to be asked for confirmation before erasing the external drive.
- The “–downloadassets” flag was introduced with macOS Mojave. It supposedly downloads on-demand assets which may be required during installation. This is presumably helpful for offline installations, though I’ve never noticed any difference in online or offline installations when using it. I wouldn’t bother with it, but add it if you like.
- Older versions of macOS used an “–applicationpath” flag in this command, but this is now deprecated and will cause an error if used. Use the command we have provided above, instead of referring to guides which were written for previous versions of macOS.
6) Press Enter to issue the command, and enter your password when prompted.
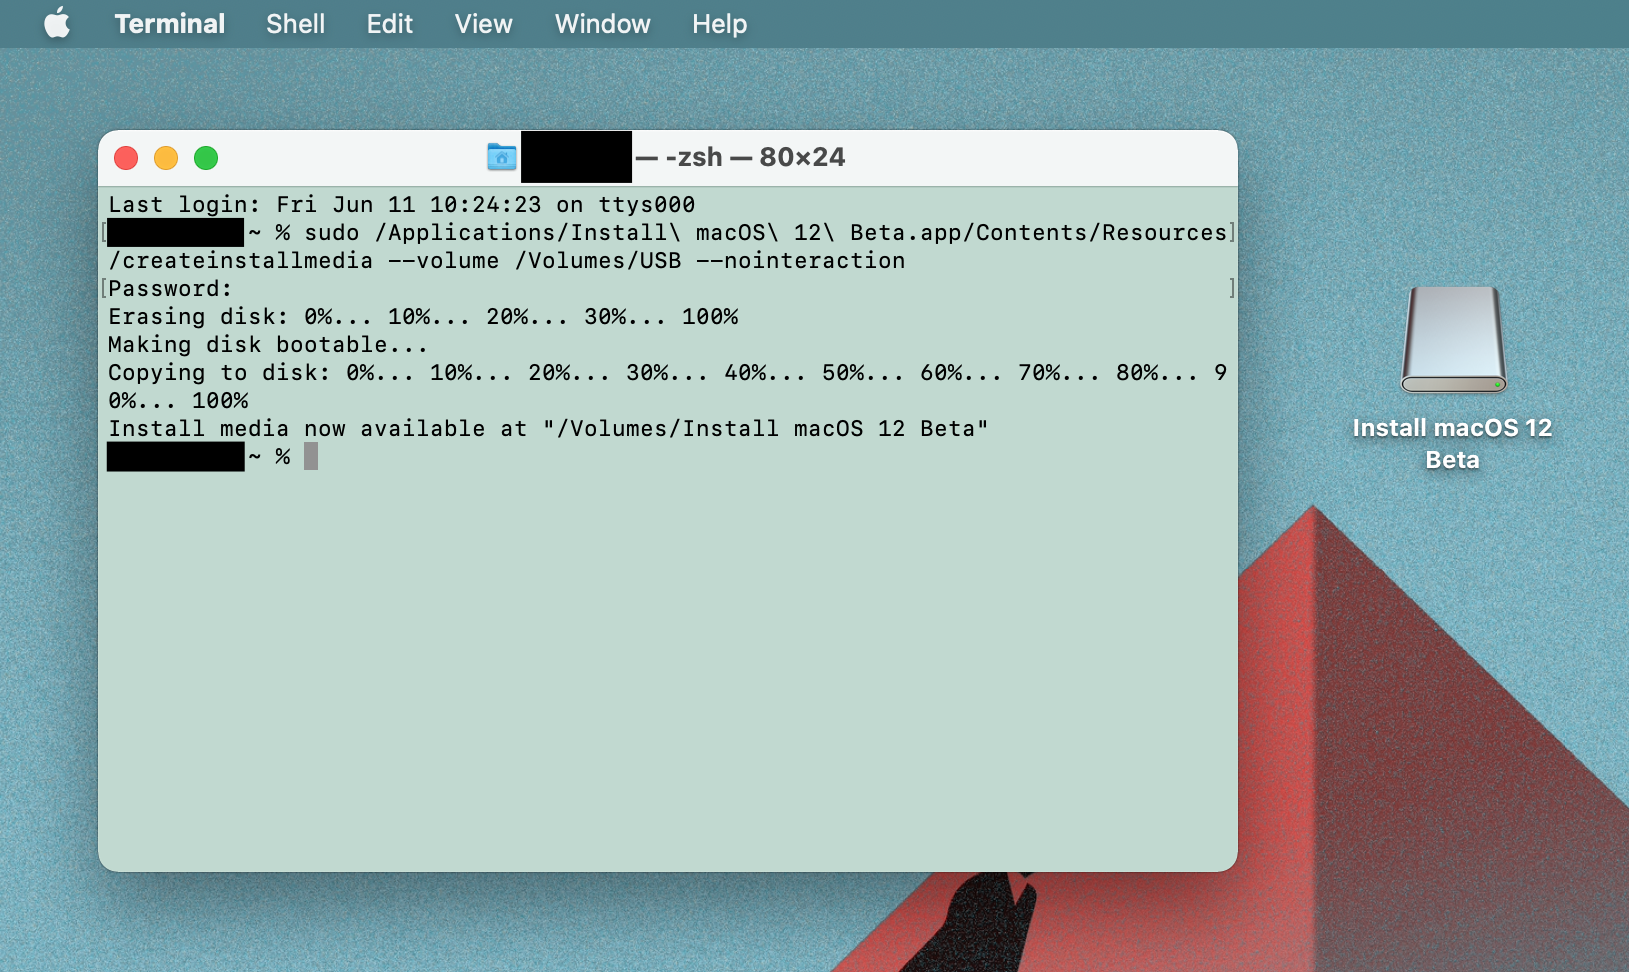
Terminal will provide readout of the external drive being erased, and of the installer files being copied onto it. When Terminal declares that the drive has been successfully created, look for it on your desktop under Install macOS 12 Beta.
How to use the macOS 12 Monterey Beta installer
1) Shut down the computer you wish to install the beta on, and insert the USB drive.
2) Start up the computer while holding down Option (⌥).
3) The Startup Manager will show a list of bootable drives. Select Install macOS 12 Beta to boot from the installer.
4) You can now continue to install as you like. The installer also allows you to reformat connected drives, and access tools such as Terminal, Startup Disk, and Firmware Password Utility.
Have fun testing Apple’s newest version of macOS! Remember: back up your data before upgrading to a new OS, particularly a beta one.
Your drive can be used to troubleshoot your Mac if it becomes corrupted and can’t boot from its own Recovery partition. Being able to reinstall your operating system or open a Terminal session from the external drive is also extremely useful in a pinch. I mainly use these drives to install macOS to multiple computers without having to re-download the installer onto each one, saving time and data.
If you need any help with the guide, ask your question in the comments below!
Source link: https://www.idownloadblog.com/2021/06/11/create-macos-monterey-install-usb/

Leave a Reply