

iOS 14 Camera: How to capture mirrored selfies on iPhone and iPad

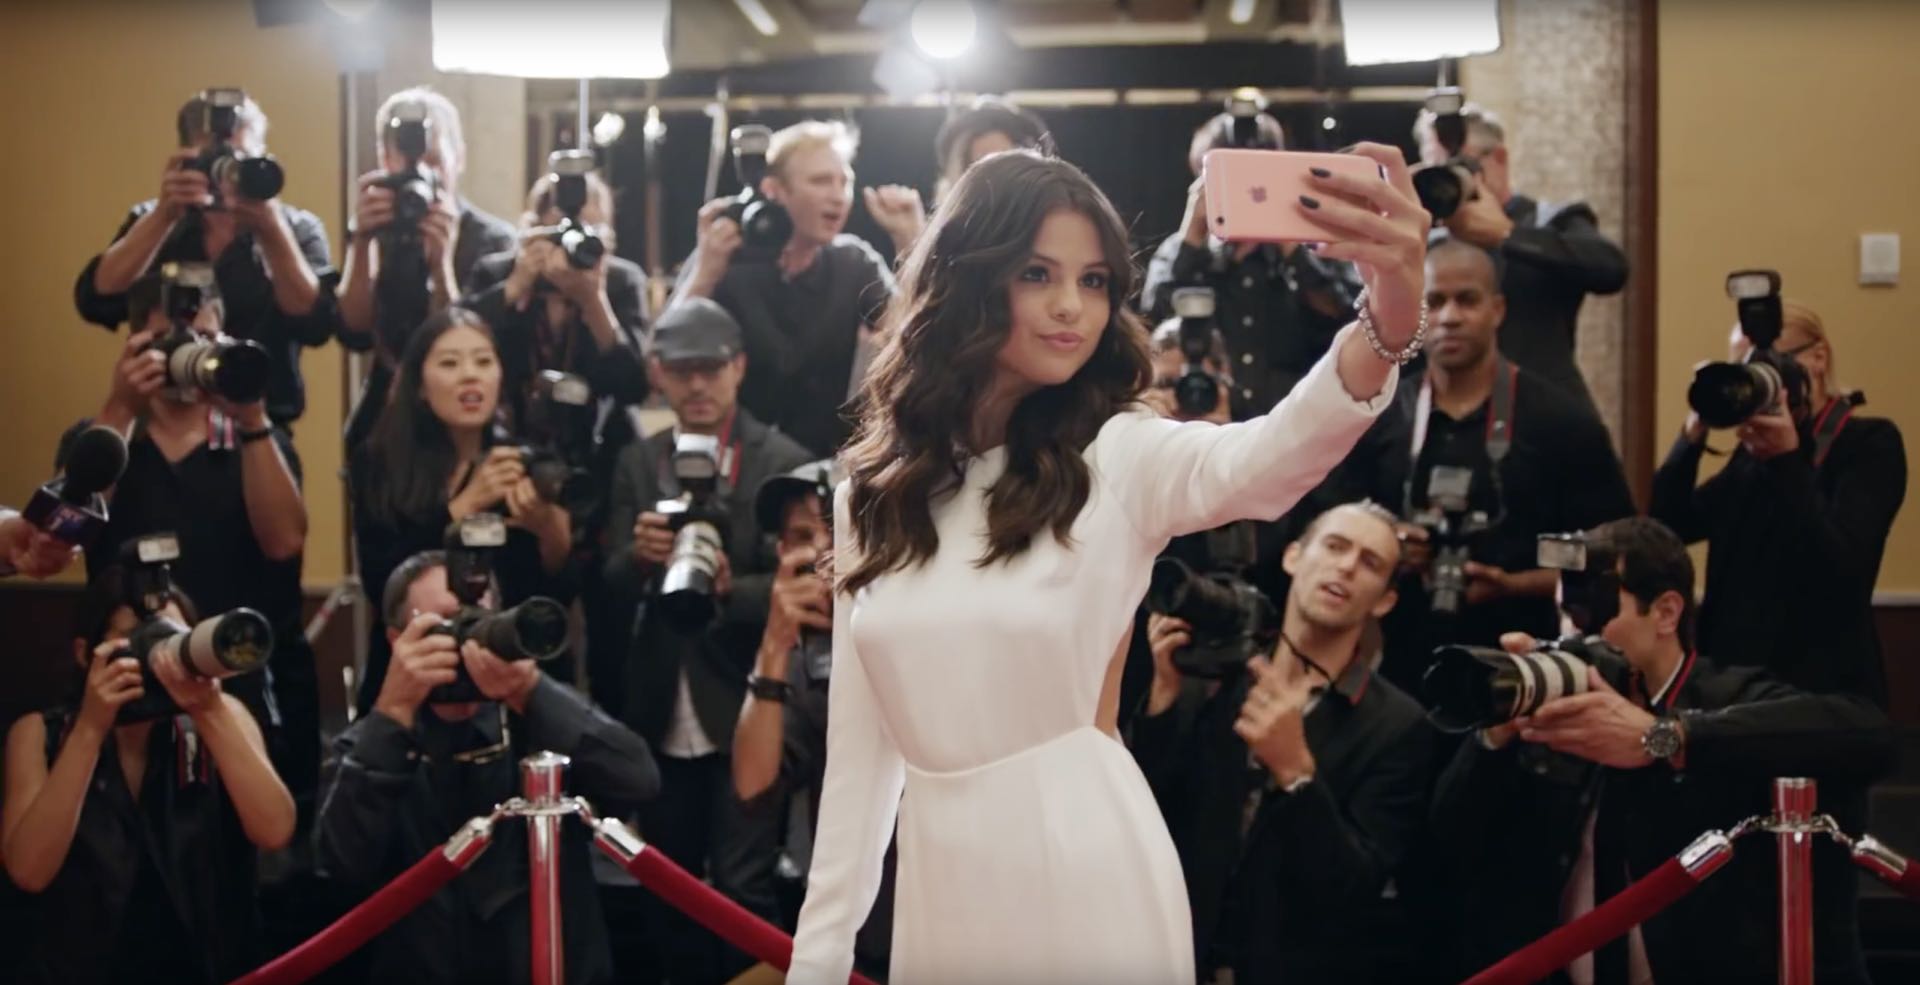
Fans of iPhone photography have long complained about the Camera app saving un-mirrored selfies. It’s confusing because the viewfinder displays a mirrored image. Thankfully, iOS 14 and iPadOS 14 let you revert this behavior. As a result, saved shots taken with the front-facing camera now match what you see in the viewfinder. Here’s how to take mirrored iPhone selfies.
Why are your selfies flipped?
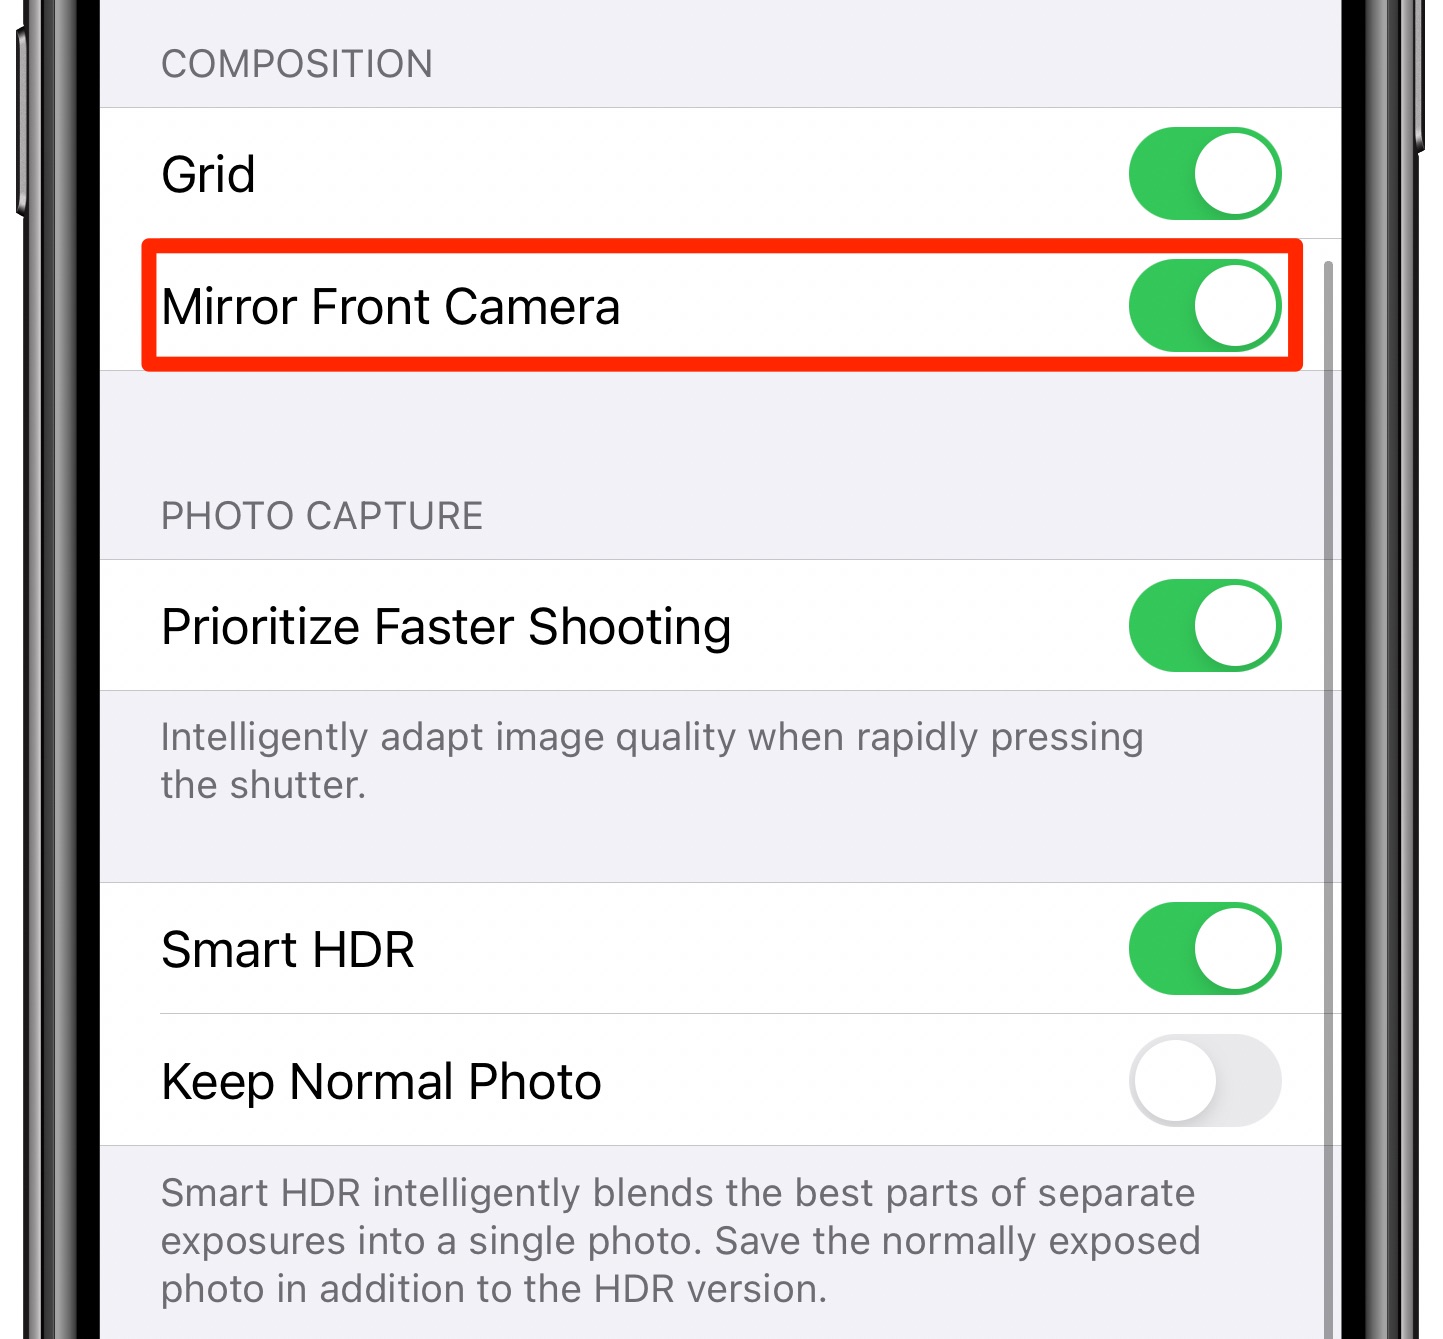
It’s taken quite a few number of years, but Apple has finally added a mirroring toggle to your camera settings. Now you can choose between taking mirrored or un-mirrored photos with the front-facing camera. This useful new setting is available on any iPhone and iPod touch devices with the iOS 14 software, and on iPads that are compatible with the iPadOS 14 update.
TUTORIAL: Tips for using Burst mode on your iPhone’s camera
But why does the iPhone viewfinder show a mirrored image in the first place? The simple answer is that before selfies came along, we were all used to seeing ourselves mirrored in mirrors and other surfaces that produce reflections with left and right reversed.
The viewfinder in the Camera app simply displays what we’re accustomed to seeing.

Photos taken with the rear camera are always shown in the viewfinder and saved to Photos un-mirrored
Before iOS 14, saved images were returned to their correct, unflipped composition. As a result, you ended up precisely with what the camera saw at the moment you took the photo.
Un-mirroring selfies manually
In iOS 13 and earlier, it was possible to manually un-mirror your selfies after the fact. You could do that quite easily with the editing tools in the Photos app. You’d typically invoke the Crop tool and hit the top-left icon resembling a pair of triangles to flip a selfie.
TUTORIAL: How to preserve your iPhone camera settings
You can still un-mirror selfies manually, but iOS and iPadOS 14 bring a handy new toggle. With it, you can configure the Camera app to automatically un-flip your selfies before saving.
Follow along with our tutorial embedded right ahead as we show you how to change your iPhone’s default behavior so that the Camera app saves your selfies unflipped.
How to take mirrored selfies on iPhone & iPad
Follow these steps to take mirrored selfies with your iPhone or iPad camera:
- Open Settings on your device.
- Choose Camera from the root list.
- Slide the Mirror Front Camera switch to the ON position below the heading Composition.
From that point onward, the Camera app will save selfies without flipping.
In other words, a photograph you take of yourself using the front-facing camera will now match what you saw through the viewfinder when you took that selfie.
50 major new features in iOS 14
For a quick overview of the 50 headline new iPhone and iPod touch features introduced with iOS 14, be sure to watch our hands-on video walkthrough right ahead.
Subscribe to iDownloadBlog on YouTube
Need help? Ask iDB!
If you like this tutorial, pass it along to your friends and leave a comment below.
Got stuck? Not sure how to do certain things on your Apple device? Let us know via [email protected] and a future tutorial might provide a solution.
Submit your own how-to suggestions via [email protected].
Source link: https://www.idownloadblog.com/2020/08/07/mirrored-iphone-selfies-tutorial-iphone-ipad/

Leave a Reply