

How to enable the ‘Save As’ option on Mac
A few years back, Apple started hiding the Save As option from the File menu in all Mac applications, a move likely aimed at simplifying things for casual users. If that works great for the majority of people, power users like you and me prefer the flexibility and granularity of the Save As command.
In this post I will show you three ways to use the Save As command on your Mac. We will look at two different keyboard shortcuts, and we’ll also set up a permanent solution to bring back the Save As option in the File menu of all applications running on your Mac.
The temporary quick fix
If you don’t want to use the Save As option regularly, then you’ll probably be better off with the quick and temporary solution which involves one single key and a couple clicks.
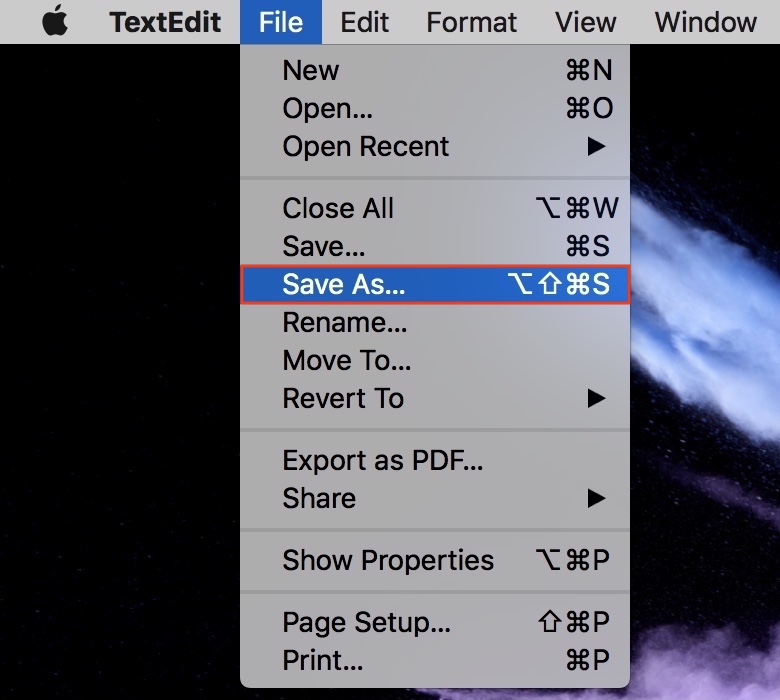
While in any application on your Mac, click on File in the menu bar, then hold the Option key on your keyboard.
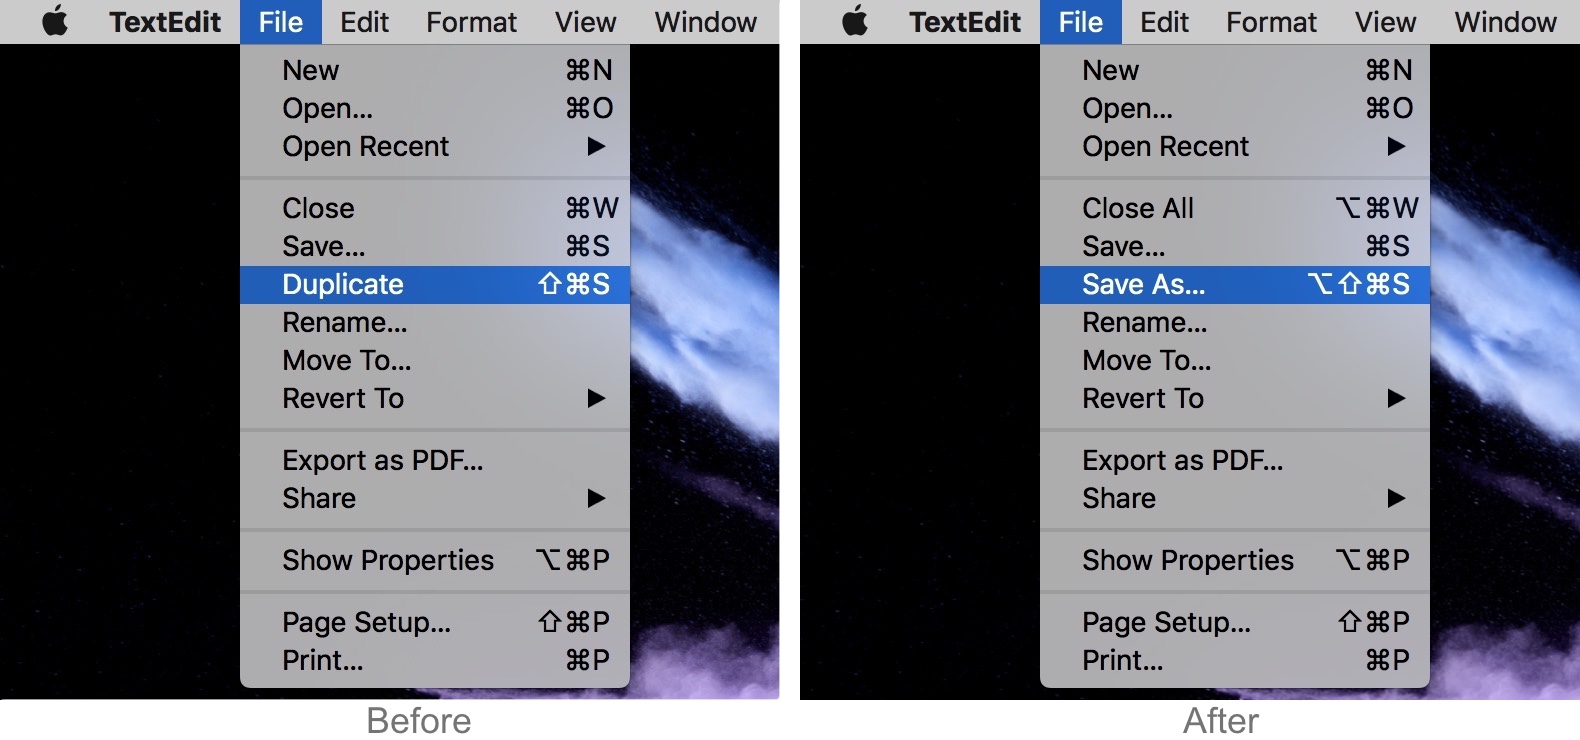
You will see the Duplicate option change to Save As. At this point, simply click on Save As with your mouse, then select the file format and save location.
The faster keyboard shortcut
As you can see on the screenshot to the right above, pressing the Option key to reveal the Save As command has also revealed the direct keyboard shortcut for Save As, no mouse required.
In any document, simply use the combination of the Option + Shift + Command + S keys to directly invoke the Save As command. Doing so will open up a window letting you choose a file format (if applicable), as well as the save location of the file.
More advanced users will probably prefer this solution over the previous one because it is more direct, although the key combination is a little harder to memorize.
The permanent solution
The final solution to bring back the Save As command is to create a custom keyboard shortcut. Doing so will permanently put the Save As option in the File menu, so it will always be available to you without having to remember any key combination.
We have already written a detailed tutorial on how to create custom keyboard shortcuts for Mac apps so we won’t go over it all again in details and I invite you to check out this tutorial for the step by step instructions.
Follow these instructions if you want to permanently put the Save As option in the File menu:
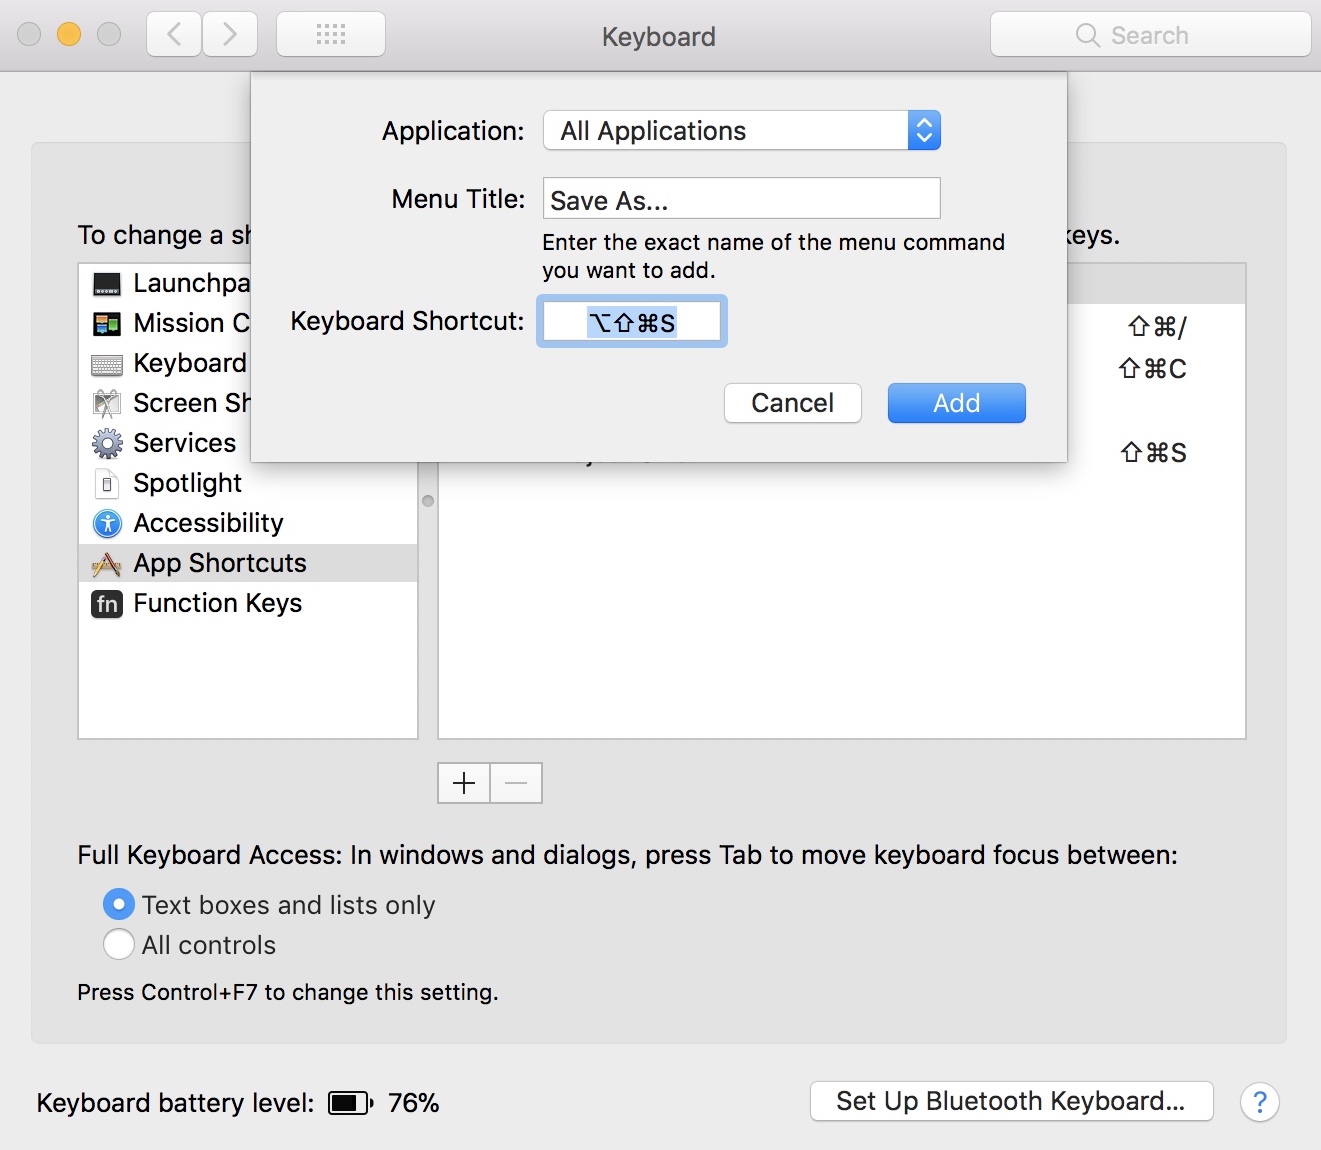
1) Go to > System Preferences… > Keyboard.
2) Click the Shortcuts tab.
3) Select App Shortcuts in the sidebar.
4) Click on the + sign.
5) Make sure All Applications is selected in the dropdown menu.
6) Type exactly “Save As…” in the menu title. Make sure you type the ellipsis too. This is very important.
7) In the keyboard shortcut section, press Shift + Option + Command + S together, or any key combination that you think would be easier to remember. Be careful though, because the keyboard shortcut you choose might clash with other commands from specific applications. For example, if you were to choose Shift + Command + S, this shortcut is already attributed to the Duplicate command in Pixelmator. Your mileage may vary, and if all you want is to have the Save As option back in the File menu, I’d suggest sticking to the default Shift + Option + Command + S combo.
8) Click Add to save your new shortcut.
From now on, the Save As option will be available by default in the File menu of all applications on your Mac.
As you can see, there is a solution for just about everyone, from the casual to the most advanced user.
Source link: http://www.idownloadblog.com/2018/03/13/how-to-enable-save-as-mac/

Leave a Reply