

How to clone a macOS boot drive make a bootable backup with the SuperDuper! app
With many of us storing extremely personal documents, photos, and other types of information on our computers these days, it can be detrimental when a storage drive fails, or when a computer needs to be replaced, and we have no viable data backup.
Note: Purchases made on this page help support iDownloadBlog. We may earn a small commission when you complete a purchase using affiliate links on our website.
Apple’s first-party Time Machine feature can be helpful because it makes system snapshots that we can restore to our working drive, but when your main operating system storage drive fails, those snapshots can be useless to you in the moment as you won’t have a bootable operating system to boot from to apply those snapshots to.
That’s where the powerful SuperDuper! application for macOS comes into play, as it can create a bootable clone of your existing operating system and all your files so that when your main operating system storage fails, you can boot from the cloned drive and continue to use your computer.
In today’s tutorial, we’ll show you how to clone your macOS boot drive using the free SuperDuper! application.
What you need to know
SuperDuper! is different from Time Machine in that it creates a bootable clone of your Mac’s boot drive – the drive you install your macOS operating system on. Time Machine, on the other hand, creates time scaled snapshots that your Mac’s existing boot drive can be restored to – effectively sending your machine back in time to a working state.
When your Mac’s internal storage drive fails, you won’t be able to boot into macOS anymore. In this case, Time Machine snapshots are worthless because you can’t send your operating system back to a working state if the drive your operating system is installed on isn’t functioning. Likewise, you can’t boot from Time Machine snapshots. This is where SuperDuper! shines, as it can make a fully bootable backup disk of your boot drive on another internal or external storage drive that you can boot from when your internal drive fails.
There are potential pros and cons to each Time Machine and SuperDuper! – for example, Time Machine backups are likely to be more up to date, as it’s designed to create high-frequency snapshots that you can effortlessly restore to and have a moderate number of recent changes available in case the need for an immediate backup arises.
SuperDuper!, on the other hand, may provide an outdated backup depending on how frequently you clone your storage drive, meaning that should the need arise to use your cloned backup, it could be significantly outdated by the time that moment comes, and it may not be up to date with all the files that you were just working on yesterday.
It’s a good idea to use some combination of Time Machine and SuperDuper!, which would require two separate drives. SuperDuper! clones your boot drive, while Time Machine creates up-to-date snapshots. You can then use Time Machine to update your cloned boot drive in the event of total internal storage drive failure to have an up-to-date system again, even if the setup is only temporary while you send your machine in for repairs or attempt replacement of the failed internal drive yourself (with the latter being harder on modern Macs with soldered storage chips).
That’s not only extremely useful in a pinch – it’s an essential component of a comprehensive system backup that you can use right in the thick of things when an unforeseen disaster strikes.
How to clone a macOS boot drive with SuperDuper!
To make a clone of your Mac’s boot drive with SuperDuper!, simply follow the steps that we’ve outlined below:
1) Download and install SuperDuper! from the utility’s official website. The URL has been provided below:
https://www.shirt-pocket.com/SuperDuper/SuperDuperDescription.html
Note: SuperDuper! needs Full Disk Access permission to be able to clone to your drive. We’ll enable that permission in the next step.
2) Navigate to → System Settings… in your Mac’s menu bar:

3) Navigate to Privacy & Security → Full Disk Access in the System Settings window:

3) Click the “+” button and choose the SuperDuper! app to add it to the list. Then, turn it on:

Note: Now that SuperDuper! has Full Disk Access permissions, you can proceed with the boot drive cloning process.
4) Launch the SuperDuper! app from your Mac’s Applications folder:

5) Click the Copy drop down combo box and select the Macintosh HD volume to make it the source of your cloning:
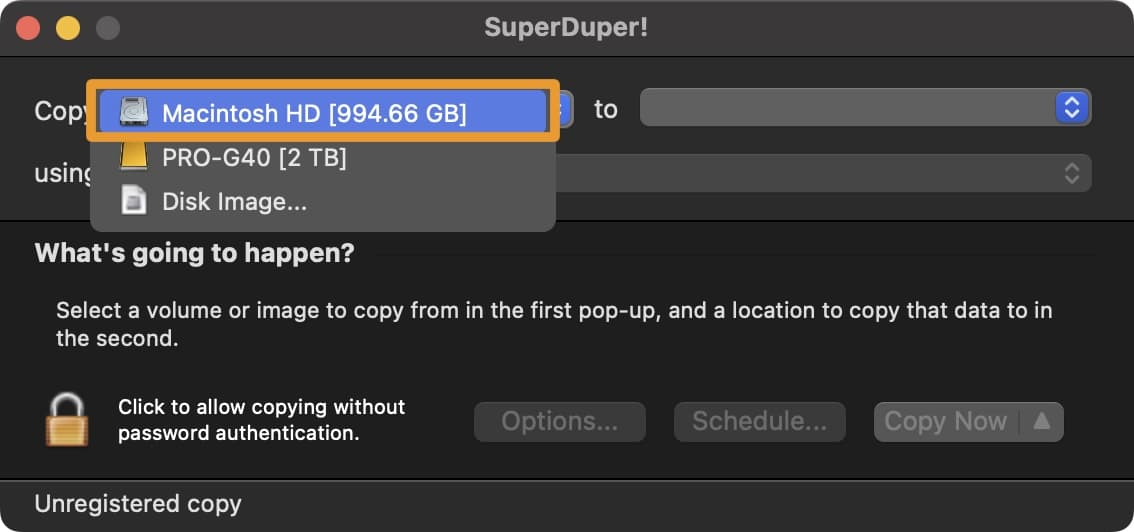
6) Click the to drop down combo box and select your preferred spare drive to write the clone to:

Note: We will be using a SanDisk Pro-G40 Thunderbolt 3 external SSD for this tutorial, as it’s a blazing-fast external option. You can use any internal or external drive you want, as long as the storage space is sufficient for the drive you’re cloning. The storage space on the drive you want to write the cloned contents to must be equal or more than the drive you’re trying to clone.
7) Click the Copy Now… button to proceed with the cloning process:

8) Enter your Mac’s password when prompted, then click the OK button:

9) SuperDuper! will now warn you that you’re about to erase the contents of your new drive to write the cloned Macintosh HD contents to. Click the Copy button to proceed:

10) If prompted to register SuperDuper!, just click the Later button to bypass this prompt and move forward:
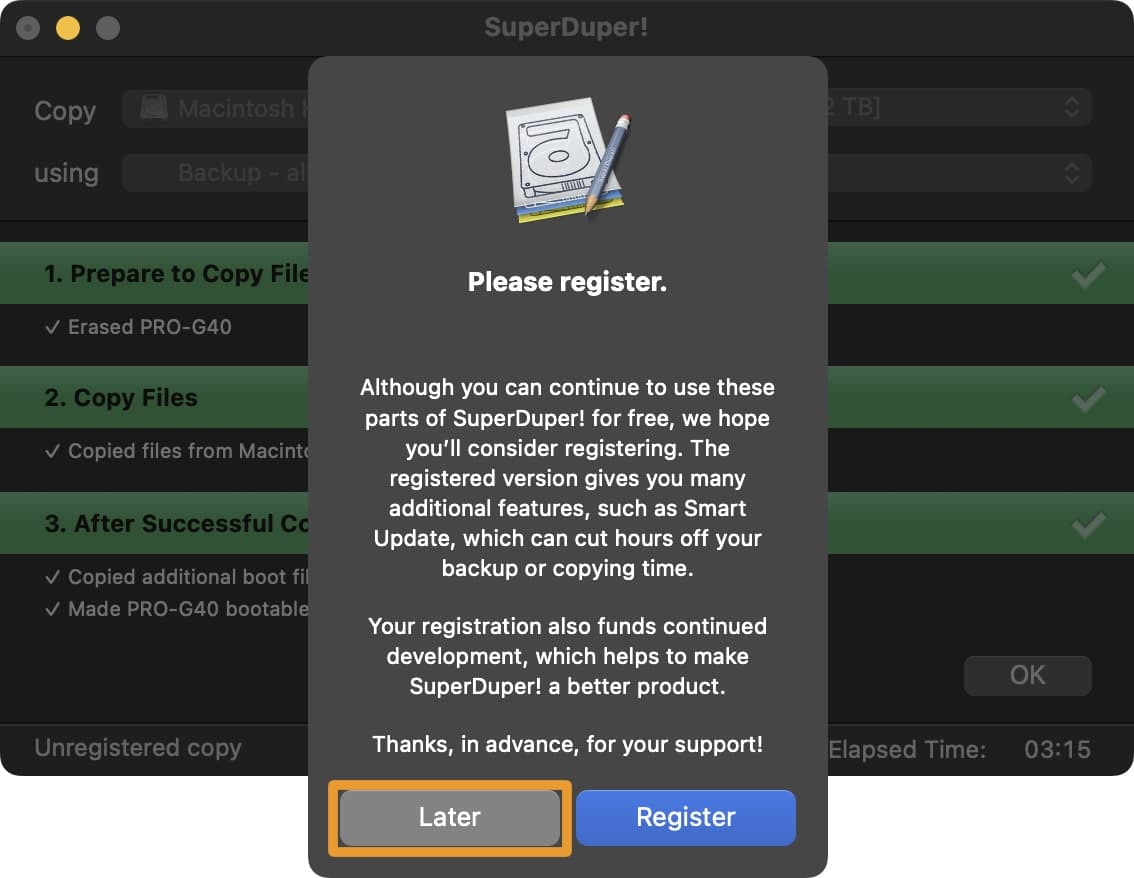
Note: You can purchase the full version for $27.95 with additional perks, but this isn’t required for a simple drive cloning. These features are free to use.
11) SuperDuper! will begin the driver cloning process:

Note: This can take several minutes, depending on the speed of the drive and the size of the drive you’re cloning. Our SanDisk Pro-G40 Thunderbolt 3 external drive took approximately 1-3 minutes to clone our entire Macintosh HD drive.
12) When complete, all the bars turn green and you can click the OK button to finish:

Congratulations, you have successfully created a bootable drive clone of your Macintosh HD volume that you can use if your internal storage drive ever kicks the bucket.
Conclusion
While Time Machine backups are important for having up-to-date snapshots of your system, including the latest file changes, newest documents, and more, a Time Machine backup alone is not enough to protect you when your Mac’s internal storage drive dies.
You should combine the Time Machine backup with a true clone of your Macintosh HD volume that you can make with the SuperDuper! application, which you can actually boot from if your Mac’s internal storage drive fails. You can then update your cloned drive with the latest snapshots of your Time Machine backup, letting you pick up where you left off until repairs are completed.
Source link: https://www.idownloadblog.com/2025/06/11/clone-macos-boot-drive-with-superduper-tutorial/

Leave a Reply