

How to encrypt and password protect folders on Mac
Even if you’re the only user on your Mac, there’s nothing wrong with adding an extra layer of security. You may have files within folders that contain sensitive information. Or maybe you do share your Mac with others in your household and have private items that you don’t want anyone to accidentally come across.
With this in mind, you can encrypt and password protect folders like this on your Mac and here’s how.
Password protect a folder on Mac
In order to encrypt and password protect your folders on Mac, you’ll need to open the Disk Utility and create a disk image of the folder. You can do this using Spotlight Search or opening Applications > Utilities > Disk Utility. Then, follow these steps.
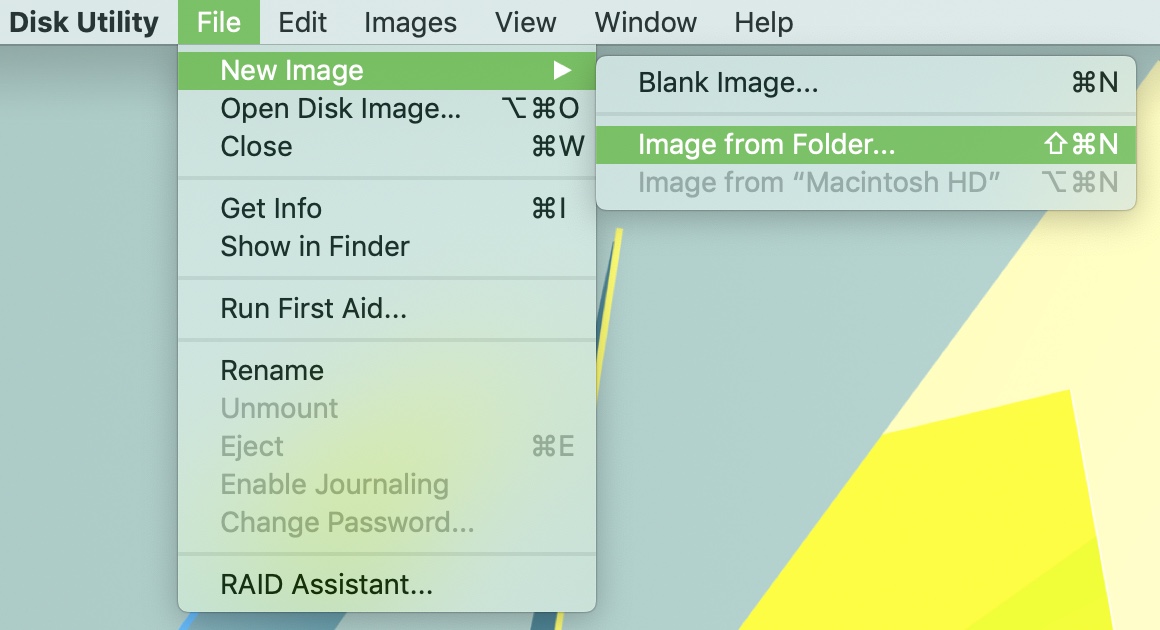
1) Once you open Disk Utility, select File > New Image > Image from Folder from your menu bar.
2) Browse for, select the folder you want to protect, and click Choose.
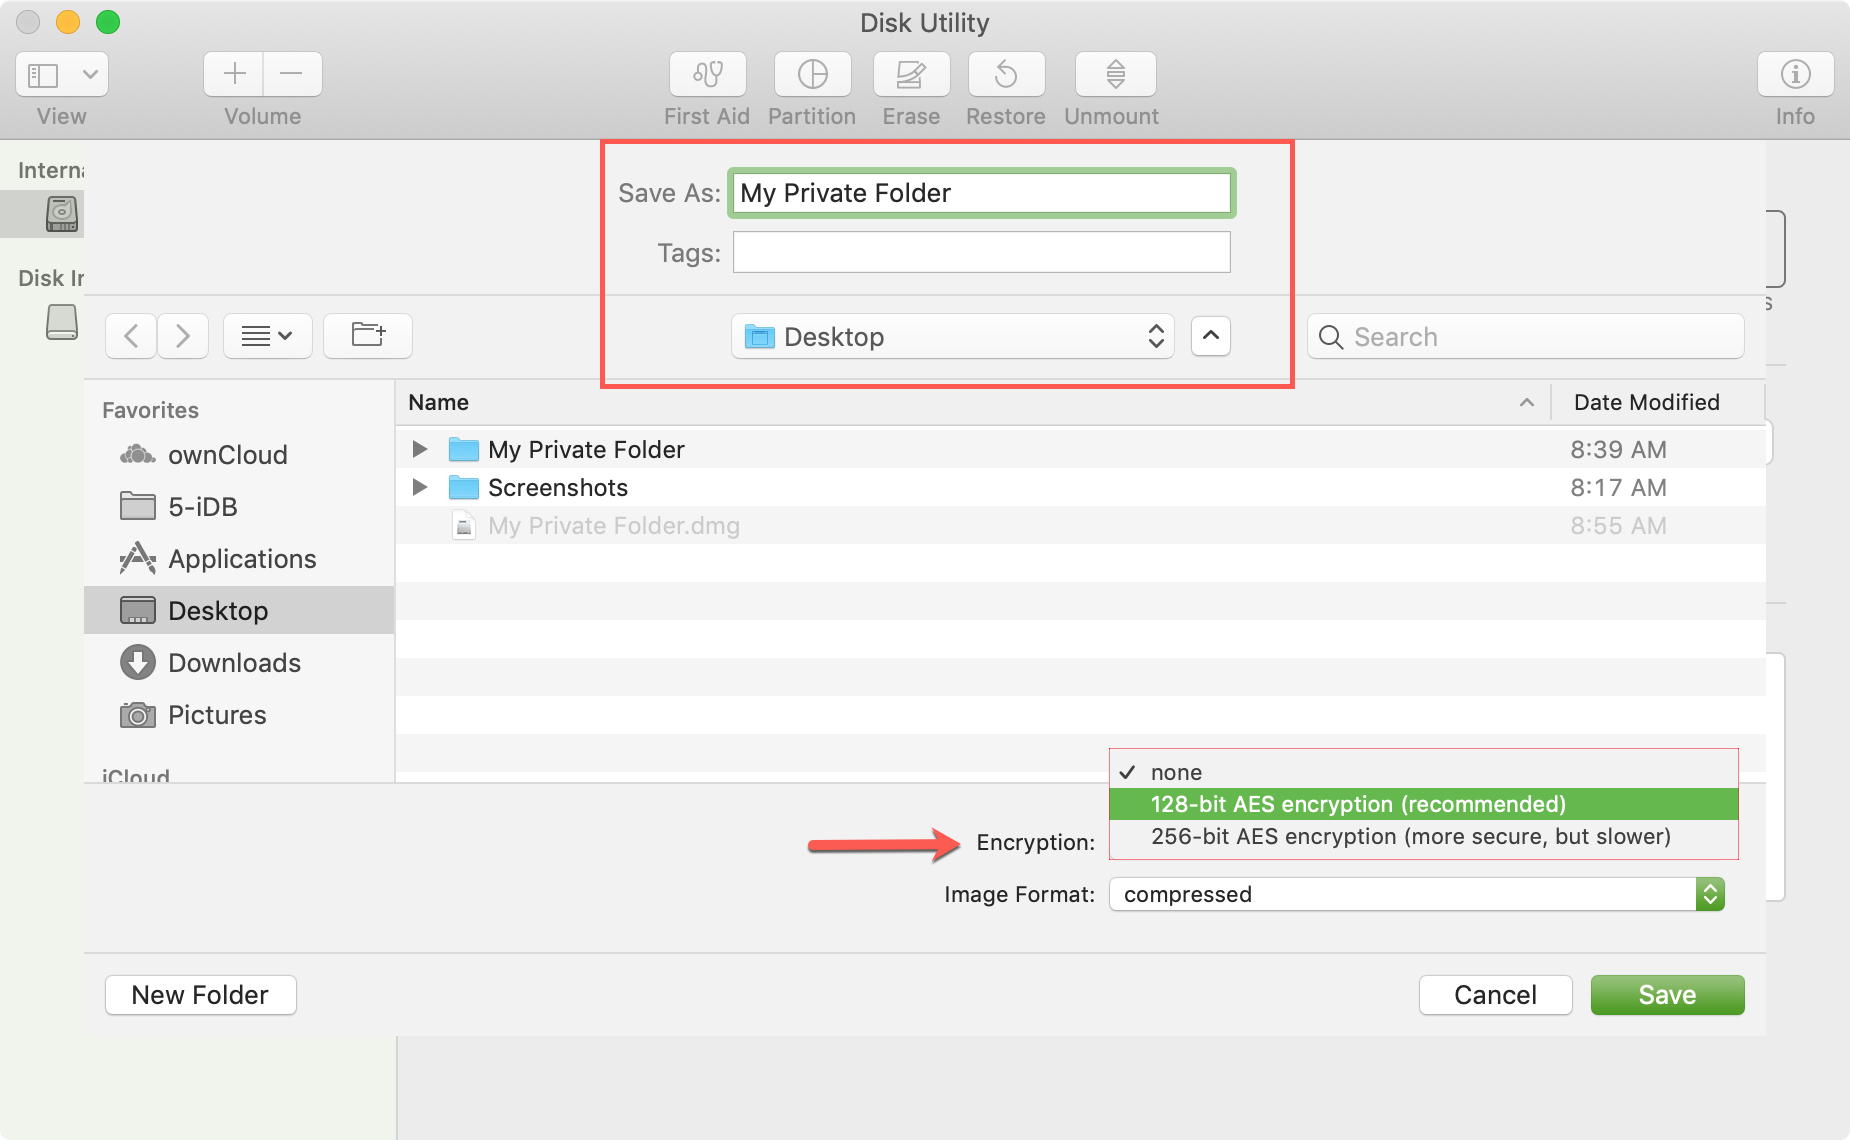
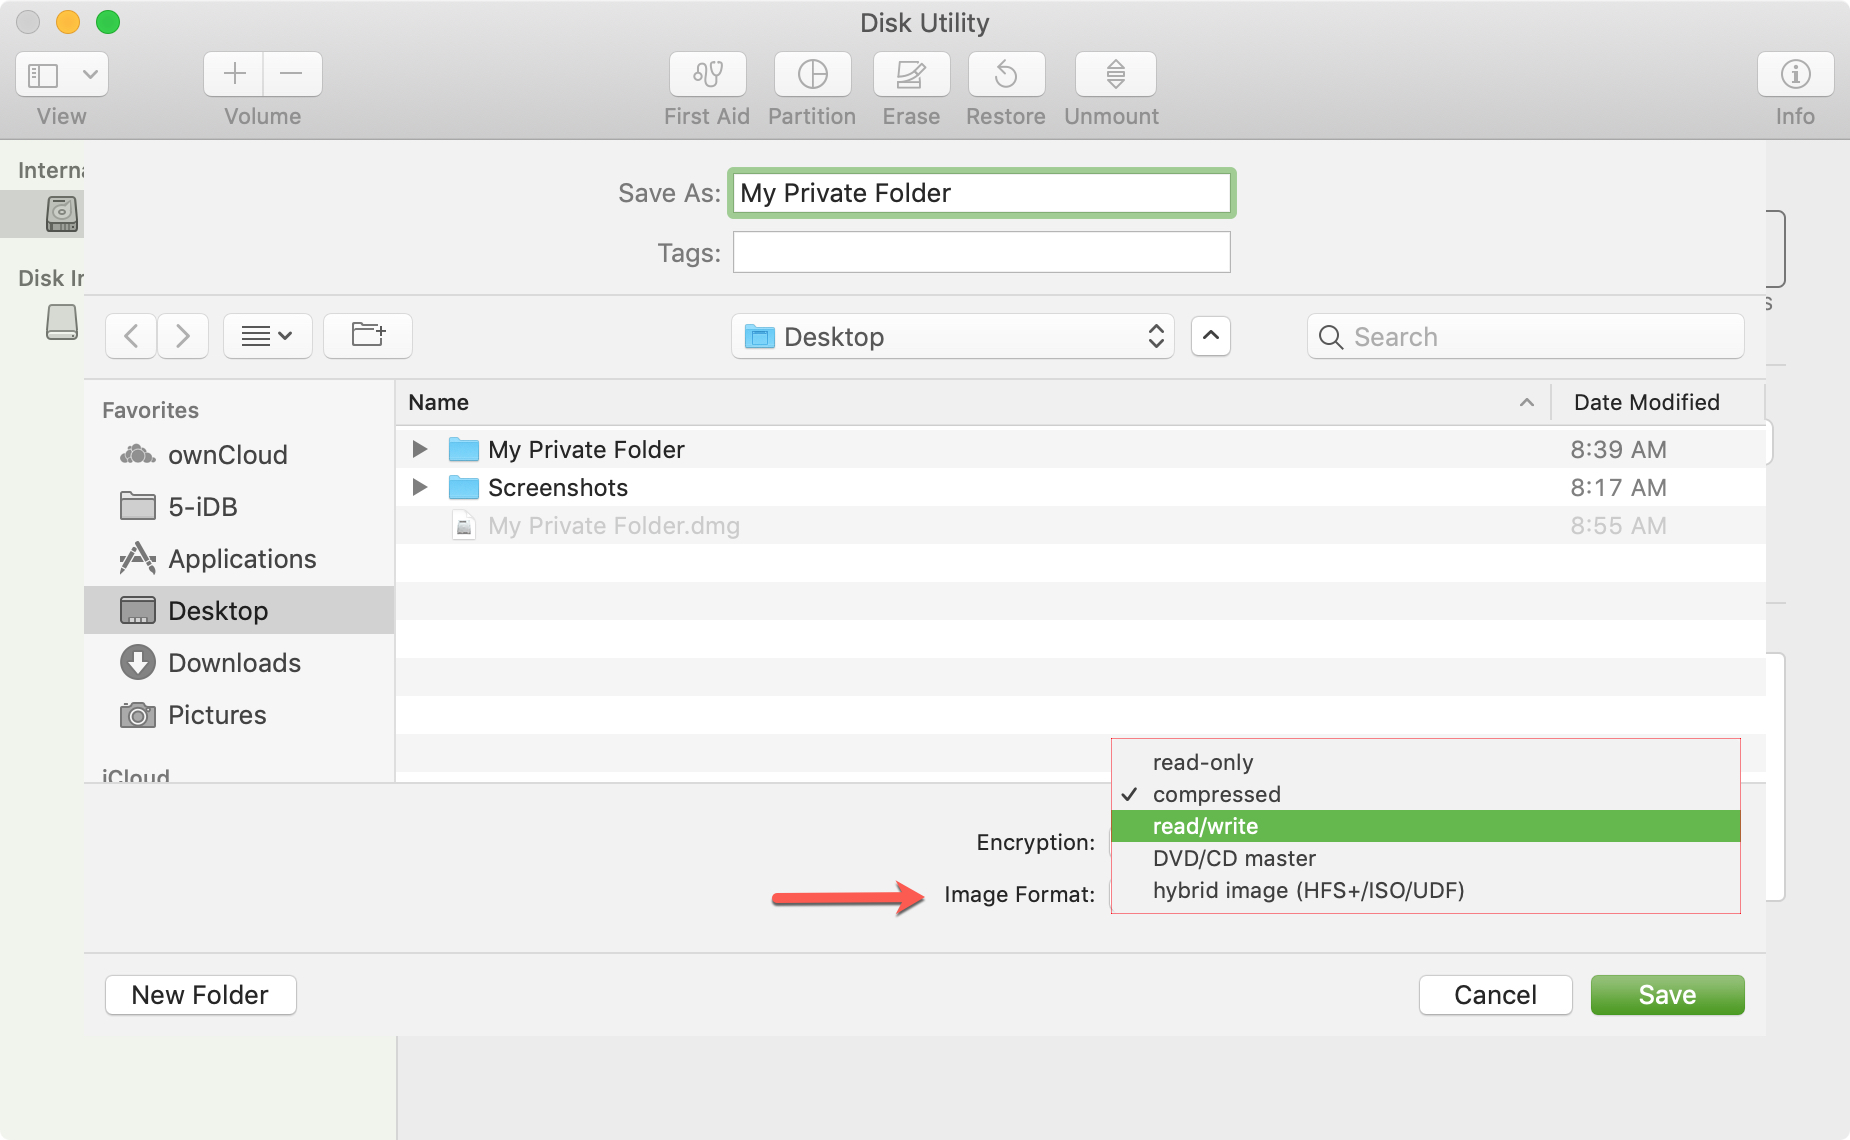
3) In the next window, choose the location for the new folder image and optionally give it a different name or add a tag.
4) Then, select your Encryption from the two options. 128-bit AES encryption is a little faster for the encryption/decryption process, but 256-bit is more secure.
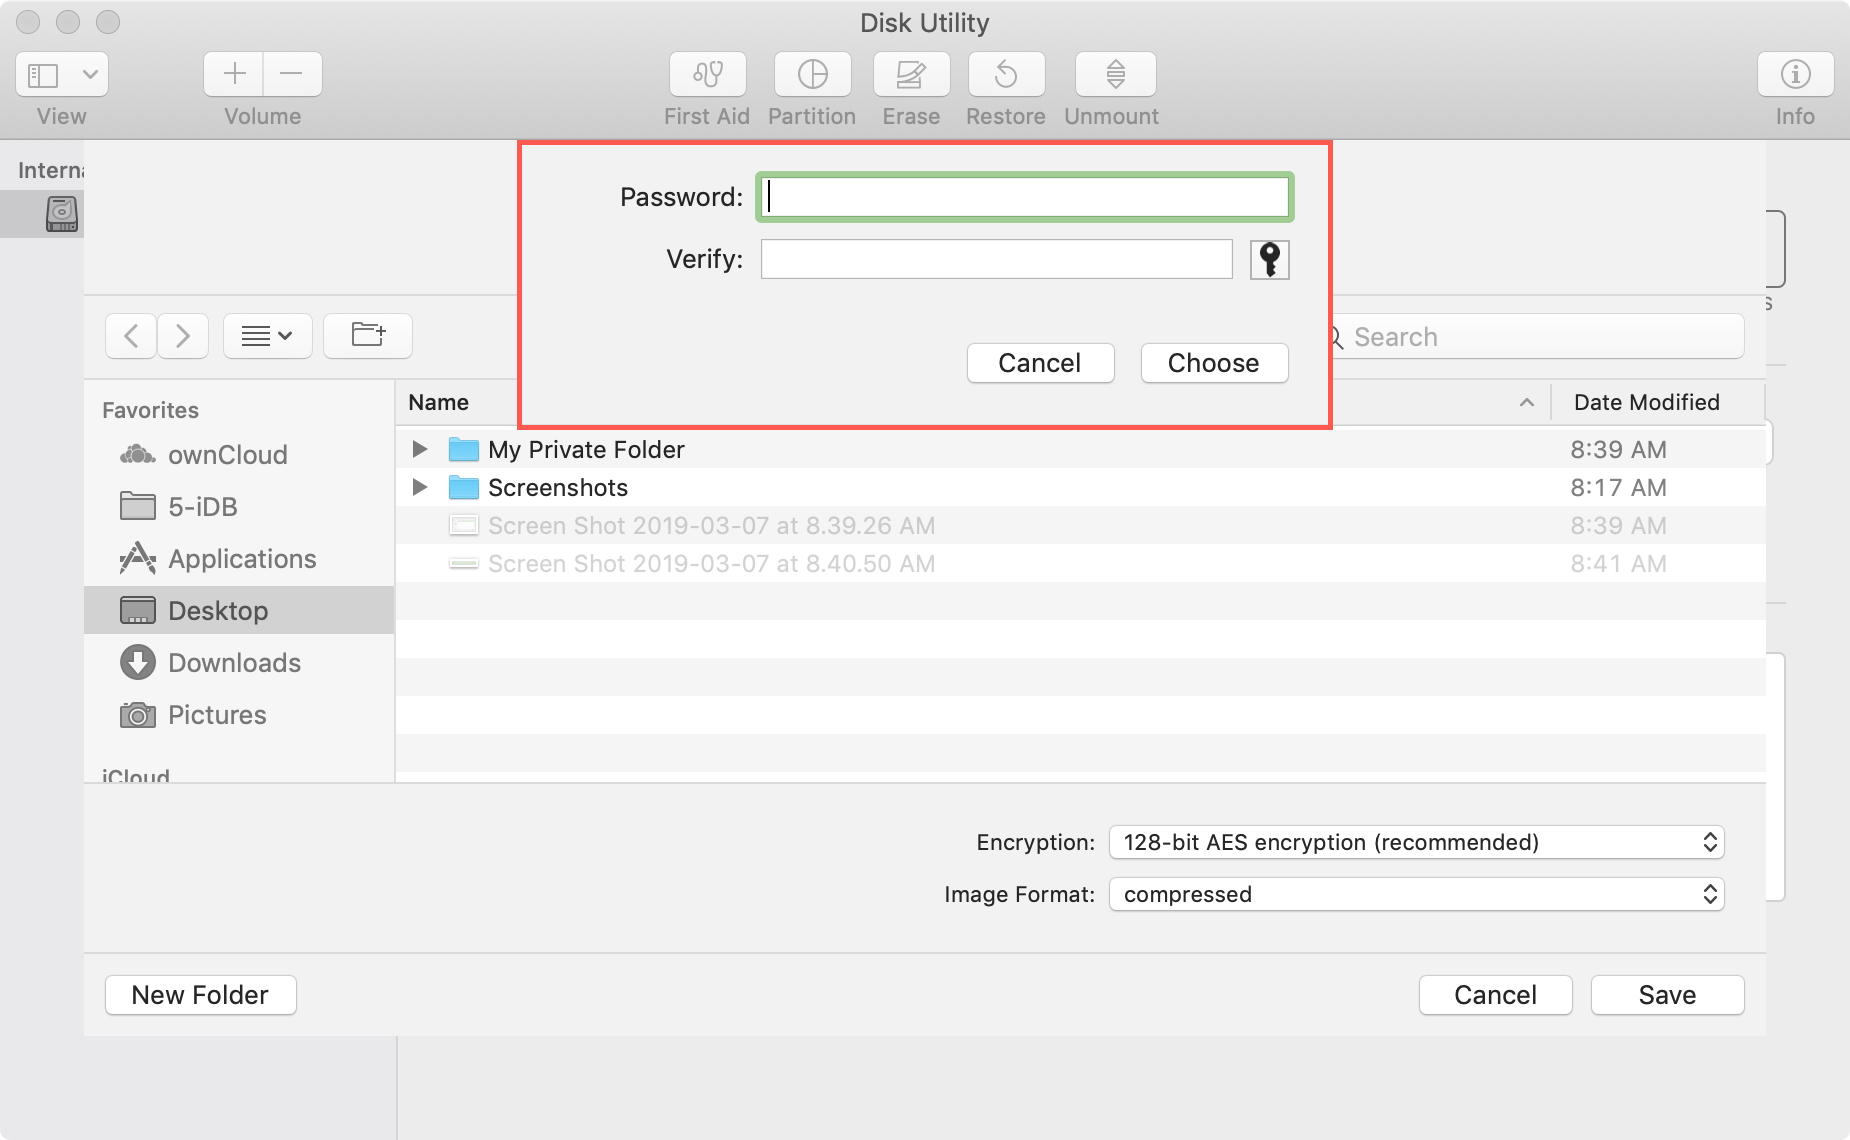
5) You will then be prompted to create and verify the password you want to set for the folder image. Make sure this is a password that you will remember or jot down somewhere. If you forget it, you won’t be able to access the folder image.
6) Next, select the Image Format. If you only want to view the folder, you can pick Read-Only. But if you want to make changes to the folder, such as adding more items to it, then choose Read/Write.
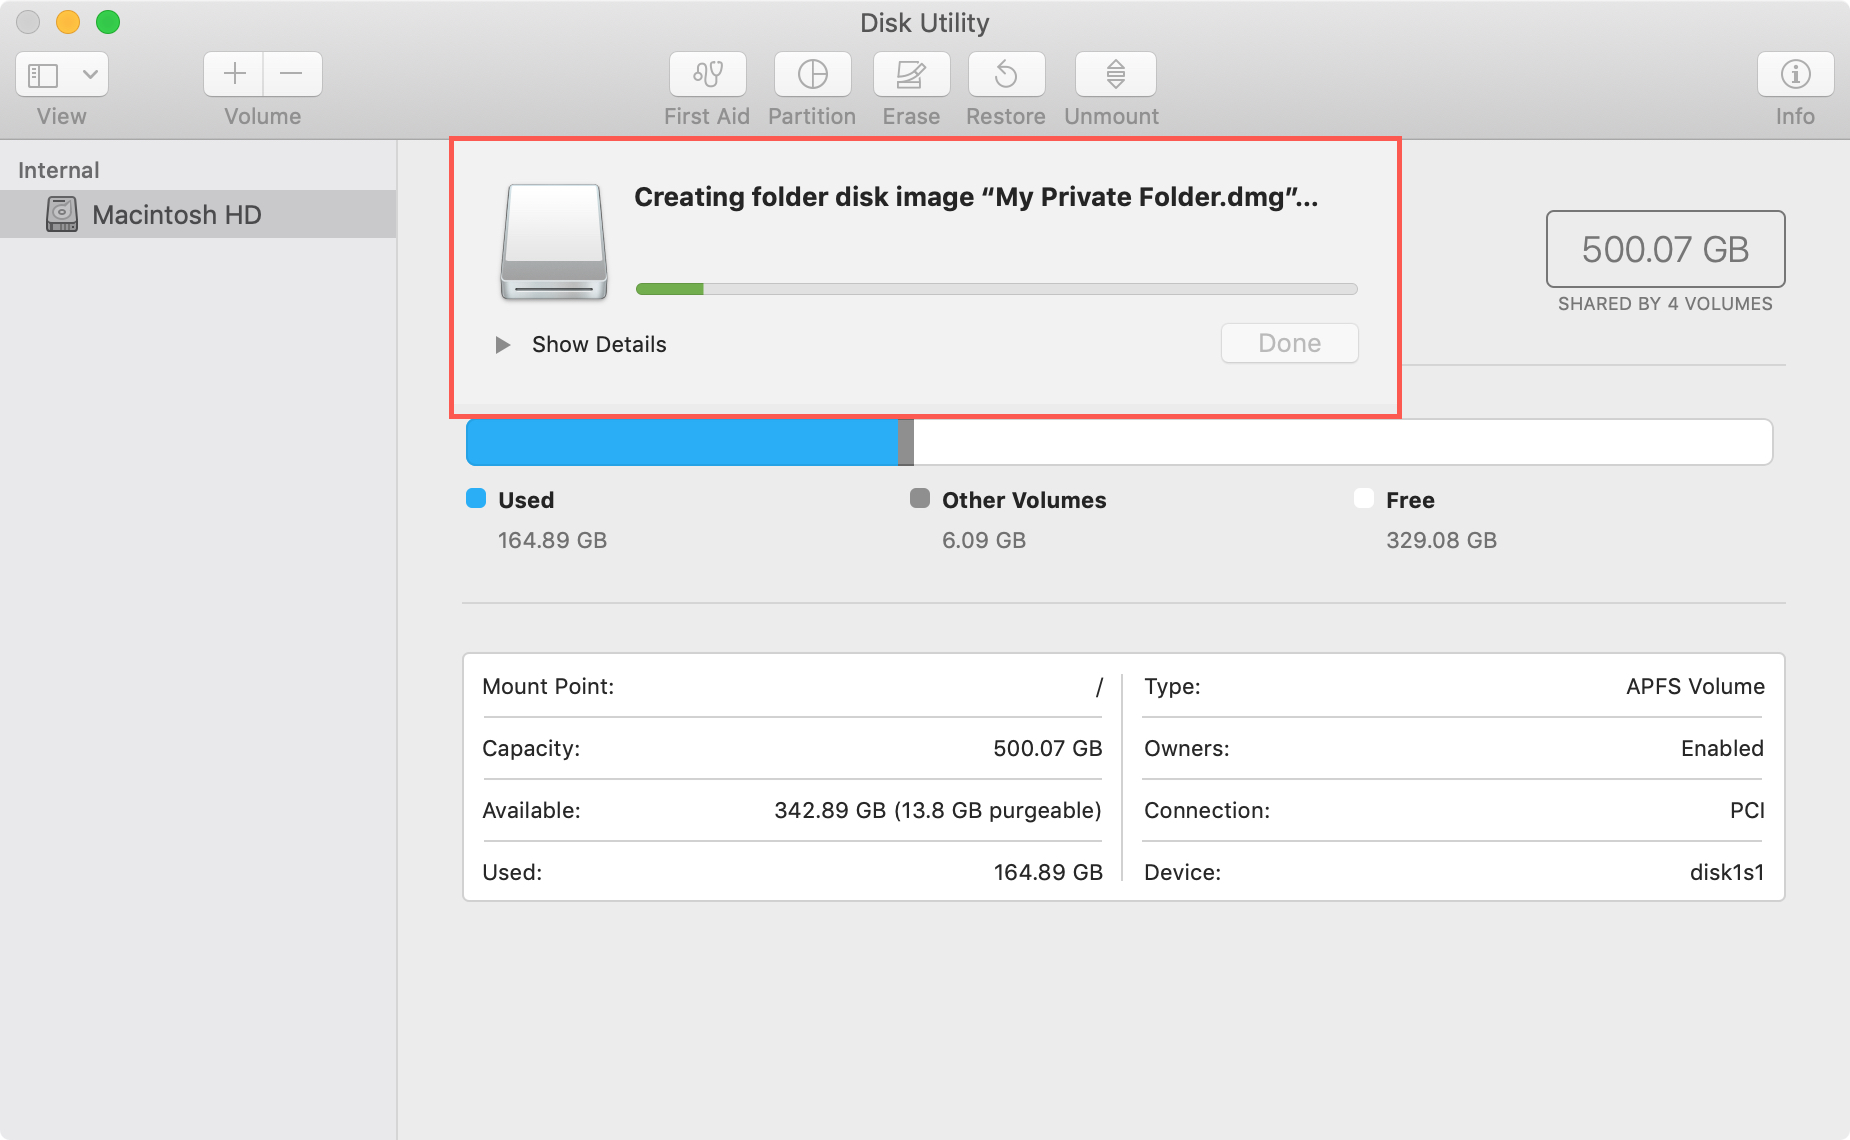
7) Click Save. You will see the progress of the operation in the Disk Utility window. Depending on how many items you have in the folder, it could take a few minutes. Click Done when it finishes.
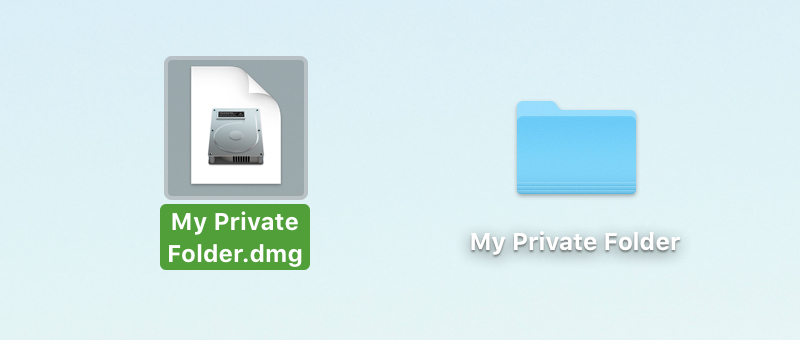
8) Navigate to the location where you saved the folder image and double-click on it. It will have the file format DMG.
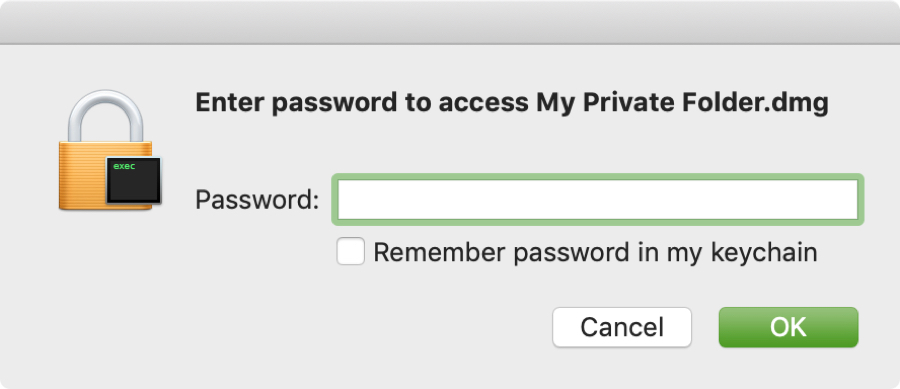
9) Enter the password you created for the folder image when prompted and click OK. You can optionally check the box to remember your password in your keychain. However, checking this box sort of defeats the purpose of requiring a password to open it.
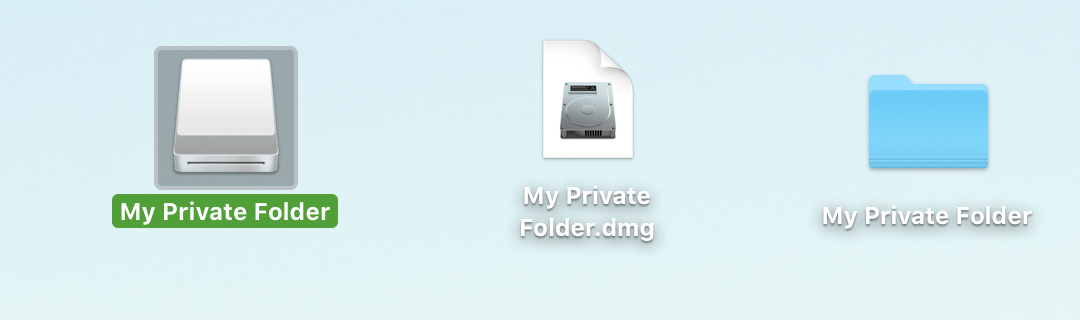
10) You will now see the mounted disk image of your folder. Double-click to open it and from there you add, access, or remove items, just like normal.
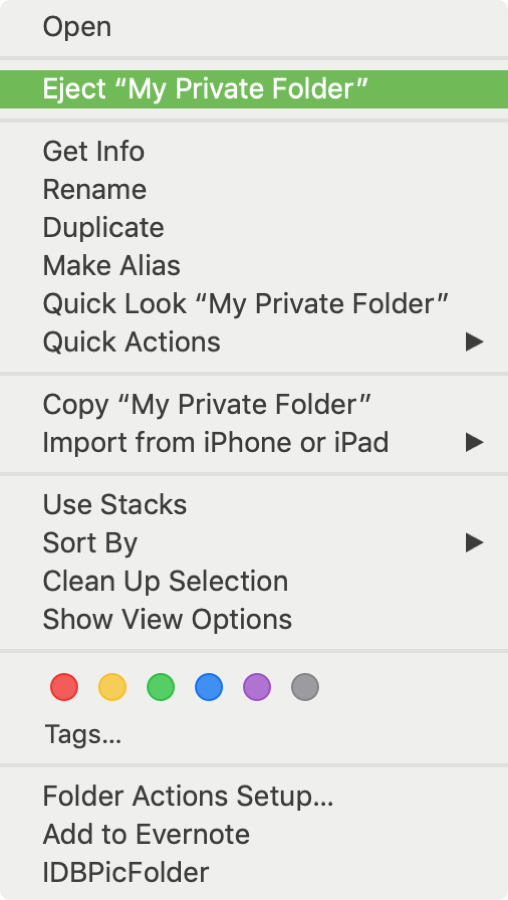
When you finish using the folder, you’ll want to password protect it again by unmounting it. Right-click on it and select Eject “folder name”.
The next time you want to access the folder, just double-click that DMG file, enter your password, and that’s it.
Notes on password protecting a folder on Mac
You’ll notice that your original folder is untouched. The process you go through with the above steps creates a disk image of your folder. So, nothing happens to your original. You can move it or delete it if you like and just use the password protected DMG file moving forward.
As noted earlier, just be sure to remember that password or have it saved somewhere!
Also, if you do not unmount the disk image by ejecting it as described above, and simply close it, you won’t be asked for the password if you reopen it. Unmounting the disk image is what keeps it safe and requires the password each time using the DMG file.
Wrapping it up
Has there been a time that you wanted to password protect a folder on your Mac and weren’t sure how to do it? Hopefully this tutorial will help you to keep your private items away from prying eyes.
Source: Xalirate
Source link: https://www.idownloadblog.com/2019/03/08/encrypt-password-protect-folder-mac/

Leave a Reply