How to reduce the file size of a PDF on Mac

Portable Document Format, or PDF for short, is one of the most ubiquitous file formats that is universally adopted across platforms. A PDF created on a Windows PC will be easily opened and even edited on a Mac, for example. That alone makes it one of the most used and most convenient file formats.
On Mac, you can easily create a PDF without the need of additional software, something I personally use quite often. While the process is quick and simple, it lacks customization options, specifically about the quality, and by extension the file size, of the PDF generated.
In these cases, you might end up a with a very large PDF file weighting several MB. Of course, the better the quality of the document, the heavier the file will end up being.
There are instances where quality matters more than file size, but in most occasions, you’ll probably want to end up with a smaller file size which will make it easier to email, for example. Thankfully, there is a relatively unknown feature on your Mac that allows you to to take an existing PDF file and compress it to reduce its size.
In this tutorial, I will show you how to compress and reduce the file size of a PDF on a Mac by using the Preview app.
on Mac
For this tutorial, I downloaded a sample PDF that weighs in at 105 MB. This is a pretty large file that many email services wouldn’t even allow you to send to someone. We’ll see how much the file size reduction process helps at the end of the process.
1) On your Mac, double-click on the PDF file you want to compress to open it. By default, it should open with Preview. If not, make sure you do open that file with Preview.
2) In the menu bar, click on File, then click on Export…
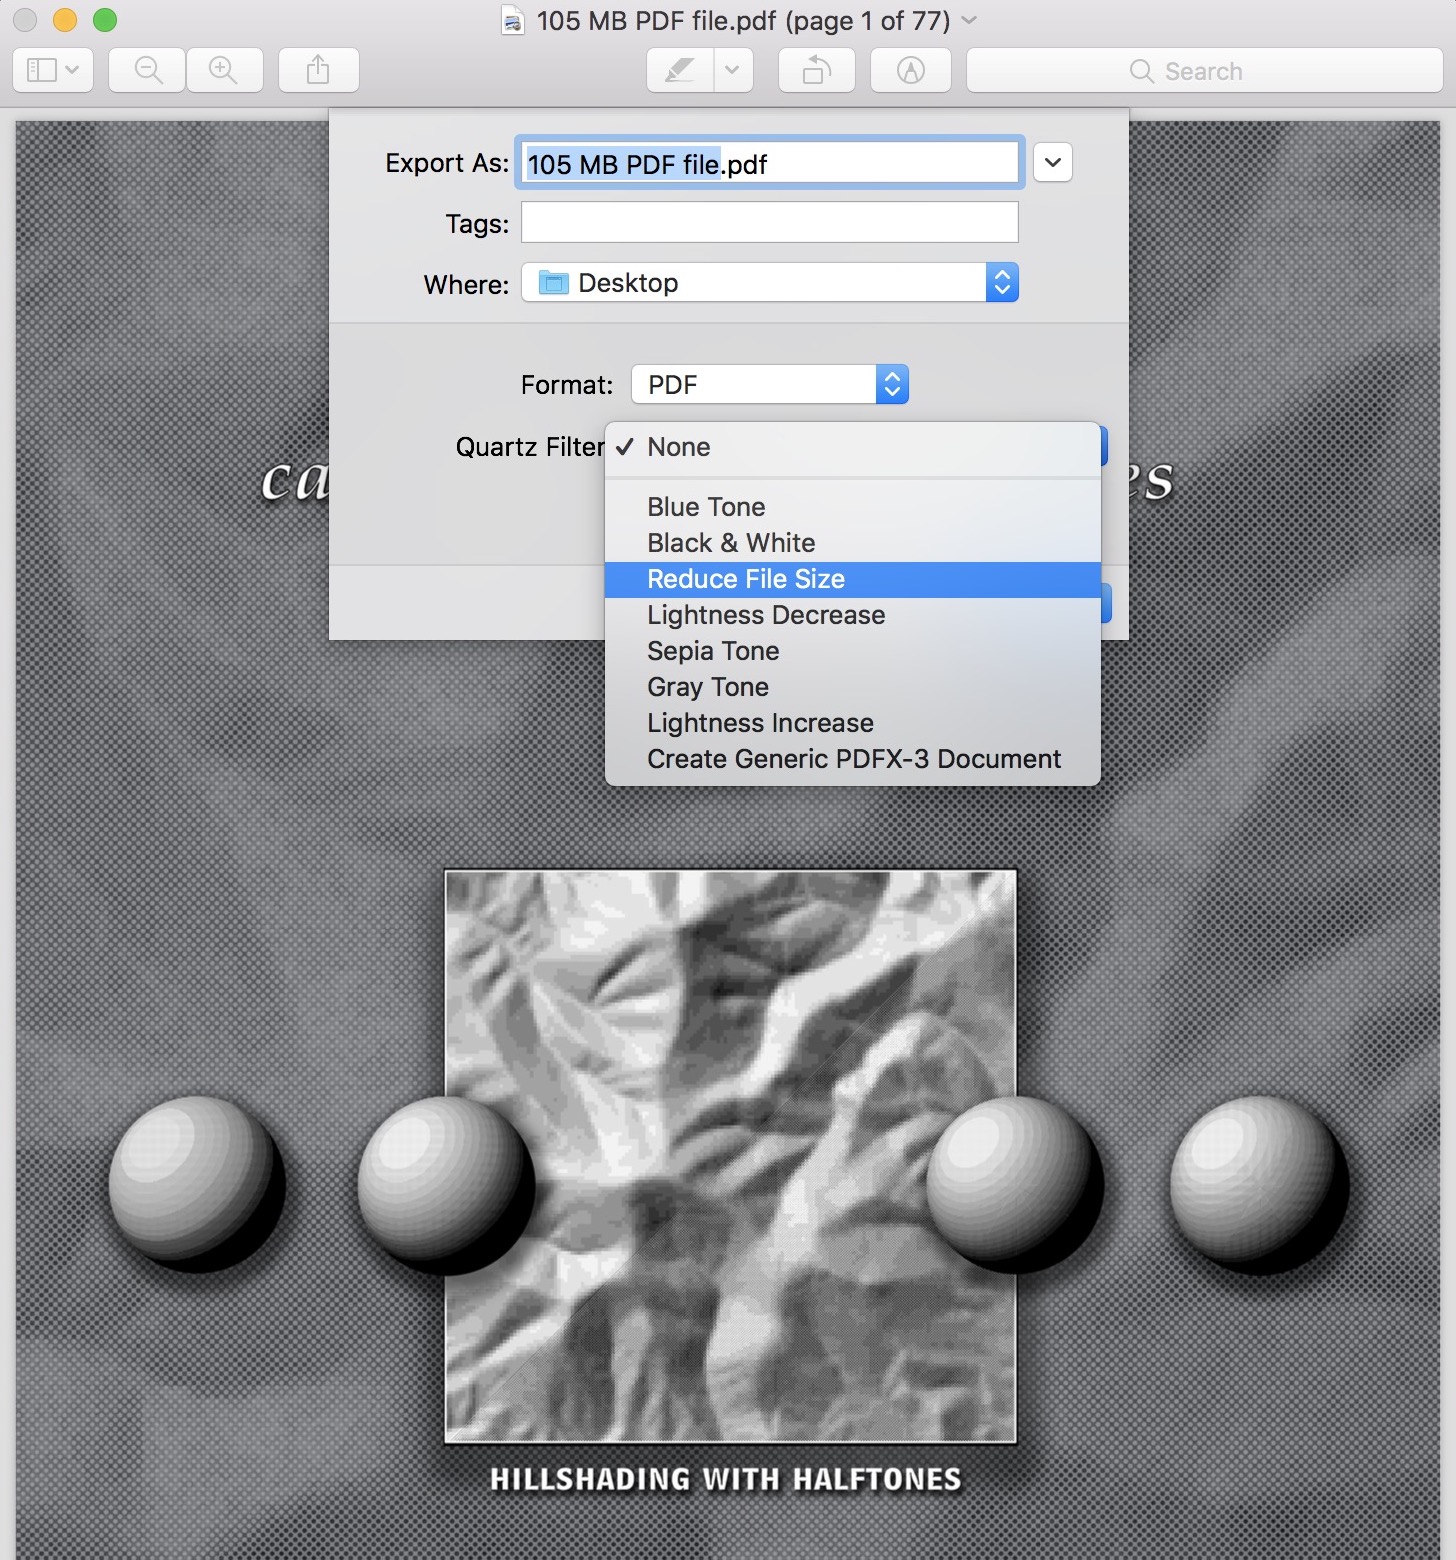
3) Click on the Quartz Filter dropdown menu.

4) Select Reduce File Size, the click Save. The compressed PDF file will be saved to your computer.
Unfortunately, you don’t have any control over the compression level. In most cases, you probably won’t care about that, but if that is something you really want to adjust, then you should look into more capable third-party apps such as PDF Expert.
Results: My 105 MB file was compressed and reduced to only 3.2 MB, which represents a reduction of about 97% in size. Although some images within the document have clearly lost their sharpness, the text contained in the file looks just as sharp in the compressed version as it does in the original one.
Your mileage will greatly vary depending on the original file, what it contains, and what your Mac can effectively compress within that file, but in most cases, you will end up with a file dramatically reduced in size.
We’ve written quite extensively about managing PDF documents on iDB. For those wanting to learn the in and outs of PDF file management on a Mac, make sure to check out our guides on how to create PDF documents, how to split and how to combine PDF files, and how to sign a PDF without the need of additional software.
Source link: http://www.idownloadblog.com/2018/02/16/how-to-reduce-the-file-size-of-a-pdf-on-mac/


Leave a Reply