How to select different still frames of Live Photos

Live Photos is among the features Apple was selling prominently during the iPhone 6s ad campaign. Live Photos is still around, thanks for asking. As you’ll recall, Live Photos lets you record what happens 1.5 seconds before and after you snap a photograph.
These images come alive when you touch them in the Photos app and can be set as your Lock screen wallpaper or shared via services like WhatsApp, Facebook, Instagram and Tumblr. When you take a Live Photo, the Camera app uses AI to select the best still image.
It’s this still portion of a Live Photo that’s displayed in the Photos app, sent when you share it and more. In this tutorial, we’re going to teach you how to select a different moment in your Live Photo as the still frame.
For the purposes of this tutorial, we’re going to use Google’s free app, Motion Stills.
Released in June 2016, it lets you convert Live Photos into animated GIFs and movies with cinematic backgrounds. As of recently, the app supports playing Live Photos frame-by-frame and allows you to select a different still frame before exporting.
However, changing the still frame of a Live Photo will result in a blurrier image with fewer details than the original. That’s because your iPhone saves only one still image in full resolution while compressing the remaining frames as a lower-resolution video.
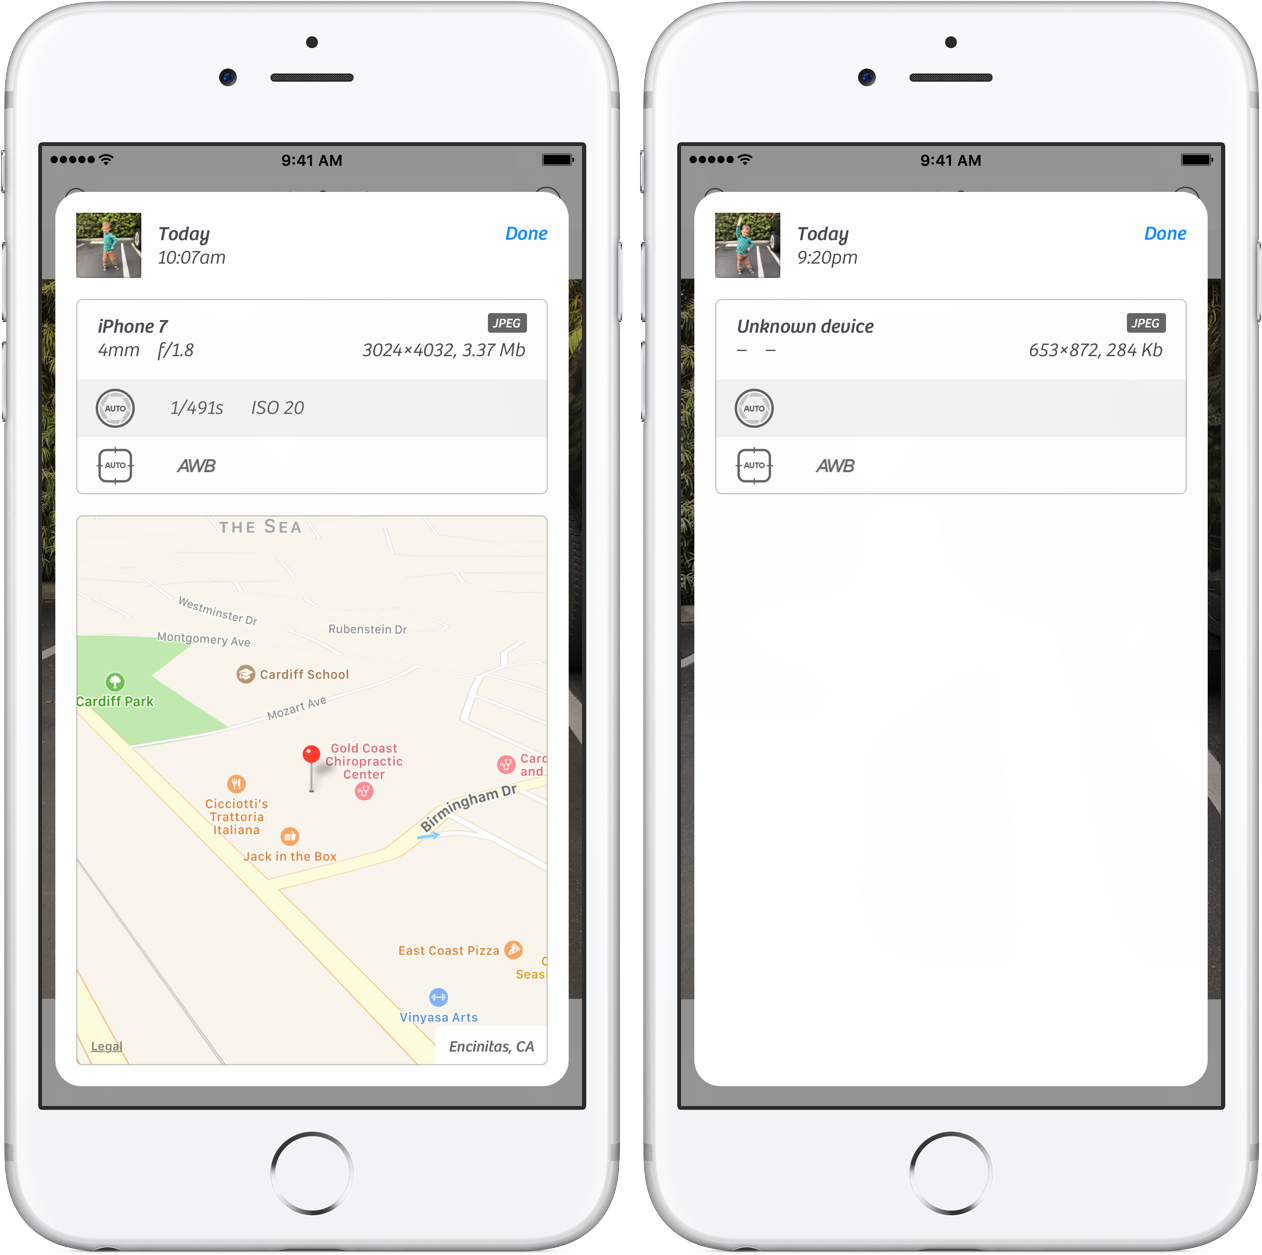
When you replace the original full-resolution still with a new one, Google’s app creates the new still from a low-resolution video frame. Not only does changing the still image overwrites the original still, but removes all EXIF image data from your Live Photo as well, including location, camera resolution, model, vendor and so forth.
Clearly, that’s something to keep in mind before selecting a different still frame of your Live Photo. Follow our step-by-step tutorial to learn how to manually select the still frame for your Live Photo in the Motion Stills app.
How to change the still frame of a Live Photo
1) Download and open Google’s Motion Stills app on your iPhone.
2) You’re presented with a single scrolling stream of the images in your Photos library. Swipe up and down to find a desired Live Photo, then tap the image to select it.
3) You’ll be taken to the next screen where the selected Live Photo is already lopping. Now tap the Share icon in the bottom-right corner of the photo and select the Export Live Photo option from the popup menu.
4) Use the horizontal slider at the bottom to advance through each captured frame, then tap the green round checkmark button to save the Live Photo with the currently selected frame as its new still image.
The image gets re-exported to your Photos library as a new copy with that frame as its primary still. Don’t worry, the image is saved in Apple’s looping Live Photos format and not the GIF format of Google’s Motion Stills app.
No longer do you have to press a Live Photo with 3D Touch to see the moment you wanted just because the Camera app has selected a bad still. You can now delete the original Live Photo from Photos (and your Recently Deleted album) to save space.
To re-iterrate:
- Re-exported Live Photos lack EXIF data of their originals
- Changing the still frame lowers its resolution vs the original still
Keep this in mind when deciding whether to delete the original Live Photo.
If you need more proof, this before vs. after screenshot of Camera+ (my favorite photo-editing app on iOS) demonstrates that all EXIF data present in the original image, at left, has been cleared from the re-exported Live Photo, at right.
TUTORIAL: How to recover deleted photos on iPhone and iPad
As you can clearly see for yourself, the still frame of the original Live Photo is in the full 12-megapixel resolution (3,024 x 4,032) versus a paltry 563-by-872 pixel resolution still image present in the re-exported Live Photo.
TUTORIAL: How to turn Live Photos into stills
In other words, if you share a Live Photo in which you have changed the original still, the recipient will see your the image in Photos and other apps in a much lower resolution.
How do you like this nifty tip and do you use Live Photos at all?
Source link: http://www.idownloadblog.com/2017/03/17/how-to-select-different-still-frames-of-live-photos/


Leave a Reply