How to replace an aging laptop’s thermal paste to stop overheating and regain thermal performance
If you have an older laptop-style computer, regardless of whether it’s a Mac or a Windows PC, then you might notice that it starts running warmer after several years’ worth of use. If this describes a situation you’re experiencing, then I’m here to reassure you that it isn’t just you; in fact, this is considered normal and there are routine maintenance procedures you can perform to restore its thermal performance to its glory days.
Why is the laptop running warmer?
You might hear a mixed bag of answers from various people about why a laptop starts to run warmer over time. The less initiated might be quick to blame the software, claiming that the older hardware has trouble keeping up with the software as it gets more advanced. While this can be true, the combination of older hardware and newer software often results in slower operation, and typically not more heat production.
Instead, increased thermals are often the result of thermal system failure. This doesn’t mean that the thermal system is done for – it simply means that it’s not working at peak intended operating performance. It’s more likely that your cooling fans and heat pipes have developed dust buildup and that your CPU and/or GPU’s thermal paste has started hardening and drying out.
These are problems because if you have dust buildup in the cooling fans, heat pipes, and heat fins, you won’t move as much air as you could if they were clean. This results in more heat buildup as it doesn’t dissipate as quickly as it should. Moreover, hardened and dried out thermal paste – the goopy stuff between your CPU and/or GPU and your thermal pipe’s copper heat block – loses its thermal conductivity over time.
Fortunately, you can likely fix this temperature problem and have a cooler-running laptop with just some routine maintenance that should take you less than an hour to complete.
What you will need to fix it
You will need a few basic tools and supplies to clean out your laptop’s cooling system and replace the thermal paste. If you don’t already have anything, you can likely get what you need for under $40 (assuming you already have a toolkit at home). Chances are you will already have most of it in your house already, saving you from having to buy it all ASAP.
You will need:
- An anti-static mat or wrist band to prevent static discharge from damaging sensitive electronics
- A screwdriver set to disassemble laptop components (often a small Pentalobe or Torx screwdriver and a small Phillips head)
- A nylon prying tool to remove fragile plug connectors
- A can of compressed air or a small paint brush to remove any dust out of fans, heat pipes, and heat fins
- A tube of thermal paste and an optional spreader to replace what you will remove
- 70% or stronger Isopropyl alcohol wipes or fluid and Q-tips to remove old, crusty thermal paste
- About an hour of your time
Note: Purchases made on this page help support iDownloadBlog. We may earn a small commission when you complete a sale using affiliate links shared on our website.
Need help sourcing some of these products? No worries, we got you. Here are some of the items we’d recommend to undertake this project:
- Anti-static wrist band – around $5 from Amazon
- Toolkit – around $30 from Amazon
- Compressed Air – around $16 from Amazon
- Thermal Paste – around $10 from Amazon
- Isopropyl Alcohol Wipes – around $4 from Amazon
Considerations before undertaking this project
Disassembling your laptop in any capacity may void your warranty, depending on the brand and their terms of service to you as the consumer. Some brands are more lenient than others, but Apple seems to be particularly snippy about consumers going in and tinkering with their precious hardware.
If you have an active warranty on your machine, then it may be better for you to go to the computer manufacturer and submit a support request, as they may be able to do this procedure for you either at no cost or for a small fee – all without voiding your warranty.
On the other hand, if you don’t have a warranty (as I don’t on my 2017 13-inch Razer Blade Stealth laptop), then you don’t really have anything to lose and you have everything to gain from performing a little routine maintenance on it.
This isn’t a particularly difficult project, but I highly recommend researching thermal pastes before just taking any off-the-shelf product. Be aware that some compounds are both thermally and electrically conductive, and you don’t want the latter if you don’t know what you’re doing. You also want to avoid too thin of compounds that could pump out after multiple heat cycles – instead, opt for something thicker that will remain in place.
A good thermal paste that performs nicely, isn’t electrically conductive, and has good thermal conductivity performance is the Thermalright TFX thermal paste. It’s relatively thick and goopy, which prevents it from pumping out over time as quickly as a thinner and runnier thermal paste would. I would highly recommend this paste for beginners who are undertaking this project for the first time.
Pro tip: Absolutely avoid liquid metal in lieu of traditional thermal paste unless you’re experienced with it and know what you’re doing, as it’s electrically conductive and can cause an electrical short if applied incorrectly.
Undertaking the project
When you’re ready to start with this project, simply follow the steps that we’ve outlined below:
1) Before starting, either place your laptop on an anti-static mat or attach your anti-static wrist band to your wrist and to a metal chassis component of the laptop.
Note: You will not see this in our photographs, as we were busy moving between the disassembly process and operating the camera.
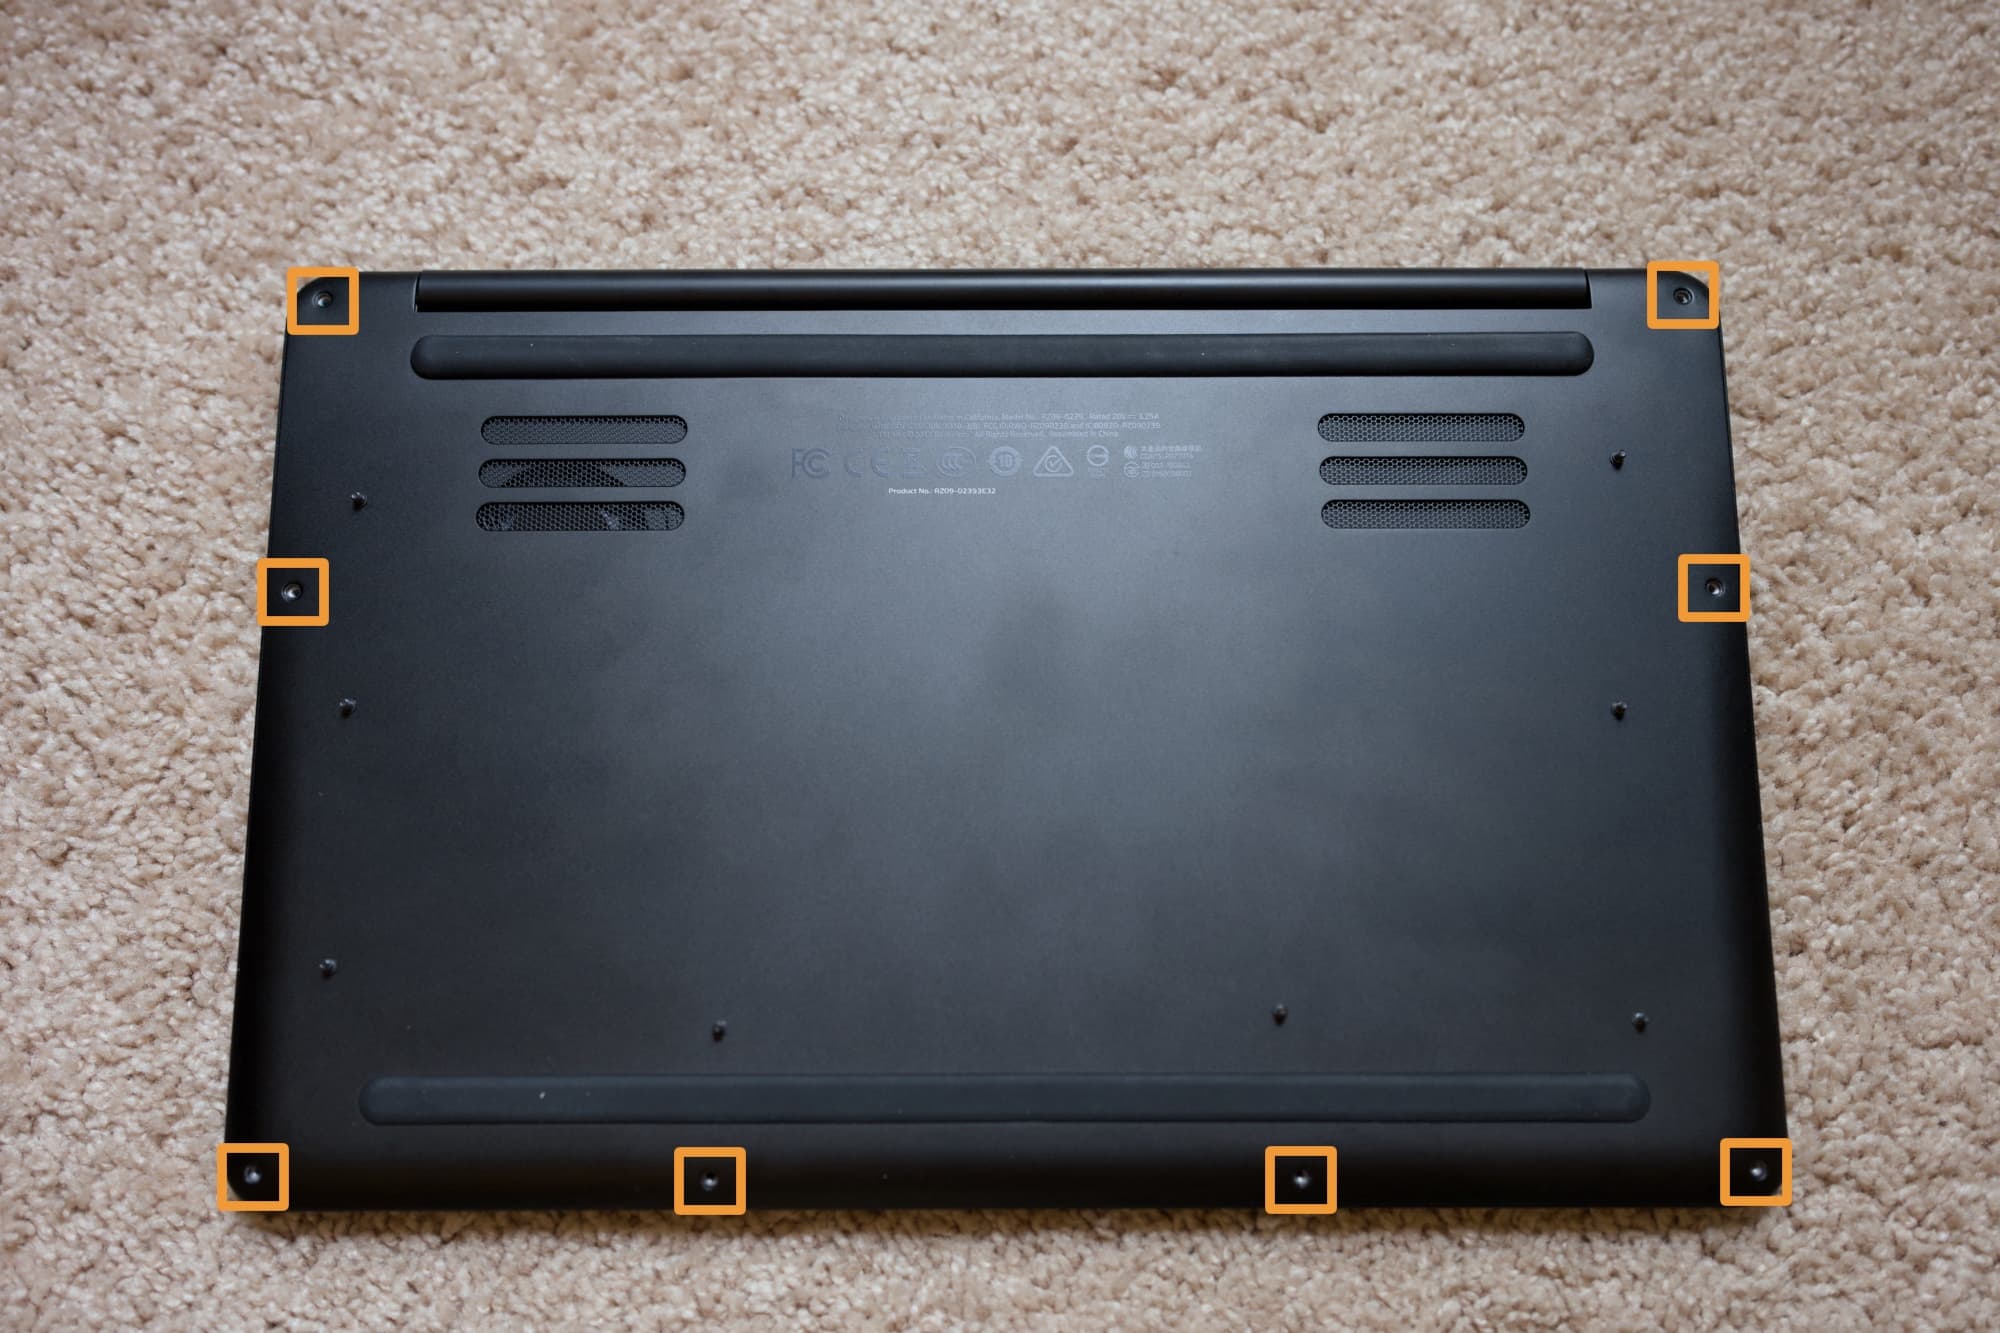
2) Begin by removing all the screws from the bottom of your laptop and removing the back plate.
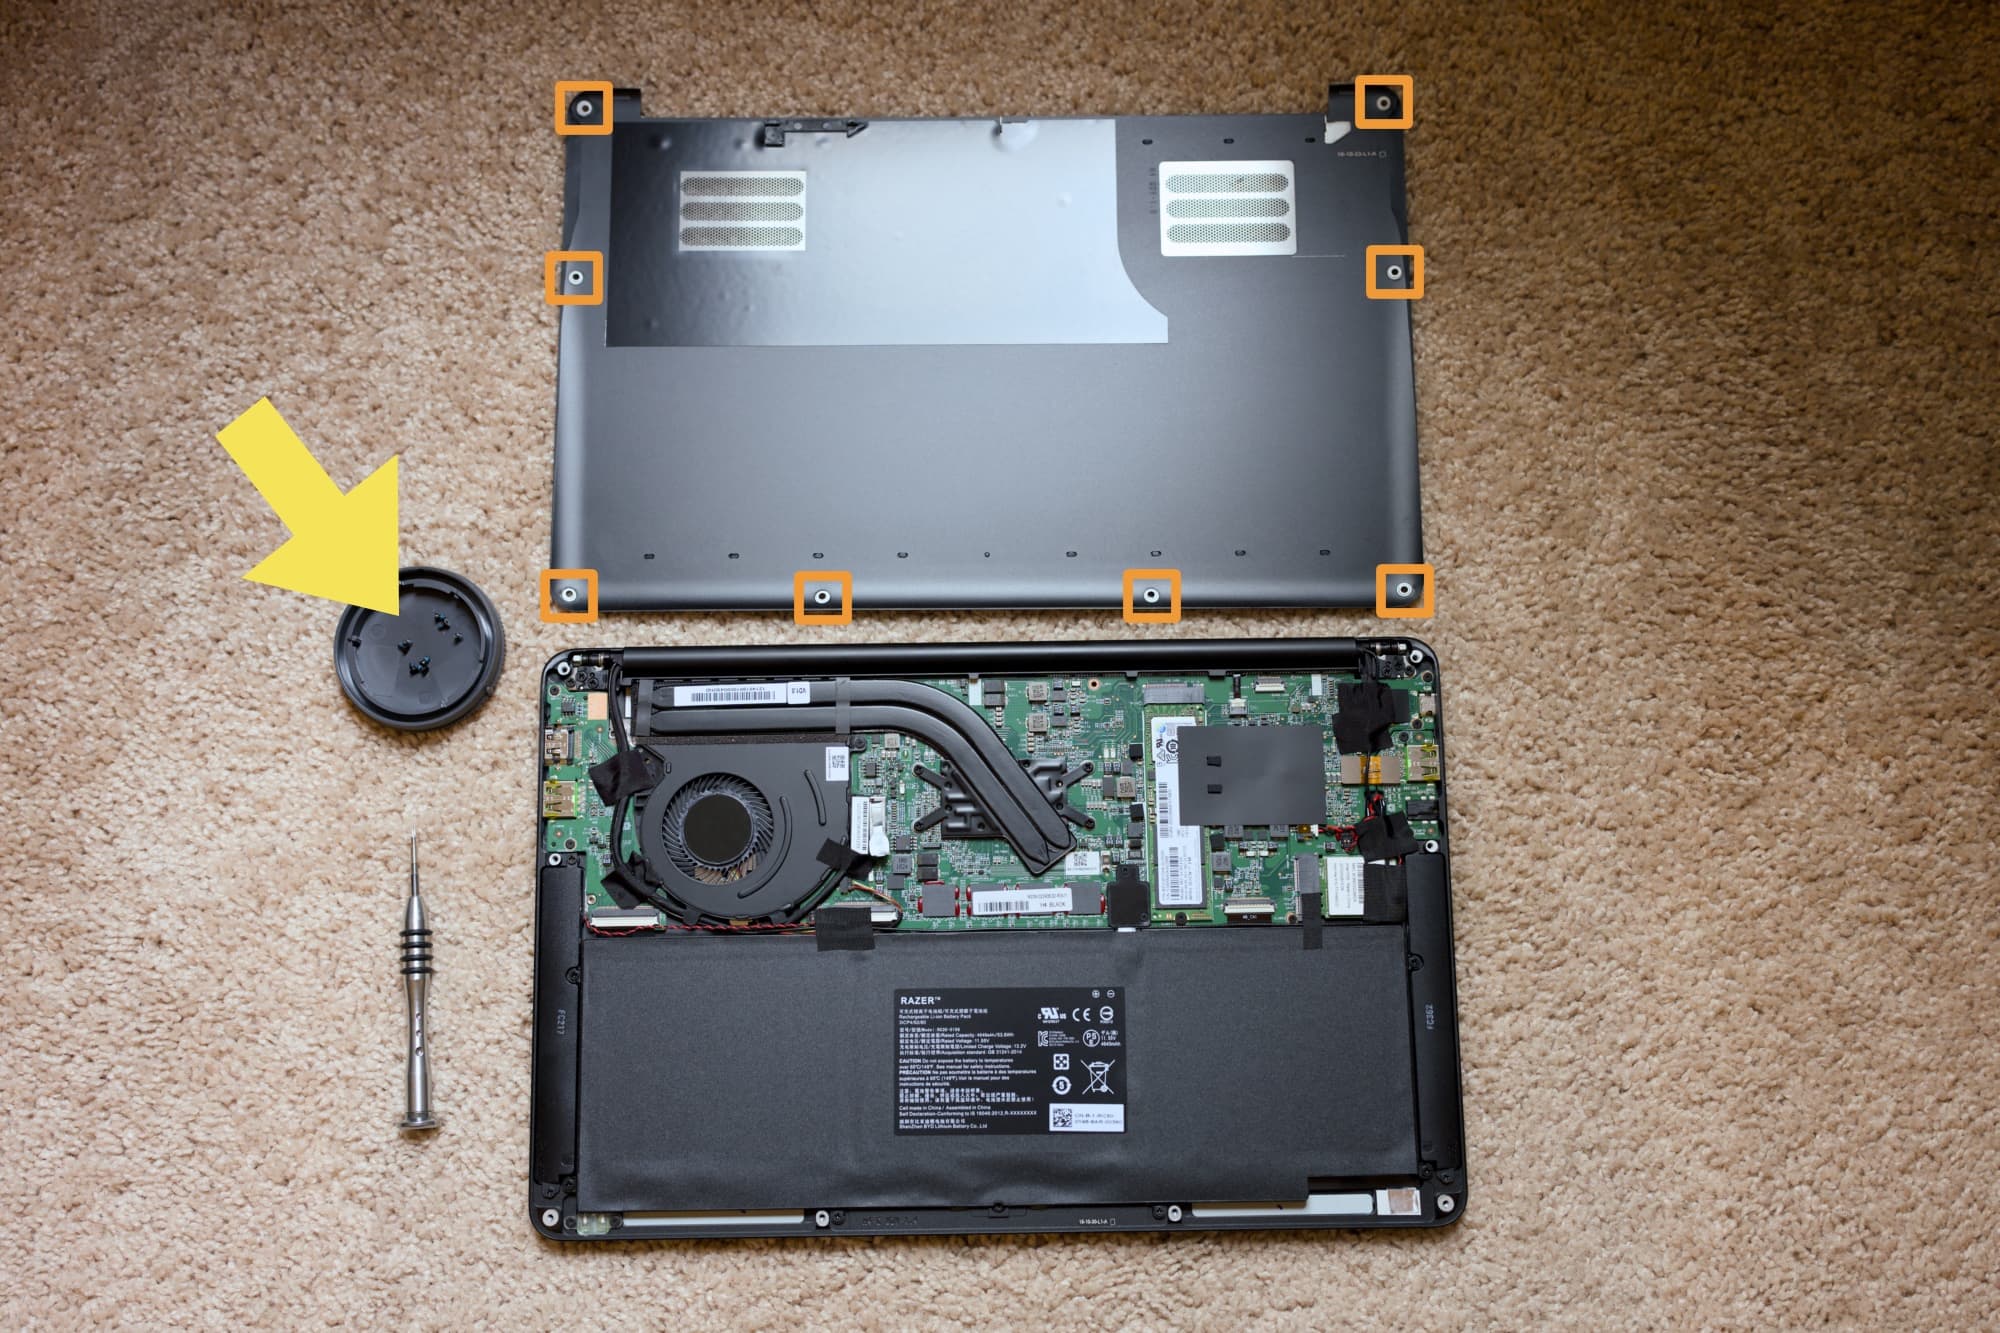
Note: We recommend using a small catch-all for your screws, as they’re small and easy to lose. For this tutorial, I simply used a Sony camera lens cover that I had laying around and it worked swimmingly.
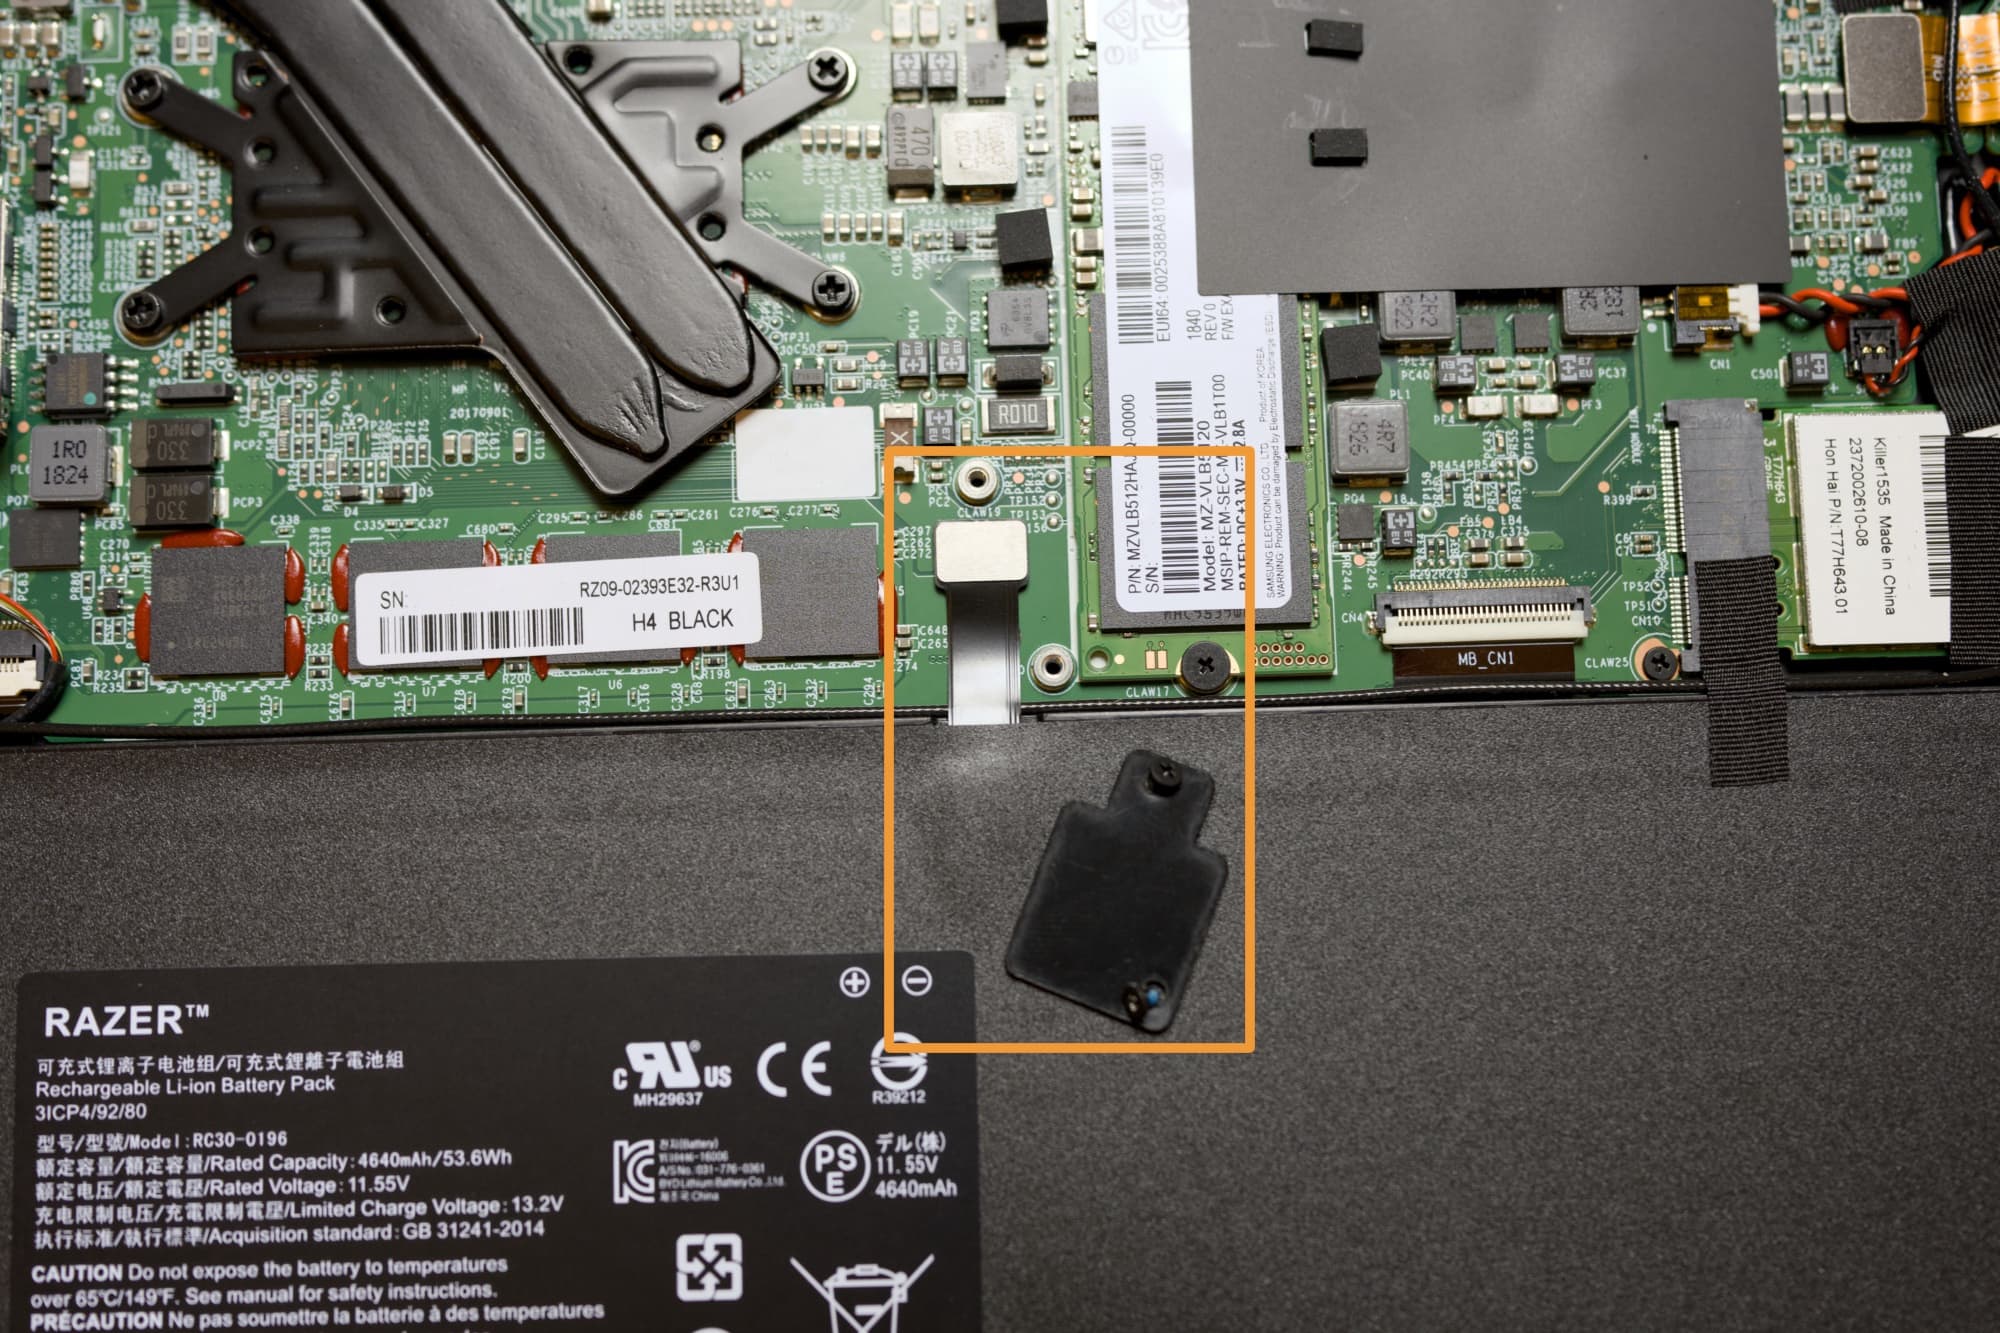
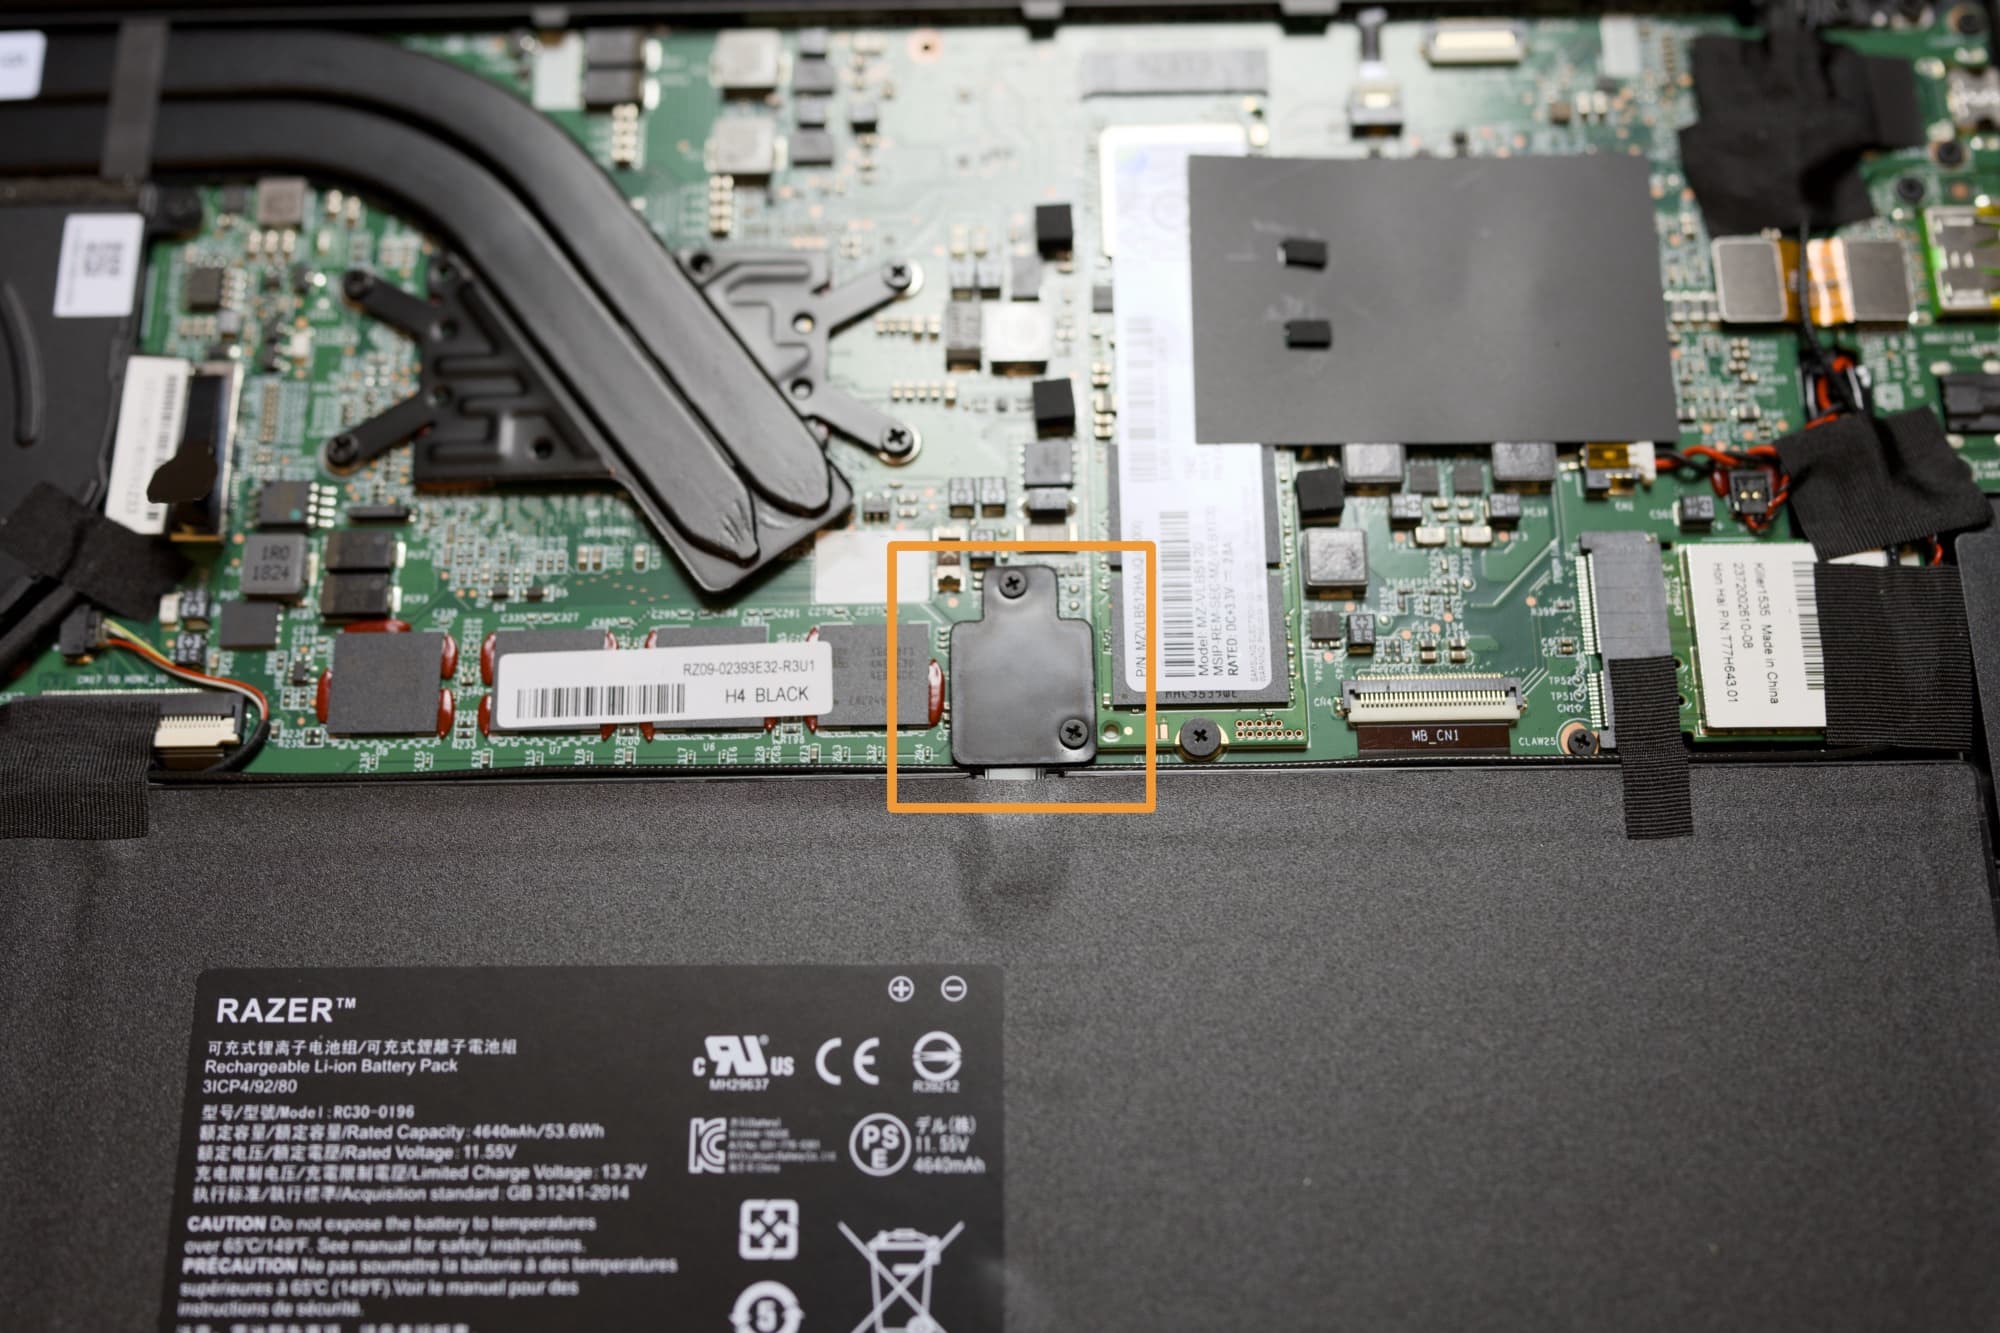
3) Disconnect the laptop battery from the motherboard to prevent electrical shorts. You may need to remove a small shield, which could have small screws holding it on, depending on the model of your laptop:
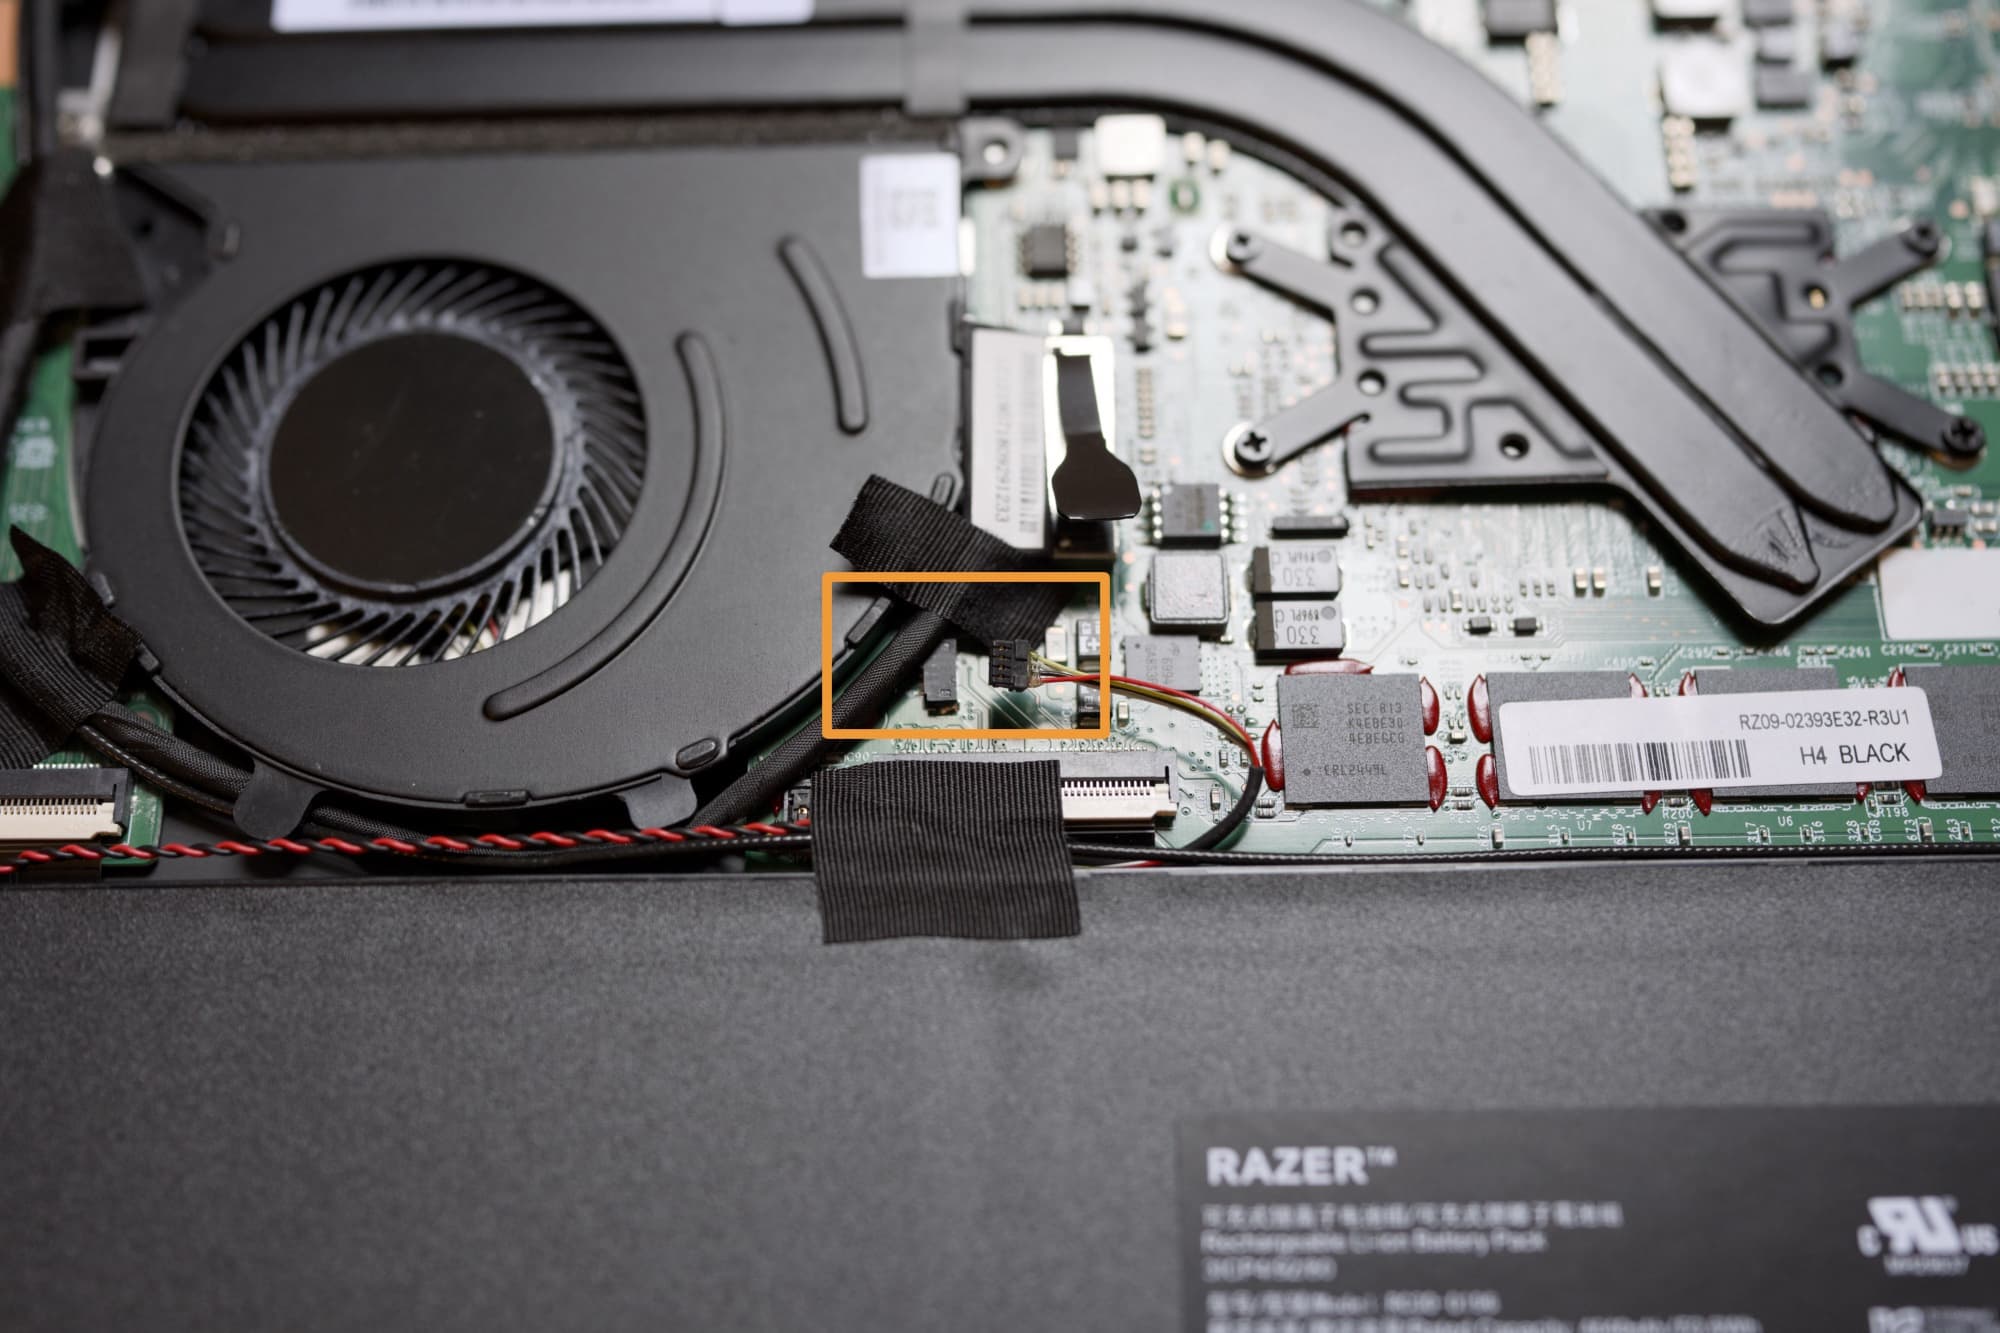
4) Disconnect any cooling fan power cables in your laptop and then remove any screws holding them in:
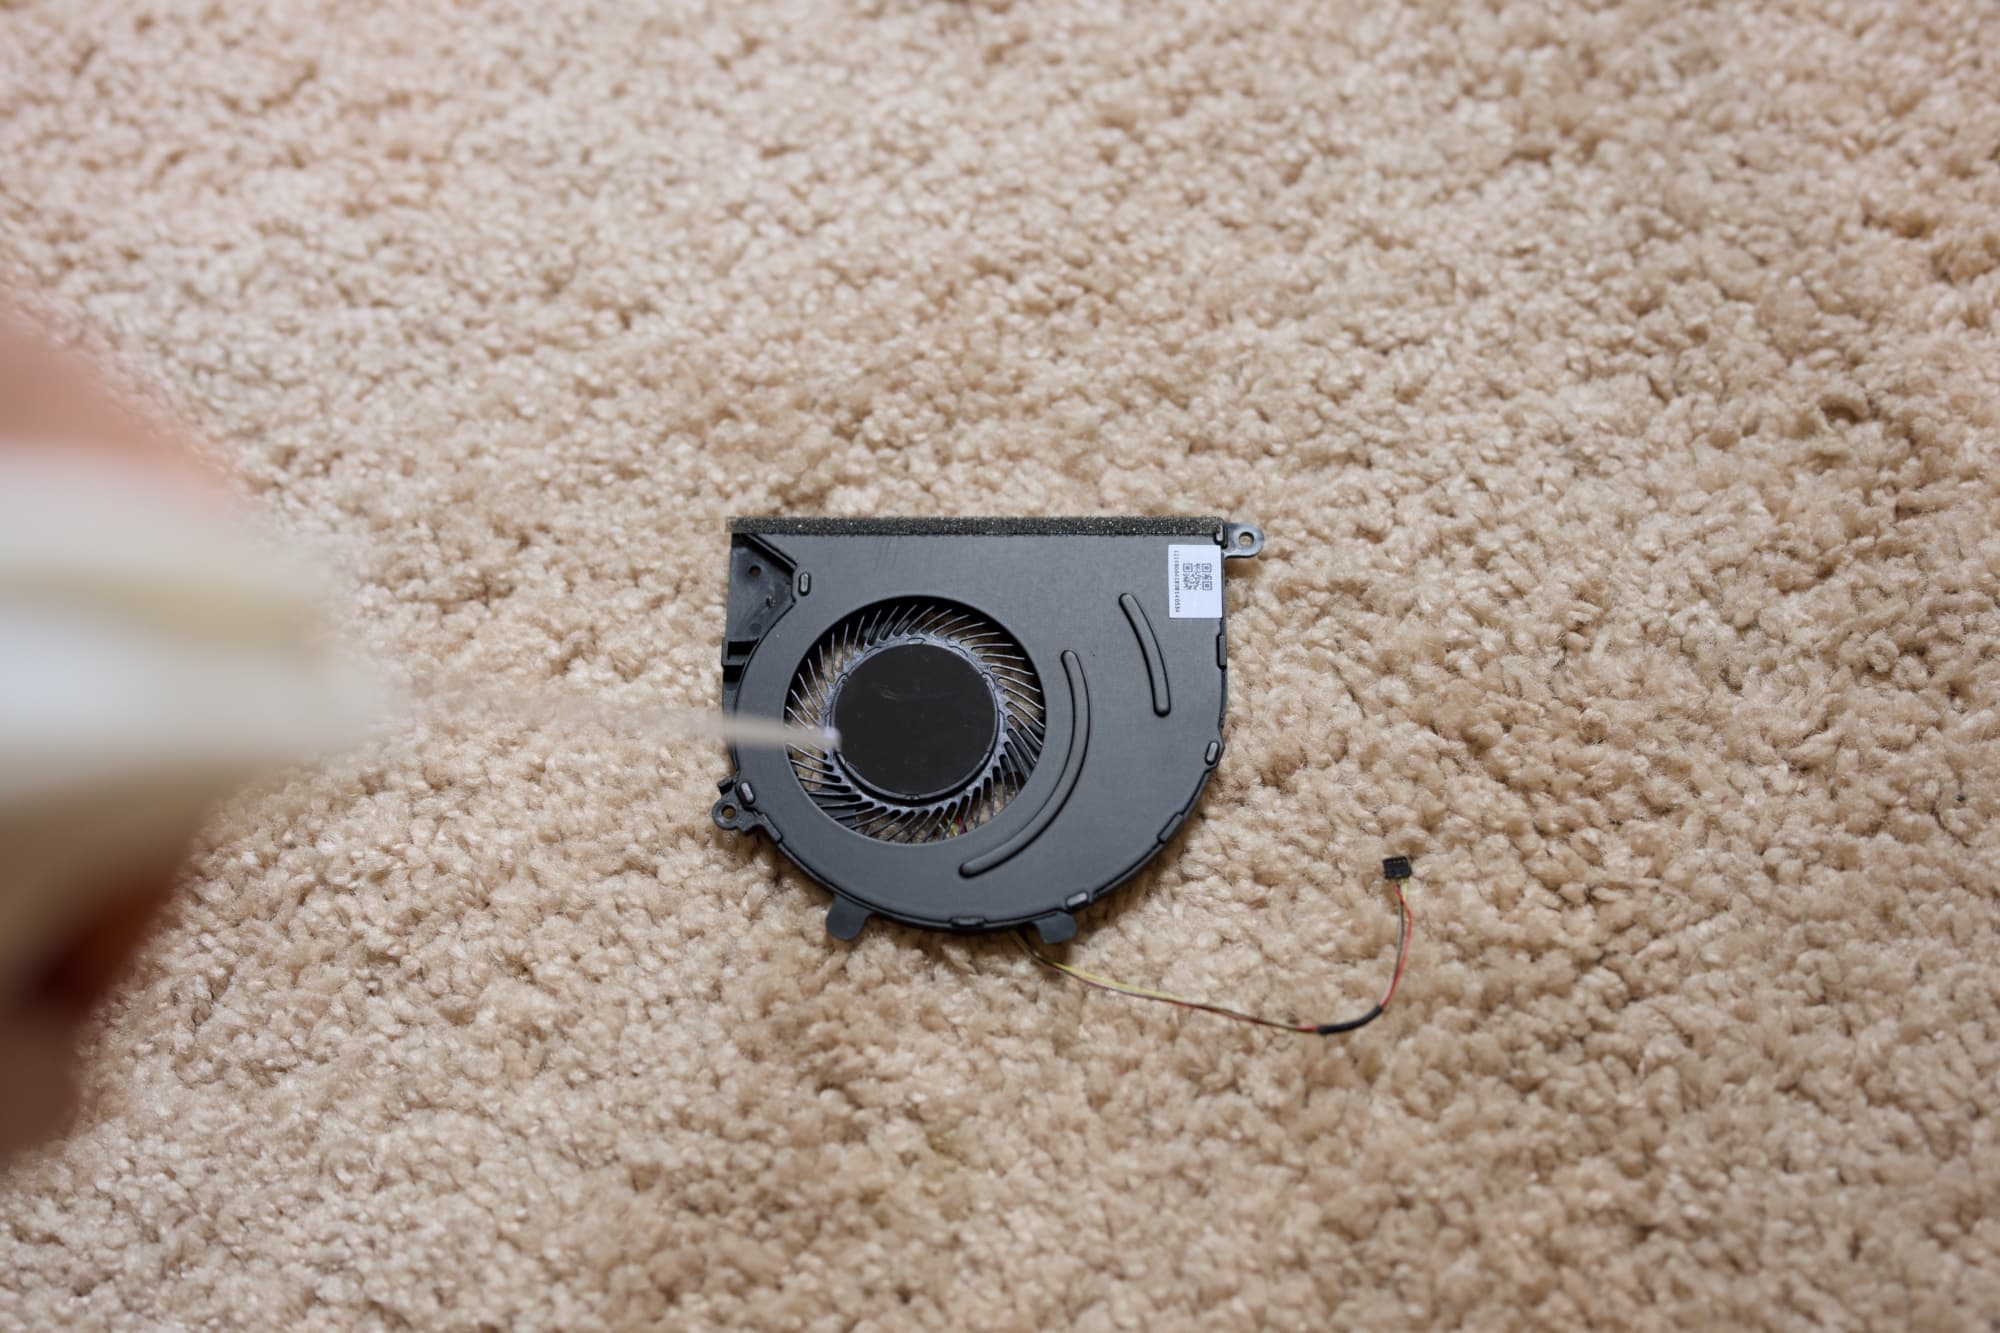
5) Remove the fan(s) and use a can of compressed air or a small clean paintbrush to remove dust buildup from the fan blades:
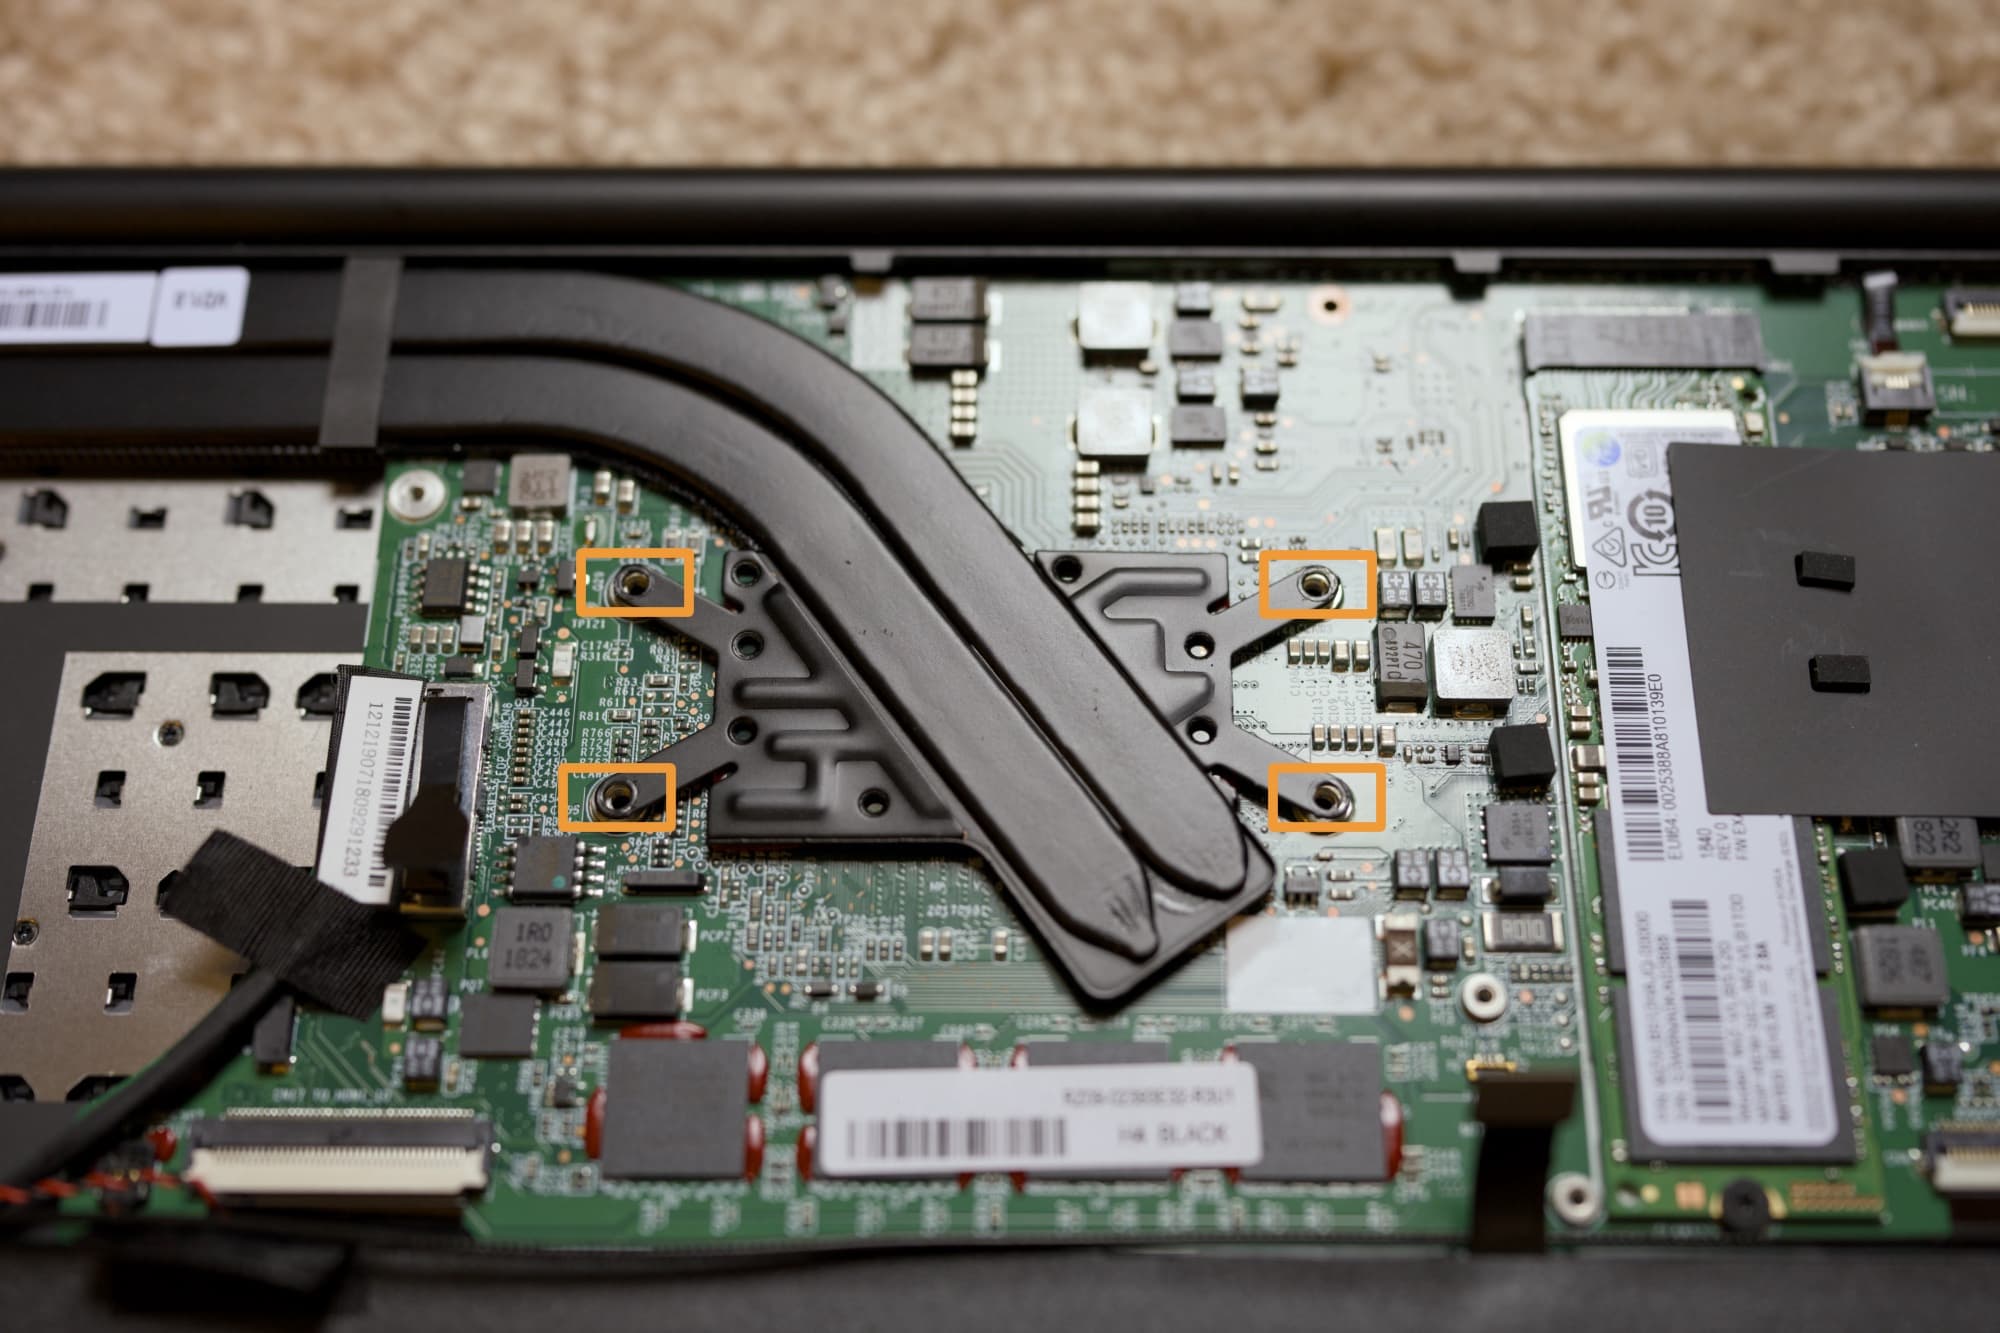
6) Use a screwdriver to remove the screws holding down the copper heat block and heat pipes to the motherboard:
7) Gently lift on the heat block to break the thermal paste free:
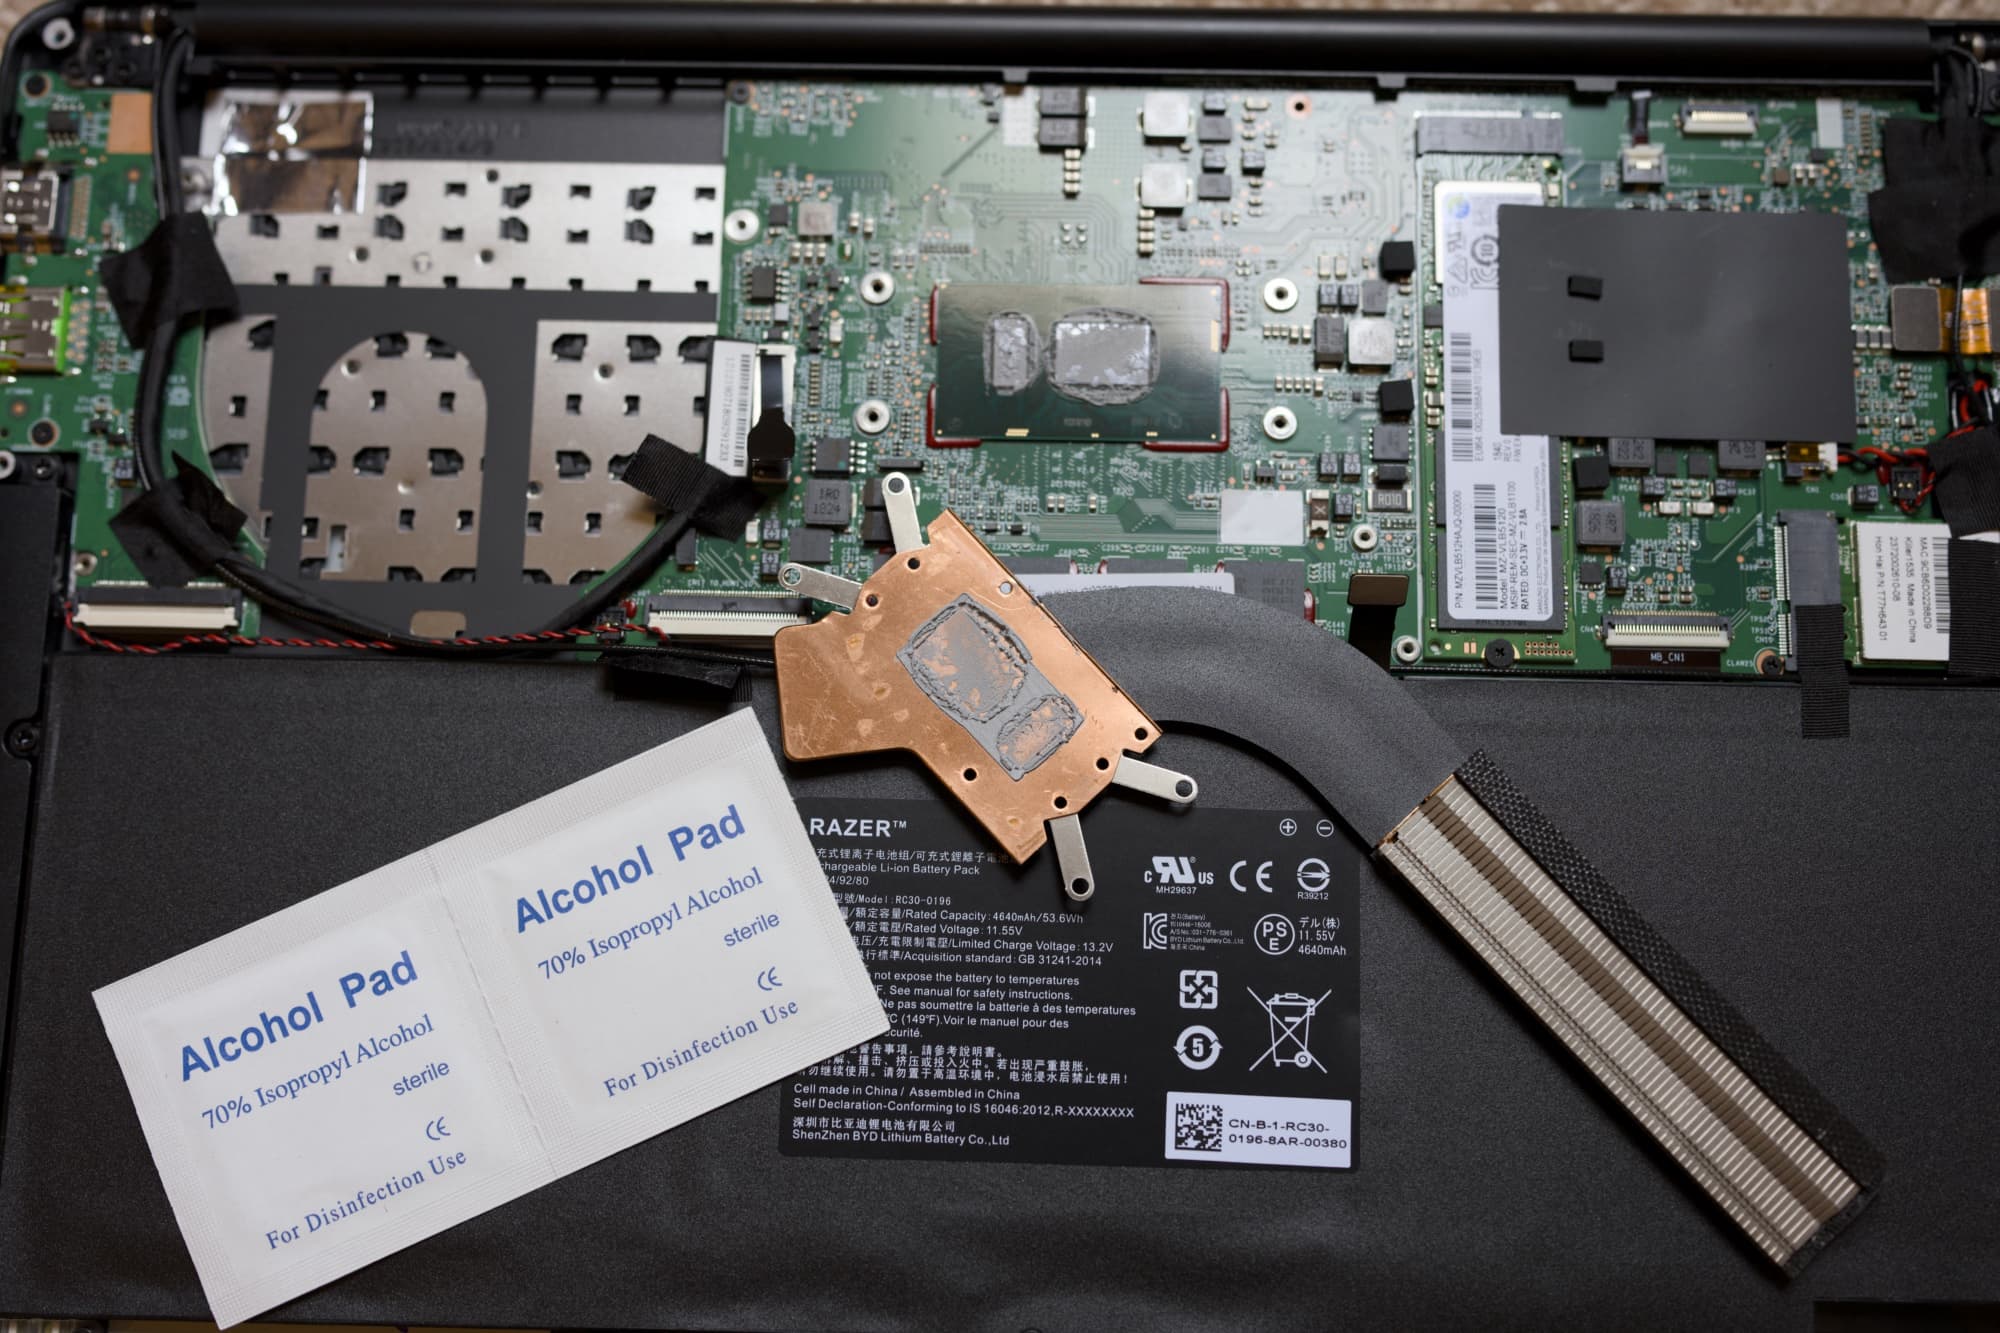
Note: Now is a good time to examine the thermal paste. On mine, you can see that it’s old and crusty and beginning to crack around the edges. It was certainly due to be replaced.
8) Use isopropyl alcohol wipes (or fluid and Q-tips) to wipe the heat block and processor dies clean:
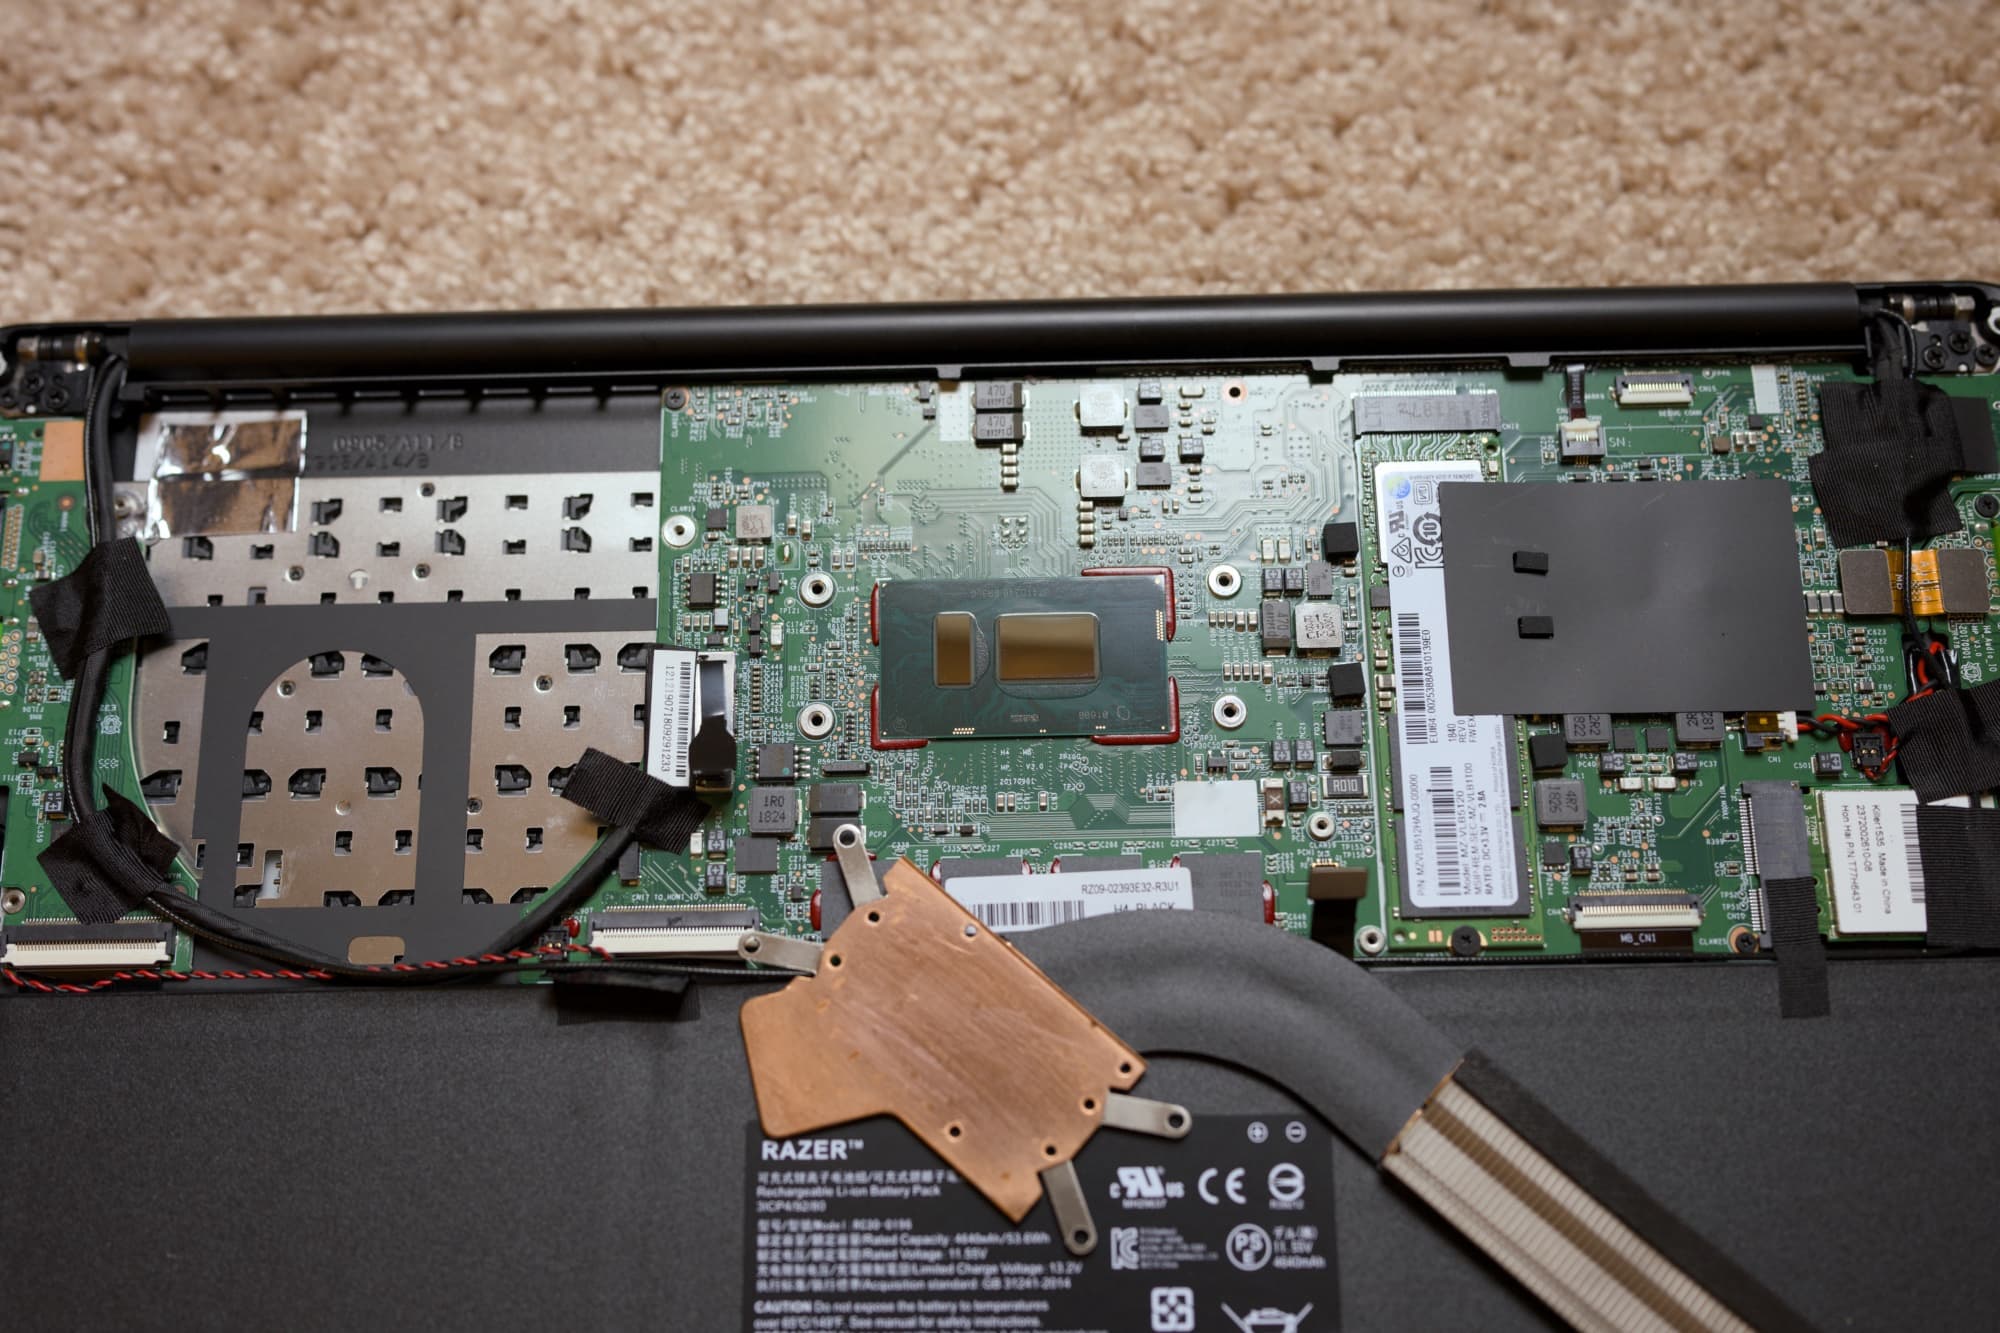
Note: It’s important to get all of it off. You should use at least 70% isopropyl alcohol to have enough power to remove stubborn thermal paste. If you don’t remove all of it, the new thermal paste won’t cure properly.
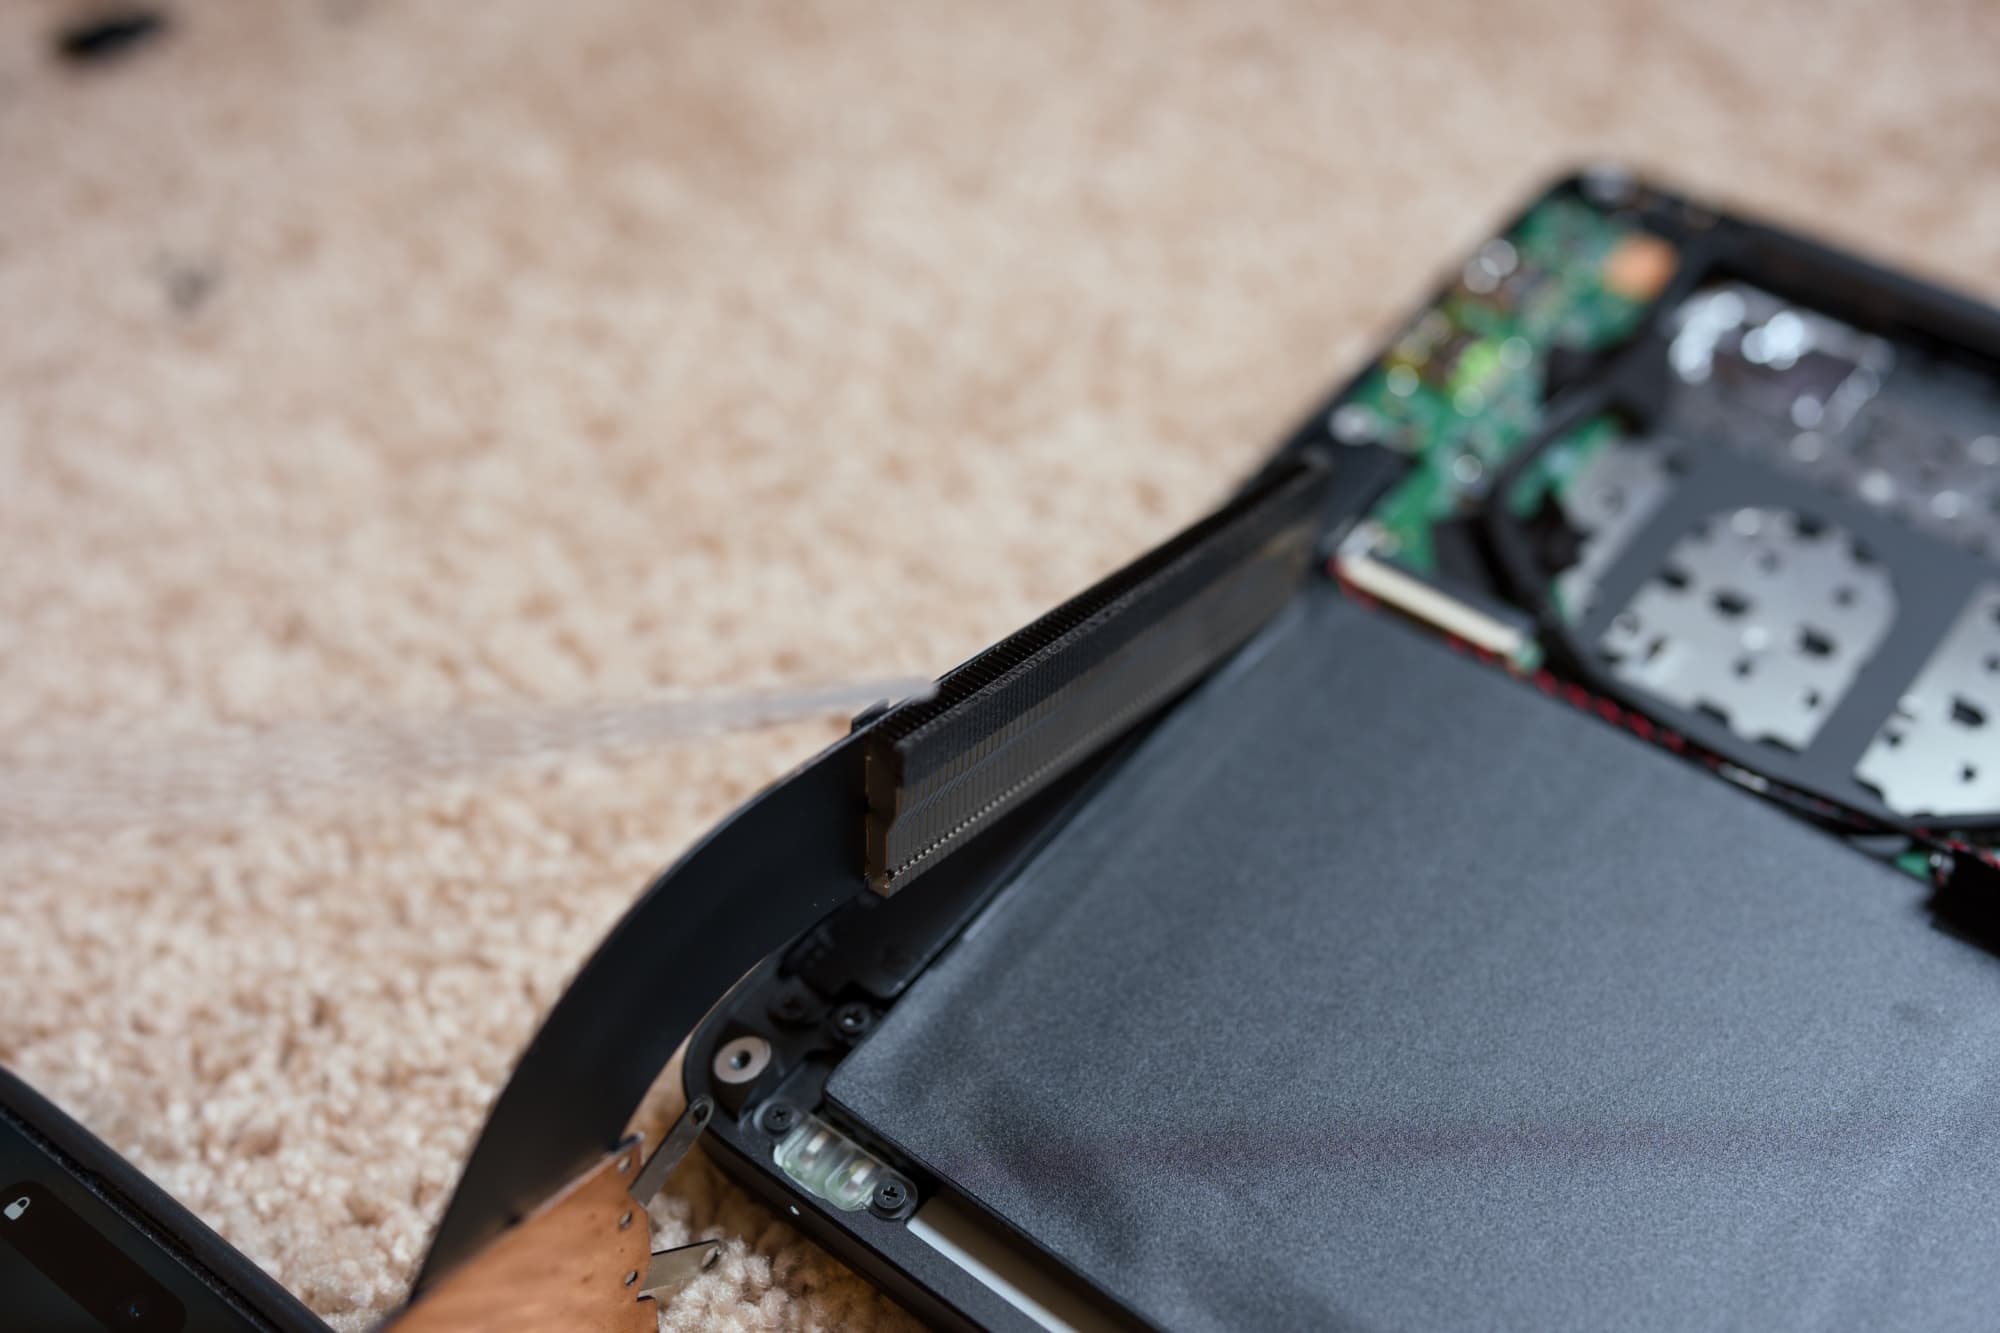
9) Use a can of compressed air or a small clean paintbrush to remove dust buildup from the heat fins at the end of the heat pipes:
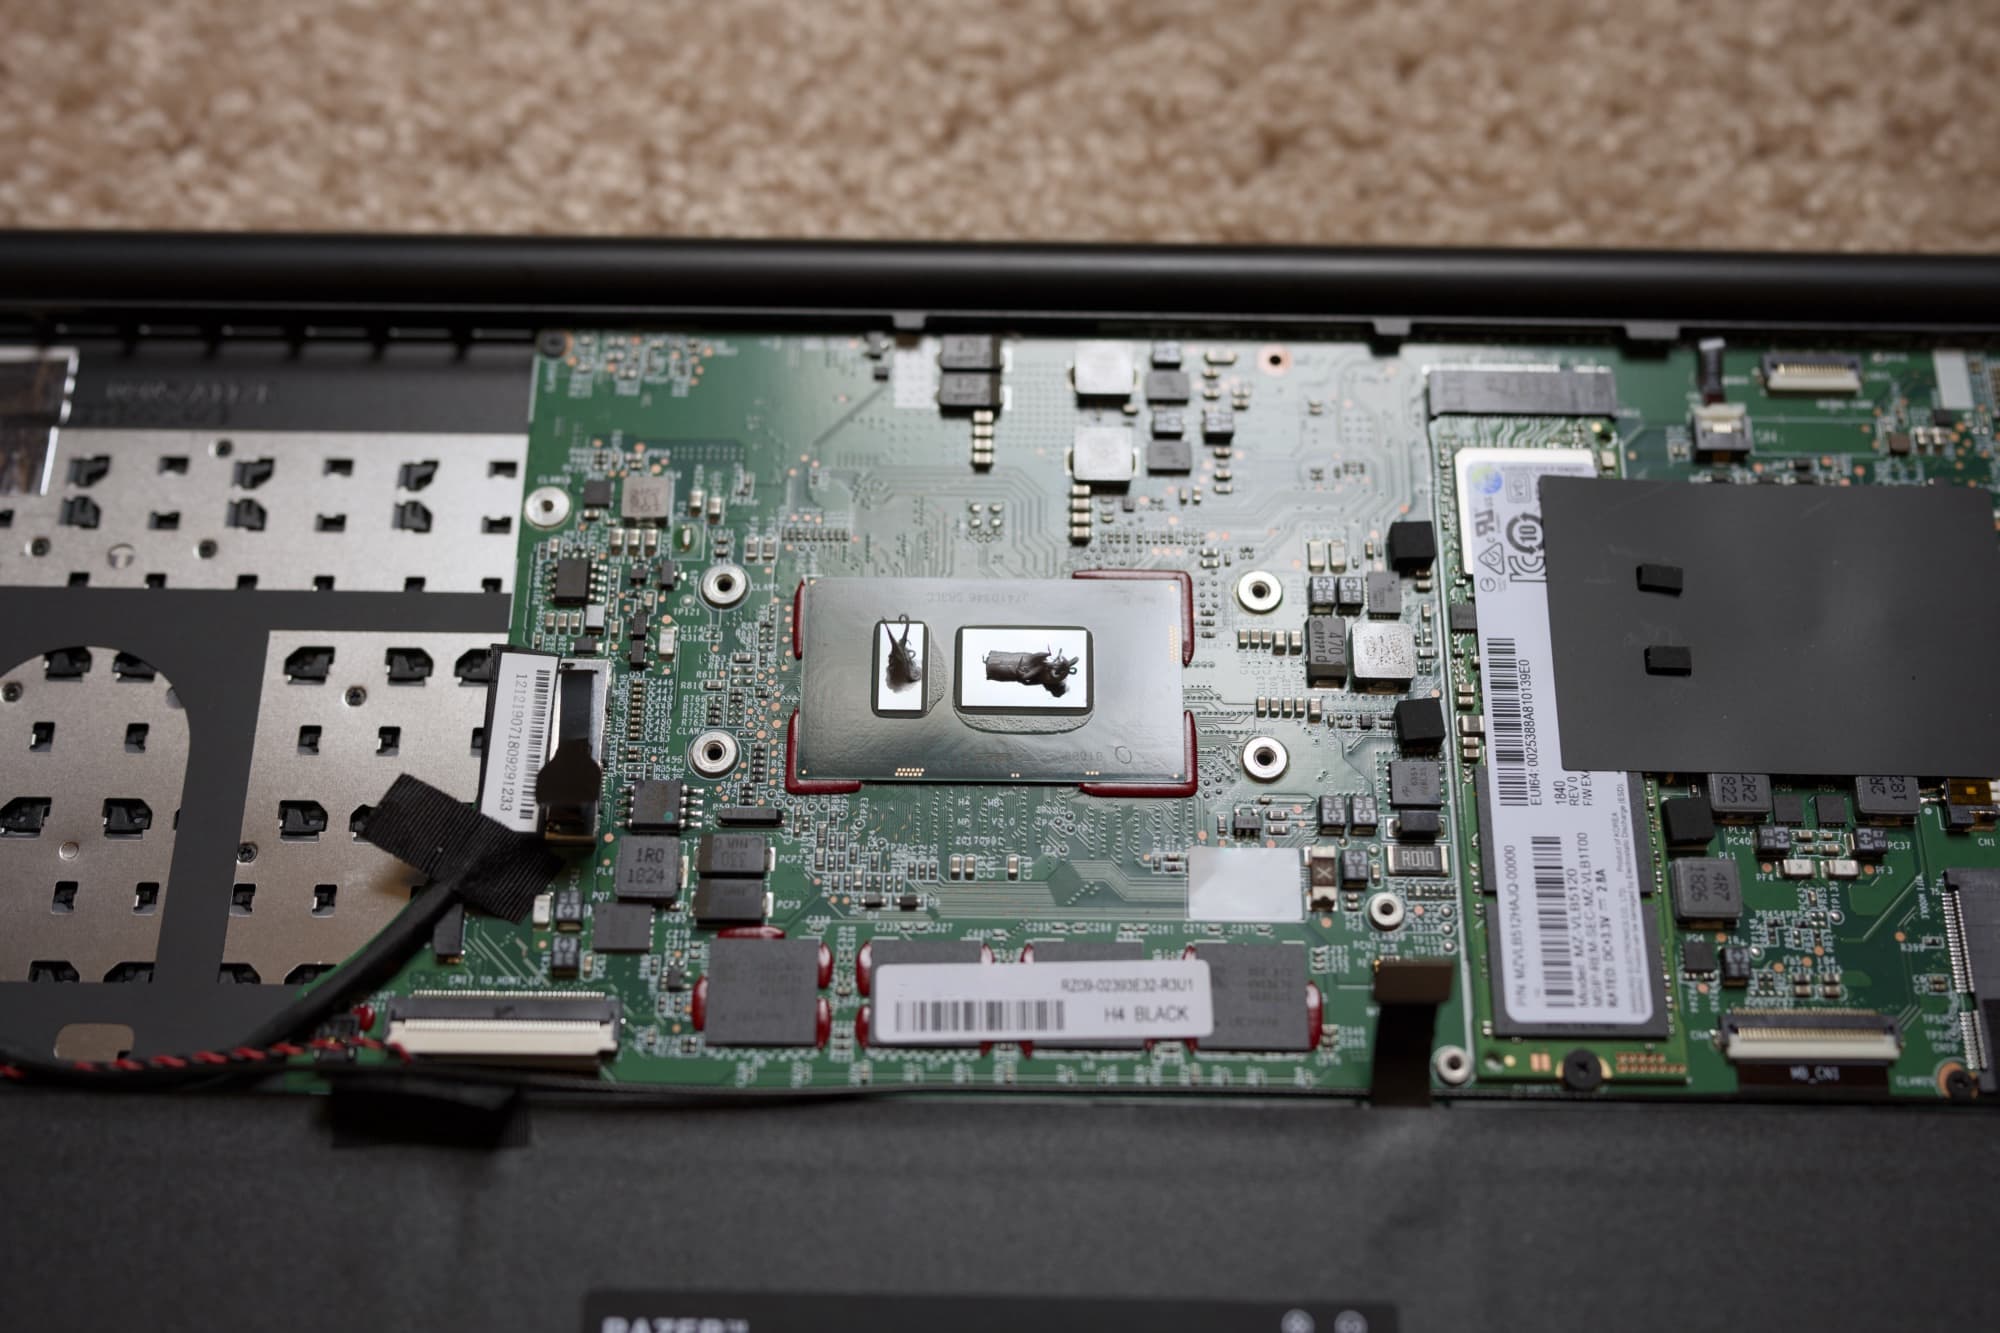
10) Apply a fresh bead of thermal paste to the CPU and GPU dies as shown:
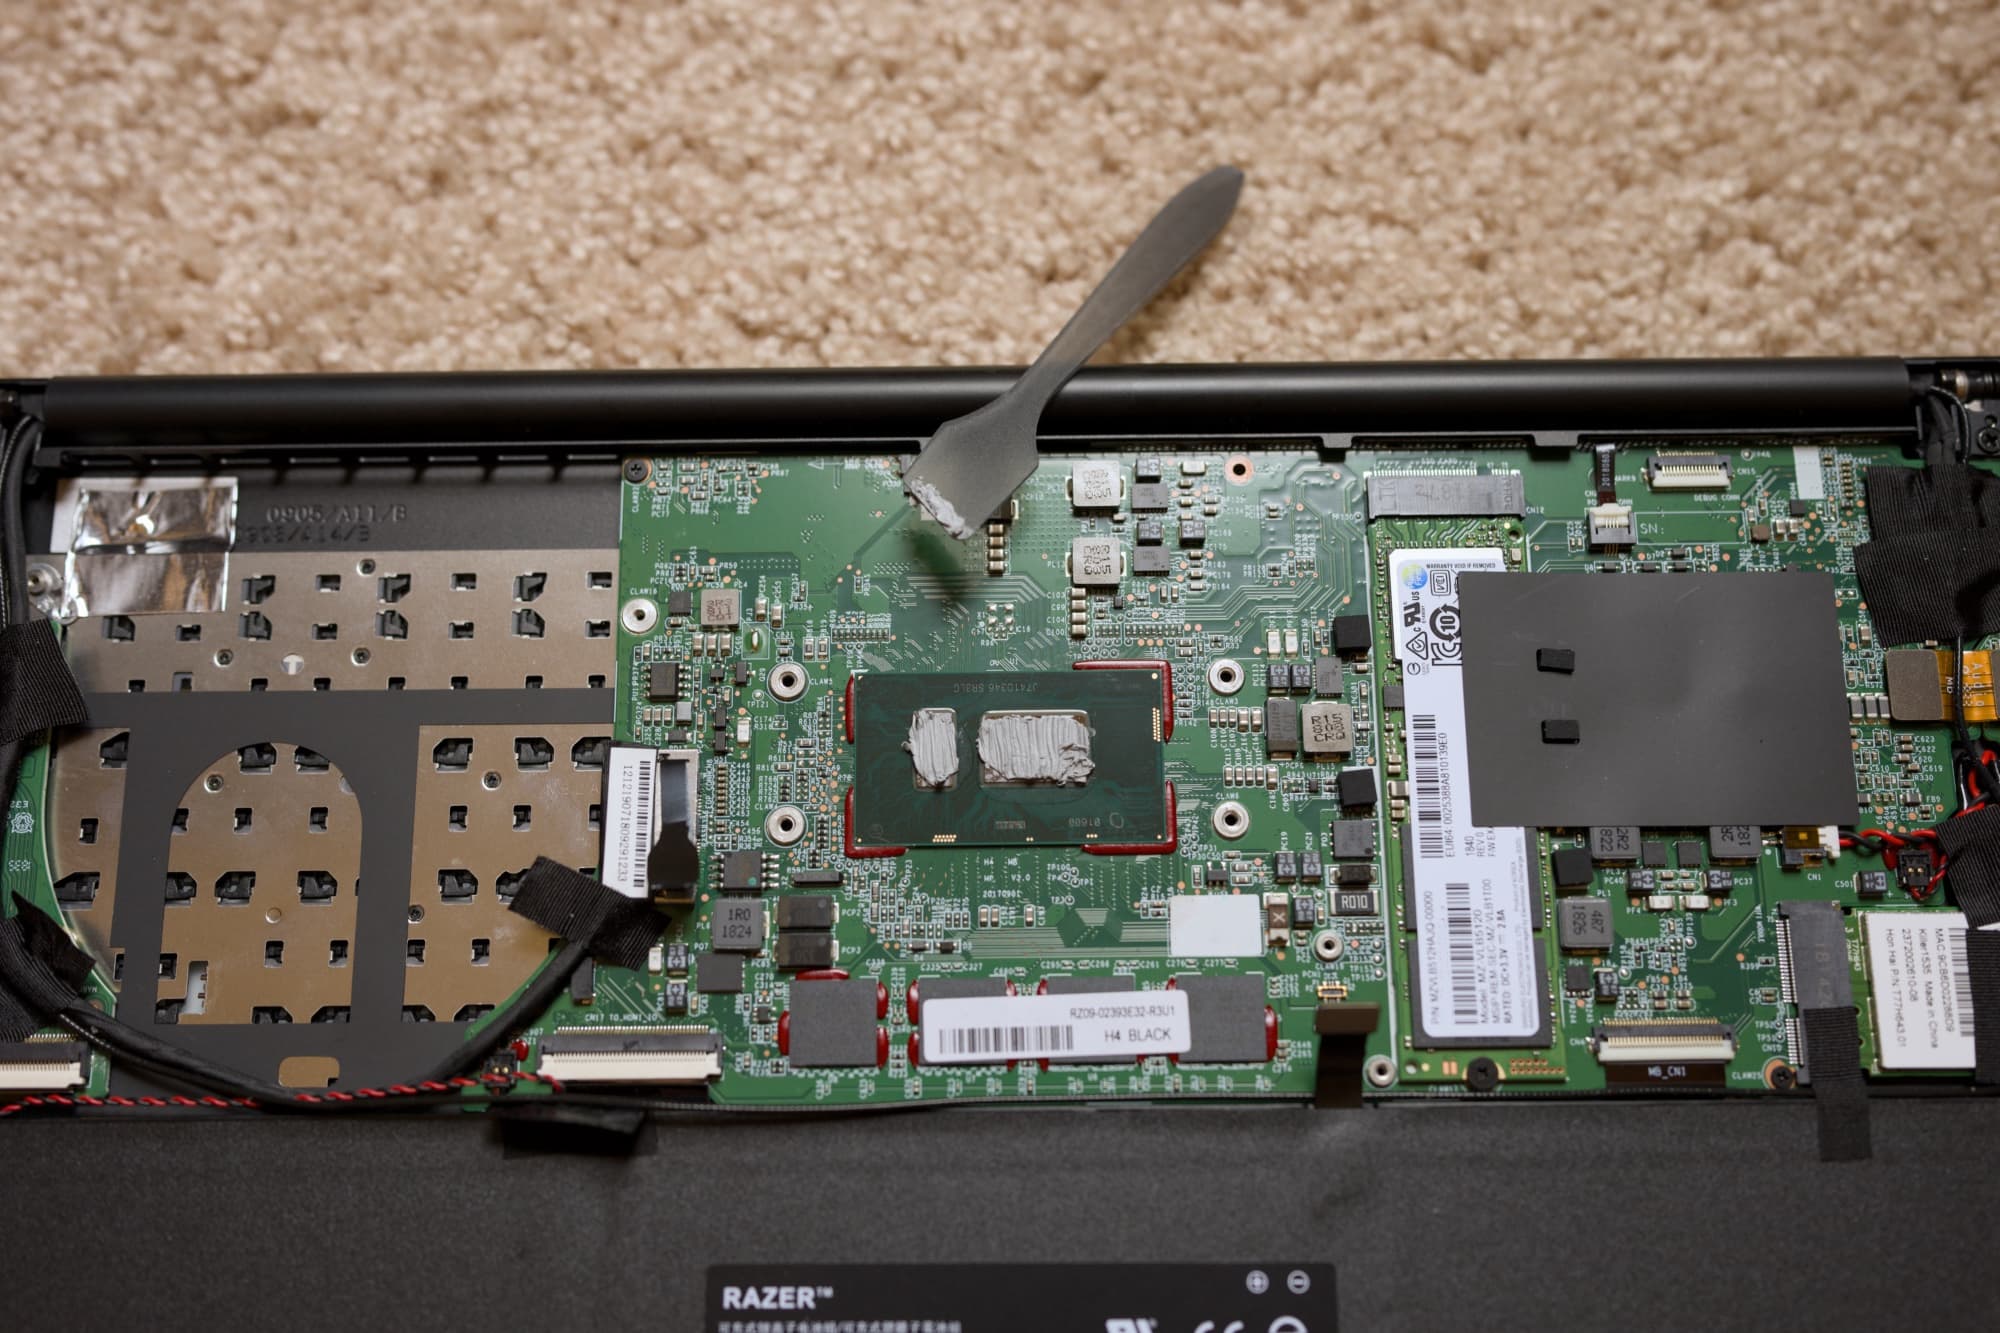
11) Use the included spreader (if provided) to smooth the thermal paste across the dies’ surface as shown:
12) Carefully replace the heat block and torque down its screws:
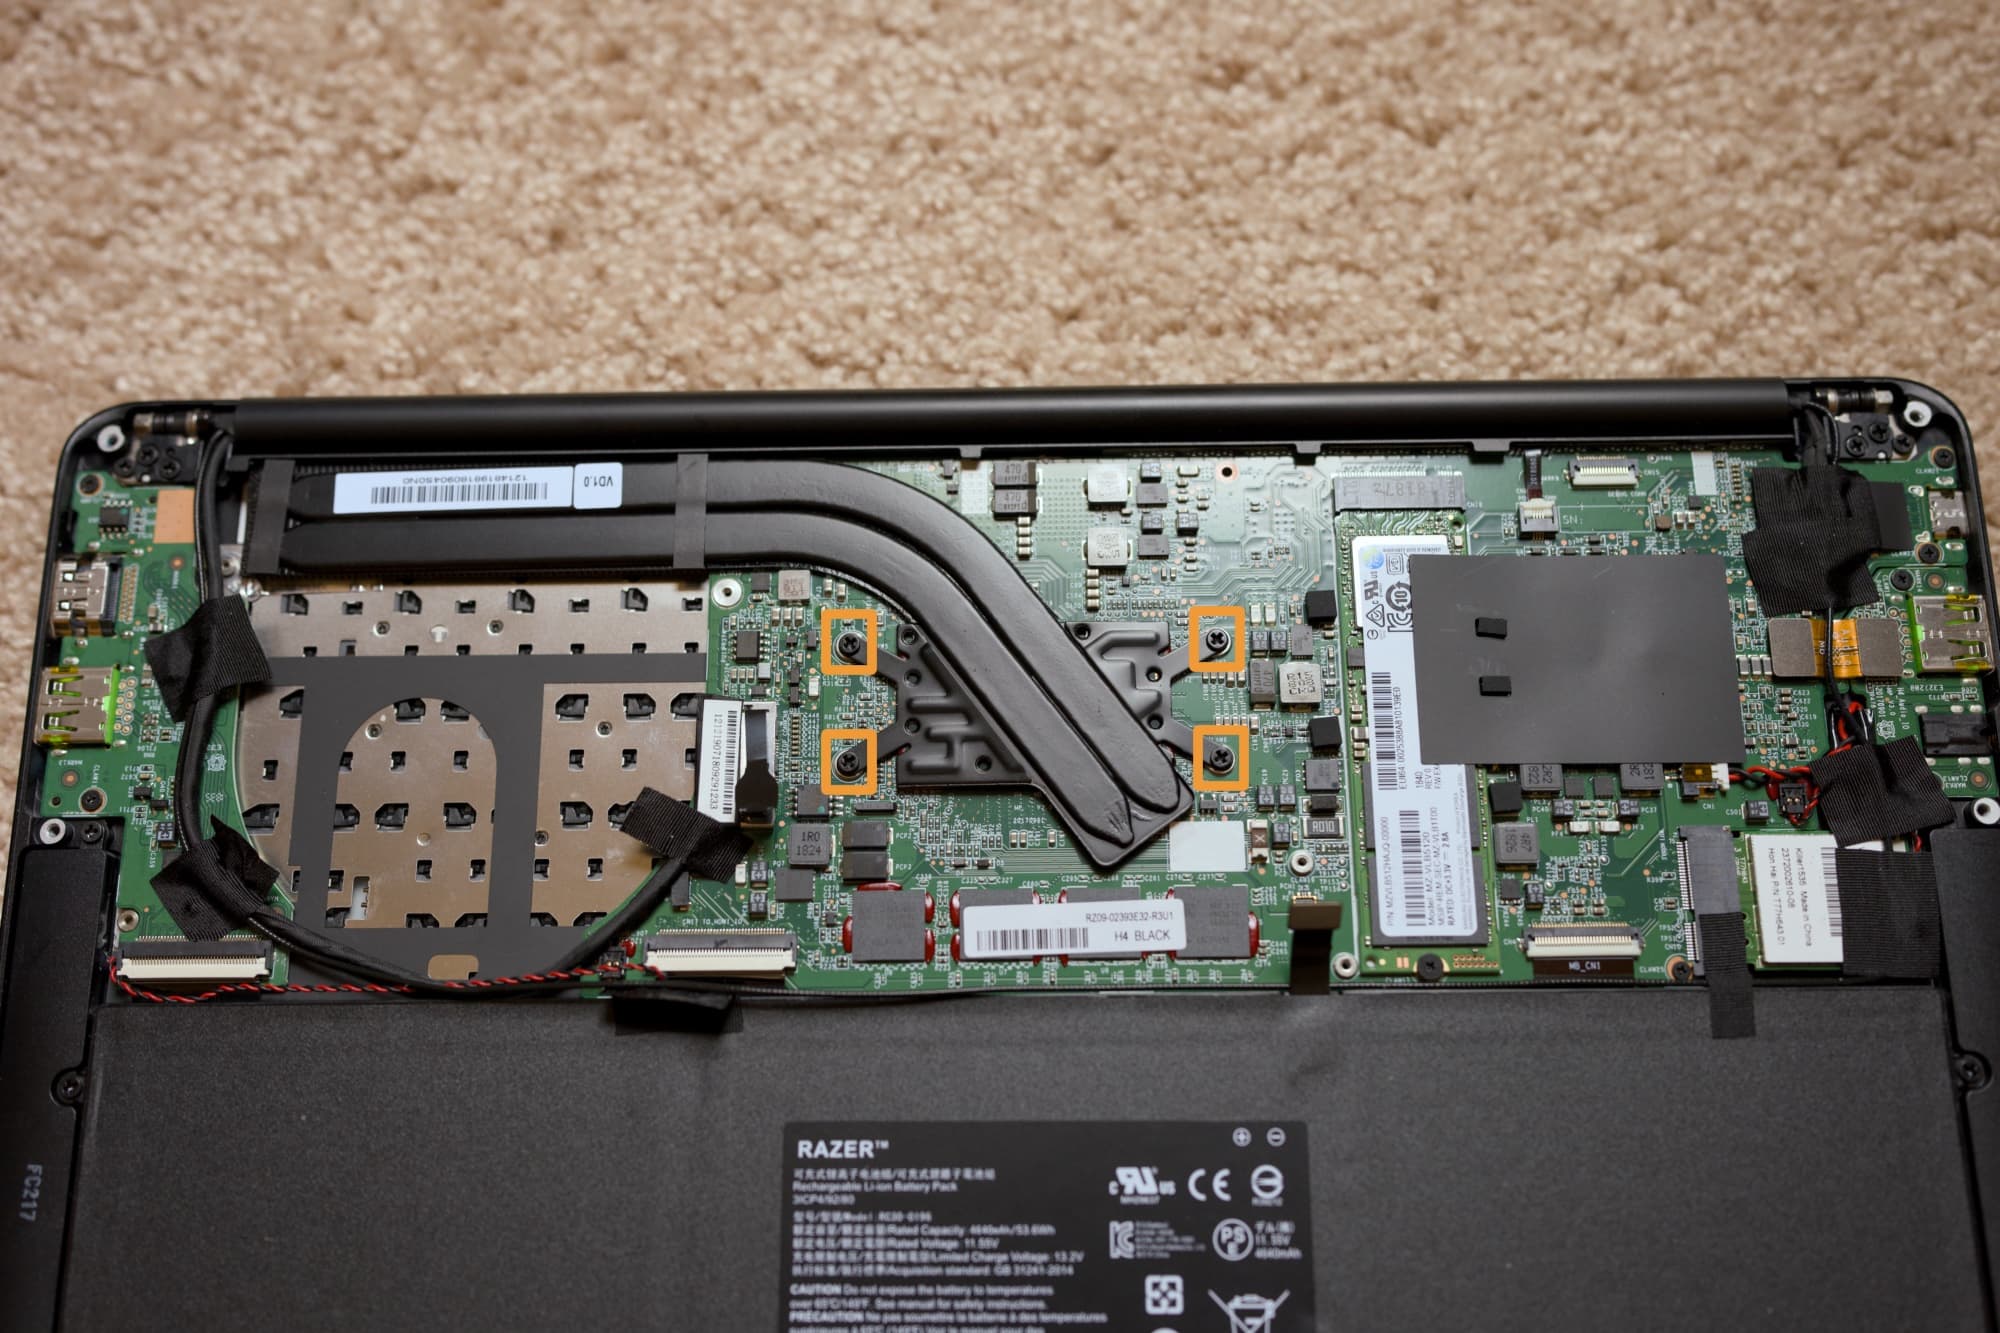
Note: Be careful when putting the heat block down over your thermal paste. Go slow and be straight, as not to smear the thermal paste you applied.
12) Carefully replace the cooling fan, plug it in, and torque down its screws:
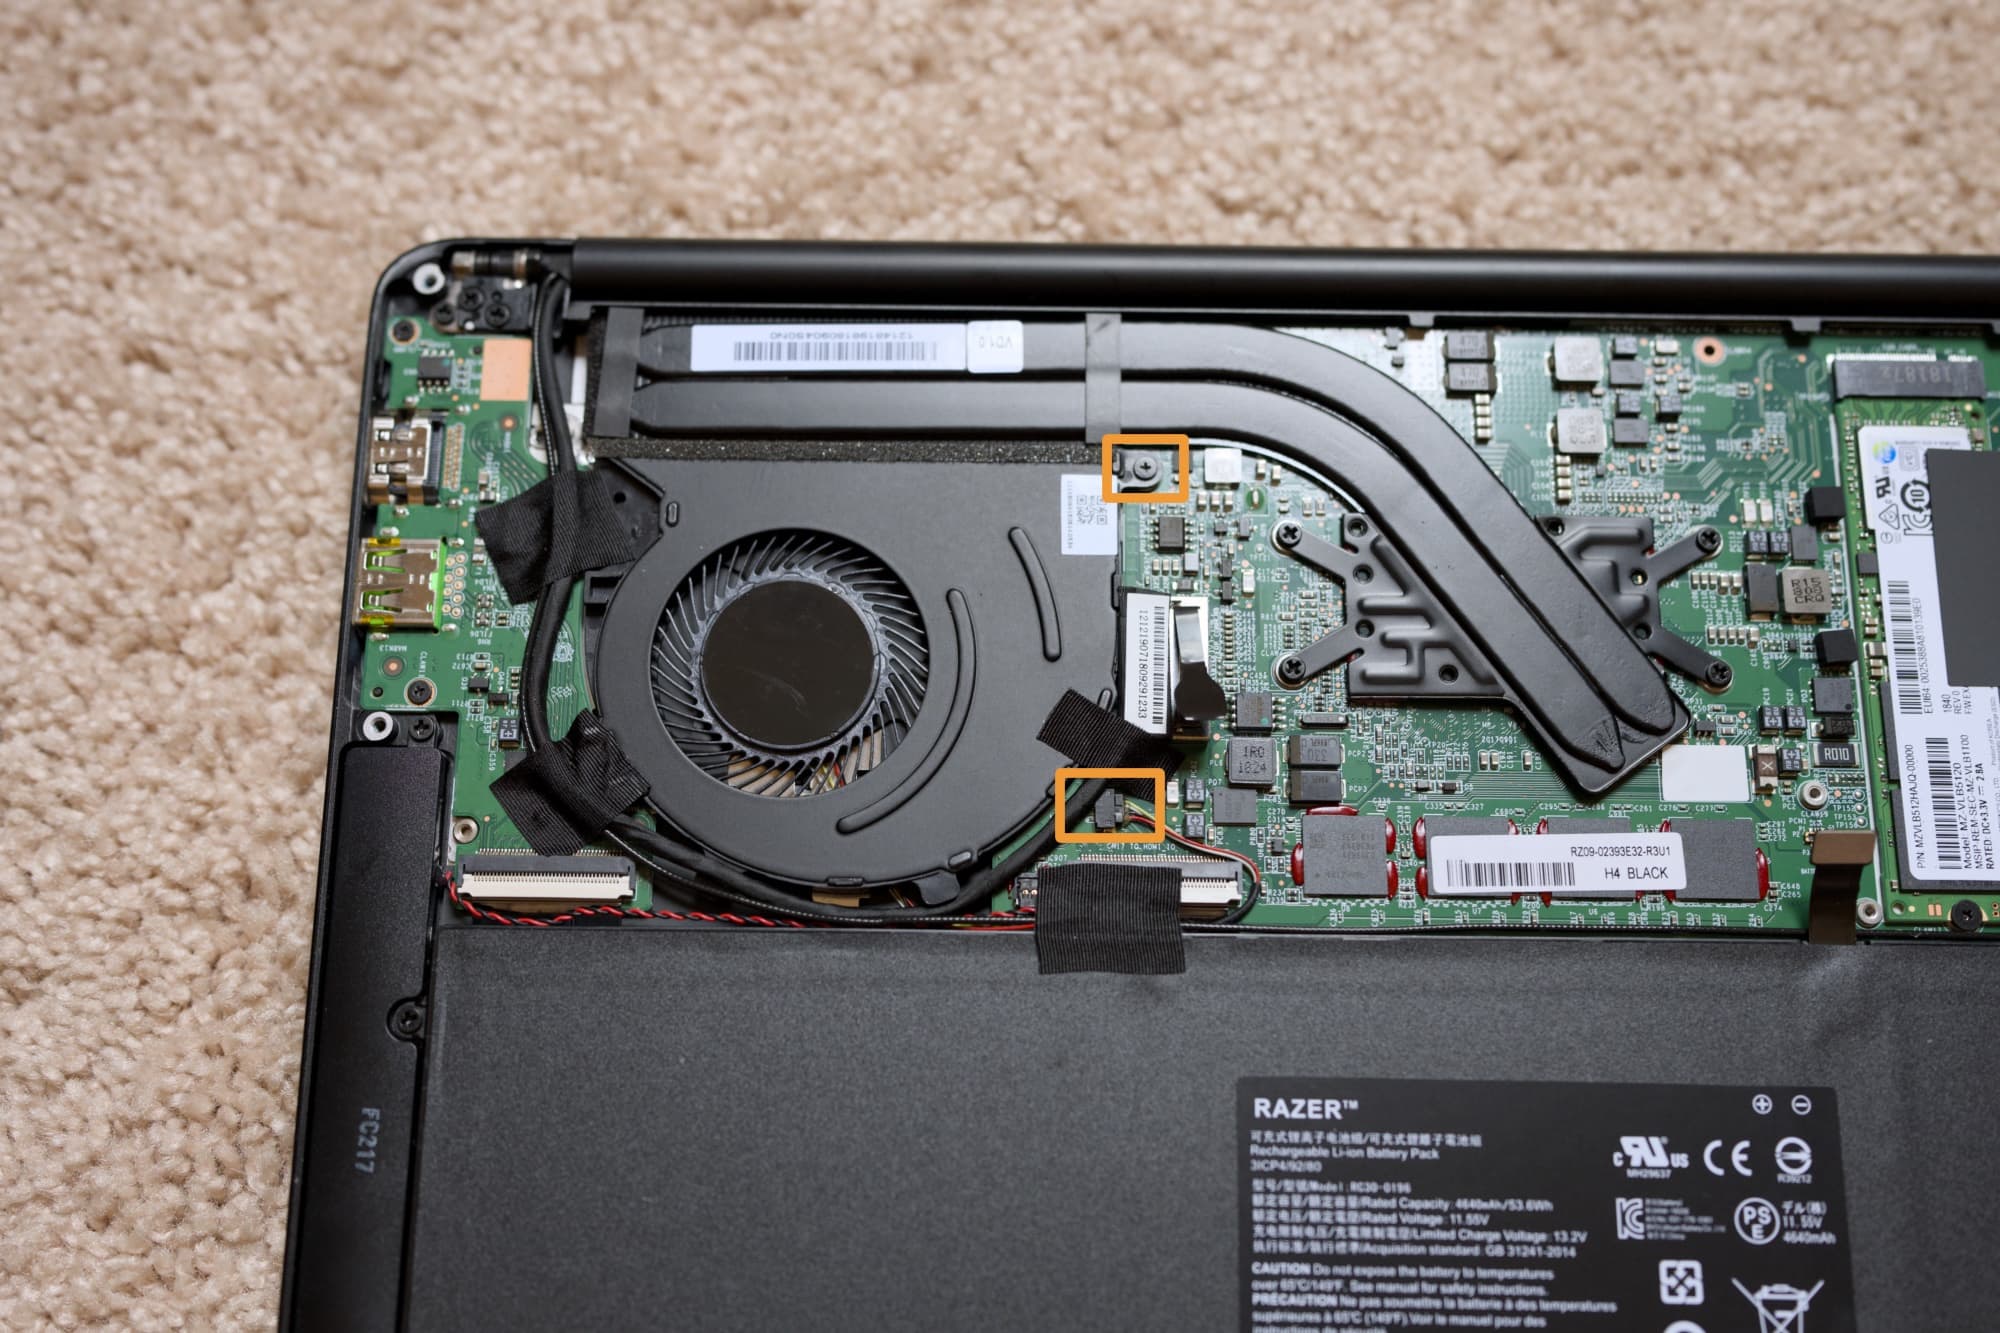
Note: The cables for laptop cooling fans can be hair-thin, so be careful not to fray them.
13) Re-attach the battery connector and the protector if present:
14) Replace the back plate of your laptop and torque down its screws:
15) Attempt to boot up your computer to ensure you hooked everything back up correctly.
Note: Listen for fan spinning and ensure you get a picture on the display. If everything works, you’re in the clear. If not, re-open the laptop and make sure you hooked everything up correctly.
Congratulations, you have successfully cleaned, re-pasted, and re-assembled your laptop.
Verify results
It may take a few heat cycles for your thermal paste to fully break in, but you should be able to open a hardware monitoring program such as iStat Menus for macOS or HWiNFO64 for Windows to validate whether you’re seeing improved CPU and/or GPU temperatures after performing this procedure.
If your laptop was already clean from the start, like mine was, then what you might notice instead is that you have better thermal headroom with the newly replaced thermal paste, which allows your processor to achieve boost clocks for longer without thermal throttling. This equates to higher performance.
Wrapping up
Cleaning out your laptop’s cooling system and replacing the thermal paste is an advisable step if you’ve never been inside of it and it’s several years old. You’d be surprised how much dust can accumulate with use, and moreover, just how ineffective dried up thermal paste can be.
Were you successful with this endeavor? Let us know in the comments section down below.
Source link: https://www.idownloadblog.com/2025/07/02/how-to-change-thermal-paste-on-laptop/


Leave a Reply