

How to use your Mac as an Apple TV display and speaker
Learn how to wirelessly stream video and audio content from your Apple TV to your Mac’s display and speakers.
But first, why might you want to do this?
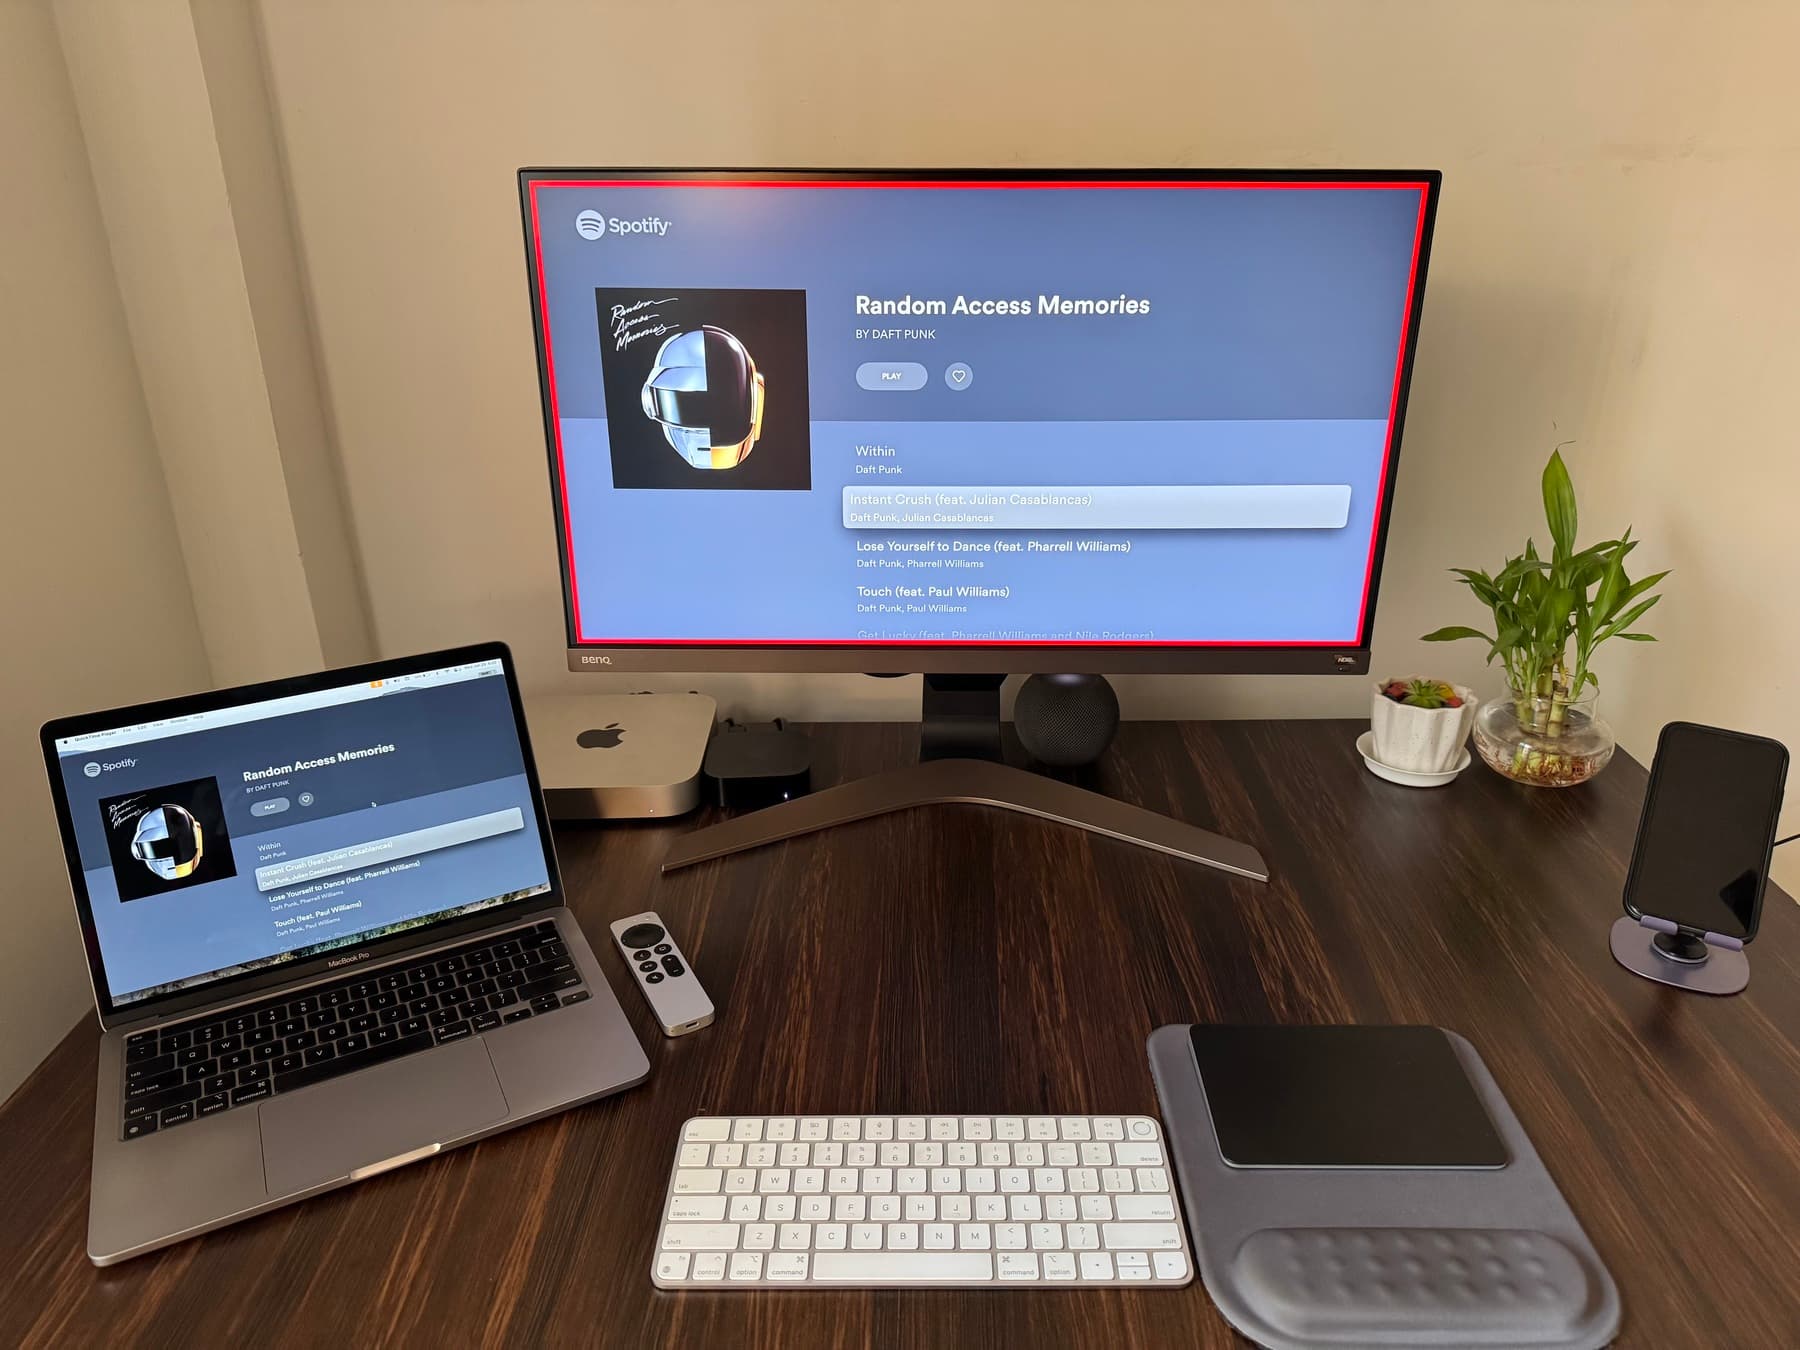
I keep an Apple TV on my work desk hooked up to one of the HDMI ports on my BenQ 4K monitor, which I primarily use with my Mac mini.
While working on a separate Apple TV tutorial, I discovered it was super easy to route the video and audio from Apple TV to my Mac (and even my iPad, which I will mention later).
While this setup was intriguing to me, I wondered if it might be practical for other users. As it turns out, there are some situations where using your Mac’s screen and built-in speakers (or other audio devices connected to your Mac) as your Apple TV display and speaker can be useful:
- You’re using the television with other devices, like a PlayStation, and thus can’t use that with your Apple TV.
- You want to watch or listen to something on your Apple TV while being in a different room.
- When working, you want your Apple TV content in a little window on your Mac.
- You don’t want to fire up the huge living room television, and would rather consume content on a smaller screen.
- Your television’s speaker is crappy, and you want to use your MacBook’s excellent speakers for audio.
- You want Apple TV’s sound to be played on multiple speakers of different kinds (it’s super cool — more on this later).
- You want to use a speaker that’s compatible with your Mac but not with your Apple TV or television.
- You want to control music volume from your computer’s keyboard, thus eliminating the need to pick up the Apple TV remote.
A few drawbacks you should know about
Before we get to the steps, here are two issues with this setup worth knowing.
Red outline on the television screen
When you wirelessly broadcast your Apple TV’s video or audio, a red rectangle appears on all four edges of the main television screen. So, using your Mac as an Apple TV speaker may not be suitable when watching videos on its main display, but it shouldn’t be much of an issue when using apps like Spotify or Apple Music.
Doesn’t work with protected streaming content
Netflix, Hulu, Prime Video, and many other streaming services use Widevine, which is Google’s DRM system that allows users to watch videos but blocks them from taking screenshots & screen recordings or making copies. This restriction can also lead to blacked-out screens during casting and AirPlay.
As a result, you cannot use your Mac as the Apple TV display or speaker when viewing content in Apple TV+, Disney, Netflix, Prime Video, and other streaming apps. However, you won’t face this problem with YouTube and similar platforms.
Use your Mac as your Apple TV display and speaker
- Ensure your Mac and Apple TV are connected to the same Wi-Fi network.
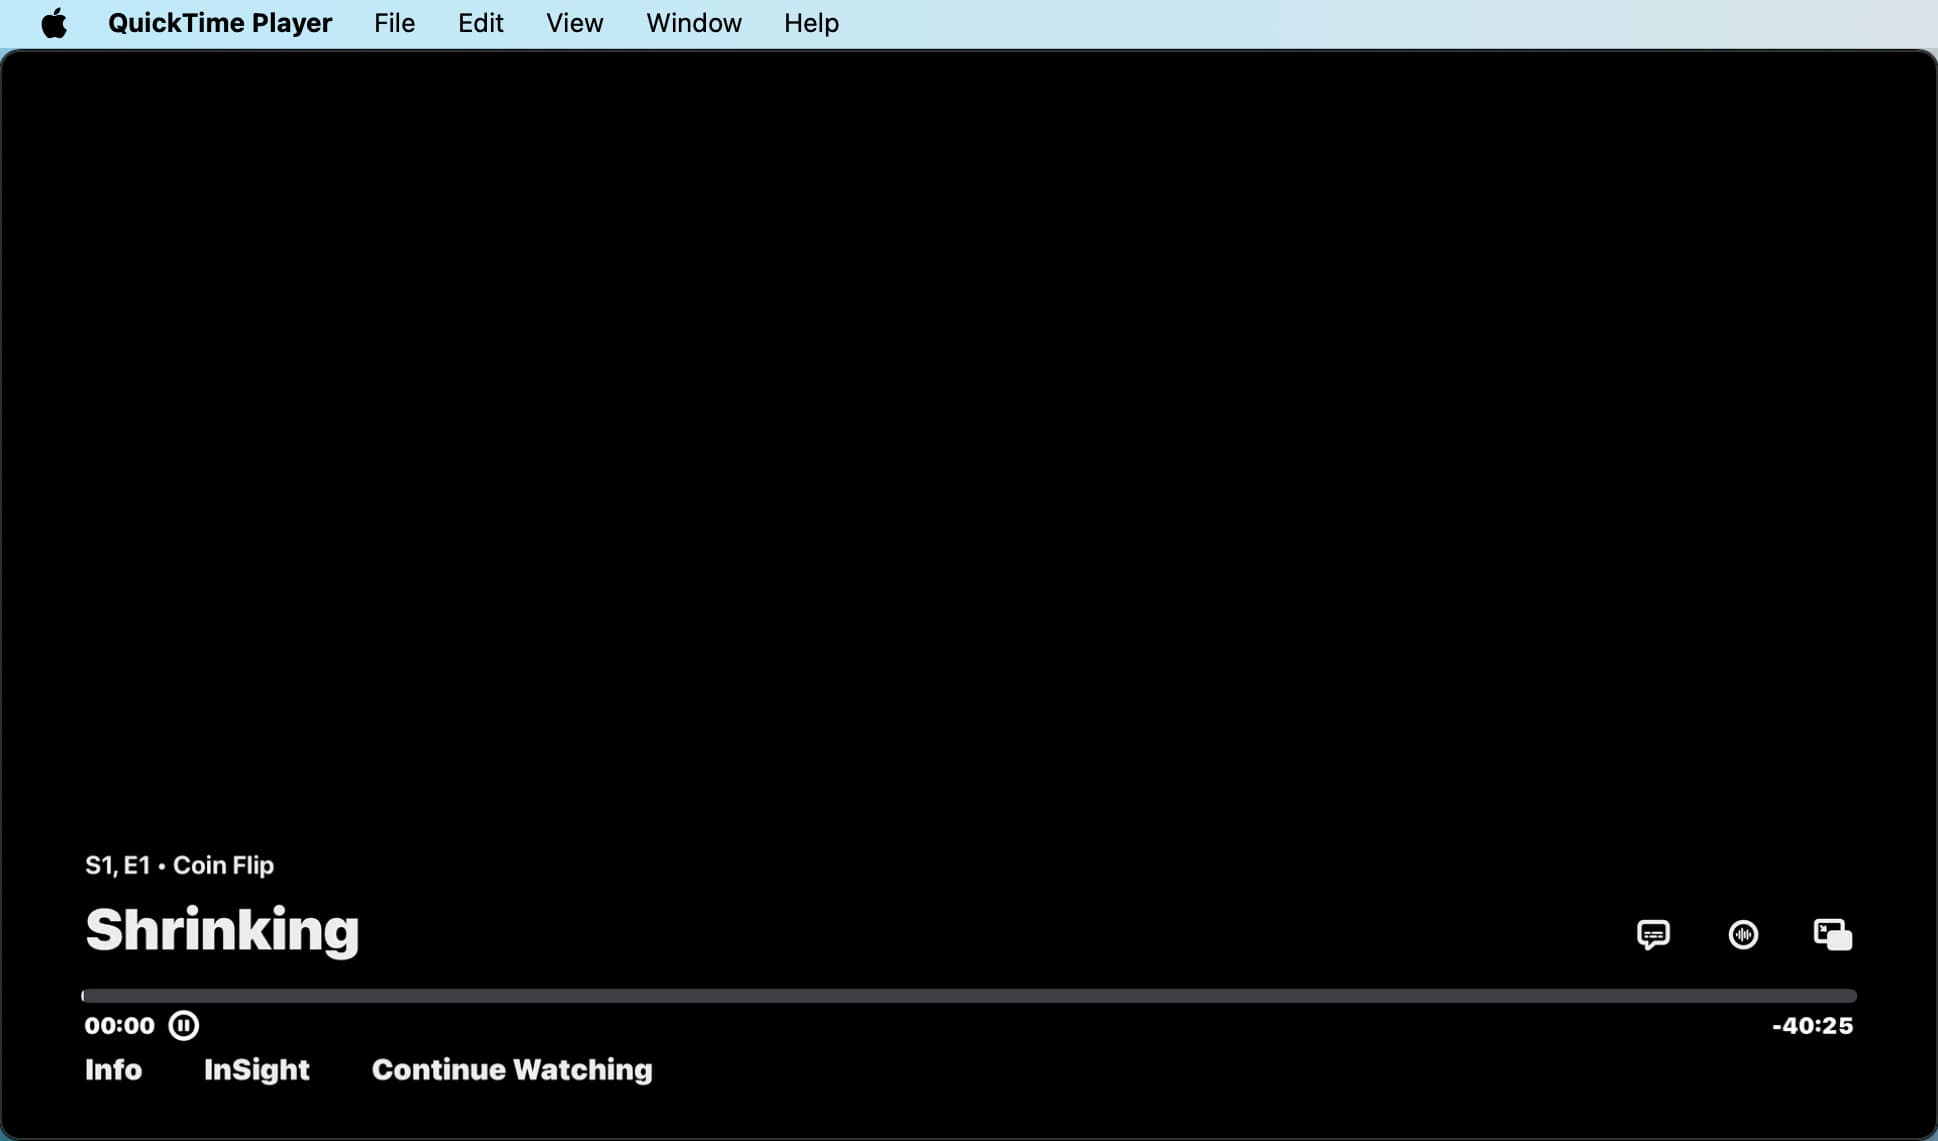
- Open the built-in Apple QuickTime Player on your Mac. If it was already open, quit and relaunch it.
- Click File > New Movie Recording in QuickTime’s menu bar.
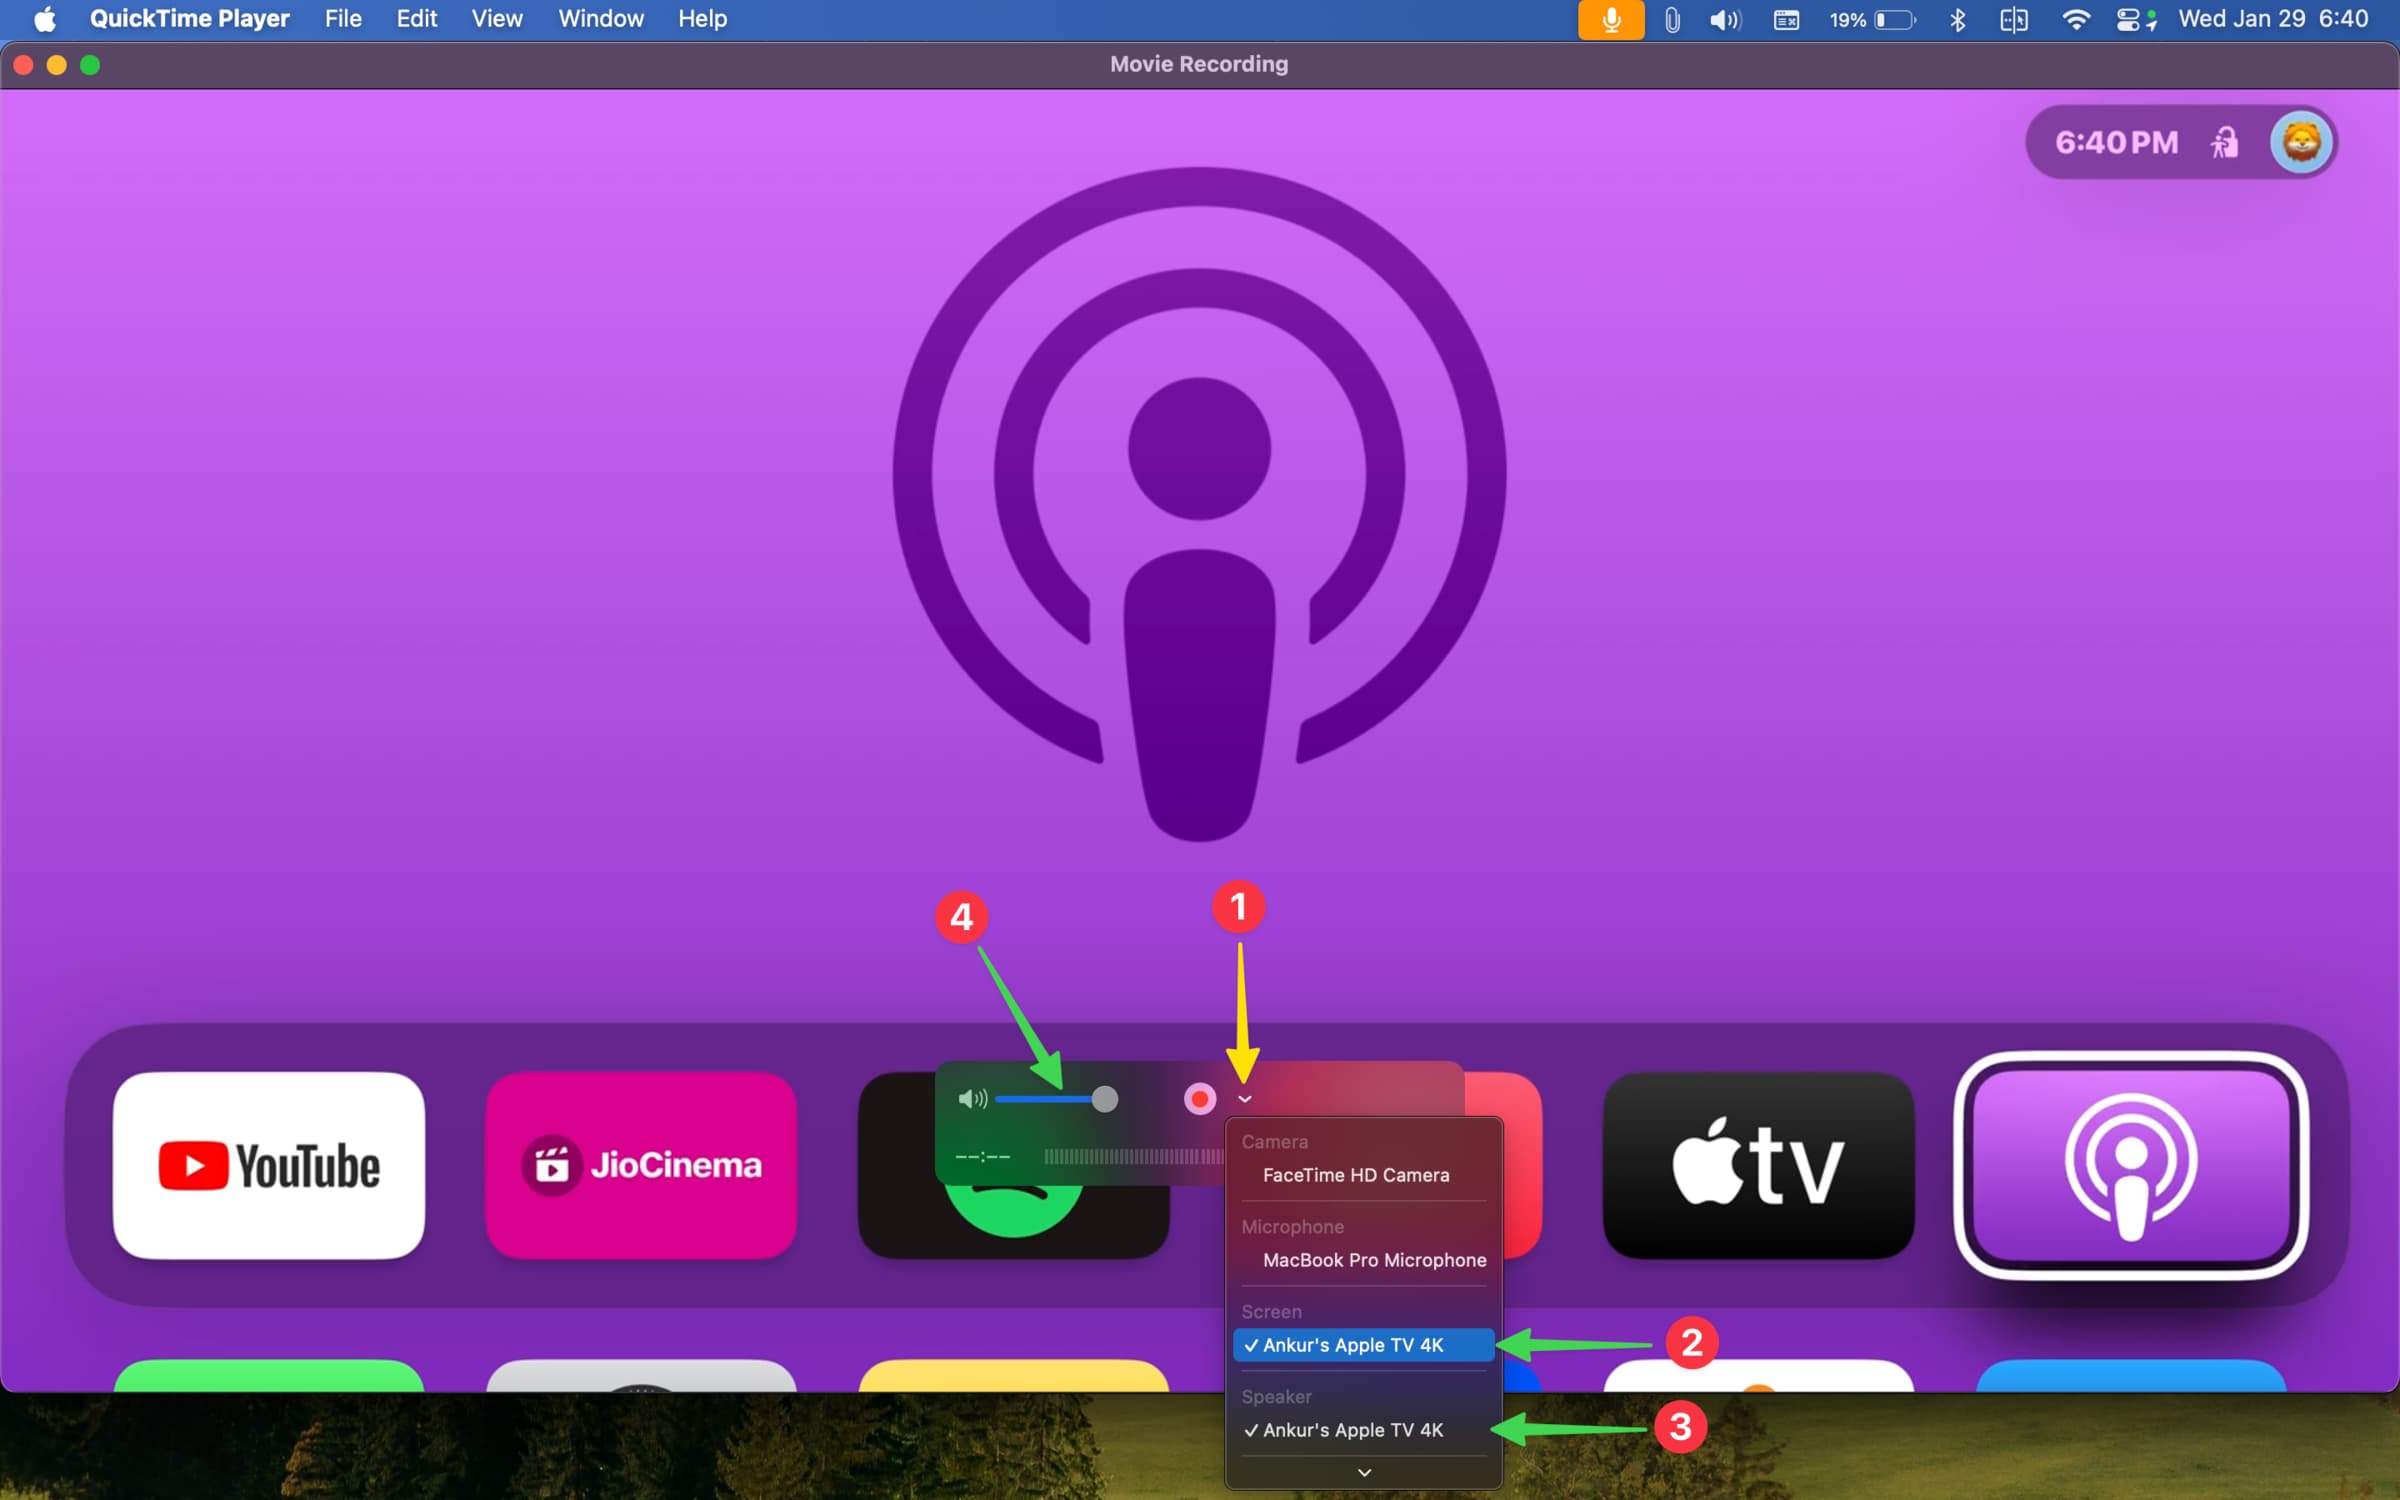
- Hit the tiny arrow on the QuickTime Player screen and select your Apple TV as the Screen. You will now see the contents of your Apple TV inside QuickTime on your Mac. Next, select your Apple TV as the Speaker. Note that you can also choose your Apple TV as the speaker but select something else as the screen.
- Drag the speaker slider in QuickTime all the way to the right. If you don’t, you won’t hear the audio from your Apple TV.
That’s pretty much all there is to it.
Now, open Spotify, Apple Music, Apple Podcasts, YouTube, or a similar app on your Apple TV and play a song or video. You’ll see the Apple TV screen/video in QuickTime and the audio will come from your Mac’s built-in speaker. You can adjust it using your computer’s volume keys.

Note: Don’t hit the record button in QuickTime, as that will start a screen recording of your Apple TV.
Connect other audio devices to your Mac
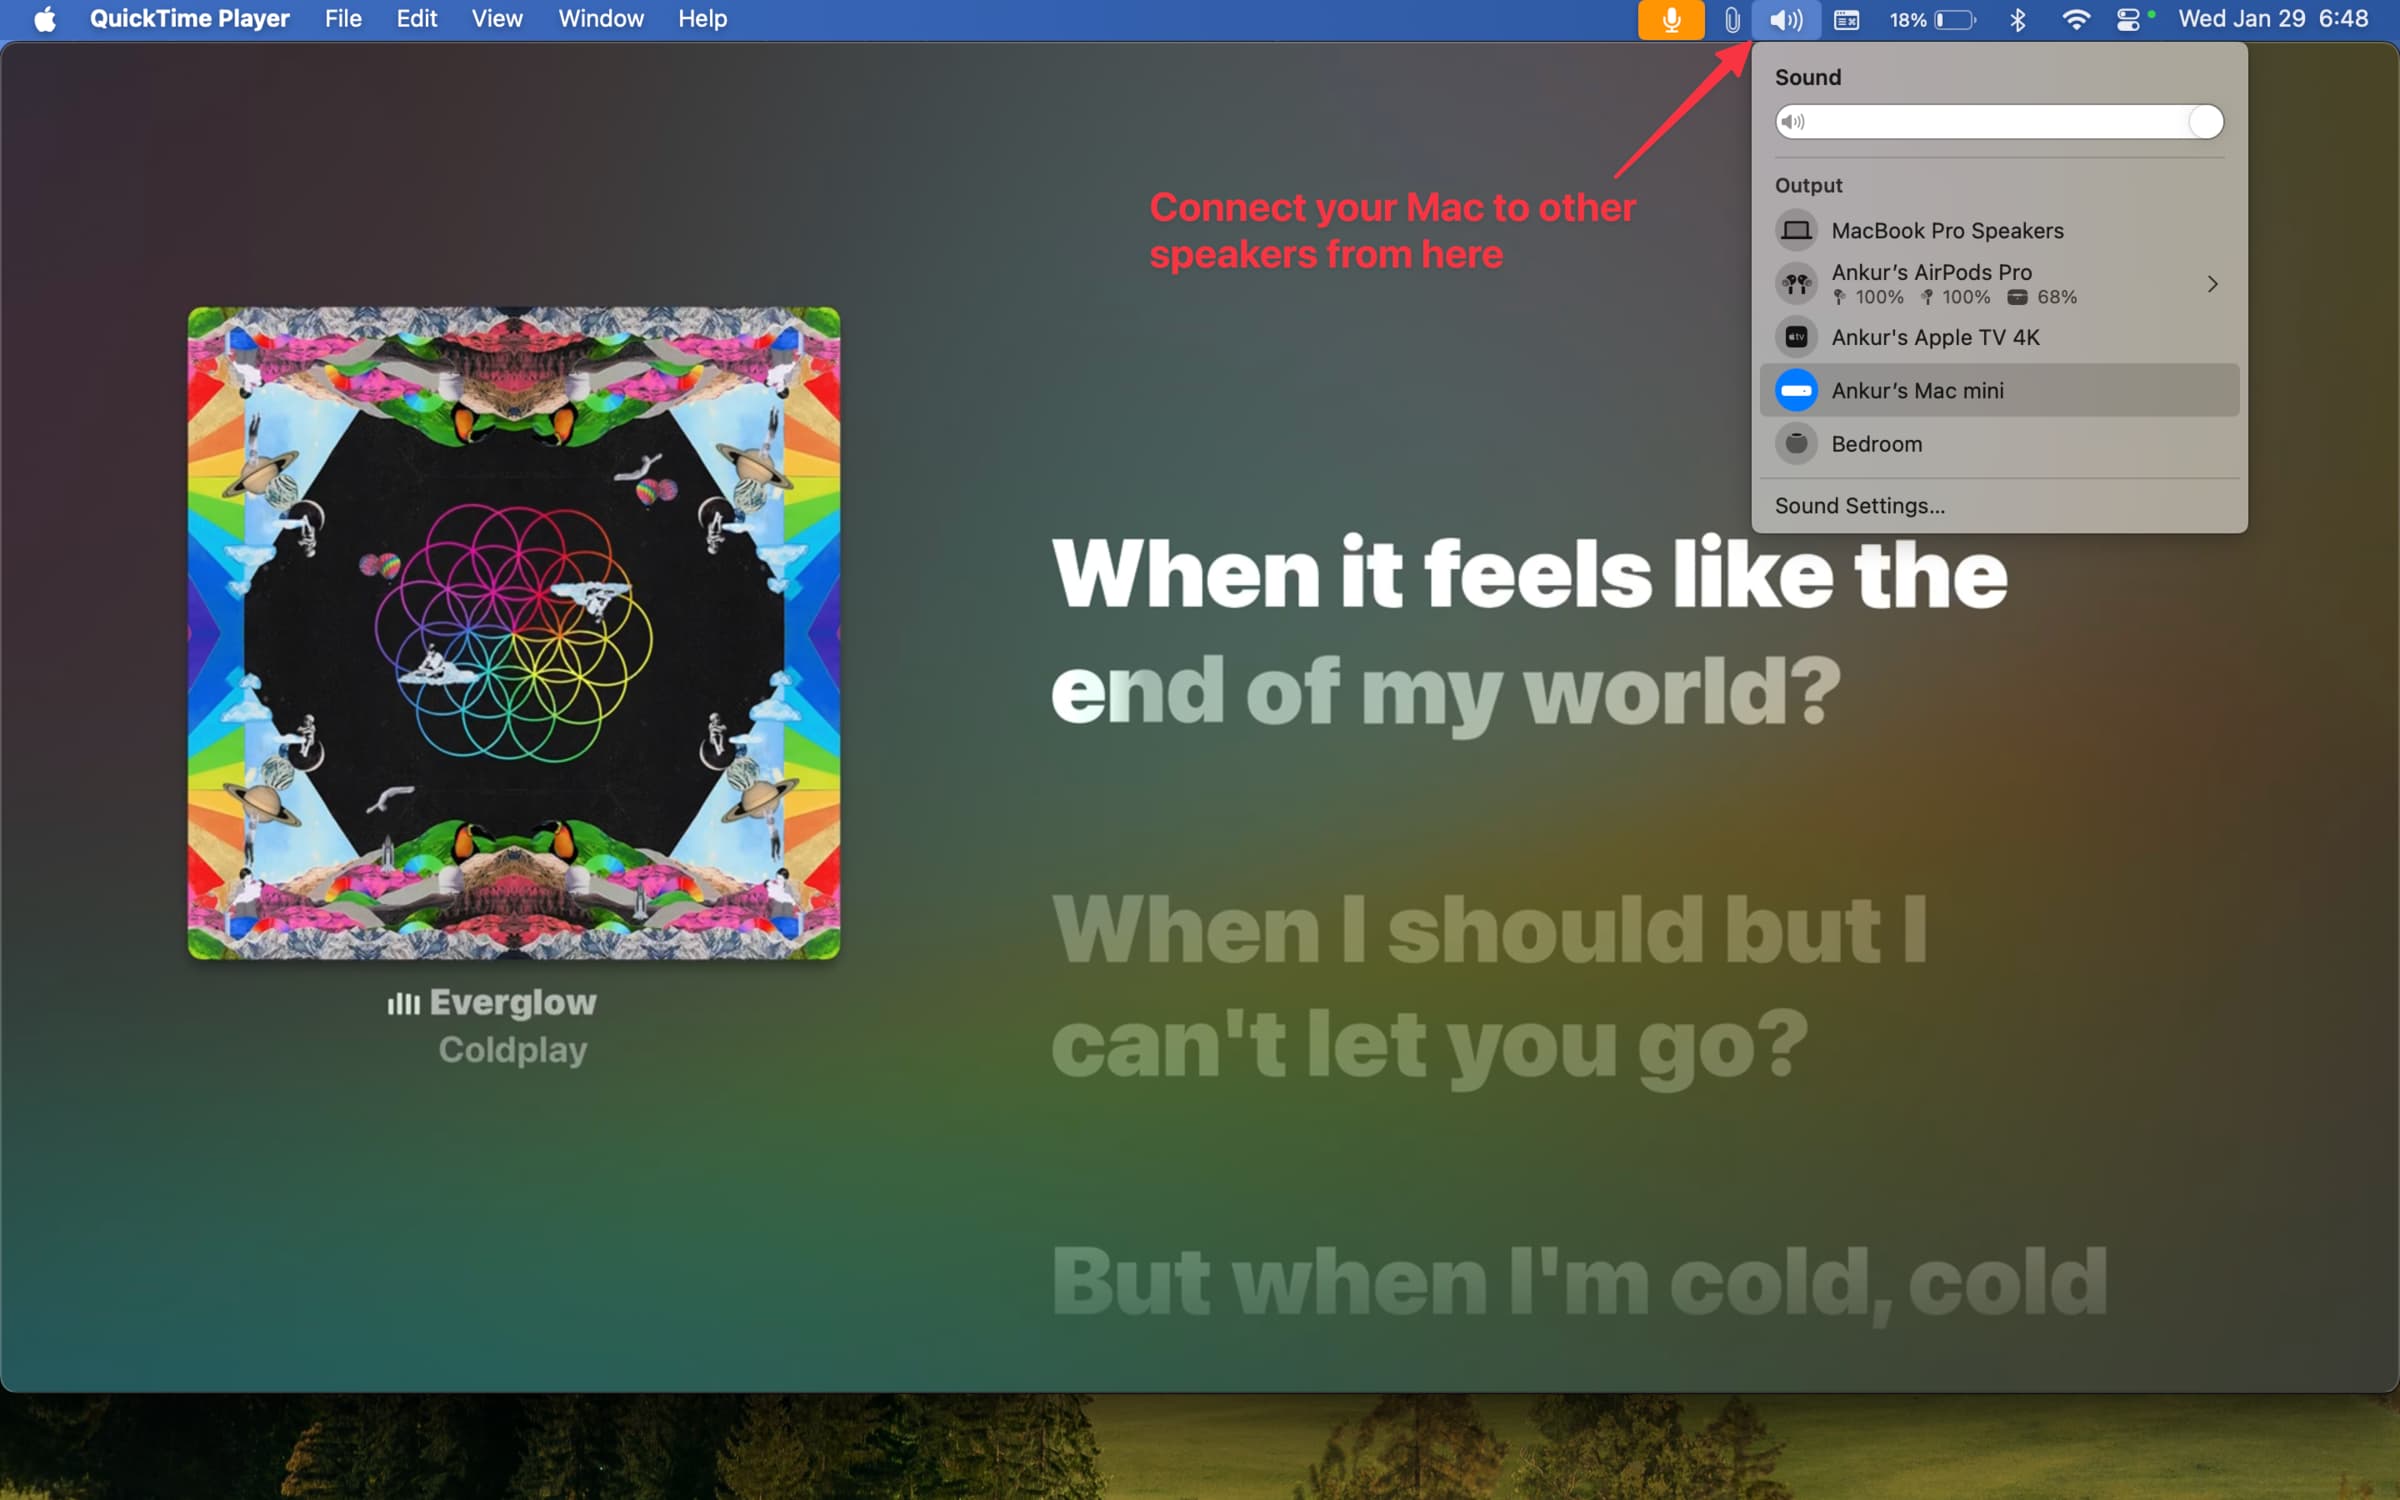
You can connect your AirPods, HomePod, Bluetooth headphones, or speakers with a 3.5 mm audio jack, etc., to your Mac, and the Apple TV sound will play through it.
Route Apple TV audio to several speakers all at once
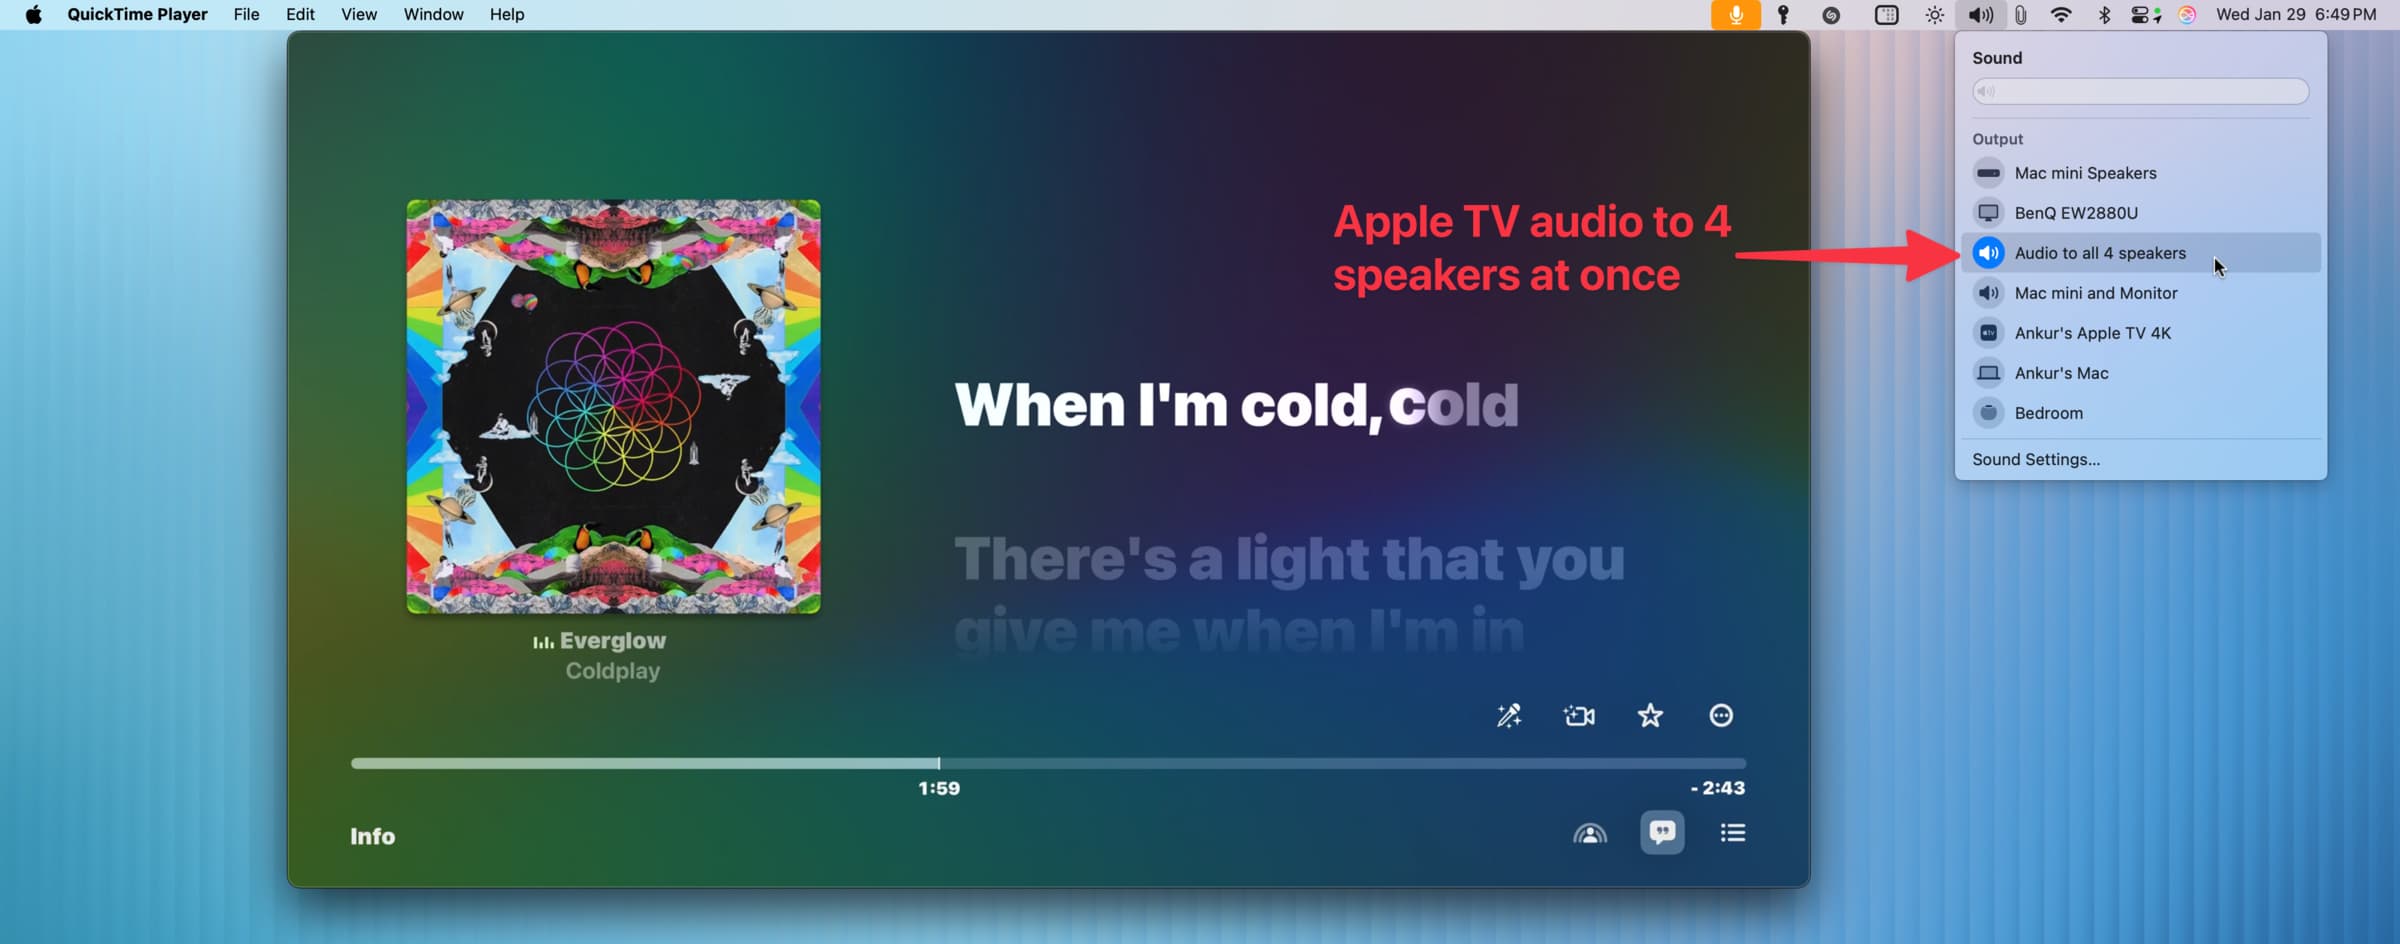
You can use the built-in Audio MIDI Setup app on your Mac to channel the sound to several speakers simultaneously. For instance, I can direct my Mac’s audio (which in reality is Apple TV’s audio) to play through my Mac’s speaker, monitor speakers, Google Next, and AirPods — all at the same time.
Use your iPad as the Apple TV display
Take your mouse pointer and hover it over the green traffic light button of the QuickTime window on your Mac and choose Move to iPad.
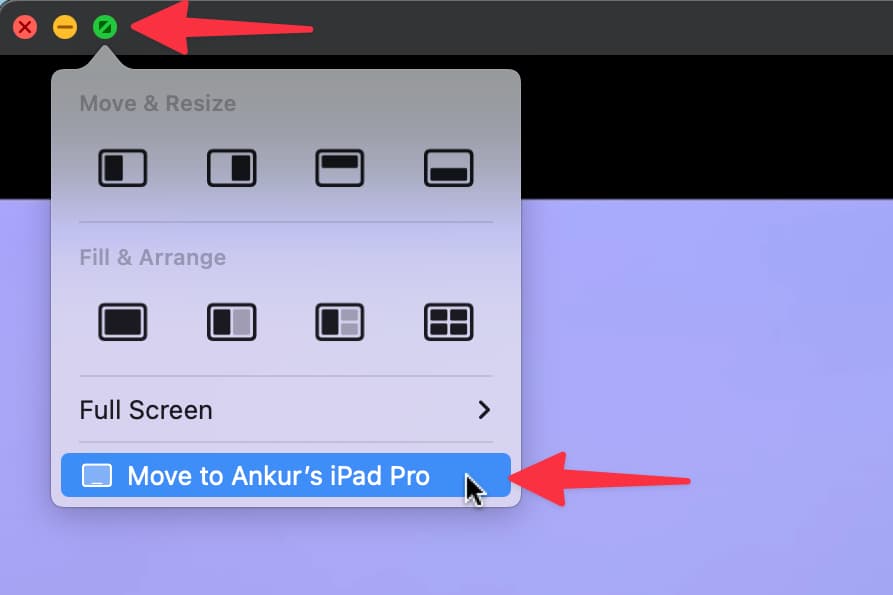
Once done, the Apple TV video will play on your iPad; however, the sound will continue to come through your Mac’s speaker.

If you can’t use your Mac as your Apple TV display and speaker
- Check if your Apple TV is awake and its tiny white light is visible. Press the power button on your Siri Remote if it’s off.
- Force Quit and reopen QuickTime Player on Mac.
- Make sure you have not connected AirPods, HomePod, or other wireless audio devices to your Apple TV.
- Keep your Apple TV box connected to a HDMI television or monitor. It’s fine if the television or monitor HDMI input is not set to Apple TV, but ensure it’s at least connected.
- Don’t forget to drag the slider next to the loudspeaker icon in QuickTime Player if you can’t hear audio.
- Retry after restarting your Apple TV and Mac. If that doesn’t help, restart your Wi-Fi router.
More Apple TV-related tips:
- How to mirror or extend your Mac display to Apple TV
- How to AirPlay from Chrome on Mac to HomePod, Apple TV, or Sonos
- How to control your television volume with the Apple TV Remote
Source link: https://www.idownloadblog.com/2025/01/31/how-to-use-mac-as-apple-tv-display-speaker/

Leave a Reply