How to use your iPhone or iPad as a magnifying glass
In this tutorial, we will show you how to use the Apple Magnifier app on your iPhone or iPad to turn it into a magnifying glass and use it to read small text or zoom in on objects for a closer look.
Have you ever trouble reading small text on medicine bottles or the ingredients list on food packaging?
If so, your iPhone can come to the rescue by allowing you to zoom in on the text, making it much more readable. If you have specific eyesight conditions, you can further enhance the reading experience by applying various filters and adjusting brightness and contrast settings.
Related: 21 useful iPhone tips for parents and older people
Open Magnifier
There are six quick ways to do that, and you can use what works best for you.
- Method 1: Invoke Siri and ask it to open Magnifier.
- Method 2: Tap the Magnifier app icon from the iPhone or iPad Home Screen, App Library, or Spotlight Search.
- Method 3: Go to iPhone or iPad Settings > Control Center and add Magnifier to your Control Center for quick access.
- Method 4: Set iPhone Back Tap to open the Magnifier,
- Method 5: Go to Settings > Accessibility > Accessibility Shortcut and set it to Magnifier. After this, you can triple-press the iPhone Side button or iPad Top button to open it.
- Method 6: If you have an iPhone 15 Pro or 15 Pro Max, you can set the Action button to Accessibility > Magnifier.
Use your iPhone or iPad as a magnifying glass
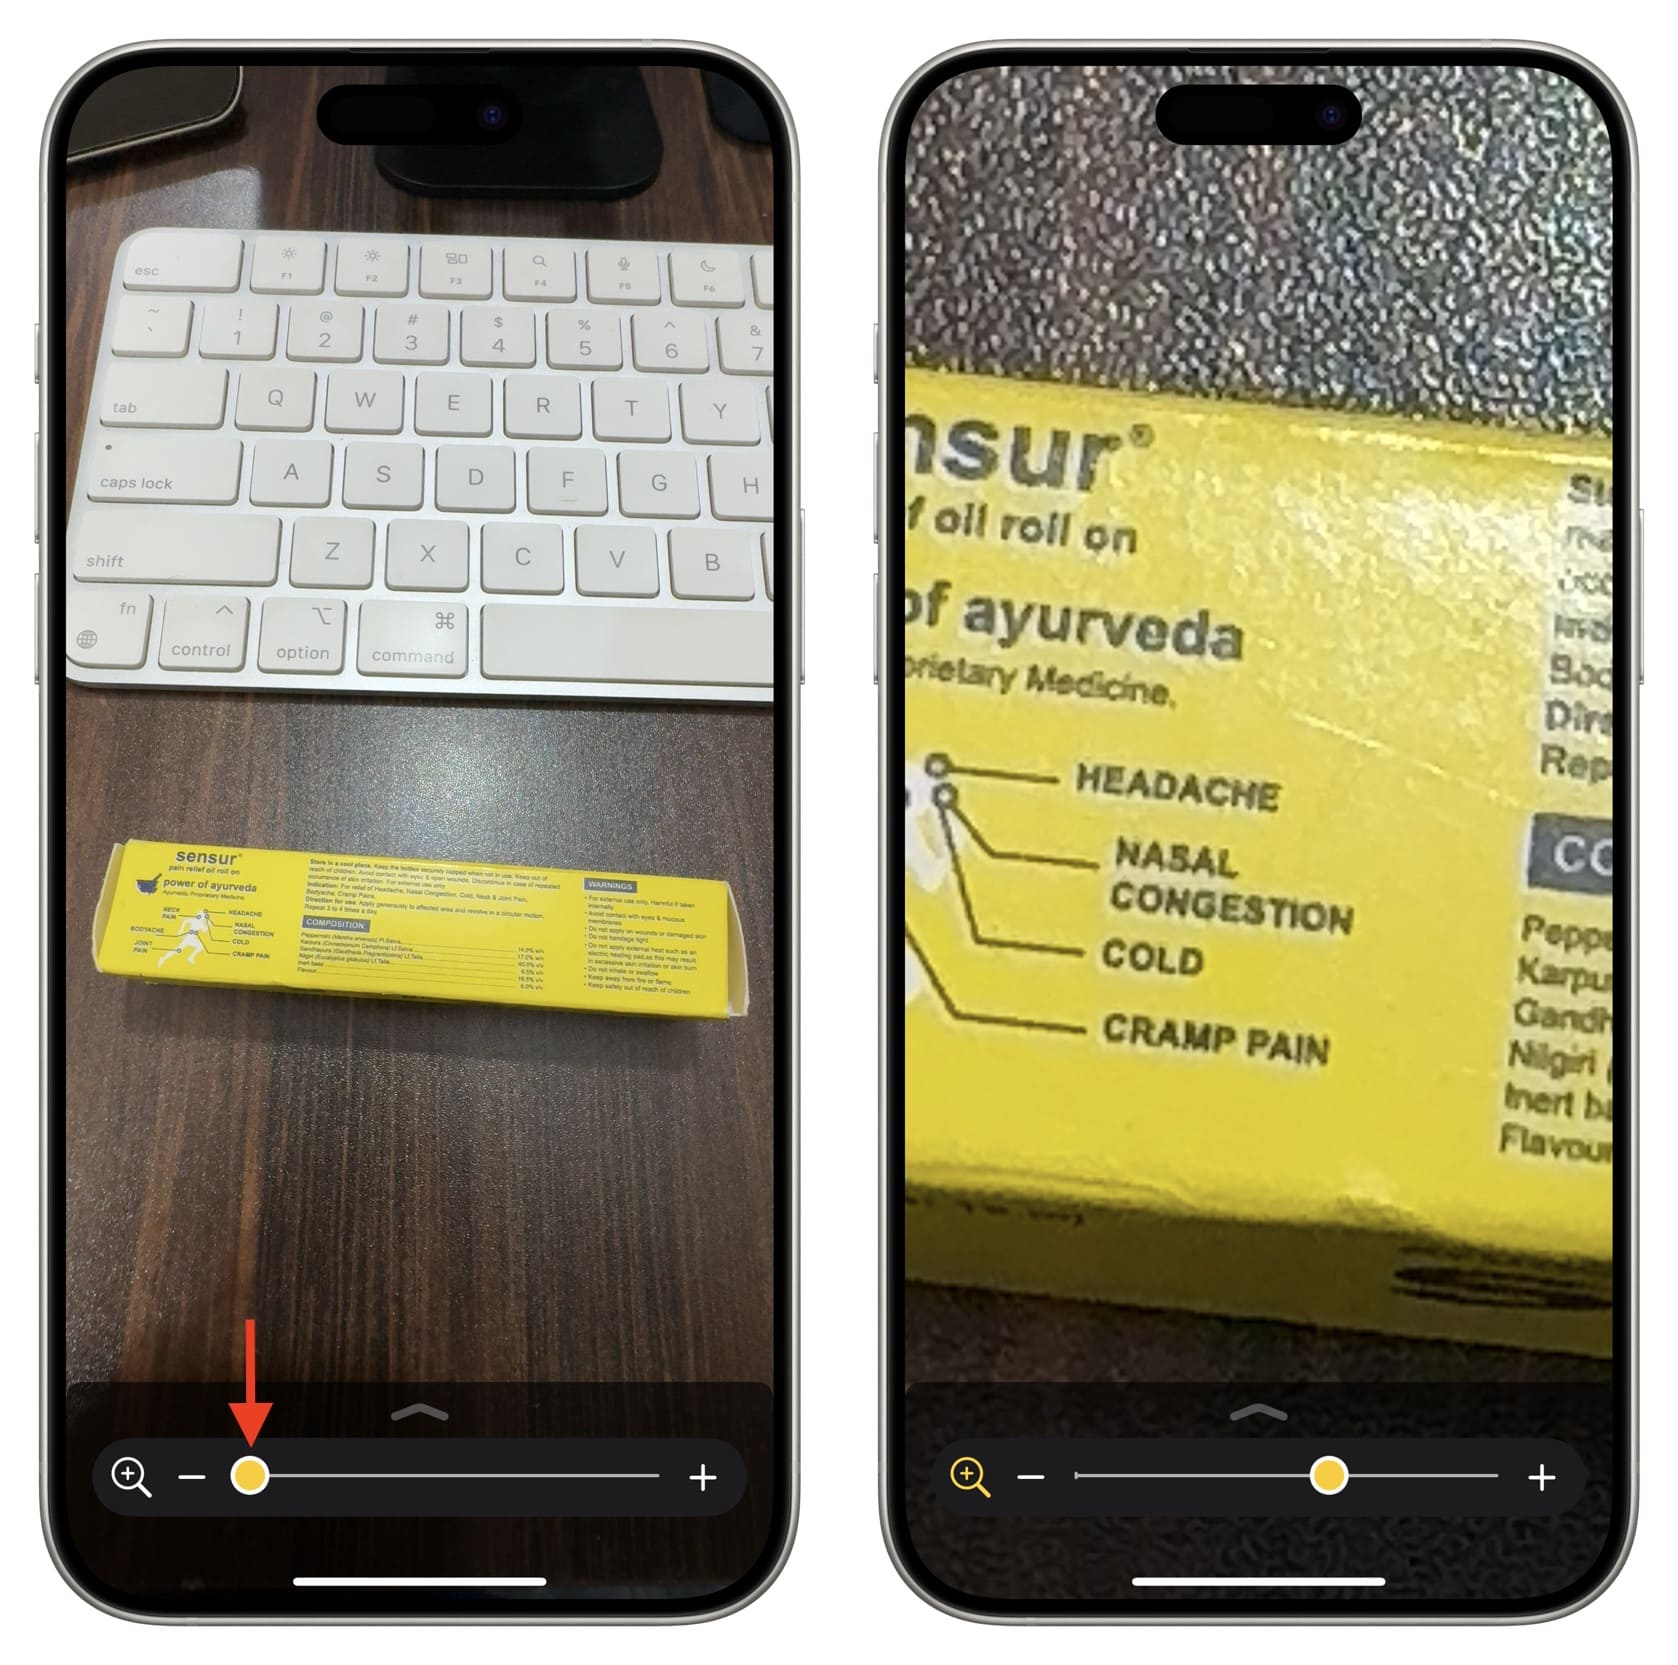
You can use the Magnifier app to zoom into text or other objects so it’s easier to read.
- Open Magnifier.
- Point your iPhone or iPad properly over the object so it’s visible on the screen.
- Use the slider at the bottom to zoom in and make it easier to read the small text or view the object closely.
Use filters and other options to improve your view
To get more controls, swipe up at the slider, and it will expand. You may have to swipe up once again to reveal all options and use them to better read or inspect the object.
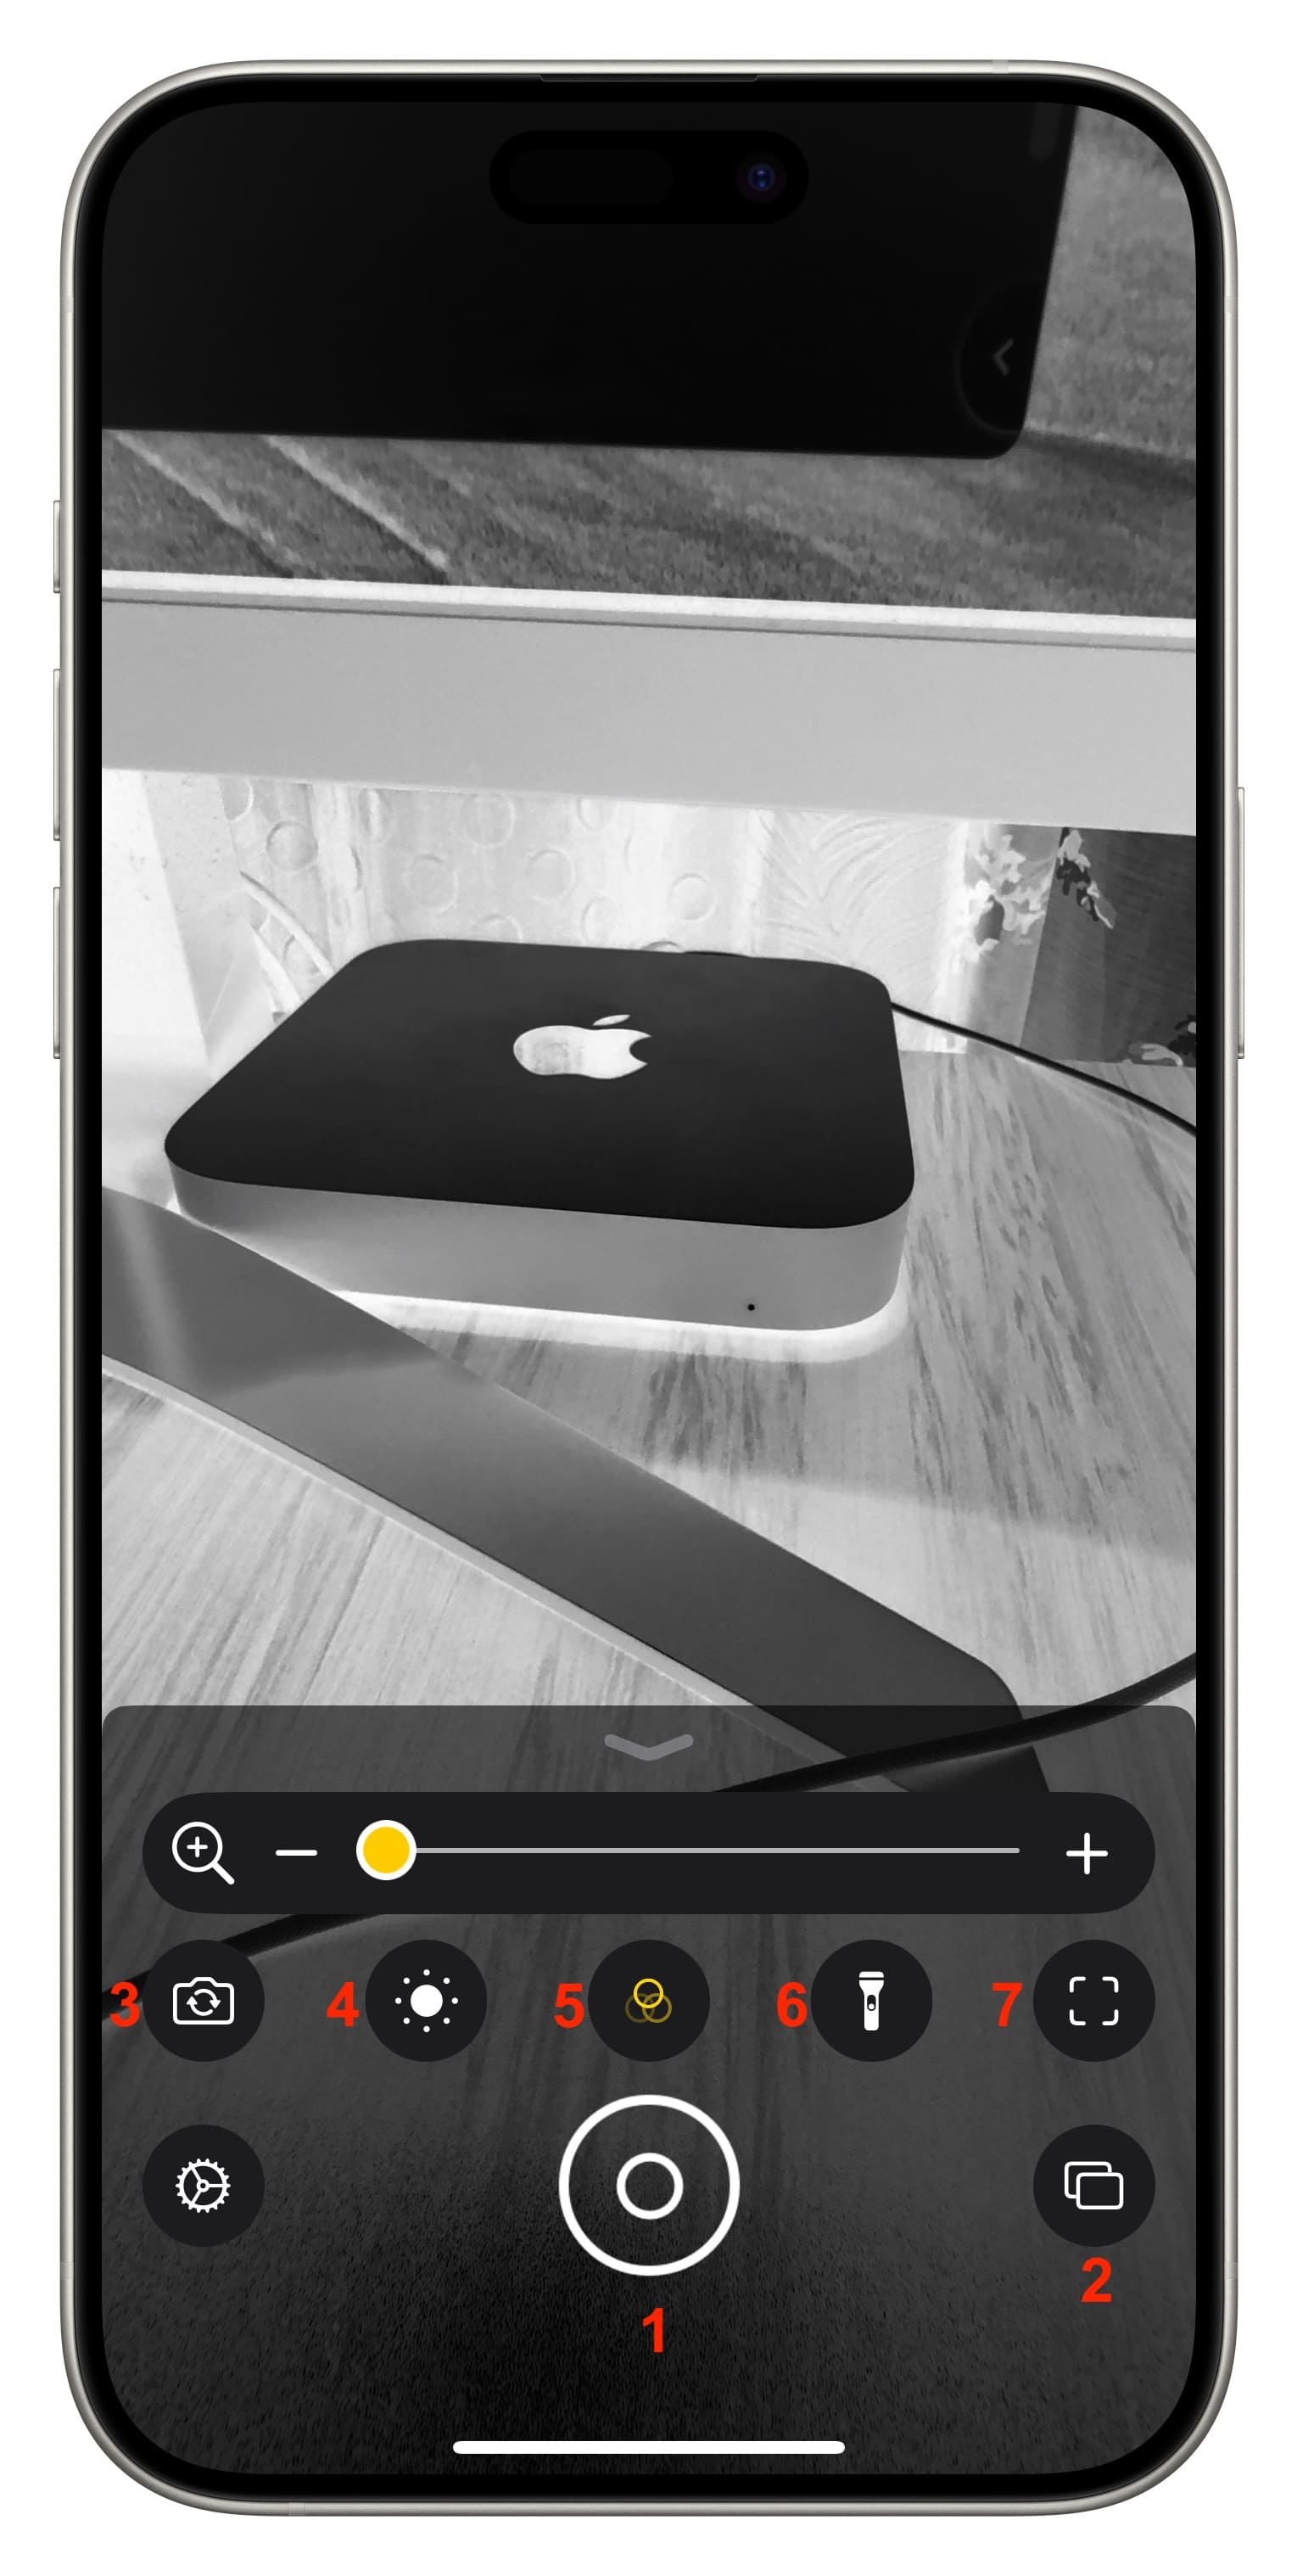
- Big shutter button: If your hand shakes, you can use the shutter button to take a picture/freeze the frame, and then zoom in to see it.
- Multi-photo mode: If you have to work with more than one frame, tap its icon and then take multiple pictures. After that, tap View (n).
- Switch the camera mode: Your options are Front, Close-up (on iPhone 13 Pro and all later Pro models), or Auto.
- Change the brightness: Adjust it to improve your visibility.
- Select a filter: Grayscale, Red on Black, Yellow on Black, Yellow on Blue, White on Blue, Inverted, Inverted Grayscale, Black on Red, Black on Yellow, Blue on Yellow, or Blue on White.
- Turn the flashlight on or off: Use this when you need more light.
- Detection mode: Explained in another tutorial.
Add the contrast button and remove unneeded filters
By default, the option to change the contrast is not added to the main Magnifier pane. To add it, tap the Settings icon > Settings. After that, tap the green plus button for Contrast.
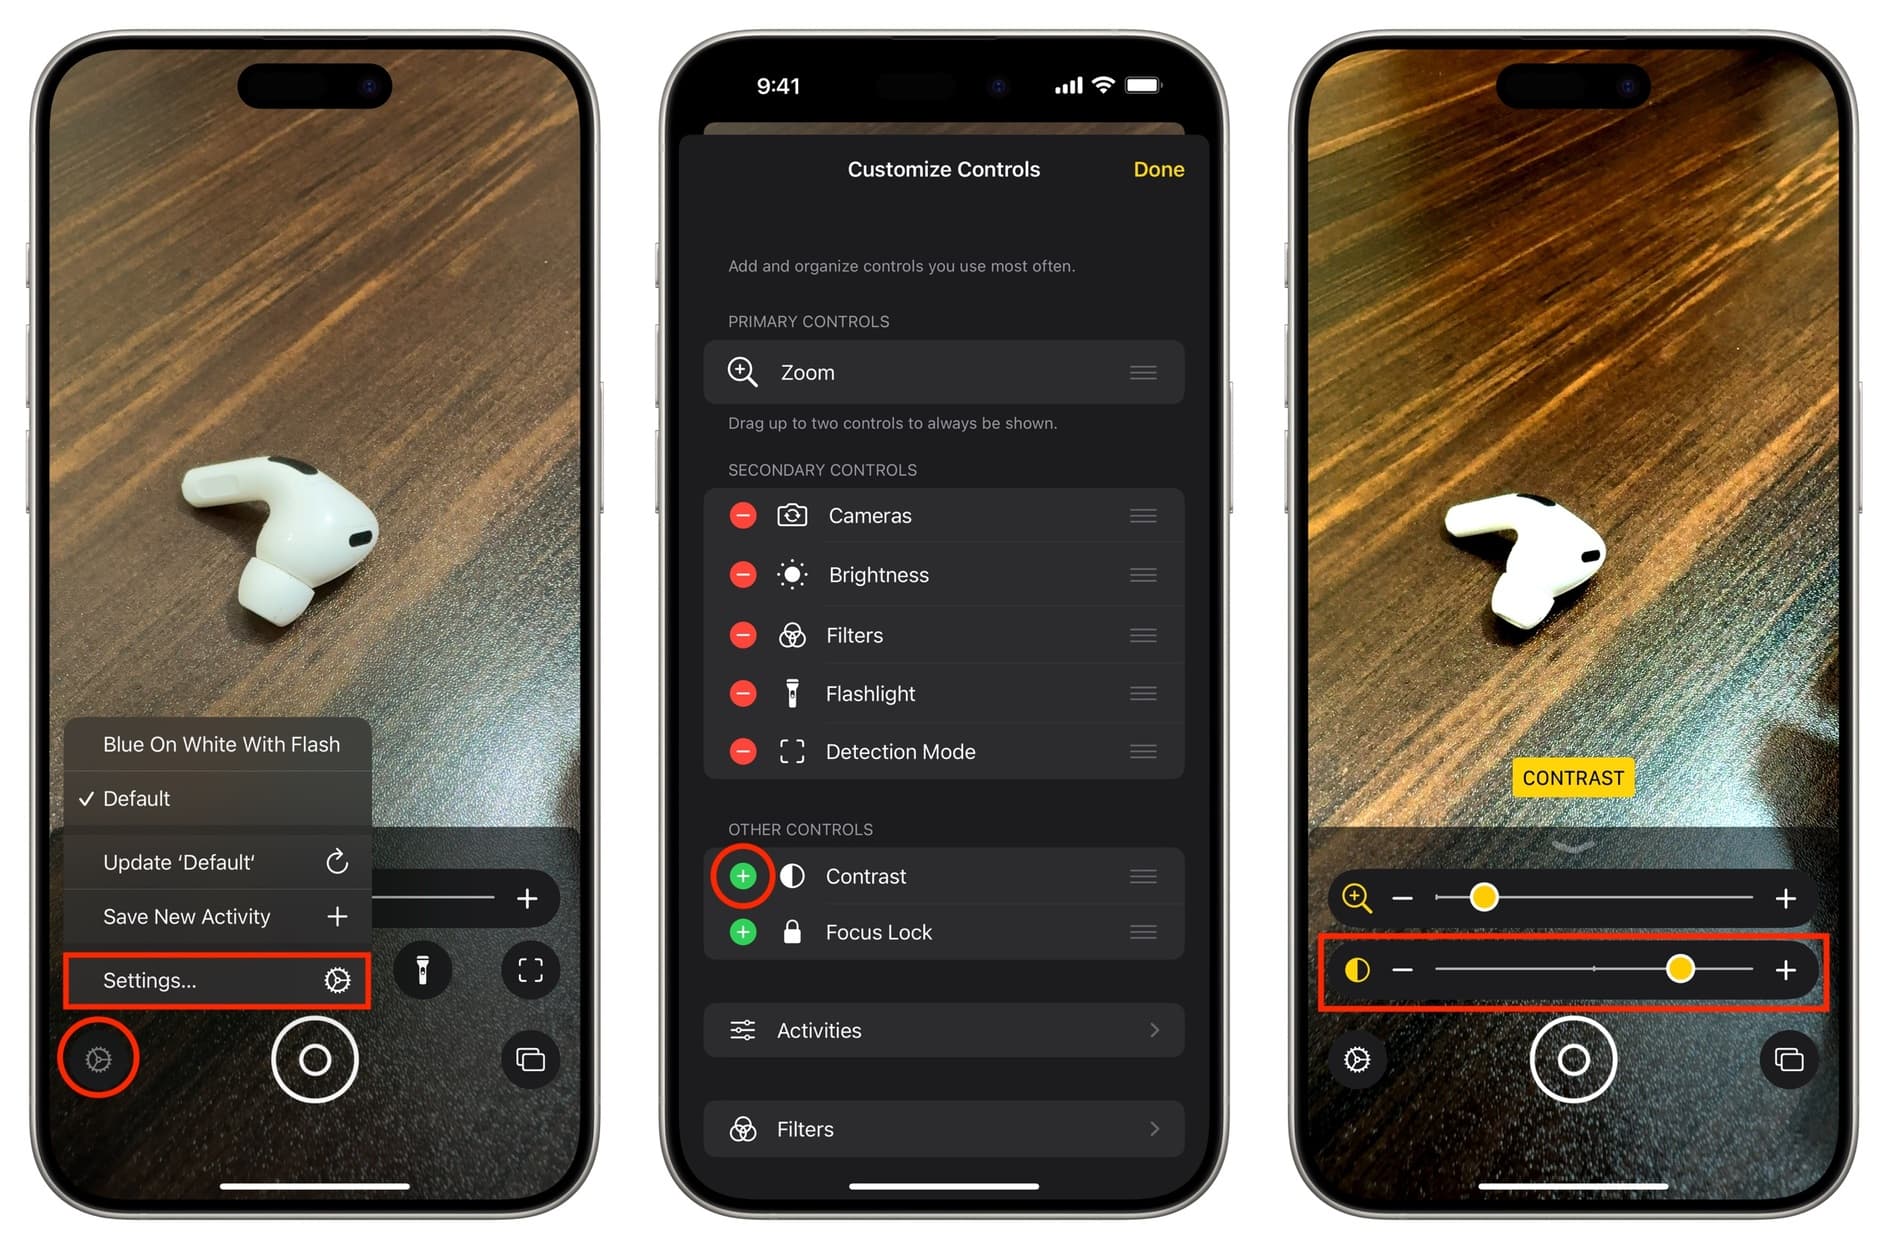
From this screen, you can use the hamburger icon next to added controls and drag them up or down to change the placement of your controls.
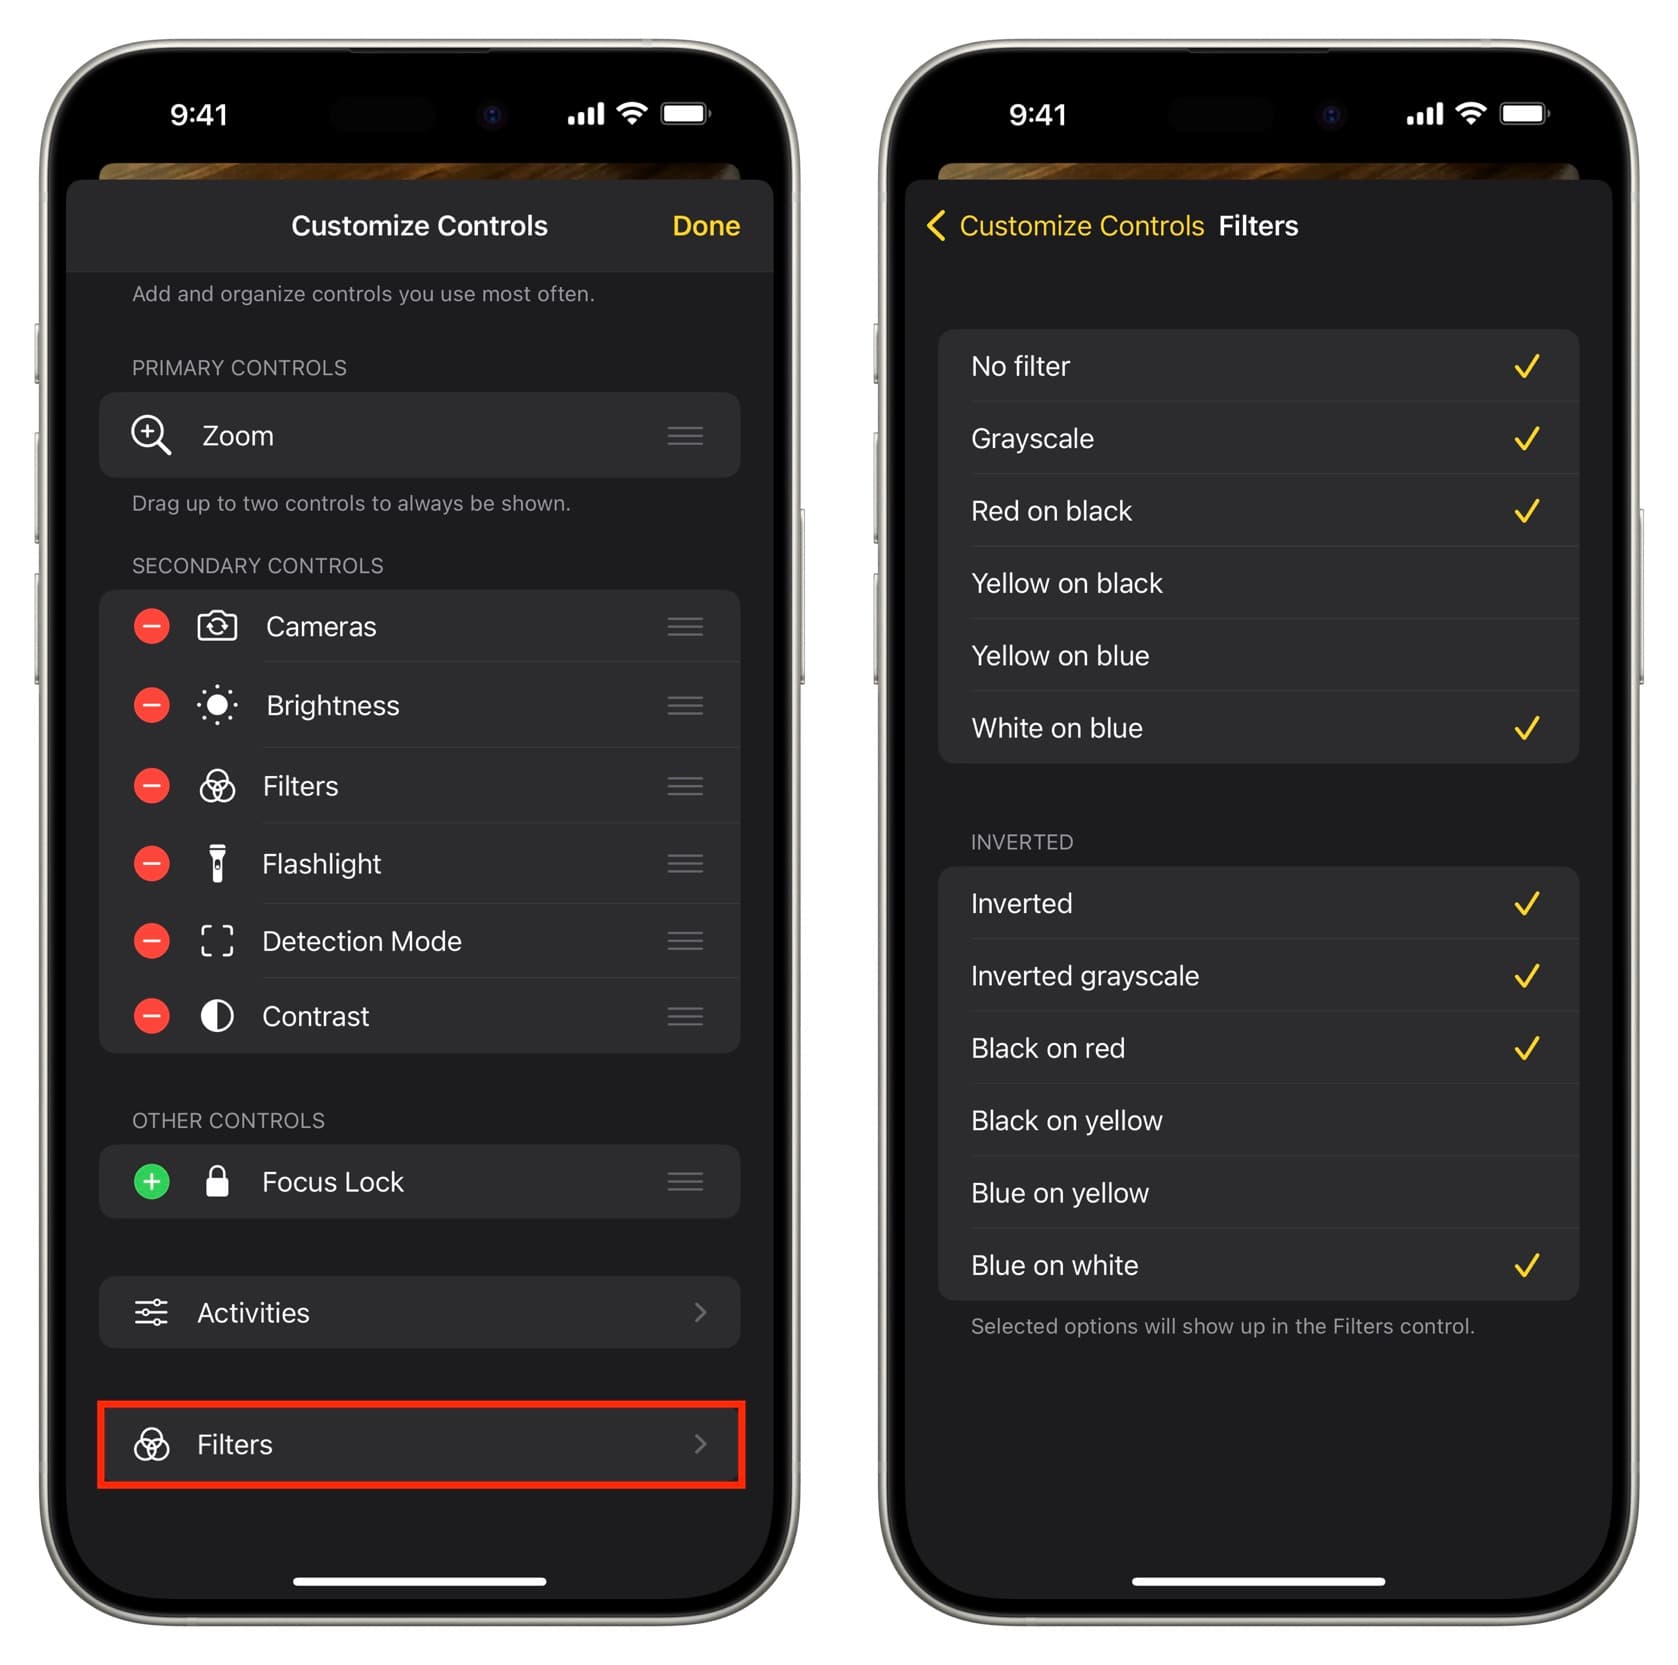
And if you think the filters pane is very crowded, tap Filters and uncheck options you do not plan on using.
Save New Activity
Let’s imagine you like to use the Magnifier with Blue on White filter, zoom set to around 30%, and flashlight turned on.
To do that, open the Magnifier and adjust its filter, zoom, and other options as desired. After that, tap the settings icon > Save New Activity and give it a name.
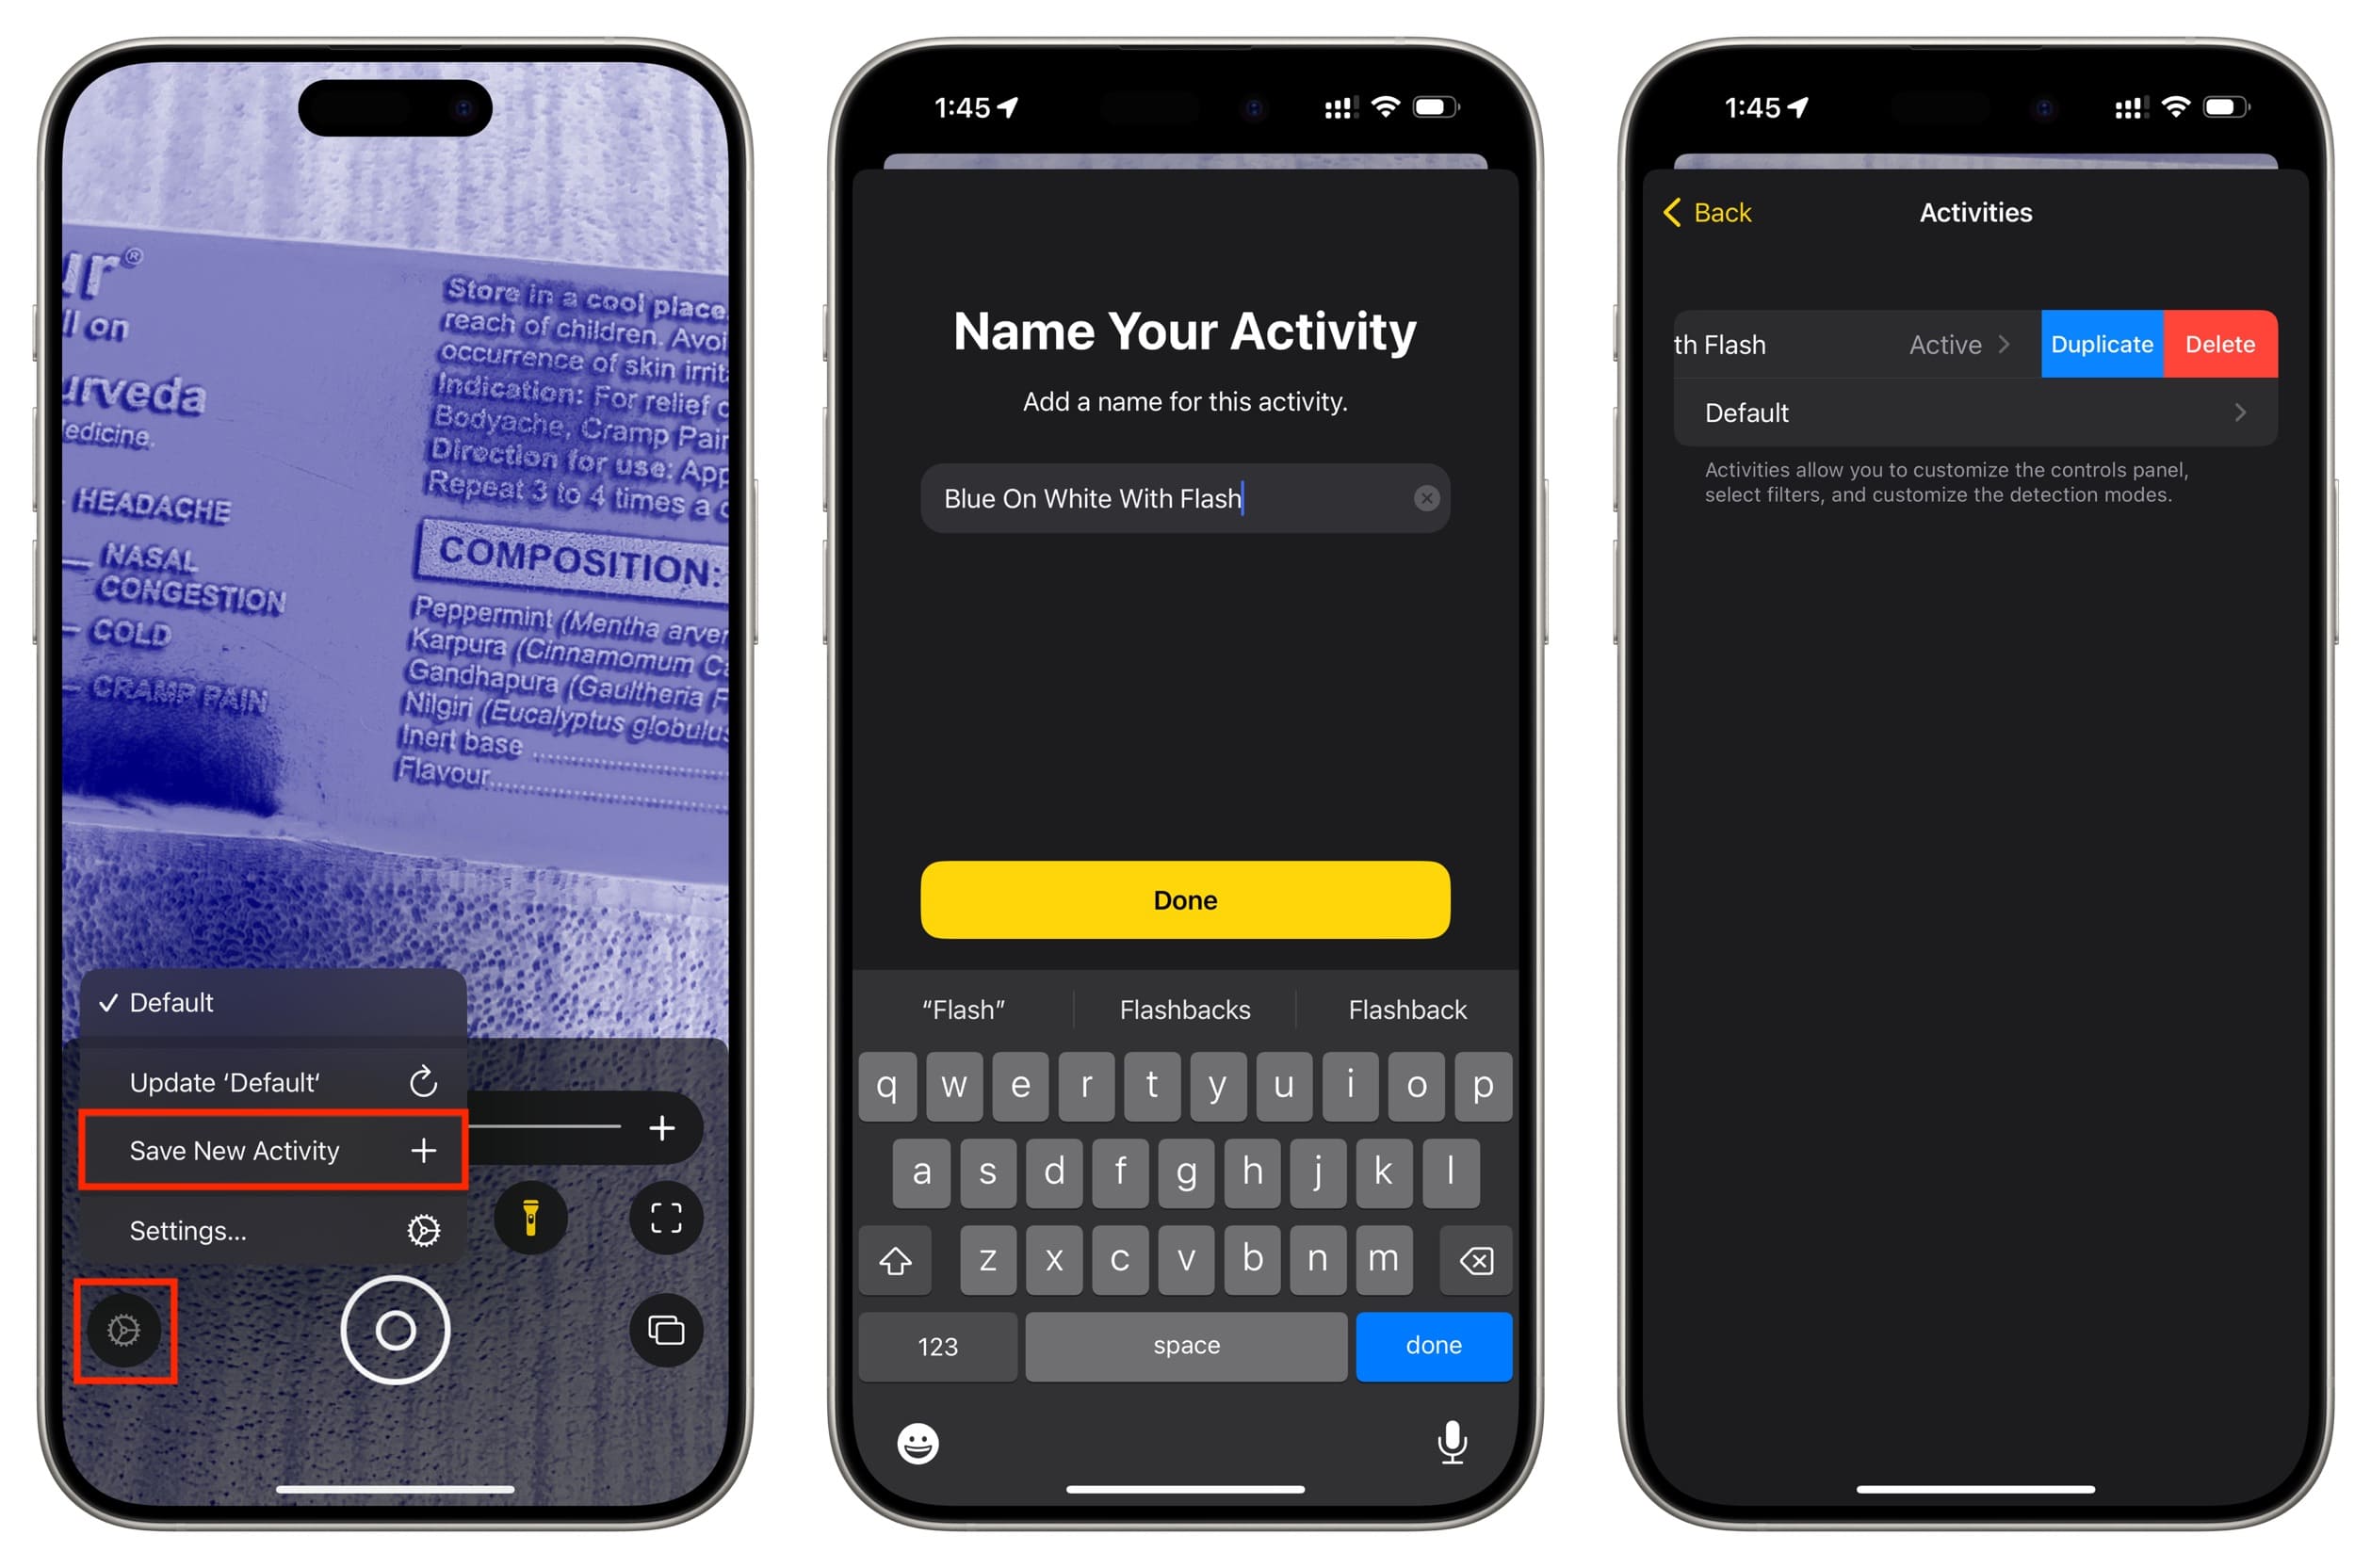
In the future, you can tap the settings icon and select this option, and Magnifier will instantly switch to that mode with all the chosen settings.
To manage these, tap the settings icon > Settings > Activities. From here, you can tap to customize one or swipe left and choose to Duplicate or Delete.
Check out next:
- 9 Apple Watch accessibility settings for the visually impaired
- How to control your iPhone or iPad with head movements
Source link: https://www.idownloadblog.com/2023/12/26/how-to-use-iphone-as-magnifier/


Leave a Reply