

How to create and use a replica of your voice with Personal Voice on iPhone, iPad, and Mac
In this tutorial, we will show you how to set up the new iOS 17 Personal Voice accessibility feature on your iPhone, iPad, or Mac to create a replica of your voice.
New in iOS 17: How to use Assistive Access on iPhone and iPad
What is Personal Voice?
Personal Voice is designed to be used with Live Speech to convert typed sentences into speech that resembles your actual voice. This can be used while communicating with someone face-to-face or on a phone call, where you type what you want to say, and your iPhone or iPad speaks those written words in your voice, and the person on the other side of the call hears them!
Who it is for
Apple’s Personal Voice feature is for people at risk of losing their ability to speak or people with speaking disability. Once Personal Voice is set up, such people can continue to communicate in “their” voice, thanks to the artificially synthesized voice clone they had created earlier when they had the ability to speak.
Per Apple:
“For users at risk of losing their ability to speak — such as those with a recent diagnosis of ALS (amyotrophic lateral sclerosis) or other conditions that can progressively impact speaking ability — Personal Voice is a simple and secure way to create a voice that sounds like them.”
How it works
To create a Personal Voice, you have to speak 150 on-screen sample phrases, which takes about 15 minutes. Once this process is done, your iPhone or iPad can take overnight (or more) to analyze your voice, learn how you speak, and finally generate your computerized artificial voice. Once your voice is generated, it can be used with Live Speech for text-to-speech conversion.
How it sounds
Surprisingly, just 15 minutes of training leads to a sound that’s very similar to your actual voice. But it does have a few robotic quirks that make it easy to know about its cloned characteristics. However, the quality is advanced enough that it may not be noticeable over phone calls, thus hiding the fact that an actual person is not speaking and his voice is coming from an artificial source via text-to-speech.
I’m confident that with improvements and faster phone processors, the Personal Voice quality is sure to get even better.
For the record, I used Live Speech with Personal Voice, and my wife was able to tell right away that the voice was mine.
Prerequisites
You need the following to create and use your Personal Voice:
- iPhone or iPad running iOS 17 or iPadOS 17. Note: You need a device with an A14 Bionic processor. As a result, you can’t generate and use Personal Voice on older devices such as iPhone 11, XS, and XR.
- Mac with Apple silicon running macOS Sonoma. Note: You can’t create Personal Voice on Mac but use it after it’s created on your iPhone or iPad.
- At least 15 minutes of free time in a silent environment with little to no ambient sound and echo.
- You must be an English speaker, as currently, Personal Voice is unavailable in other languages.
How to set up Personal Voice on iPhone or iPad
1) Open the Settings app and tap Accessibility.
2) Scroll down to the Speech heading and tap Personal Voice.
3) Tap Create a Personal Voice and authenticate with Face ID or passcode.
4) Tap Continue on the ‘Create Your Personal Voice’ splash screen.
5) Go through the ‘Get Ready to Record’ screen and tap Continue.
6) The voice name here should have your name. But in case it doesn’t, you can edit it. After that, tap Continue.
7) Check the sound quality by tapping the red record button and speaking the on-screen phrase.
- You’re Ready to Go: You will see this screen if there is no background sound and everything is ok. Tap Continue to move forward.
- Recording Considerations: Your device will inform you if you are not in a quiet enough environment. You can tap Continue to force it to be set up in this unideal situation with background noise. But doing so may lead to poor results. Therefore it’s better to switch off the room fan, close the door, and take other simple measures to cut off the extra ambient sound. After that, tap Check Again, followed by the red record button to repeat the process, and it should be successful.
8) Tap the red record button and read the first of 150 phrases.
After you read the first sentence, it will automatically move to the second, and so on. But it might pause if you take a break. In that case, hit the red button with a curved arrow to resume.
Even if you misspeak a word, you can move ahead. But for best results, you can tap the blue back arrow button to return to the previous phrase. Now, tap the red curved arrow icon to speak that sentence again. After that, it will automatically move to the next phrase, or you can tap the blue forward arrow button.
9) After you finish speaking all 150 phrases, you will get to the ‘You’re Done Recording’ screen. Tap Continue.
10) Now, you’re asked to charge and lock your iPhone or iPad. Additionally, tap Allow to let Personal Voice send you a notification when it’s done processing. With all that out of the way, tap OK.
Let your iPhone or iPad finish preparing your Personal Voice
After you’ve followed the above steps, plug your device and keep it locked. It takes several hours to process and finish generating your Personal Voice. So, it’s best to put your iPhone or iPad into charging at night to let Personal Voice finish preparing while you sleep and the phone is locked.
You can check the progress by going to the Settings app > Accessibility > Personal Voice and see a percentage there. But doing so frequently may increase the processing time.
Personal Voice took 14.5 hours to prepare on my 12.9-inch iPad Pro with an M2 chip. So, I can imagine this time being a lot more for older iPhones and iPads.
Another thing you must know about is unnecessary Personal Voice notifications! Even when your iPhone or iPad is locked and charging, you may receive notifications saying, “Preparation of your Personal Voice is paused. Your iPhone/iPad must be charging and locked to generate your Personal Voice.”
You can ignore these notifications, but I think they hinder the Personal Voice preparation process by waking the device. So, when Personal Voice was not prepared on my locked iPad, even after 10 hours of it being plugged into charging, I swiped left on the Personal Voice notification and muted it for the day. Next, I turned on Do Not Disturb, locked my iPad, put it into charging, and went to sleep. By morning (2:35 AM, to be precise), Personal Voice was generated and ready to be used!
Note: I’m using the latest version of iPadOS 17 developer beta on my iPad.
Creating Personal Voice on Mac
I could not find an option to create Personal Voice on my M1 MacBook Pro or my M2 Mac mini – both running macOS Sonoma developer beta.
However, after you create your Personal Voice on your iPhone or iPad, it can sync via iCloud to your other Apple devices, including your Mac. As a result, you don’t have to follow the 15-minute setup for each device.
To sync Personal Voice via iCloud:
- On iPhone or iPad (where you created your Personal Voice): Go to Settings > Accessibility > Personal Voice and turn on Share Across Devices.
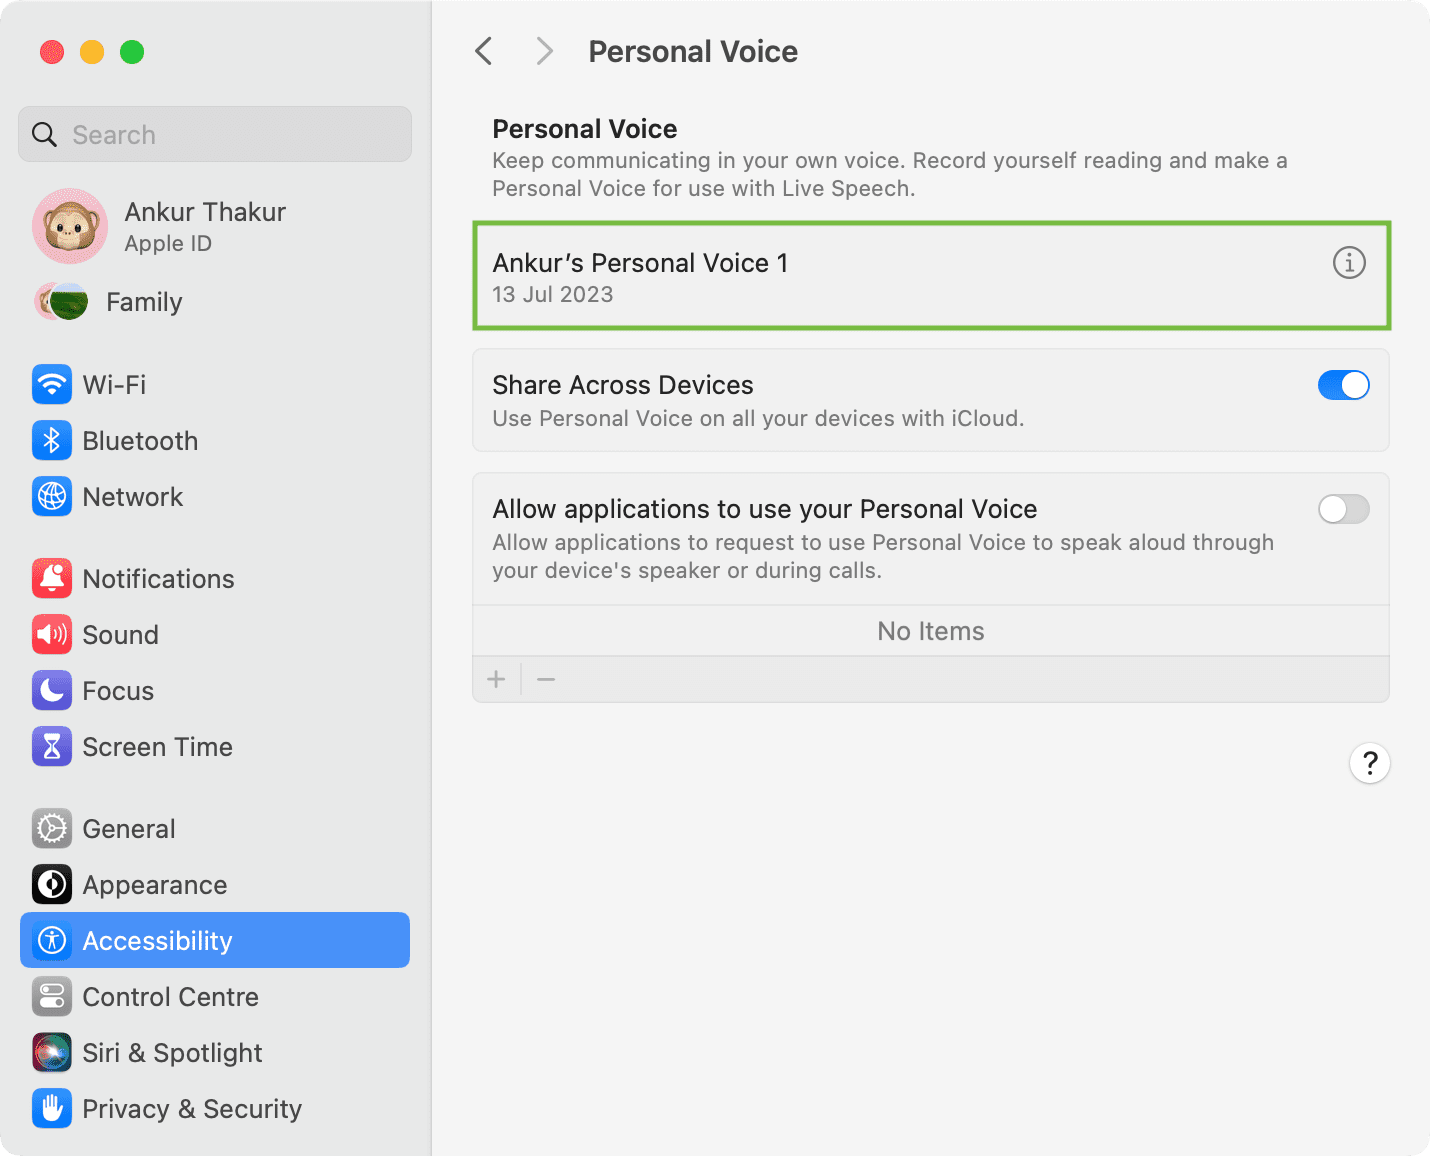
- On Mac: Go to System Settings > Accessibility > Personal Voice and enable Share Across Devices.
Note: The main text on Apple Newsroom says, “Users can create a Personal Voice …. on iPhone or iPad.” However, the fine print at the end says, “Personal Voice can be created using iPhone, iPad, and Mac with Apple silicon.” It’s confusing. But I’ve checked on my devices, and what I’ve mentioned above is correct.
How to use Personal Voice
The Live Speech feature on your iPhone, iPad, and Mac lets you type what you want to say, and your phone or computer will speak those written words, phrases, and sentences aloud. Live Speech can be used by people who can’t talk or have difficulty talking during phone calls. It can also be used while communicating in person.
You can use Live Speech without Personal Voice by selecting a system voice. But after you create your Personal Voice, you can select it for Live Speech to make things “personal” by having your iPhone, iPad, or Mac talk in a voice that resembles your voice and is not a general computer voice.
So, after you’ve created your Personal Voice, go to Settings > Accessibility > Live Speech > Voices > Personal Voice. From here, select the Personal Voice you created as your Live Speech voice.
After you’ve set Live Speech voice to your Personal Voice, triple-click the iPhone side button or iPad top button to activate Live Speech. Now, type something in the Type to Speak box and hit the send button. Your iPhone or iPad will speak those typed words in your voice.
Live Speech can be used during FaceTime and phone calls to convert typed text into speech that resembles your voice and gives the impression that you’re speaking. All this is possible thanks to the AI-generated Personal Voice.
Export your voice recordings
You have the option to export all the 150 phrases you spoke as individual voice clips.
1) Open iPhone or iPad Settings and go to Accessibility > Personal Voice.
2) Tap your Personal Voice tile.
3) Tap Export Voice Recordings and choose an option.
In my case, I selected Save to Files and saved it to iCloud Drive. My recordings were exported as a 88 MB ZIP file. And unzipping it shows the recordings of phrases I spoke. The tiny files are in Apple’s Core Audio Format (CAF), that’s natively playable on iOS and macOS.
Delete your Personal Voice
Go to Settings > Accessibility > Personal Voice. From here, tap your Personal Voice name and hit Delete.
Other accessibility tips:
- How to control your iPhone or iPad with head movements
- How to control another iPhone or iPad using your iPhone or Apple Watch
Source link: https://www.idownloadblog.com/2023/07/17/how-to-use-personal-voice-iphone-mac/

Leave a Reply