

How and when to use the different selection tools in Adobe Photoshop
When editing images in Adobe Photoshop, there will come a time when you want to select a specific part of those images so that you can apply edits to highly specialized areas as opposed to the entire frame. This applies whether you’re editing photographs captured in-camera, or digital images that you’ve made for a website.
Fortunately for you, Adobe Photoshop offers a slew of selection tools that you can utilize to select precisely the right portion of your image, and in today’s piece, we’re going to discuss some of the tools that you can use to select specific elements in any image file you might want to edit, including how and when to use specific ones.
Why to use selection tools
Why would you want to use a selection tool? That’s a great question, and it all comes down to being able to choose a unique portion of an image where an edit will take place, especially if you don’t want your edit to apply to the entire image.
In addition, selection tools make it easy to remove unwanted elements from an image. By selecting them, you can just press the delete or backspace key on your keyboard, and they’ll be removed from the image. This can also be used for isolating a subject from its background or applying precise color adjustments.
There are several different selection tools you can use, and they’re outfitted for different tasks. Some make it easier to automate the selection of elements with higher contrast between the subject and the background, while others make it easier to manage your own selection manually.
There are a lot of reasons why you might want to select something specific in Adobe Photoshop, but that’s a discussion for another day. In today’s piece, we’ll focus primarily on how it’s done so you can move on with your image editing.
Types of selection tools
Because there are so many ways to select image elements in Adobe Photoshop, we’ll discuss some of the most common in sections below:
Select All
Perhaps the easiest selection tool available in Adobe Photoshop is the Select All function. This selection tool is indiscriminate toward any part of your image and simply selects the entire frame.
Select All is available from the Select menu in your Mac’s Menu Bar, like so:
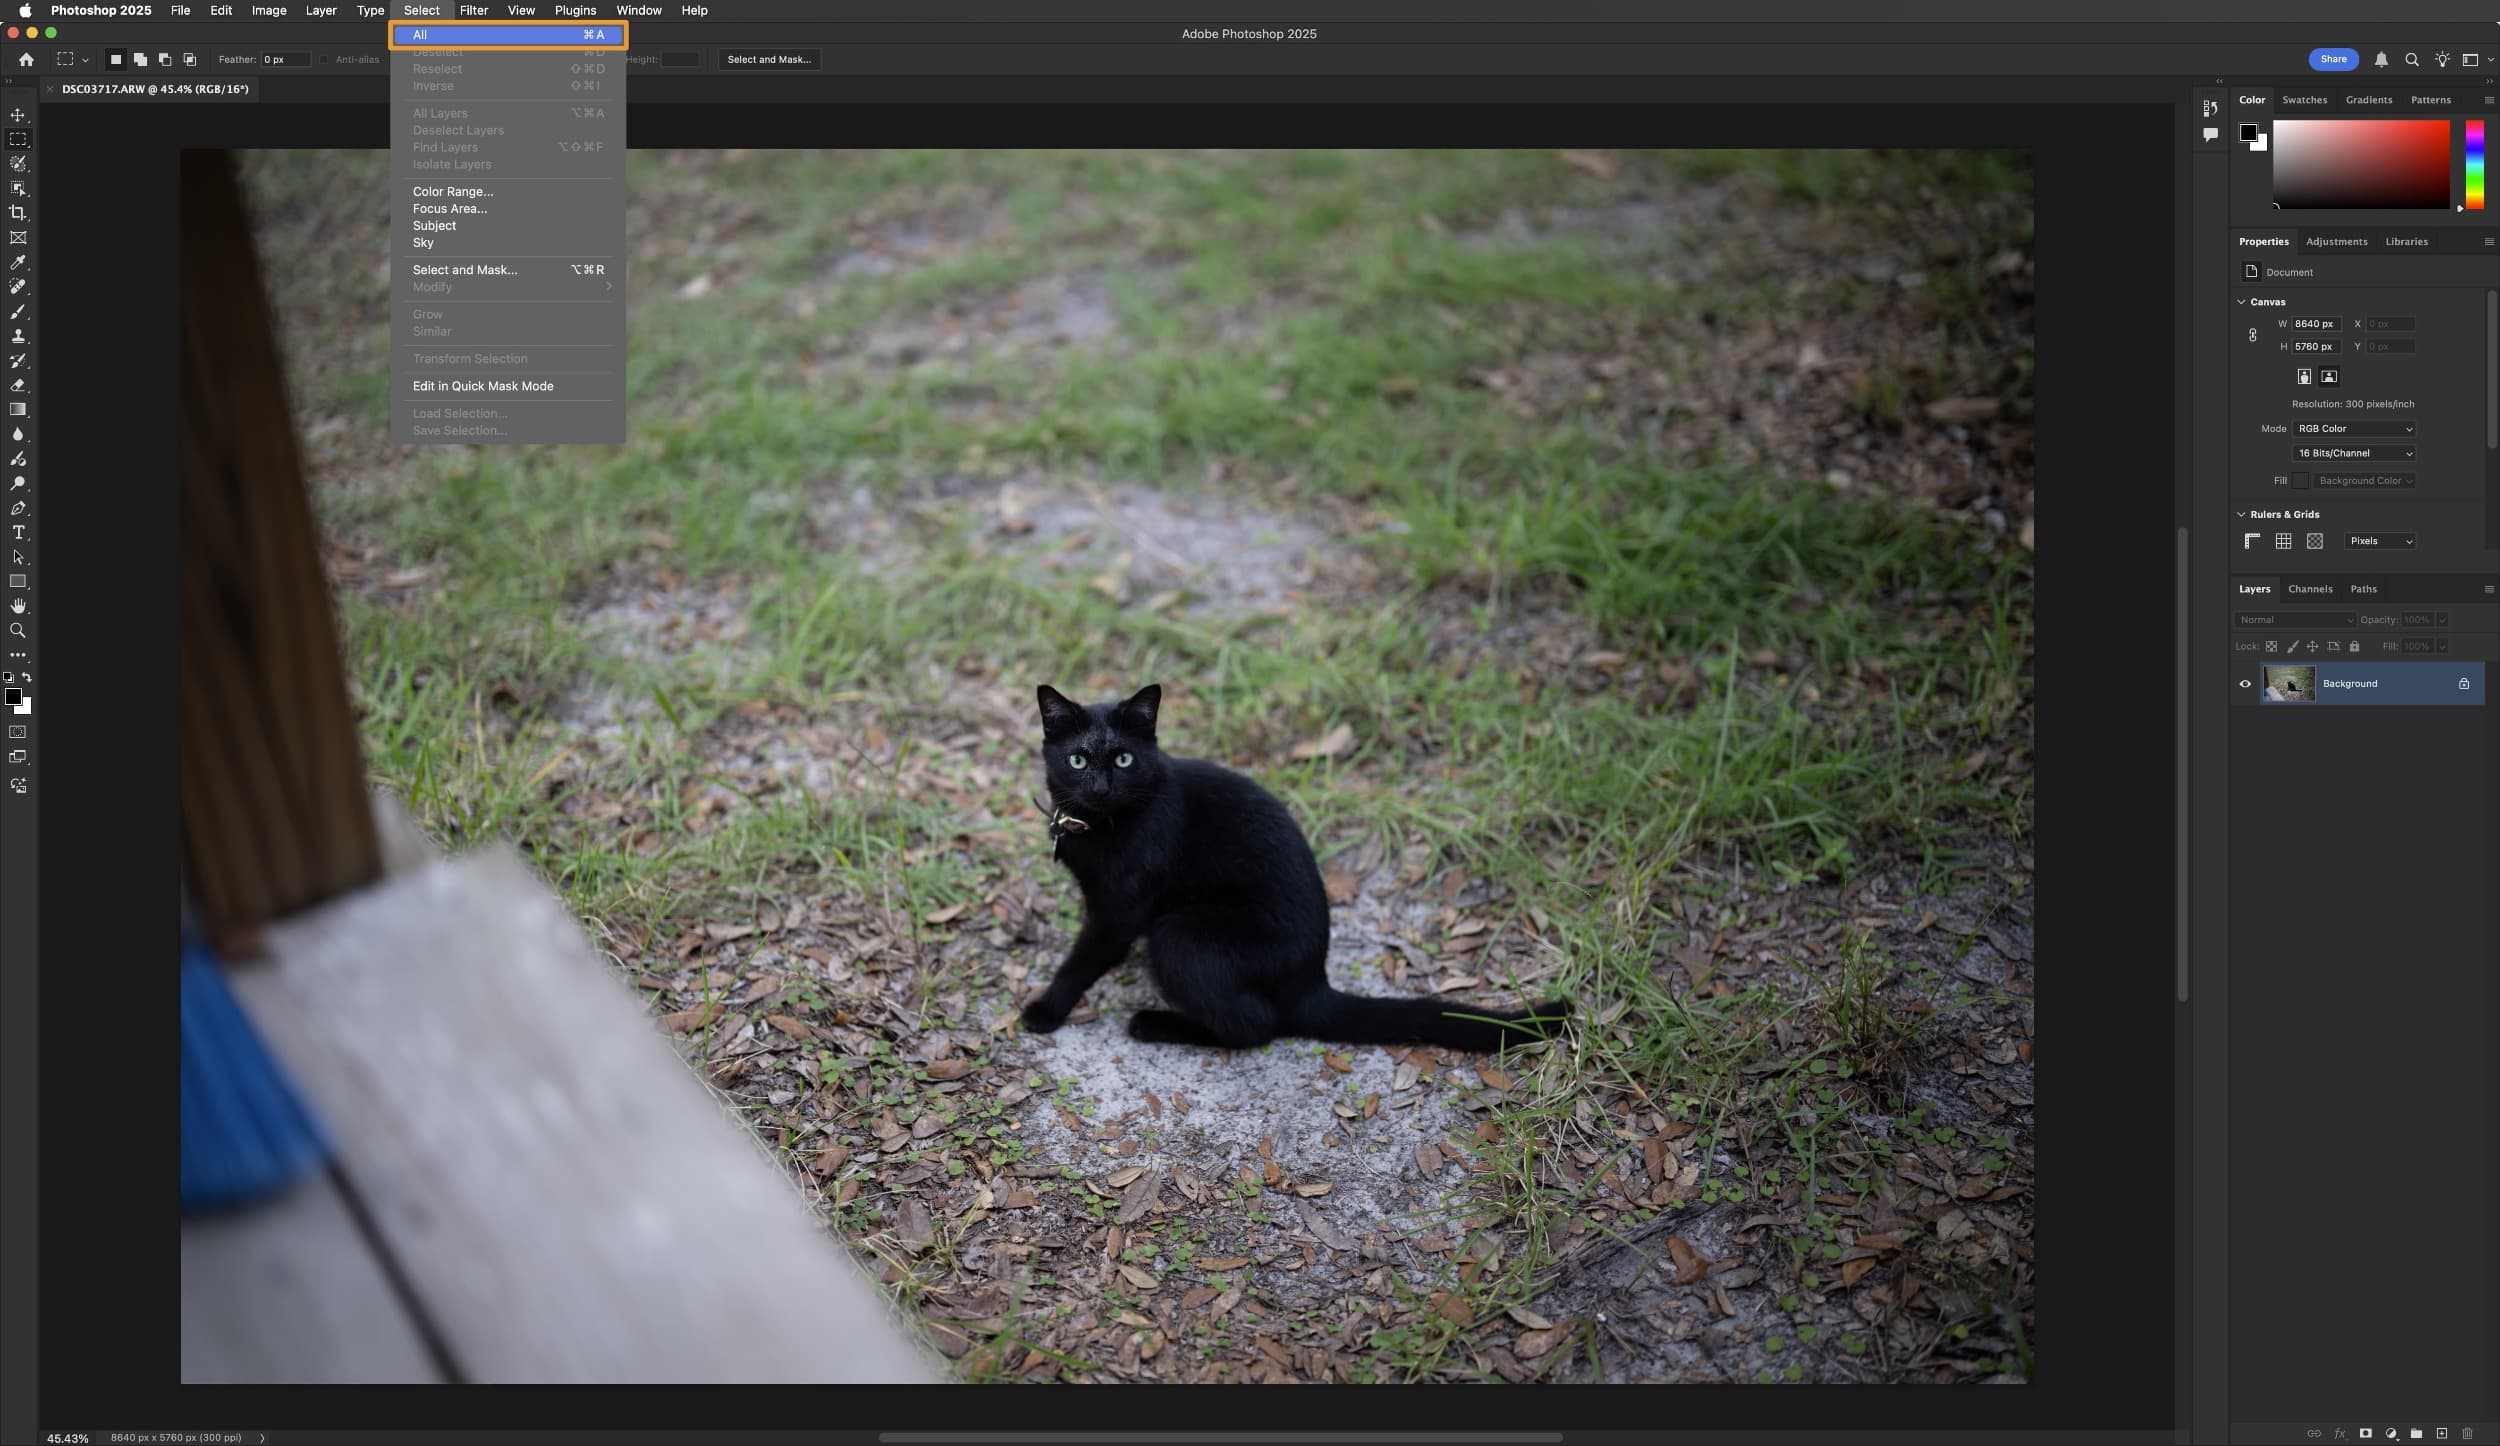
You might want to use the Select All function if you want further edits to apply to the entire image, such as a filter effect, a mask, a color fill, or something else.
It’s important to note that the Select All function shouldn’t be used if you only want to apply edits to a specific portion of your image, since it doesn’t give you the ability to select only specific pixels in your image. On the other hand, it’s a faster way to select all pixels without using a dedicated tool.
Notice how in the image below, we’ve used the Select All function, and the marching ants indicate that the entire image has been selected for further editing:

Marquee Selection
If you’re wanting to get a bit more specialized than Select All but still remain generally flexible in what you’re attempting to select, then Photoshop’s Marquee Selection Tool might be your best bet.
The Marquee Selection Tool can be used in rectangular, elliptical, and single row or single column modes, and just as you’d come to expect, these allow you to click and drag to simply select a rectangular shaped, an elliptical shaped, or a row or column shaped portion of your image.
The Marquee Selection Tool is available from Photoshop’s tool bar, and you can choose what mode you want the tool to be in by clicking and holding on the Marquee Selection Tool:

After you choose your preferred Marquee Selection Tool shape, you can click and drag anywhere in your image to begin your selection. When you release your mouse, the selection becomes set for you to perform your edits as defined by marching ants, like so:

Pro Tip: If you hold the Shift key while making your selection, then Adobe Photoshop will automatically create perfect squares or circles as you re-size your selection with your mouse as opposed to oblong rectangles or wide ovals. This can be helpful when precision is key:

You might want to use the Marquee Selection Tool if your goal isn’t to select the entire frame, but rather to select a specialized area of your image that’s naturally rectangular or elliptical in shape. They can take the guesswork out of ensuring that your rectangular lines are straight or that your elliptical curves are perfect.
Lasso
When your selection requires additional precision than that of simple rectangles, squares, circles, or ovals, then you might want to try your hand at the Lasso Selection Tool.
The Lasso Selection Tool is more of a freehand selection option that lets you go well beyond defined shapes, and it can be used in traditional lasso, selection brush, polygonal lasso, or magnetic lasso modes with each one having its own set of strengths and weaknesses.
The Lasso Selection Tool is available from Photoshop’s tool bar, and you can choose what mode you want the tool to be in by clicking and holding on the Lasso Selection Tool:

In traditional lasso mode, you can simply click and drag along the surface of whatever you want to select. You will start at one point of your image and make your way along the edges until you essentially end up where you started again, completing the selection shape as indicated by the marching ants:

Note: One disadvantage of the lasso selection mode is that you need a steady hand or precision mouse, otherwise you may inadvertently select or exclude unwanted pixels. This option may work best with a tablet and stylus.
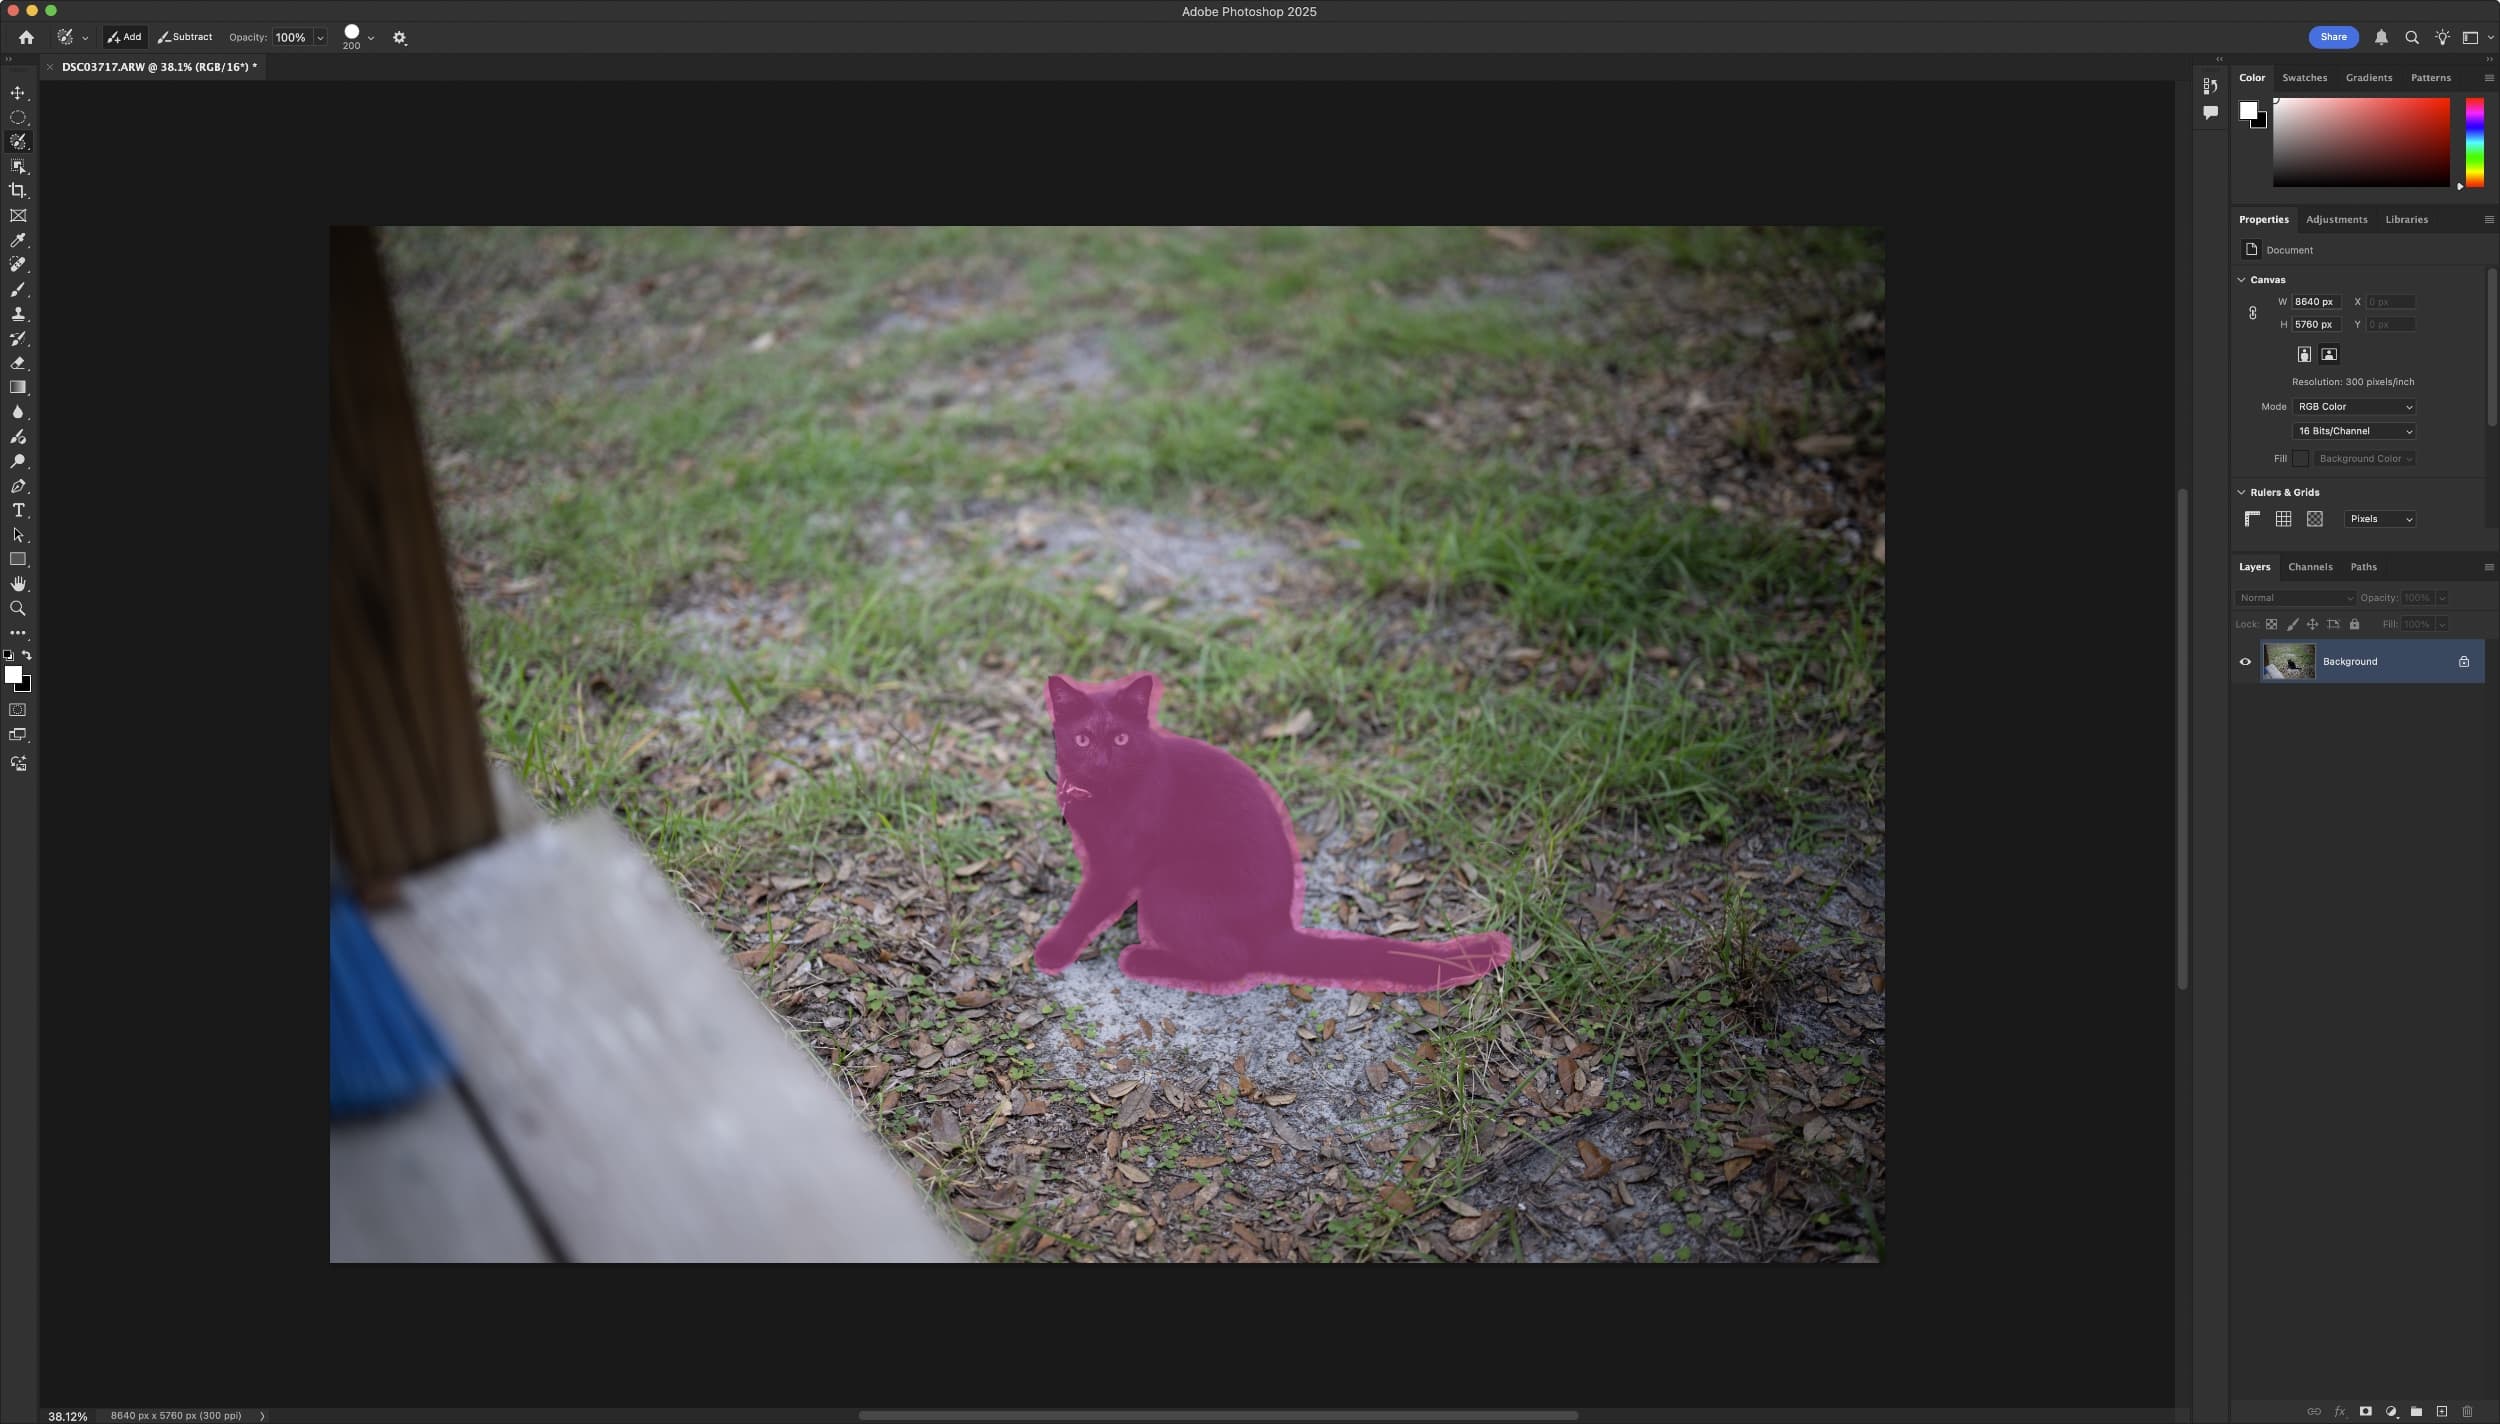
In selection brush mode, you can paint directly over specific portions of your image to select those areas. Despite being called a brush, this tool doesn’t edit your image, but instead, it received this name because you “paint” over your image in the same motions you would if you were using a traditional brush tool to paint artistic effects. Note that the selection made with this tool is indicated by pink masking rather than marching ants:
In polygonal lasso mode, you will be making straight lines around whatever subject you’re trying to select. This is different from the traditional lasso tool in that it’s not as free-hand and it may take less time to select your subject, but because it’s not as precise of a selection tool, your selection’s edges will be more jagged and exhibit polygonal edges:
Note: This selection tool creates jagged edges, so your selection won’t be as refined as a freehand selection would be. The result may appear obvious to the viewer.
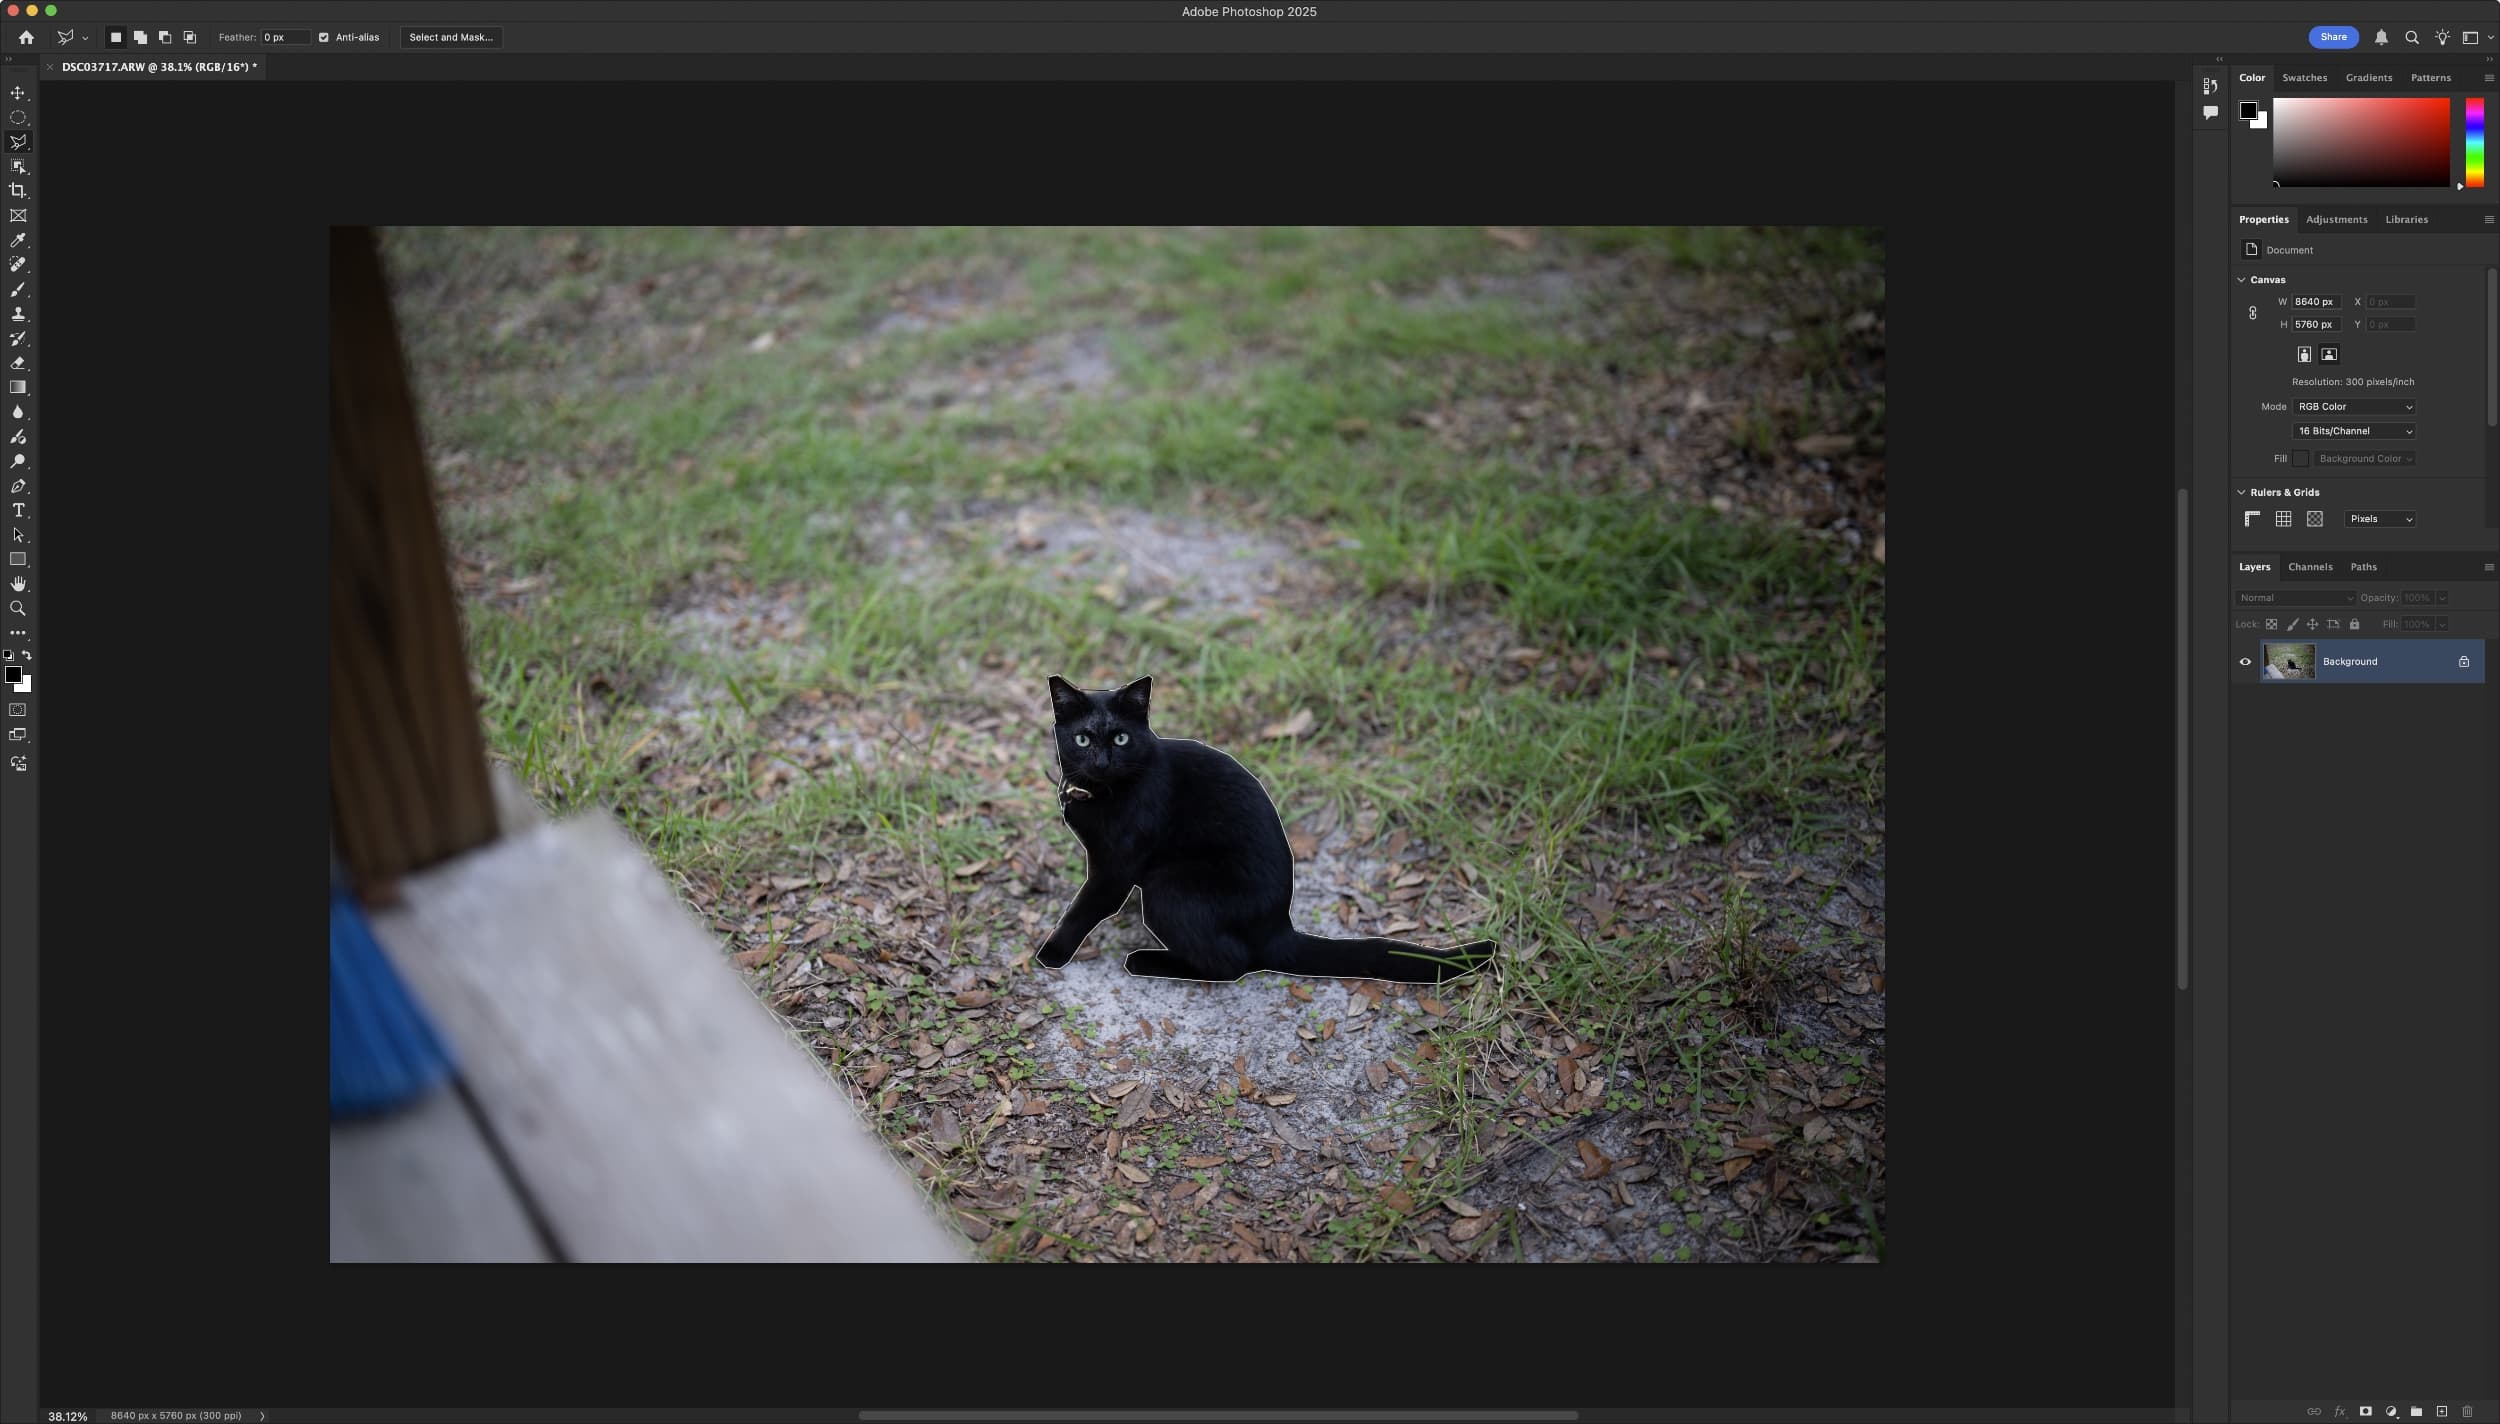
In magnetic lasso mode, you can click and drag along the surface of whatever you want to select, much like the traditional lasso tool. On the other hand, this version is more user-friendly in that it can automatically snap to the edges of your subject based on contrasting colors that help define the subject from its background. This ‘snapping’ effect is what gives this mode its name of being ‘magnetic,’ and it looks like this:

Note: This is the easiest lasso tool to use, but it depends on high color contrast. If there isn’t enough color contrast between your subject and the background, then this tool may inadvertently ‘snap’ to unwanted parts of the image and botch your selection.
Quick Selection
When you need to save even more time, Photoshop’s Quick Selection Tool can be your best friend. These intelligent selection options are more aware of your image’s contents, empowering you to perform high quality selections in fewer clicks and less time.
The Quick Selection Tool is more of a click-to-select option that auto-detects parts of your image to select based on defined edges, and it can be used in quick selection, magic wand, or object selection modes with each one having its own set of strengths and weaknesses.
The Quick Selection Tool is available from Photoshop’s tool bar, and you can choose what mode you want the tool to be in by clicking and holding on the Quick Selection Tool:

In quick selection mode, you’re essentially starting from the center of your subject and working your way out until the selection fills the entire surface area of your subject. You do this by clicking somewhere in the middle of your subject and then dragging around until you like the marching ant boundaries that you see:

In magic wand mode, you can simply click one time on the subject that you wish to select, and Photoshop will use its own algorithms to detect the boundaries of the subject you’re selecting. It doesn’t always yield perfect selection results when there are color variances in your subject, often requiring fine-tuning afterward:

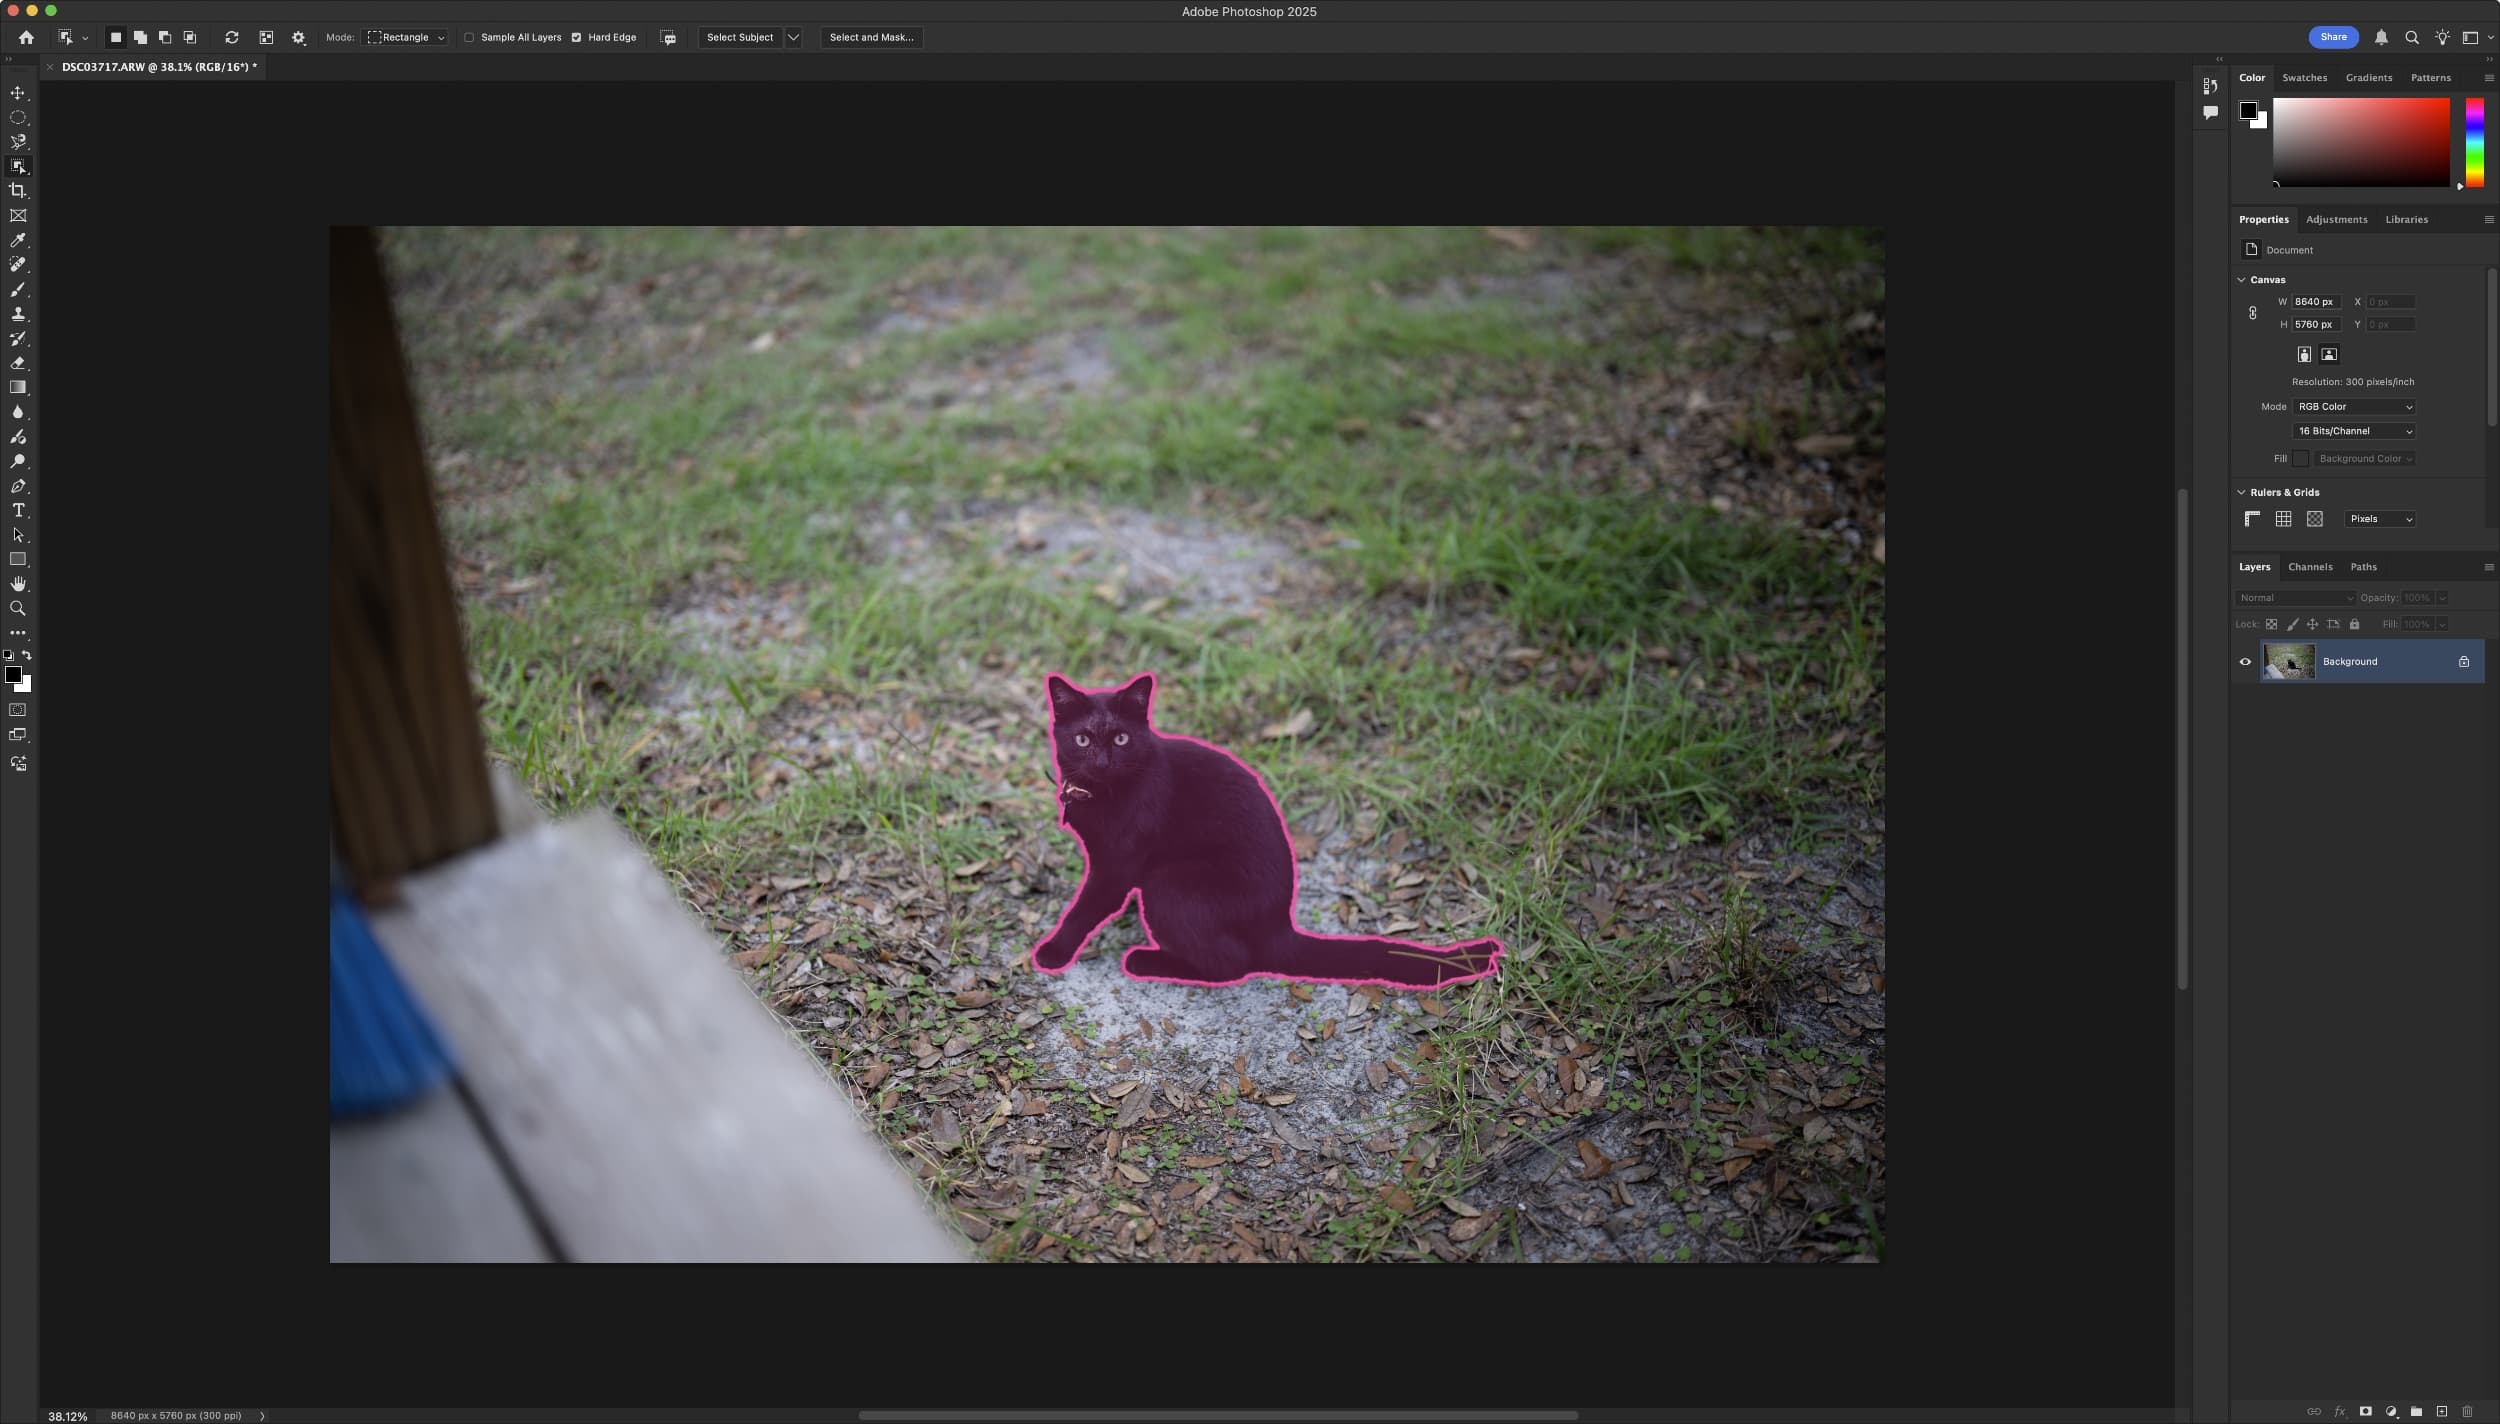
In object selection mode, Photoshop intelligently identifies subjects in your image and lets you select them by hovering over the object you wish to select and merely clicking once. This is the most automatic of Photoshop’s selection tools, and it appears to work very well, making quick work of subject selections like this one:
Other useful selection tips
We’ve already gone over some of the most useful selection tools in the Adobe Photoshop software, and while there are alternative means to achieve selections, they’re a lot more complicated and wouldn’t be suitable for a beginner.
That aside, we wanted to take this opportunity to share some tips and tricks about Photoshop selections, to help streamline your workflow.
Tip 1: Perfect shape selections
As we alluded to earlier, you can hold the Shift key while making selections with the Marquee Selection Tool in order to define perfect shapes, such as squares and circles as opposed to rectangles and ovals.
Tip 2: Add to selections
After you’ve completed one selection, you can hold the Shift key and make a second collection to include more areas of your image or photograph in your selection. These areas don’t need to be touching one another, and it’s a great way to select multiple areas of an image at the same time so that you don’t have to start over with selections for each area.
Tip 3: Subtract from selections
You can use also use the Option key (macOS) or Alt key (Windows) to remove pixels from your selection. Simply hold the key down and click and drag over the pixels you wish to exclude while using certain selection tools to exclude those areas from your selection – useful for when you over-select something or when the edges of your selection bleed into other parts of your image.
Tip 4: Intersecting selections
You can use the Shift + Option keys (macOS) or Shift + Alt keys (Windows) while dragging a tool’s selection over another selection you’ve already made to intersect the two selections. When you do this, only the overlapping areas of that selection will remain selected. This can help you narrow selections to specific pixel regions on your image.
Tip 5: Adjusting tolerances
When using the magic wand mode of the Quick Selection Tool, you can adjust the tolerances of the selection to include more or less of like-colored pixels in the subject you’re selecting from the toolbar at the top of Photoshop. If you find that you’re selecting more pixels than you want, then try adjusting the tolerance to a lower number. Alternative, if you’re selecting fewer pixels than you want, you can try a larger number.
Tip 6: Inverting selections
Sometimes it can be easier to select something when you select the opposite of it first. You can use the Command + “+” keys (macOS) or the Control + “+” keys (Windows) to instantly invert your selection. This can make it possible to select the background of your subject or the subject from a background more quickly in certain situations.
Tips 7: Deselecting
If you want to deselect your selection, you can either use the Deselect button that appears after you make a selection, or you can press Command + D (macOS) or Control + D (Windows) to deselect your current selection.
Conclusion
Mastering selection tools and techniques in Adobe Photoshop can boost your editing efficiency and significantly improve your creative output. By applying these advanced selection tips, you’ll have the tools and confidence to handle even the most challenging image-editing tasks with grace and precision.
Source link: https://www.idownloadblog.com/2025/05/14/adobe-photoshop-selection-tools-tutorial/

Leave a Reply