

How to use Focus Stacking to increase depth of field in your photos
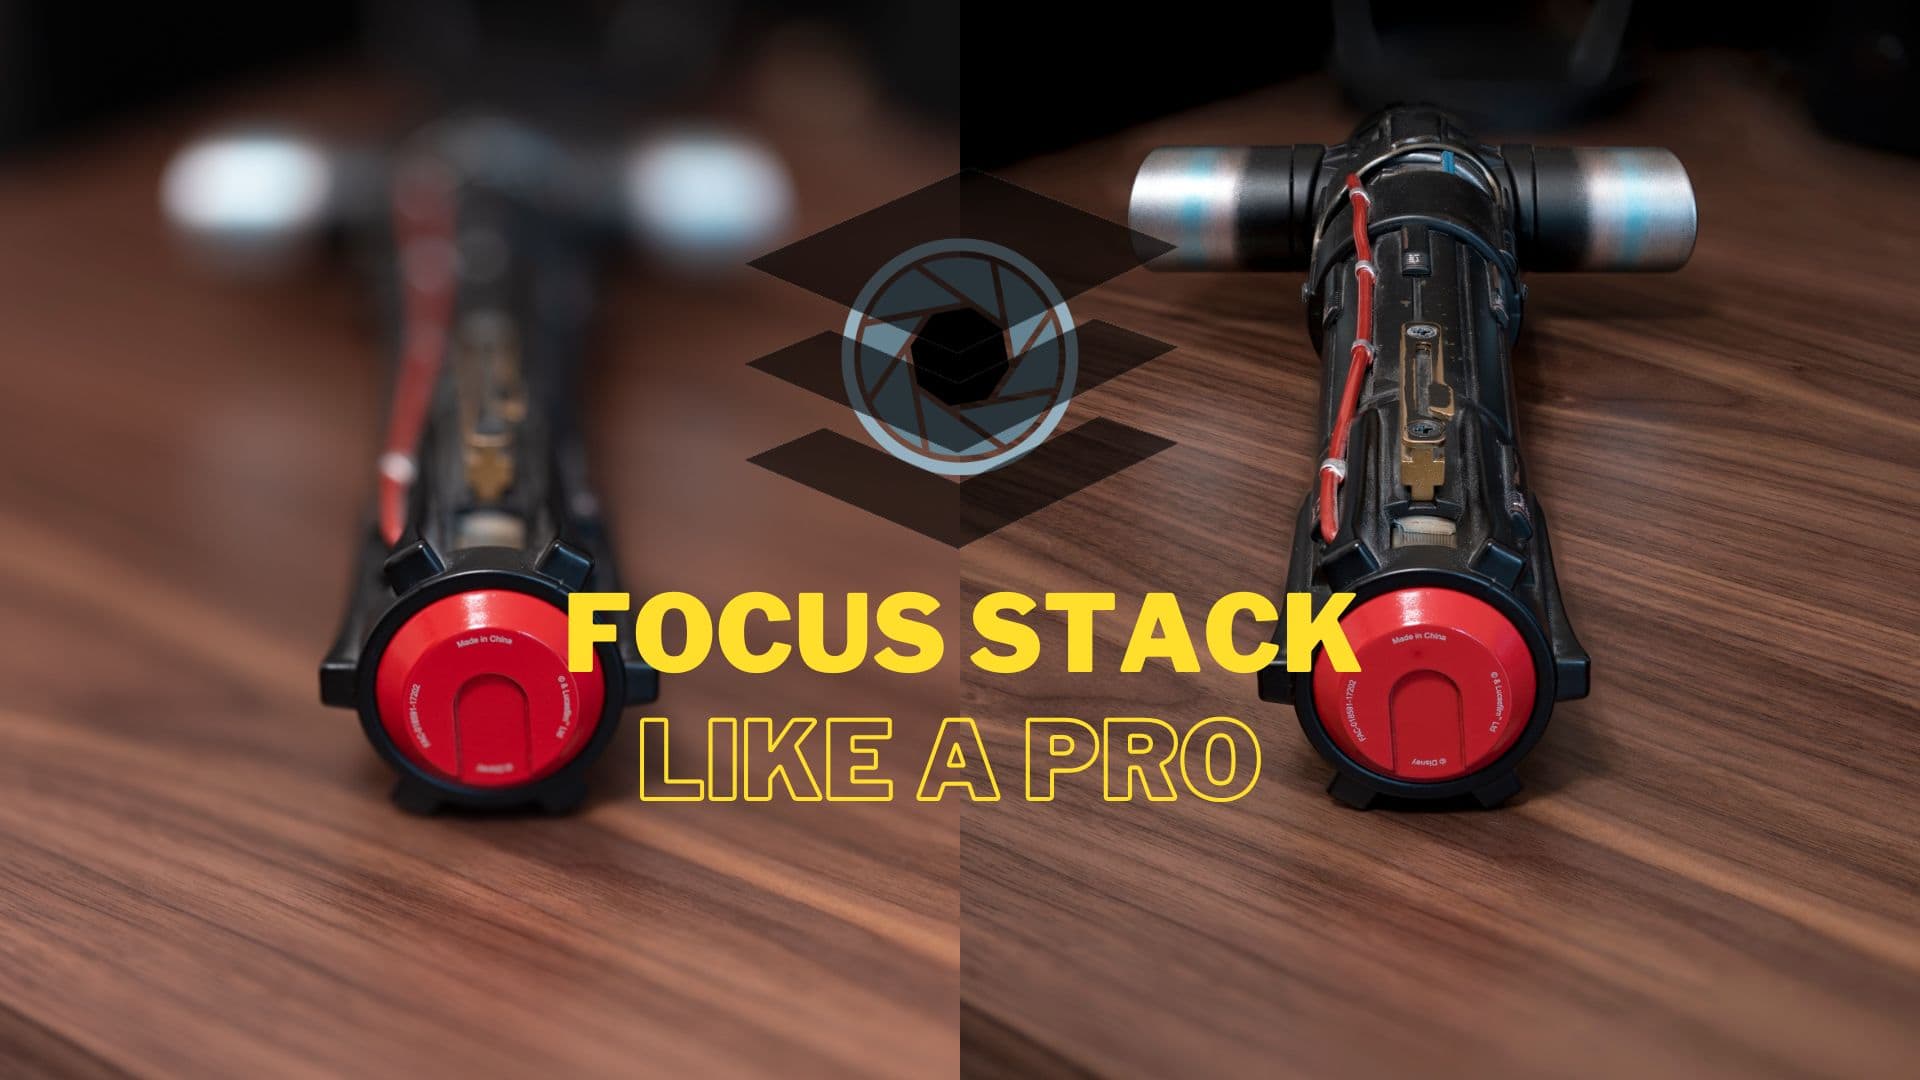
Focus Stacking is a technique that photographers sometimes use to combine several images of the same subject with a slightly different focus point in each image to create a single image with an extended depth of field beyond what might be possible with the aperture setting on any given lens.
You can perform Focus Stacking with any camera whether it’s a dedicated camera body or simply your iPhone. Note, however, that your results may vary between platforms and having a dedicated camera body may yield better results, especially if it supports automatic Focus Bracketing.
What is Focus Stacking?
When you take a photograph of something with a wide-open or semi-wide-open aperture, you should notice that your focus point is in focus while the background and foreground each appear out of focus. This is known as bokeh, and it provides both subject separation and an artistic effect to photographs.
Exactly how much of your subject appears in or out of focus is known as the depth of field, and you can increase the depth of field by stopping down your lens (using a smaller aperture or larger f-stop number) or decrease the depth of field by stopping up your lens (using a larger aperture or smaller f-stop number).
Adjusting aperture also impacts available light, so you may not want to stop your lens down too much. Doing so without the necessary adjustments to shutter speed would push the ISO higher, resulting in more visible noise in your image. Fortunately, you can avoid this with Focus Stacking.
Focus Stacking is the process of capturing several images with a larger lens aperture setting and thinner depth of field, but then blending those many images together to augment the usable depth of field. This means you can have more of your subject in focus without stopping down your lens aperture and losing light.
What is Focus Bracketing?
Certain cameras support an automatic feature known as Focus Bracketing, which just means taking several images of the same subject, but with each image progressively shifting the focal point to a different point on the subject in question. You can use these images for Focus Stacking.
If your camera doesn’t support automatic Focus Bracketing, you can still perform this process manually, but you will need to use a tripod for stability and move very slowly with manual focus capability of your lens to capture various focal points of your subject.
While the two may sound alike, Focus Bracketing and Focus Stacking are separate processes that work hand-in-hand. Images captured during Focus Bracketing can be imported into Focus Stacking software on your computer to complete the Focus Stacking process, so this is an important distinction to make.
When are these techniques used?
Focus Stacking and Focus Bracketing are used mostly in macro, landscape, and product photography in the real world.
In macro photography, the photographer wants to gather fine details of their subject. Whether that’s an insect or a flower, photographers will often find that the macro lens focuses on the closest part of the subject with a razor thin depth of field, leaving the rest of the subject out of focus. With Focus Stacking, it’s possible to get the entire subject in focus while leaving the background bokeh intact.
In landscape photography, the photographer wants to get a vast view of their surroundings. Whether that’s a sunset horizon on the beach or a cityscape, photographers will often find that their lens focuses on a nearby object and leaves the background out of focus or that it focuses on a distant object and leaves the foreground out of focus. With Focus Stacking, the entire frame can be in focus without any out of focus details.
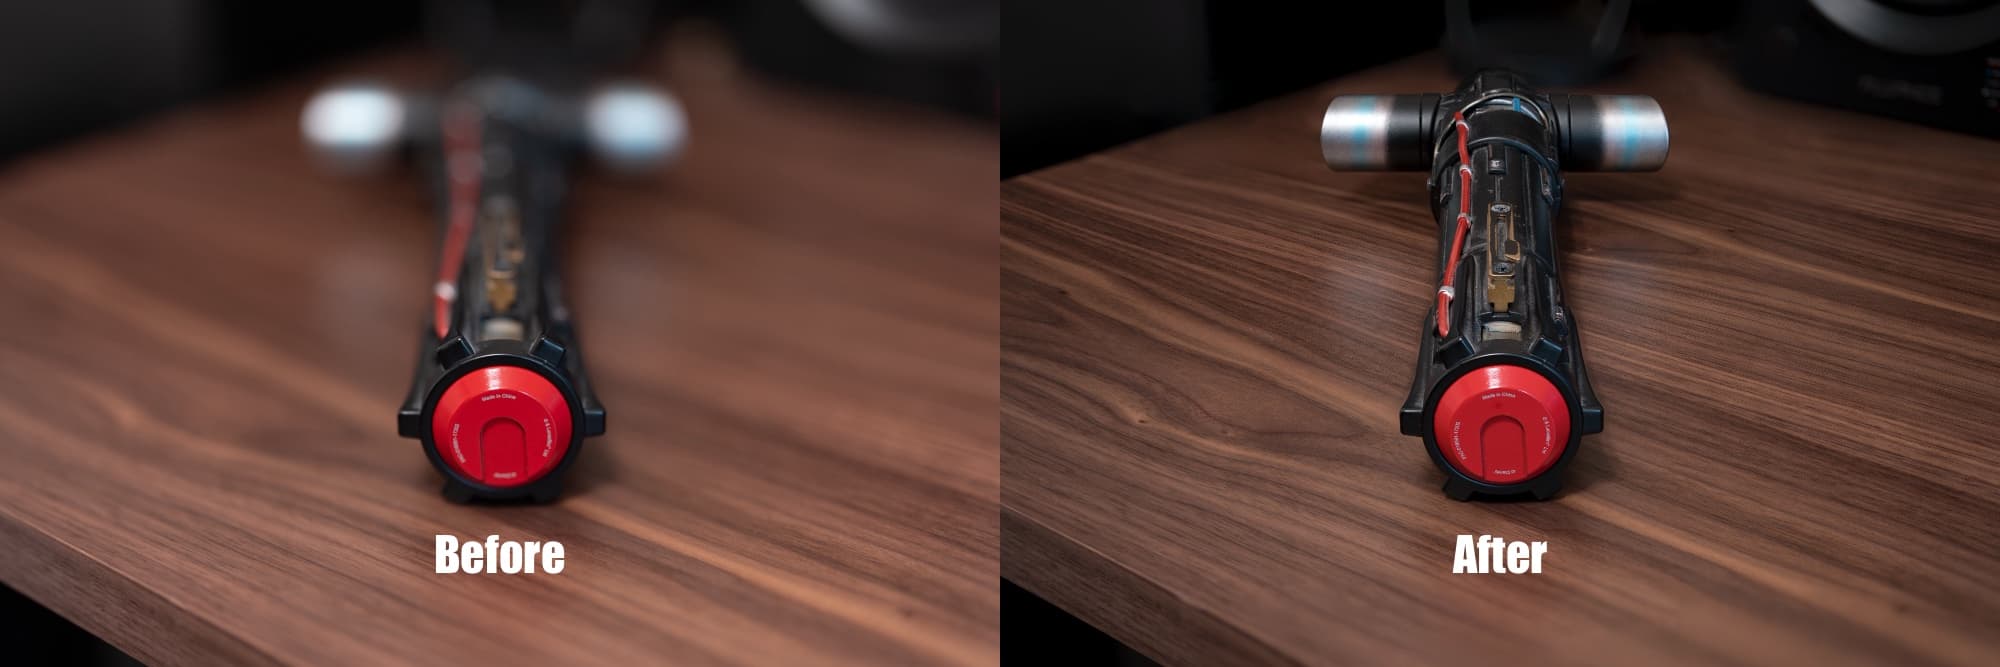
On product photography, the photographer wants to get the entire subject in focus. Whether that’s for a product review or for use as a marketing image, photographers will, much like in macro photography, find that the lens focuses on the closest part of the subject while leaving the more distant parts of the subject out of focus. With Focus Stacking, you can capture the entire subject in focus while leaving the background bokeh intact.
Are there other uses? Of course. Photography is a creative art. While the above are the most common, photographers may elect to use Focus Stacking and Focus Bracketing in other scenarios.
How to use Focus Bracketing
If you have a camera that supports Focus Bracketing, you can usually set it up from the camera’s settings. For example, on a supported Sony camera body, you can navigate to Menu → Shooting → Drive Mode → Bracket Settings to find everything you need.
The different settings you will need to configure here include:
- The Focus Bracket order (usually either shifting focus from your current position toward infinity or taking several images with different focus points including the current position, front focus boundary, and rear focus boundary)
- The Focus Bracket step width (the distance in focal point shift between each shot)
- The Focus Bracket shot amount (the number of images you want to take between brackets)
Upon choosing the automatic settings above, you can change the drive mode on your camera from single frame to bracketing and then press the shutter button and it will take care of all of this for you, saving each of the images to your memory card.
This process varies depending on the manufacturer and whether the camera body in question supports automatic Focus Bracketing. If it doesn’t, then you will have to perform the Focus Bracketing procedure manually with a tripod and the manual focus ring on your lens. To do this:
- Set your camera and lens up on a sturdy tripod
- Turn off automatic white balance and choose a specific white balance that works for you
- Set the lens to manual focus mode
- Focus on a single point on your subject, preferably closer to you
- Take the shot
- Focus on a single point of your subject slightly further away from you
- Take the shot
- Focus on a single point of your subject even further away from you
- Take the shot
- Repeat as needed until all points of your subject are in focus
All the images from the procedure above will be saved to your memory card, effectively resulting in the same lump of images that automatic Focus Bracketing would give you. The only difference is you had more control over the process. Some photographers still use the manual method even when their camera supports automatic Focus Bracketing because it gives them the sense that they’re in control.
You’ll notice that we recommended turning off automatic white balance, and that’s because you want the white balance to be the same in all your bracketed images. If the camera adjusts white balance incorrectly for even one of your several images, it will ruin the final product during stitching.
How to Focus Stack in Helicon Focus
Focus Stacking is performed on your computer in a software application such as Adobe Photoshop or a longtime favorite alternative, Helicon Focus. There may be other options out there as well, but these are the primary options that I’m familiar with and that I’ve used.
Once you’ve transferred all your Focus Bracketed images to from your memory card or phone storage to your computer, you can import those images into the software of your choosing and perform the necessary actions to ‘blend’ the focus points of all those images into a single image.
We’ll show you how you can do this in Helicon Focus below:
1) Download and install Helicon Focus from the product’s website if you don’t already have it.
Note: This is paid software, but you get a 31-day free trial to try before you buy.
2) Launch the Helicon Focus app. It should look like this:

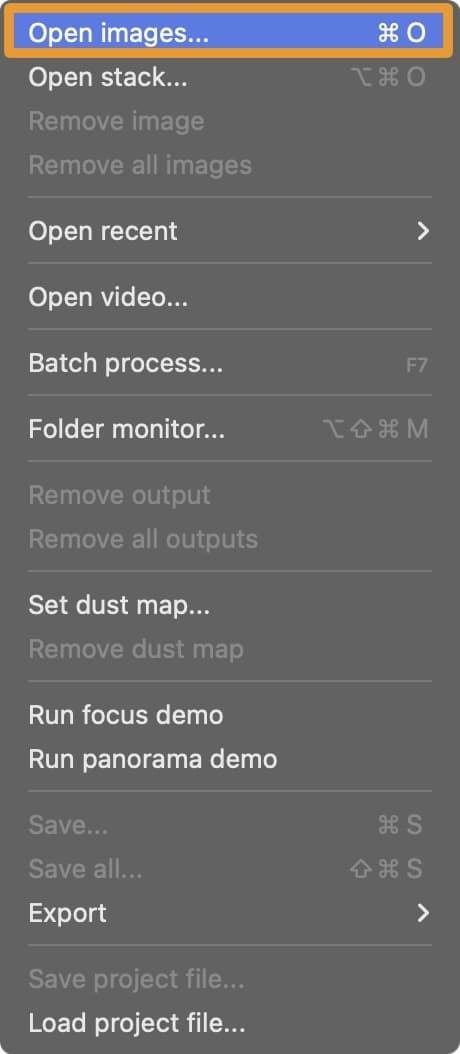
3) Navigate to File → Open images…:
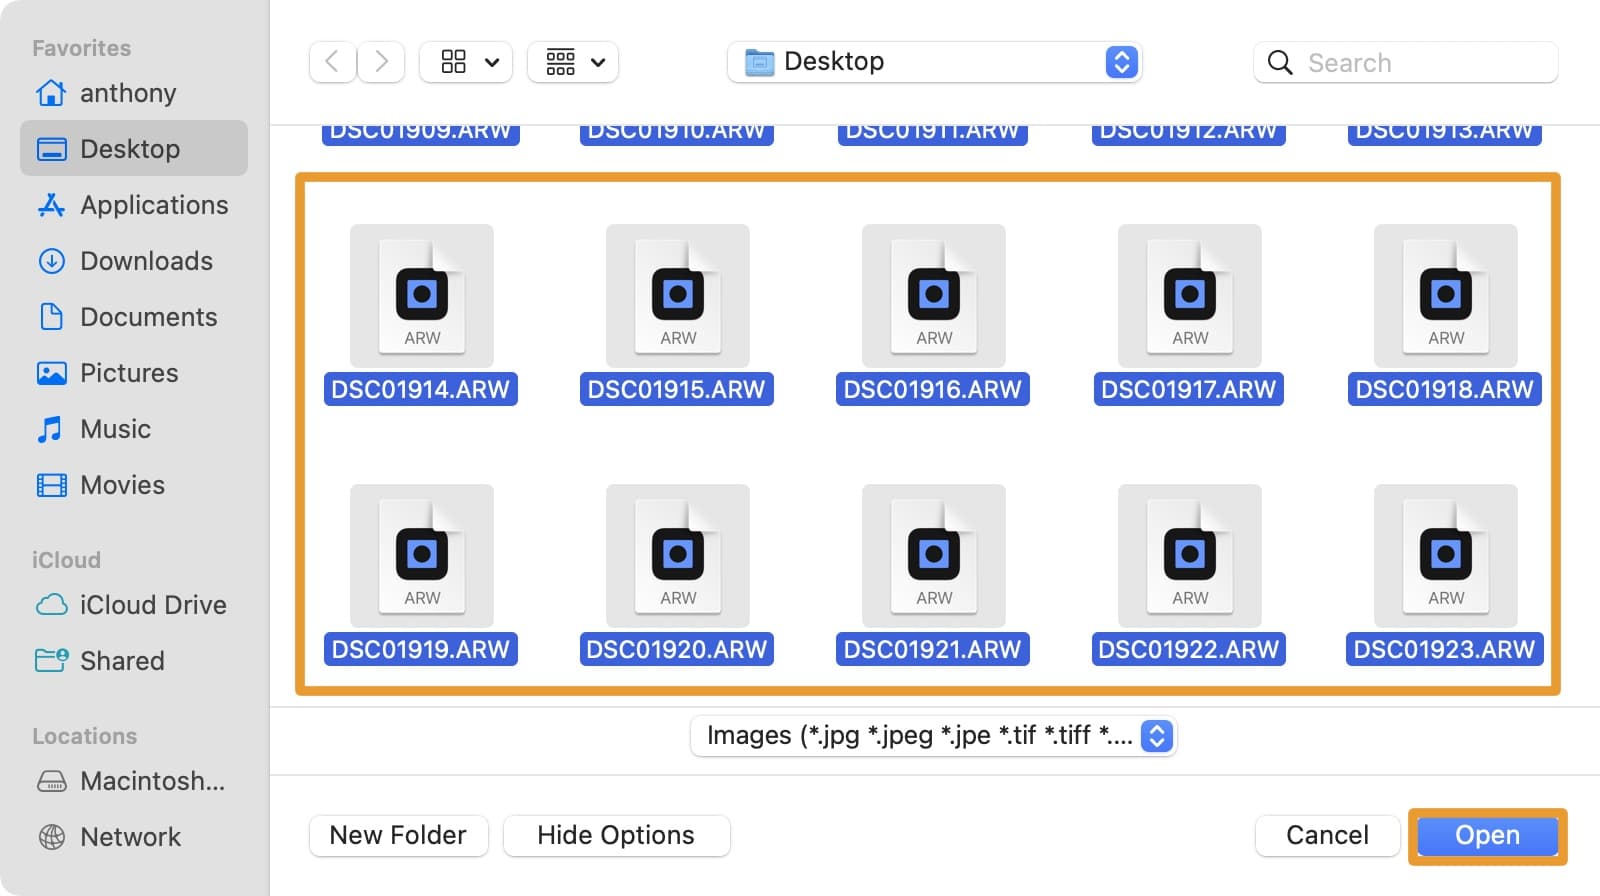
4) In the Finder window that appears, select all the image files you transferred to your Mac from your camera’s memory card, then click the Open button:
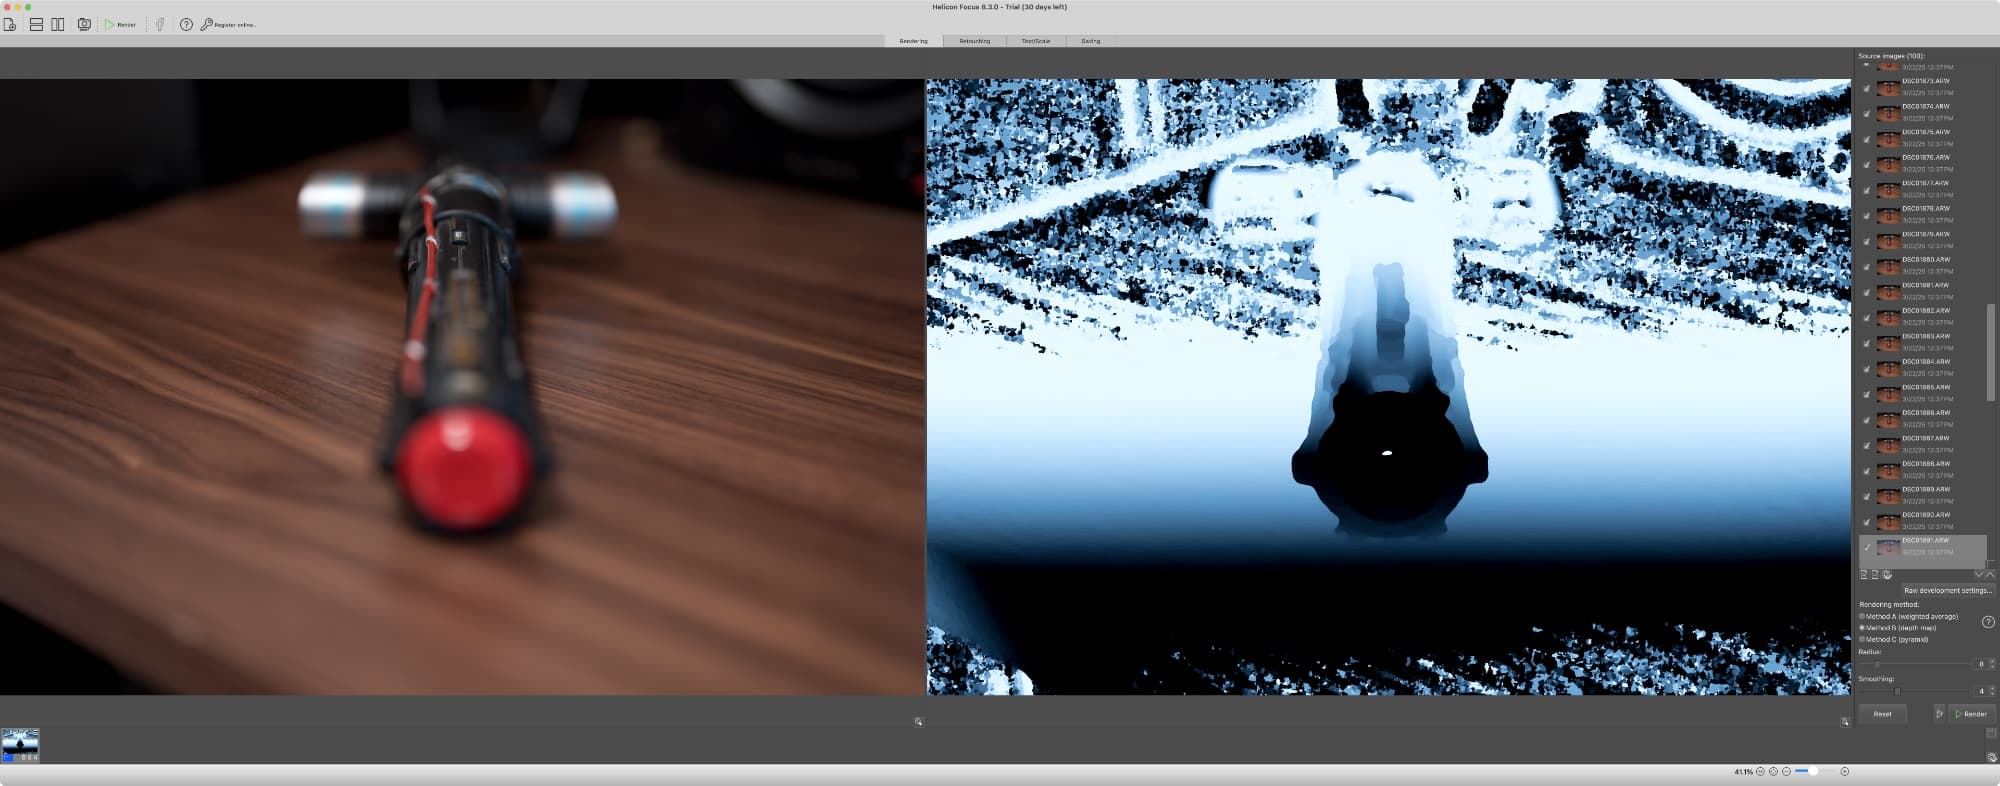
5) Click the Render button at the bottom-right of the Helicon Focus application:
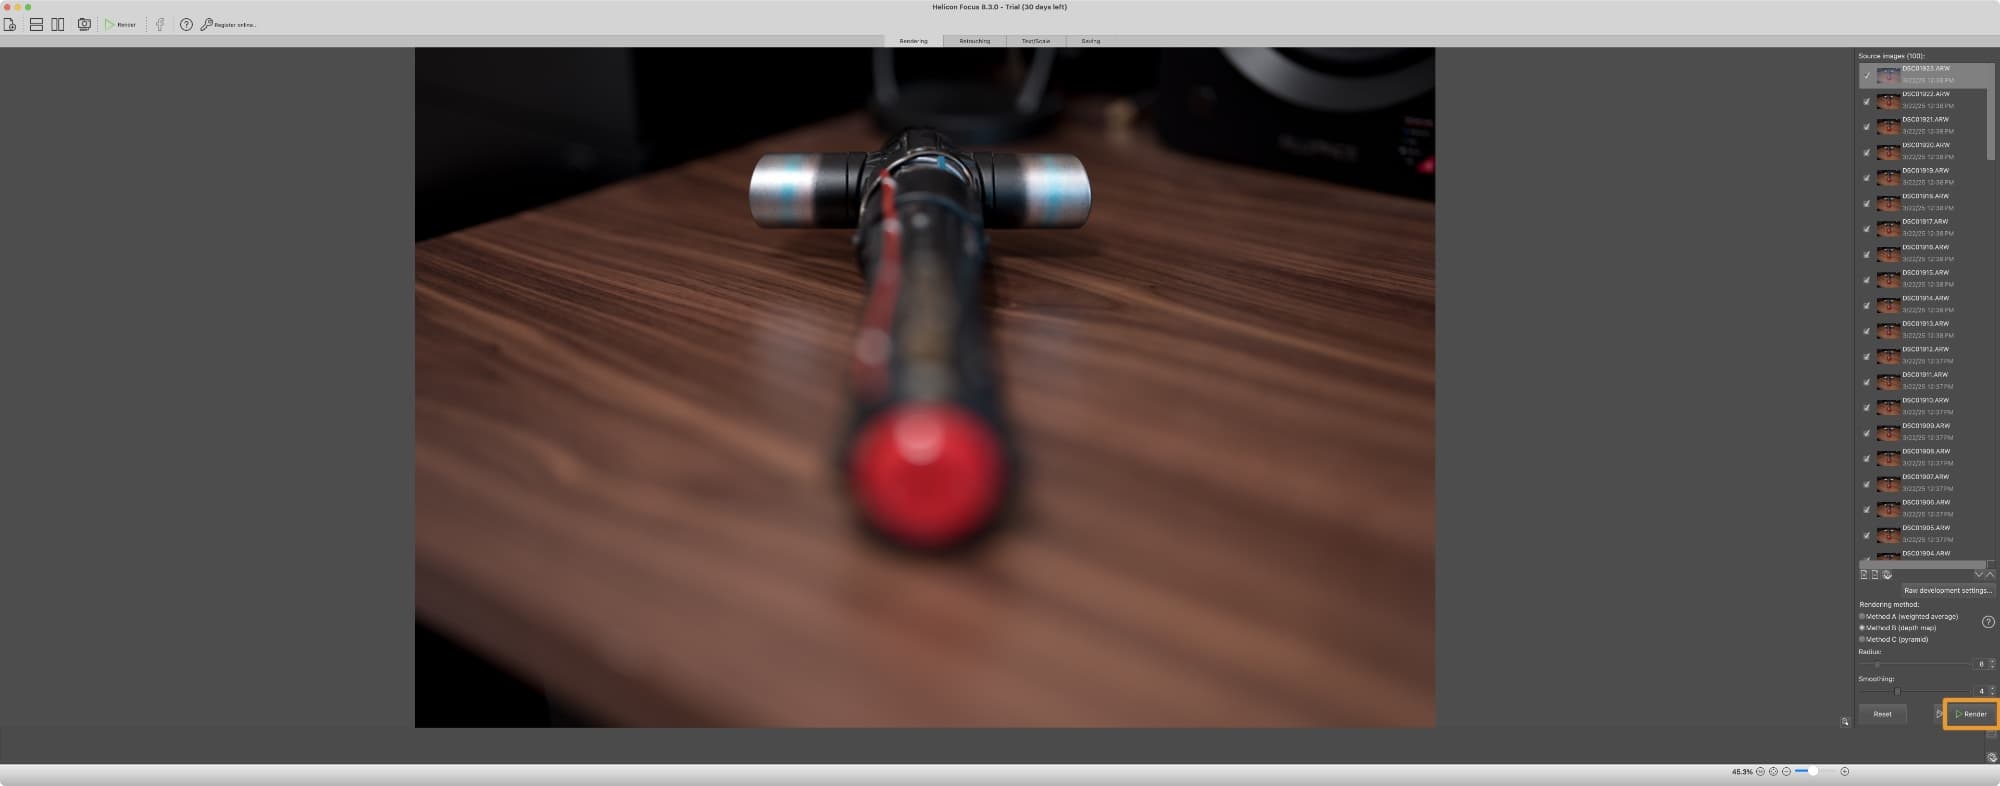
Note: You will see the Helicon Focus app map the focus of your images in real time. This may take a while:
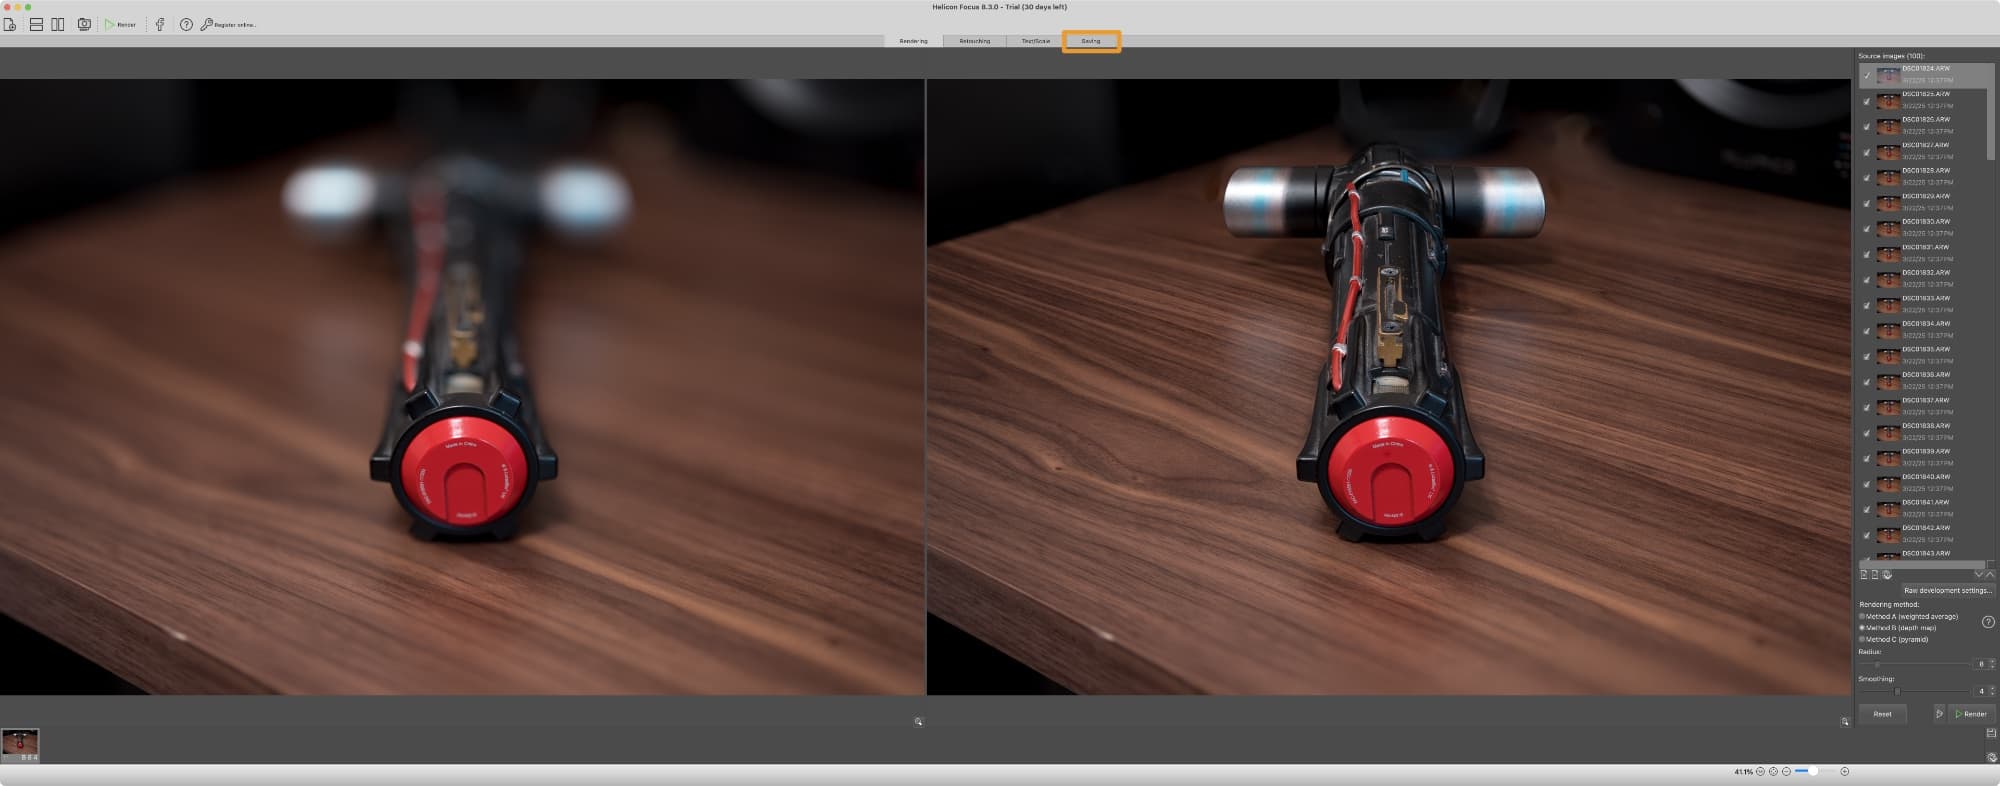
6) Once finished, click the Saving tab at the top of the Helicon Focus application:
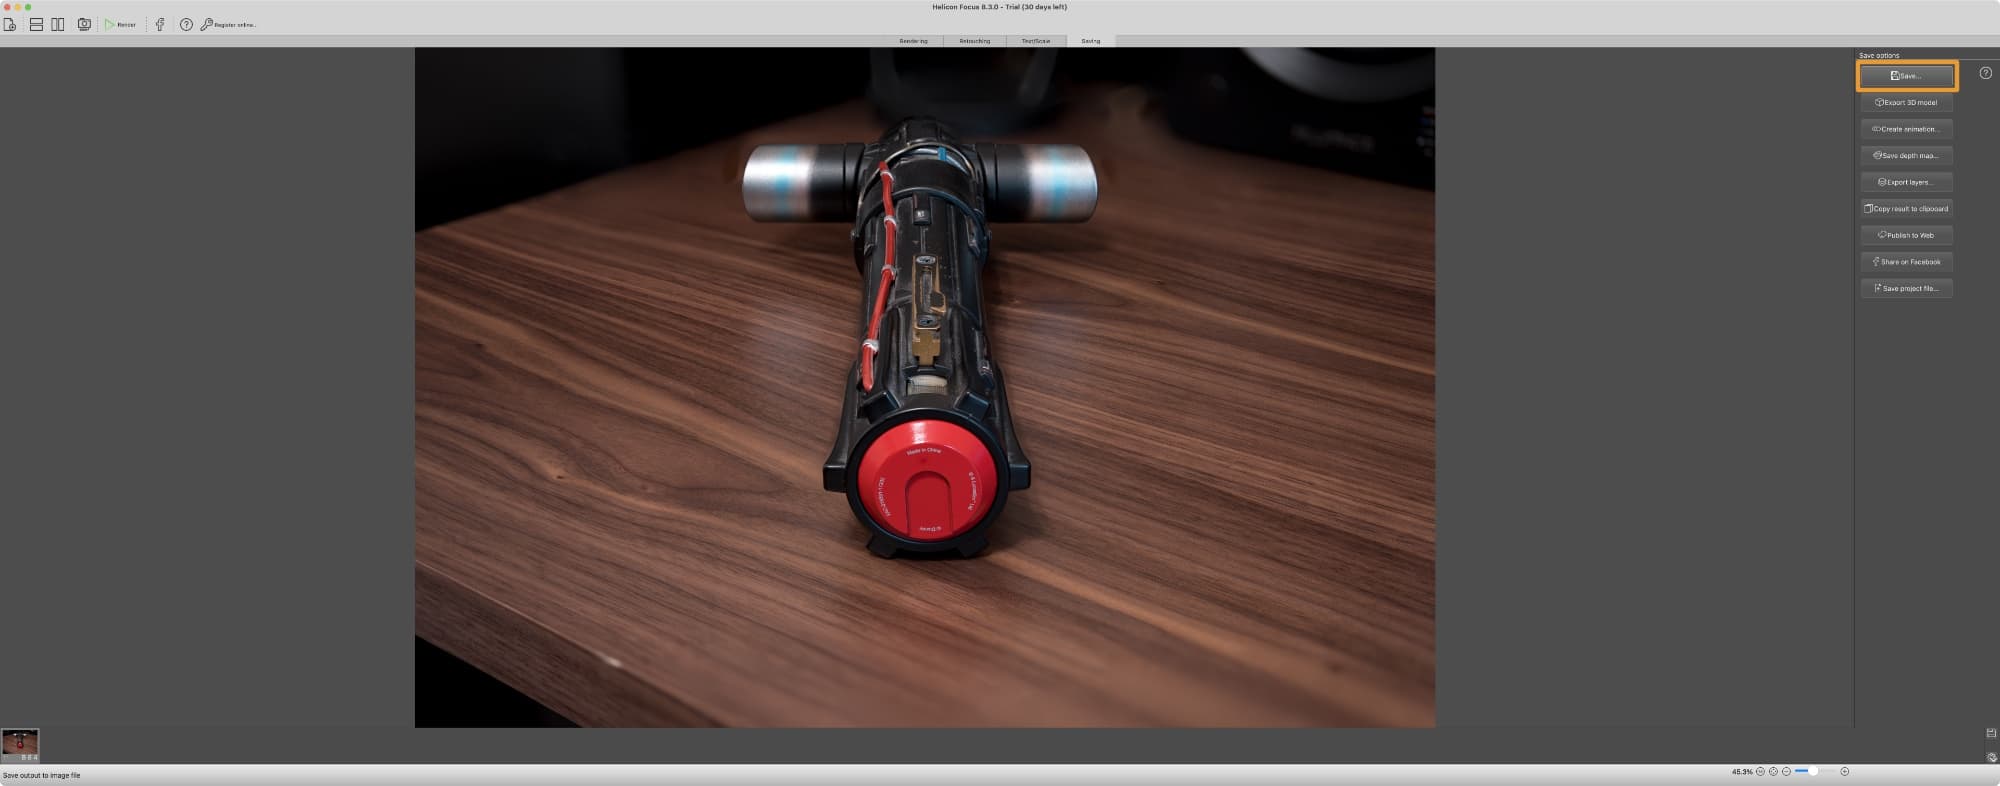
7) Click the Save button at the right side of the Helicon Focus application:
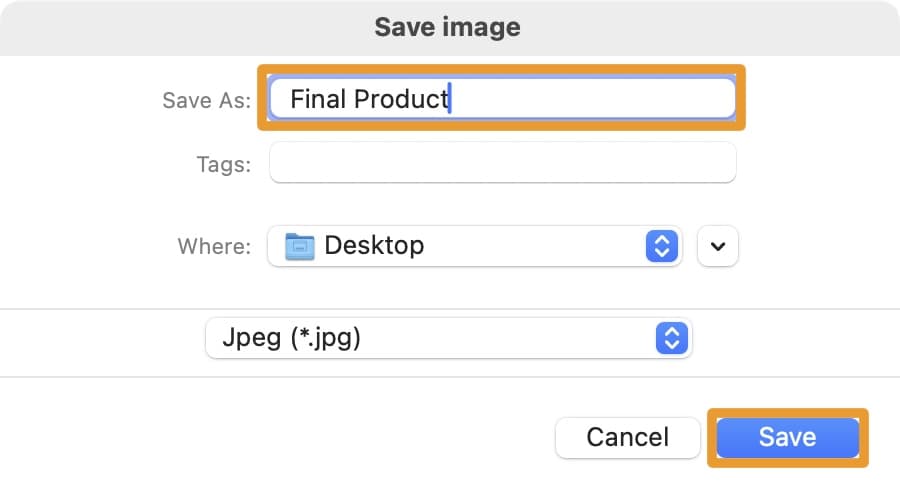
8) In the prompt, enter a name for your file, choose a file save location, and click the Save button:
9) Choose an image quality for your output file and then click the OK button:
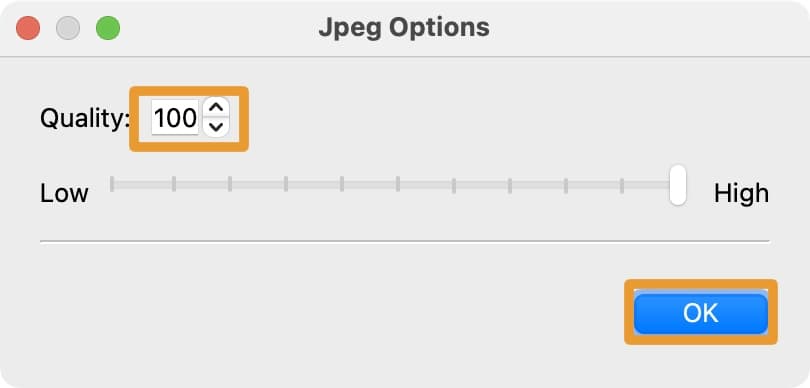
Note: Your output file is now ready wherever you have saved it and you can now move on to post-production editing to include color grading, healing brush techniques, and more.
Wrapping up
Focus Stacking and Focus Bracketing are incredibly powerful tools that can help you level up your photography. When capturing more in-focus subject than is possible with a single image and with the physical limitations of your camera lens, it can help you out tremendously.
Source link: https://www.idownloadblog.com/2025/04/02/how-to-focus-stack-photos-macos/

Leave a Reply