How to use Hover Typing on iPhone and iPad
Learn what the Hover Typing feature on an iPhone or iPad is, and how to use it to display typed text in a large, customizable box which aids visibility.
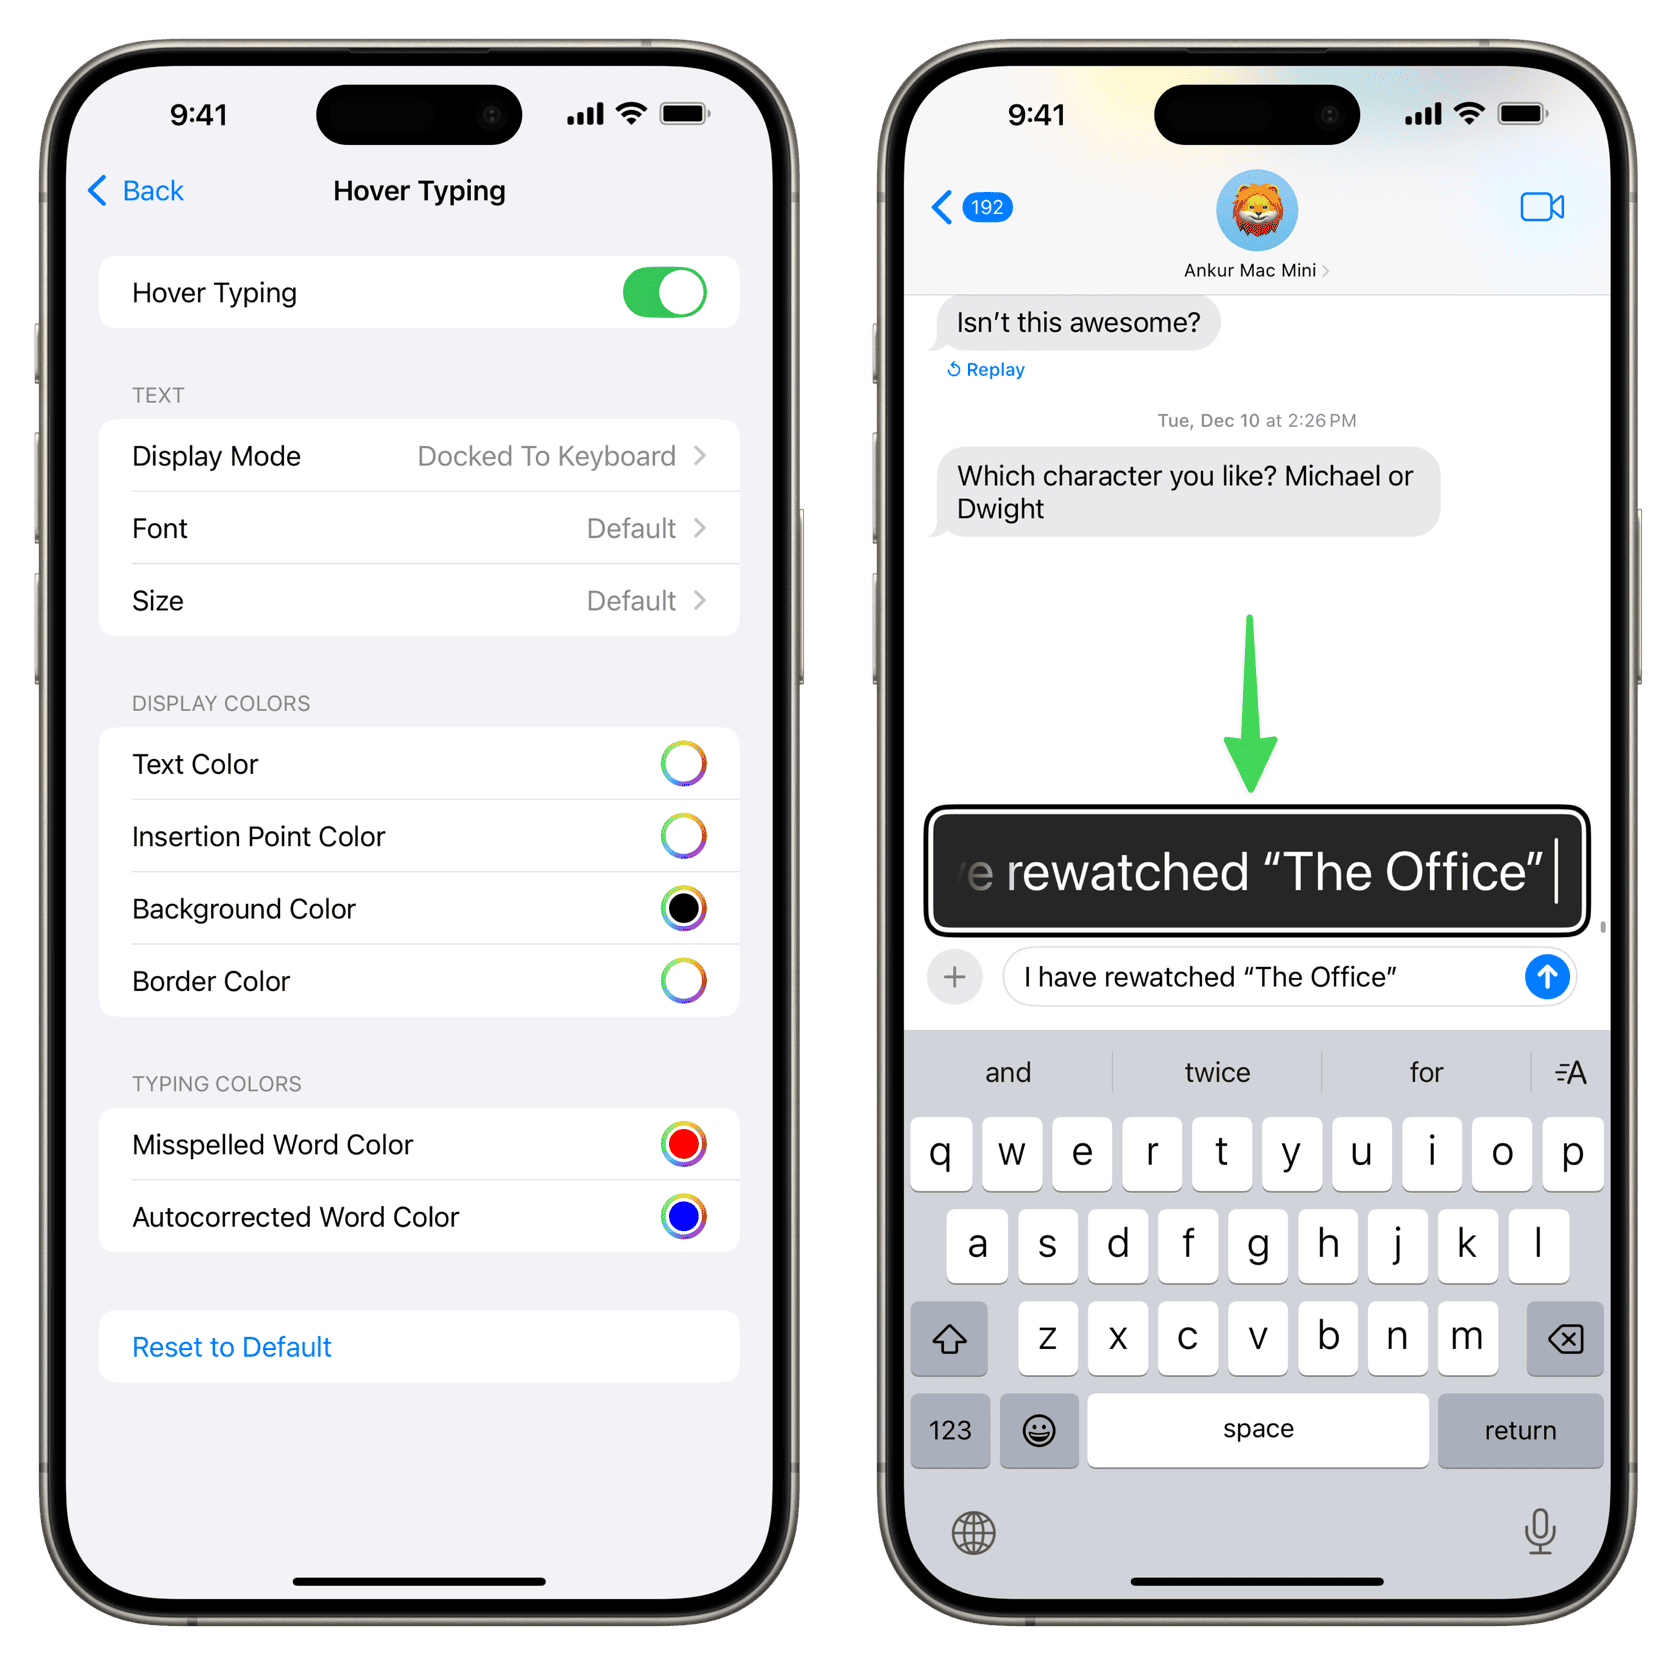
Hover Typing is an accessibility feature in iOS 18 and iPadOS 18 that shows typed text prominently, which can be helpful for folks with vision problems. Typed text is displayed with a much larger font, and you can change its color and background.
Hover Typing is great for tiny text fields that don’t support scrolling. You can even tap inside the Hover Typing box to edit text and position the cursor precisely.
Use or iPad
- Open the Settings app and navigate to Accessibility.
- Scroll down and tap Keyboards & Typing.
- Select Hover Typing.
- Turn on Hover Typing.
- Exit the Settings app and open Notes, Messages, WhatsApp, or a similar app where you can type. As you type, the Hover Typing box displays enlarged text.

Hover Typing works systemwide, even when typing Siri requests, entering device passcode, etc.
Hide and show the Hover Typing box
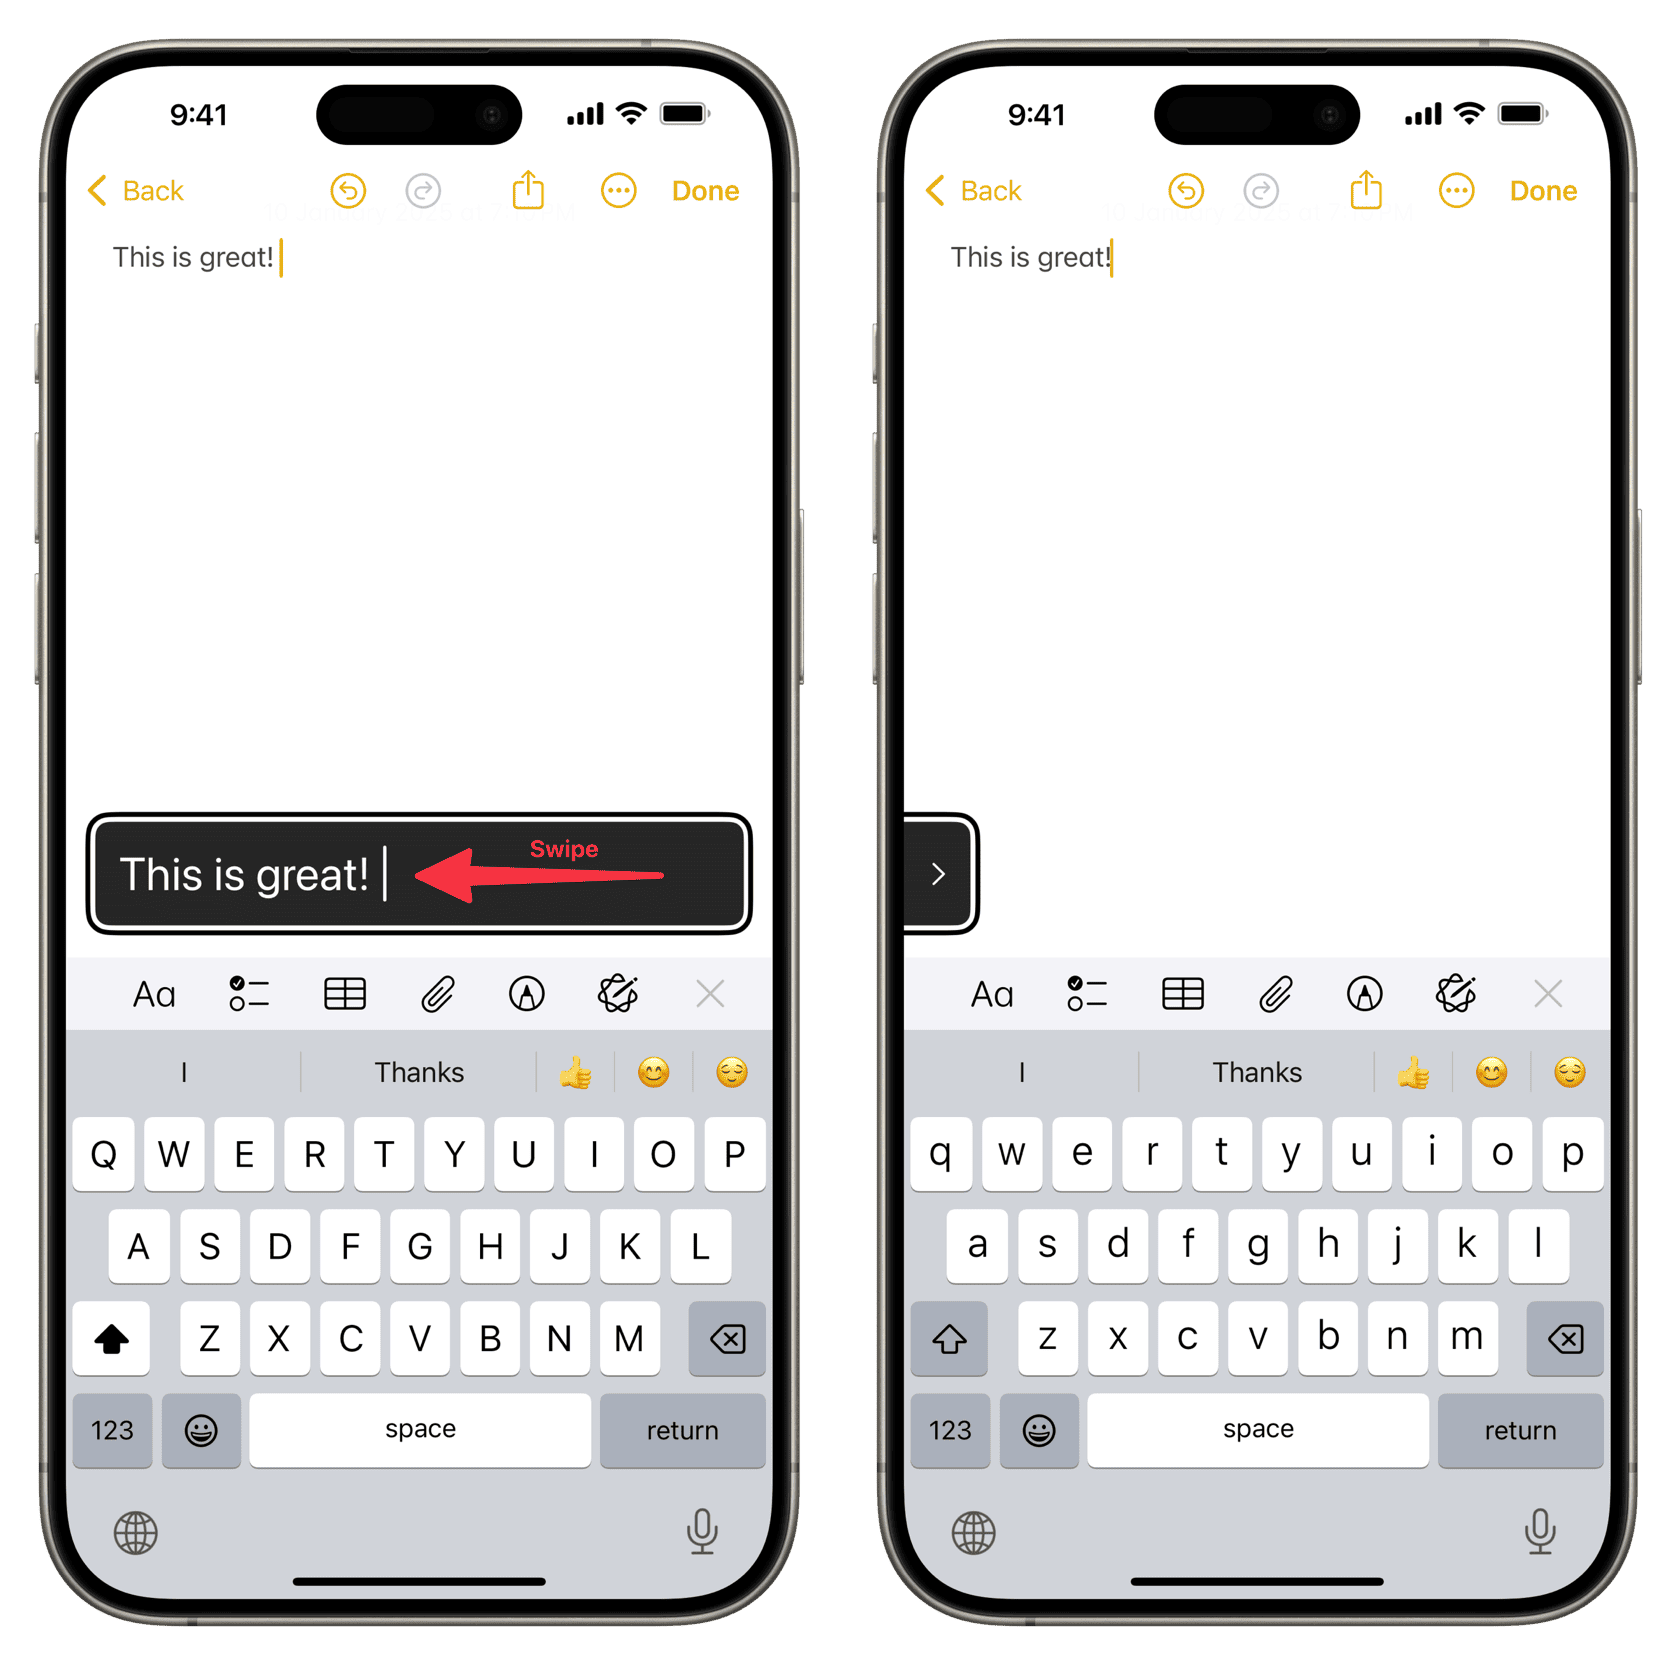
If the Hover Typing box blocks text fields, flick it away by swiping left or right to hide it, similar to how you tuck the Picture in Picture window out of view.

The Hover Typing box will show up automatically when the typing session ends.
Customize Hover Typing
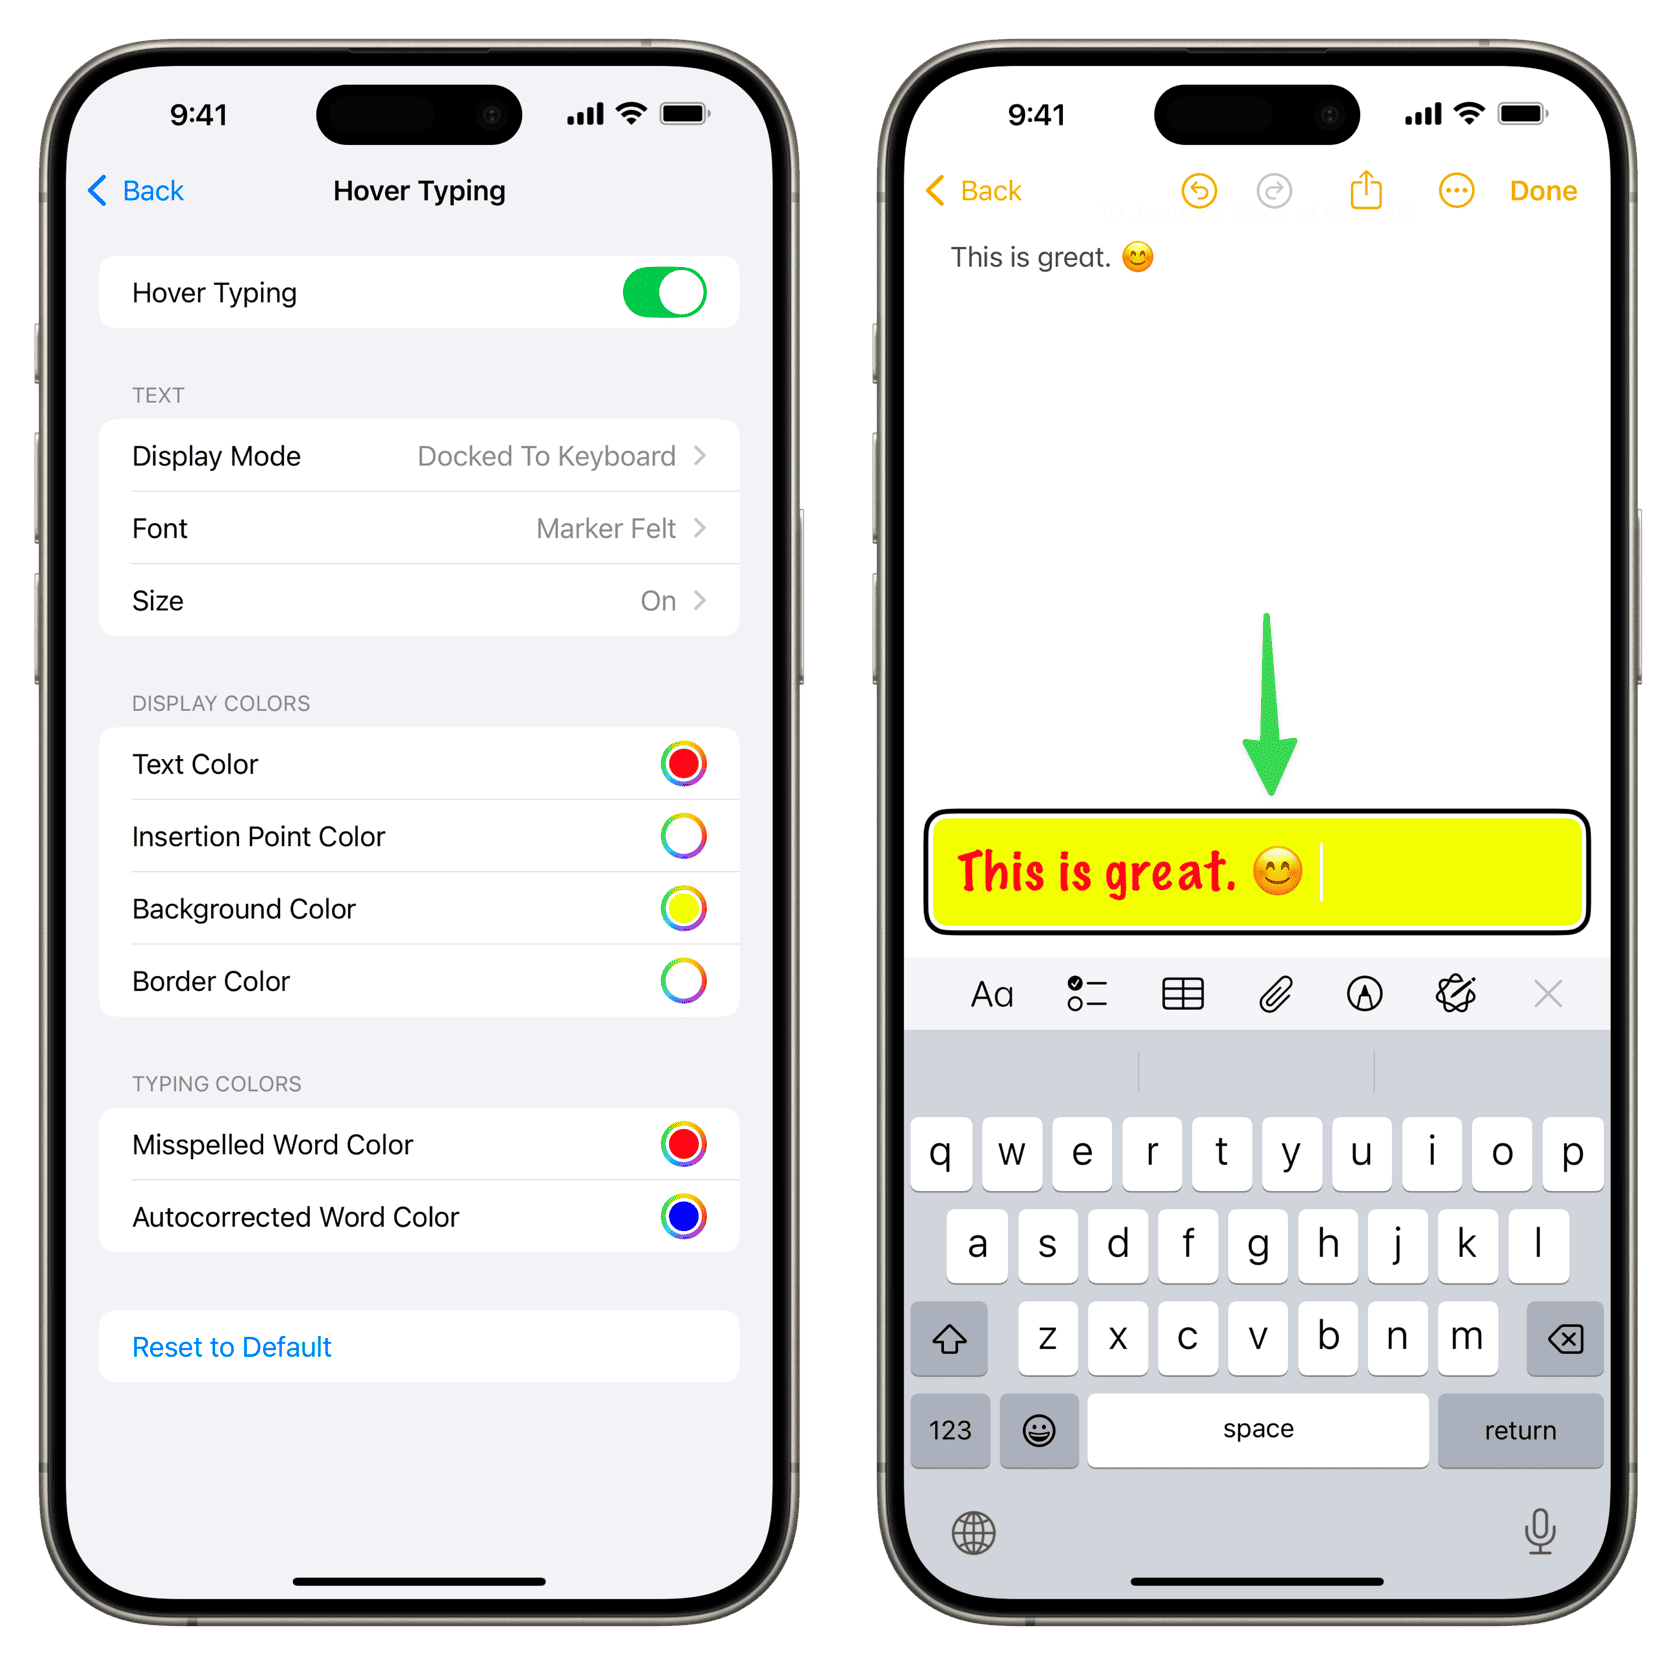
You can customize Hover Typing by adjusting its appearance and more in Settings > Accessibility > Keyboards & Typing > Hover Typing:
- Display Mode: Make the Hover Typing box appear at the top of the screen, inline with the text field, or right above the keyboard.
- Font: Choose the typeface for the Hover Typing box.
- Size: Increase or decrease font size in the Hover Typing box.
- Display colors: Customize the overall look of the Hover Typing box by changing its text color (white by default), background color (black by default), insertion point color, and border color.
- Typing colors: Change how misspelled and autocorrected words are highlighted inside the Hover Typing box.

To revert these settings to factory values, tap the Reset to Default button and confirm. Doing so will remove all your Hover Typing customization.
Use Hover Typing with Accessibility Shortcut
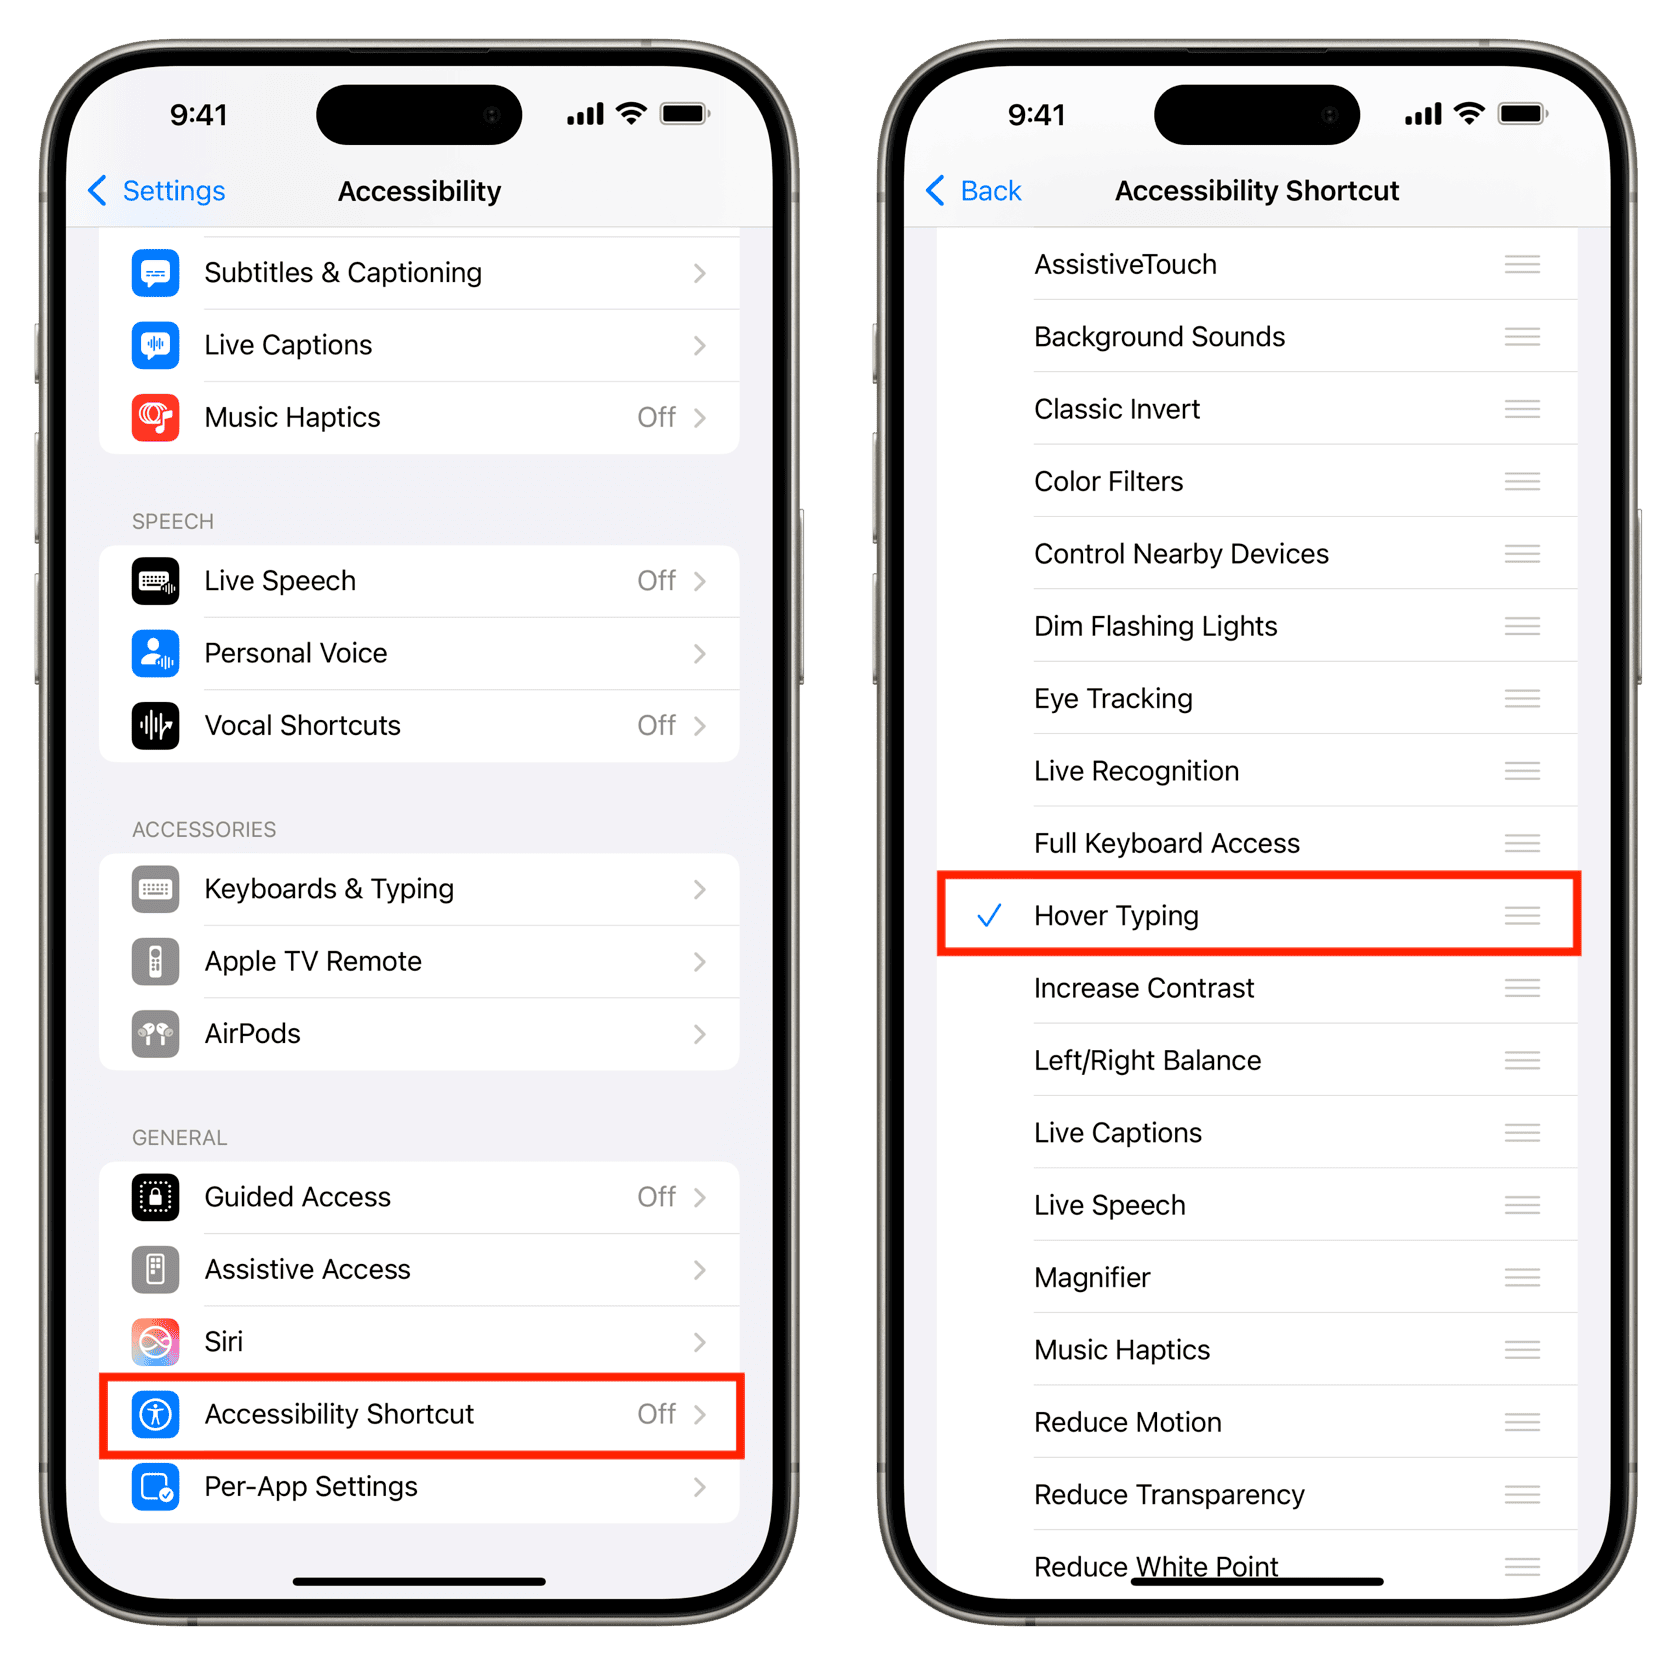
Instead of venturing into Settings every time you want to toggle Hover Typing, you can add it to your Accessibility Shortcut to use on the fly.
- Open iPhone or iPad Settings and tap Accessibility.
- Tap Accessibility Shortcut from the bottom.
- Check Hover Typing.
- You can now choose Hover Typing from the Accessibly Shortcut menu that appears when you triple-press the iPhone’s side button or the iPad’s top button.

If Hover Typing doesn’t work for you
Here are troubleshooting tips to try if the Hover Typing box won’t show up even though the feature is enabled.
- Turn Hover Typing off and back on in the accessibility settings.
- If that doesn’t help, force quit all apps and reopen the one where you were typing.
- If both tips don’t work for you, restart your iPhone or iPad.
More typing tips:
- How to use your Mac’s Hover Text to aid readability of text
- 17 tips to type quickly and accurately on iPhone
Source link: https://www.idownloadblog.com/2025/01/17/how-to-use-hover-typing-iphone-ipad/


Leave a Reply