How to edit photos and sign them in Dropbox
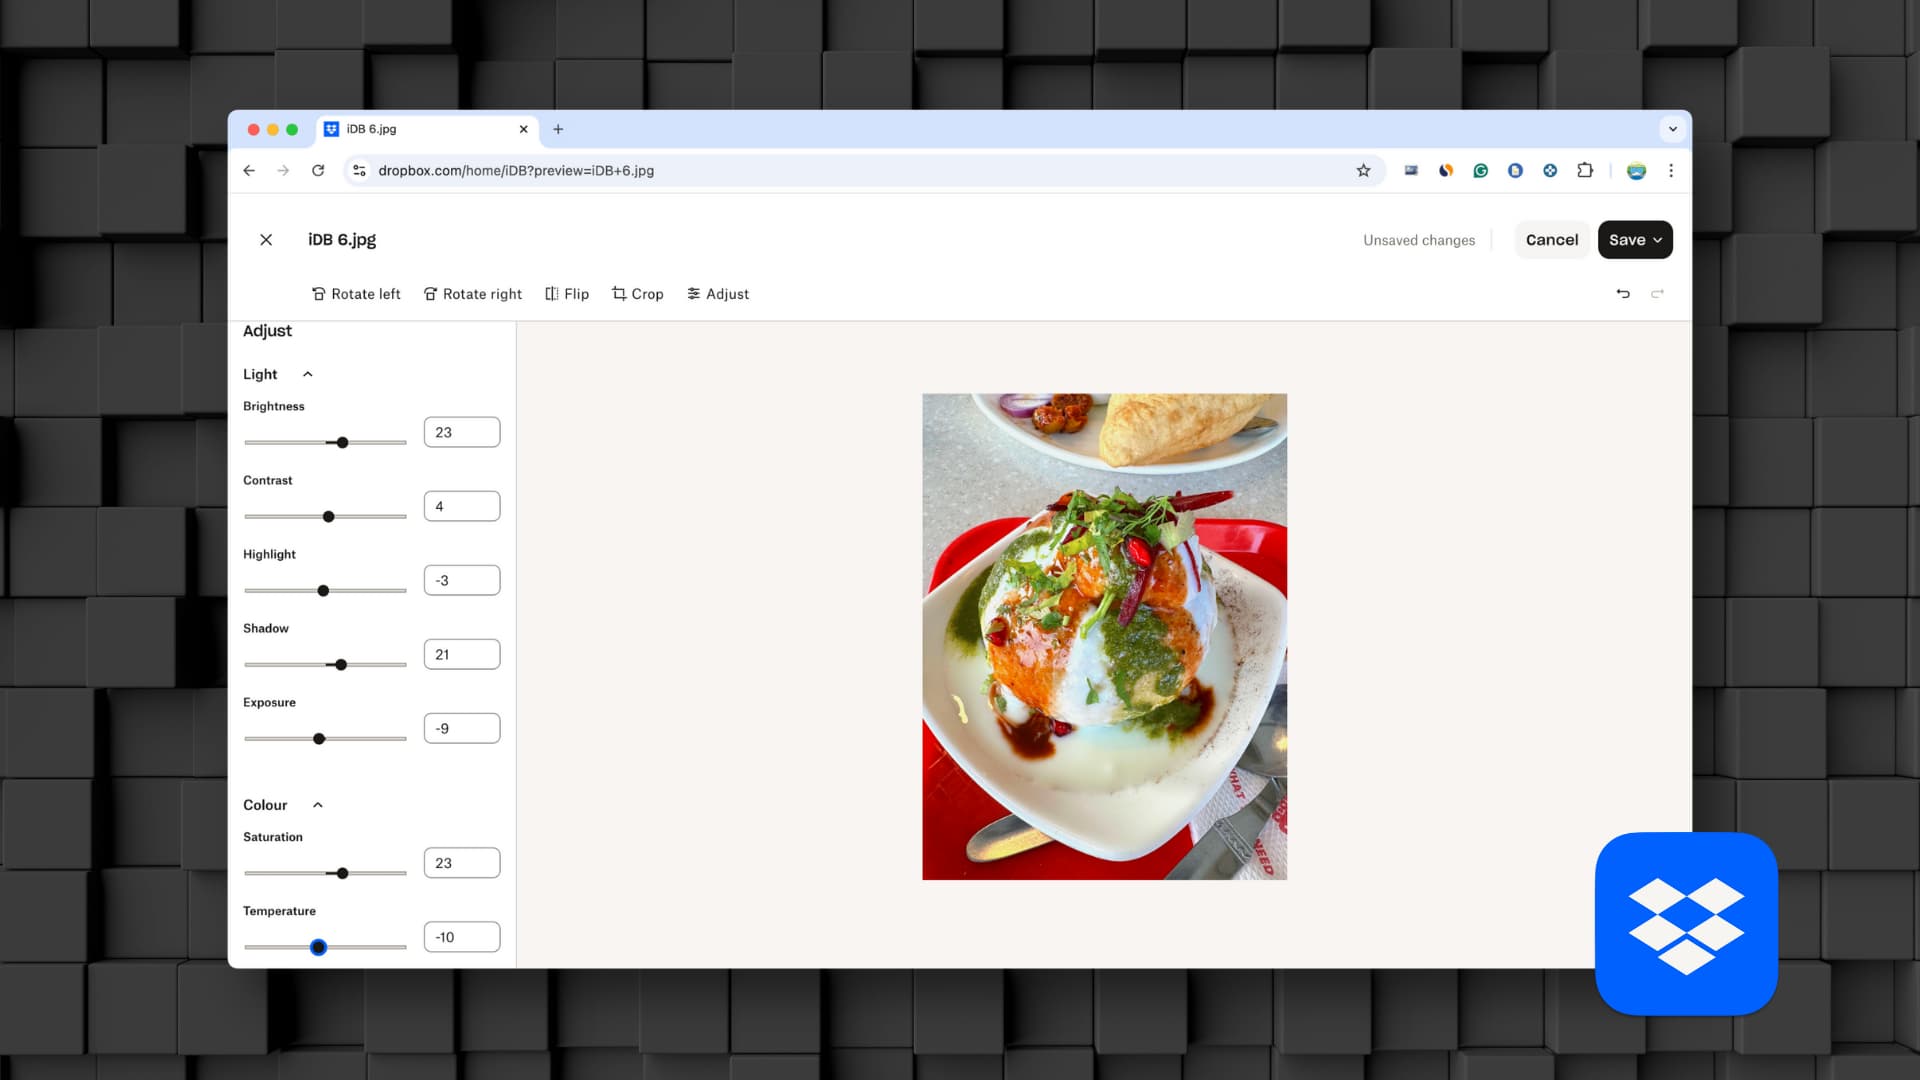
Learn how to crop, rotate, flip, and edit a photo or add a signature to it using Dropbox for a streamlined file storage, sharing, and editing experience.
In addition to being one of the best cloud storage services, Dropbox can also serve as a quick photo editor for basic adjustments.
Sure, it’s not going to replace your dedicated photo editing apps like Pixelmator, Snapseed, or Photoshop anytime soon, but if you just want to crop a picture, rotate it, flip it, or change its color settings, Dropbox has you covered. You can even sign the image or send it to other people so they can add their digital signature.
These built-in photo editing features ensure you don’t have to go out of Dropbox or download the file locally to make minor edits before sharing it with coworkers or saving it to the cloud for future use.
Edit an image in Dropbox
You can edit photos in Dropbox using a computer or iPad web browser. You can’t make edits using the Dropbox mobile app or website.
1) Visit Dropbox.com in Safari, Chrome, Edge, or another browser on your Mac, Windows PC, or iPad and double-click the image you want to edit.
Note: You can’t edit HEIC images (the photo format your iPhone uses) in Dropbox. Therefore, use the Save As option in the app to convert HEIC to JPG or PNG, and follow the steps below to edit the converted image.
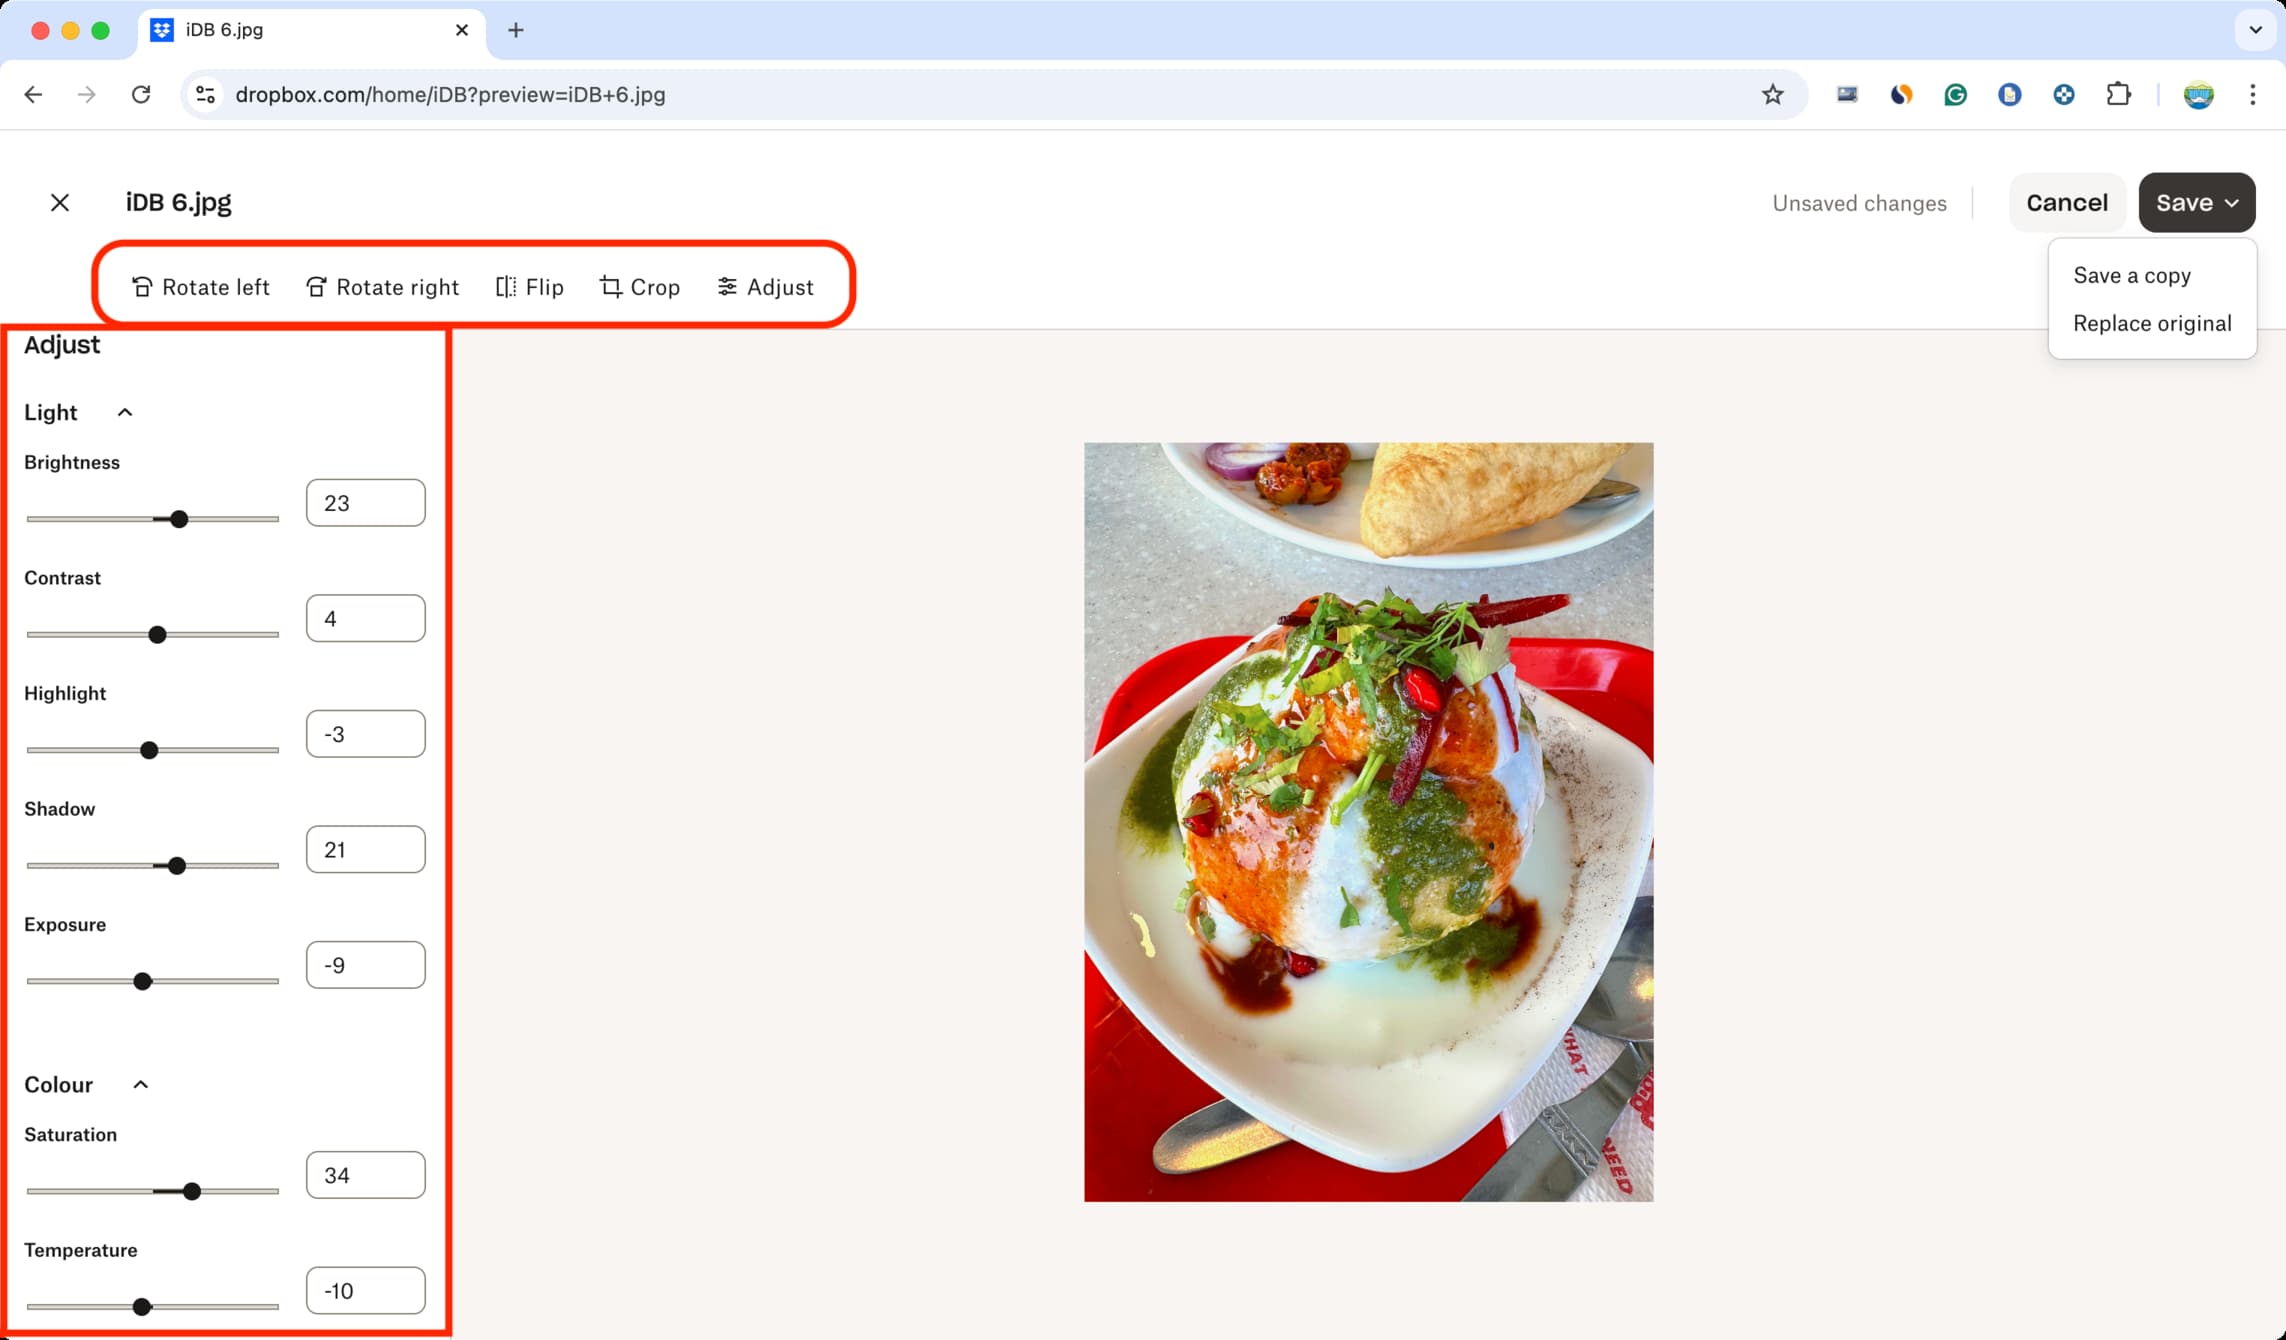
2) With the image open, click Edit from the top left corner of the Dropbox screen and select Adjust.
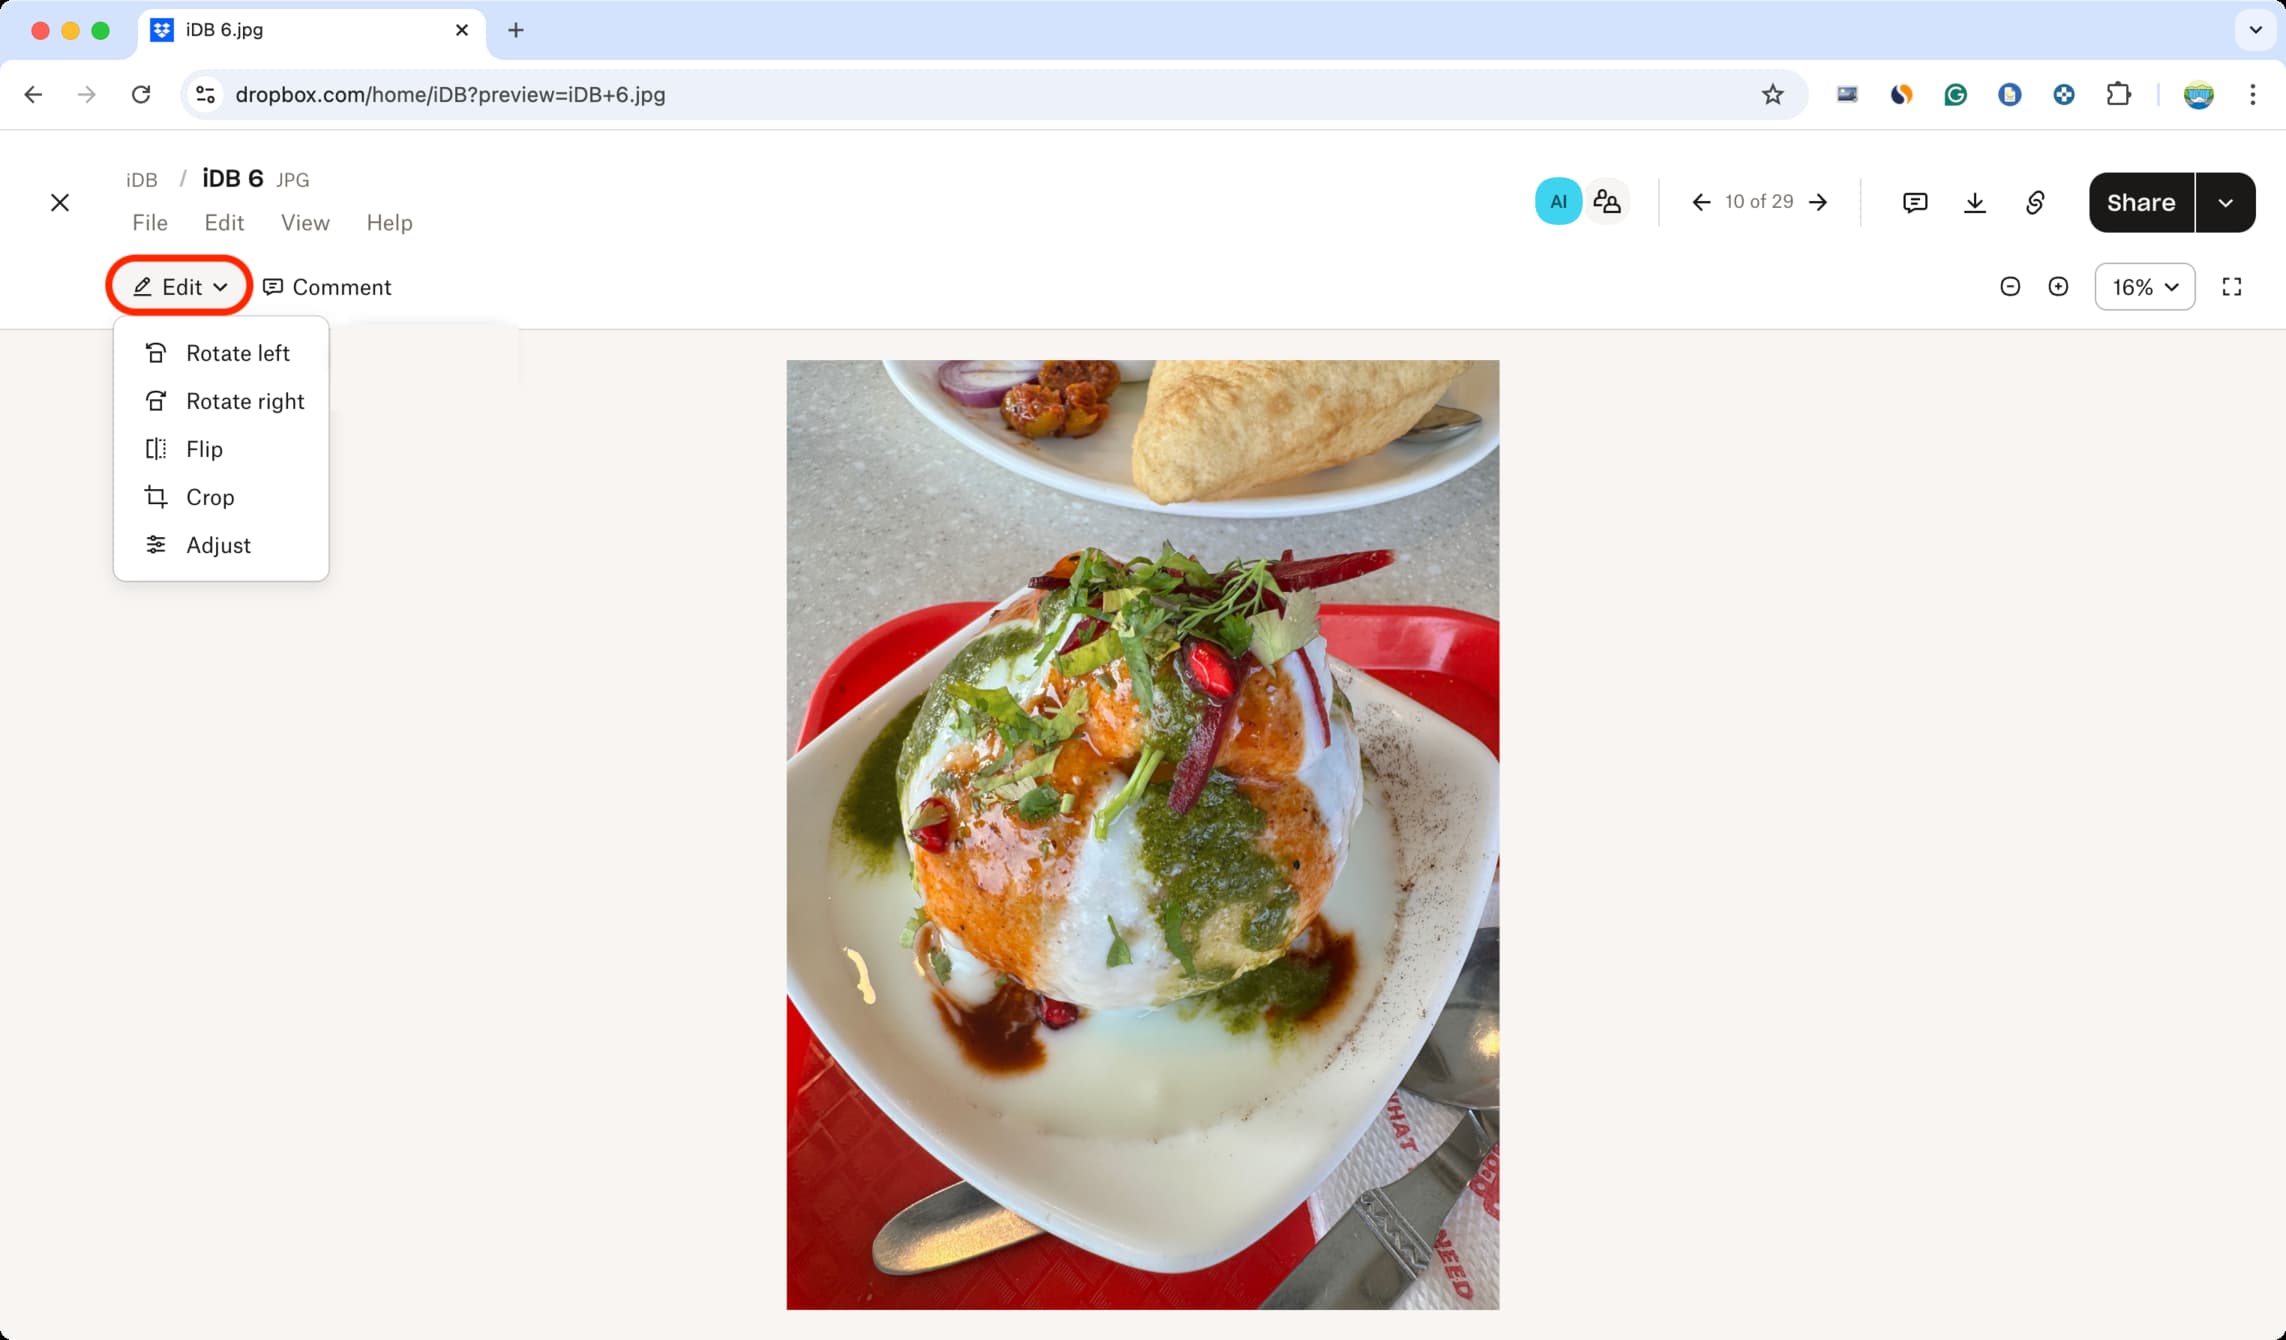
3) You can now change the light and color aspects of the image by adjusting the Brightness, Contrast, Highlight, Shadow, Exposure, Saturation, and Temperature sliders. You can also enter a number in the box next to them or use the arrow buttons to fine-tune the values.
4) Rotate, flip, or crop the image by using the respective buttons located at the top (or when hitting Edit in Step 2).
5) Once you are happy with the edits, click the Save button in the top right corner and choose to save the new edited image as a copy or have it replace the original.
Sign the image in Dropbox
Dropbox allows you to add a digital signature to your image or send it to other users for them to sign.
One important thing to note is that signing the image converts it to a PDF. So, if you’re comfortable with that, follow the steps below to add a signature to the picture using Dropbox. If keeping the original image format intact is crucial, you can use your iPhone or iPad to add a signature or watermark to your image.
1) Visit Dropbox.com in a computer or iPad browser and locate the image you want to sign.
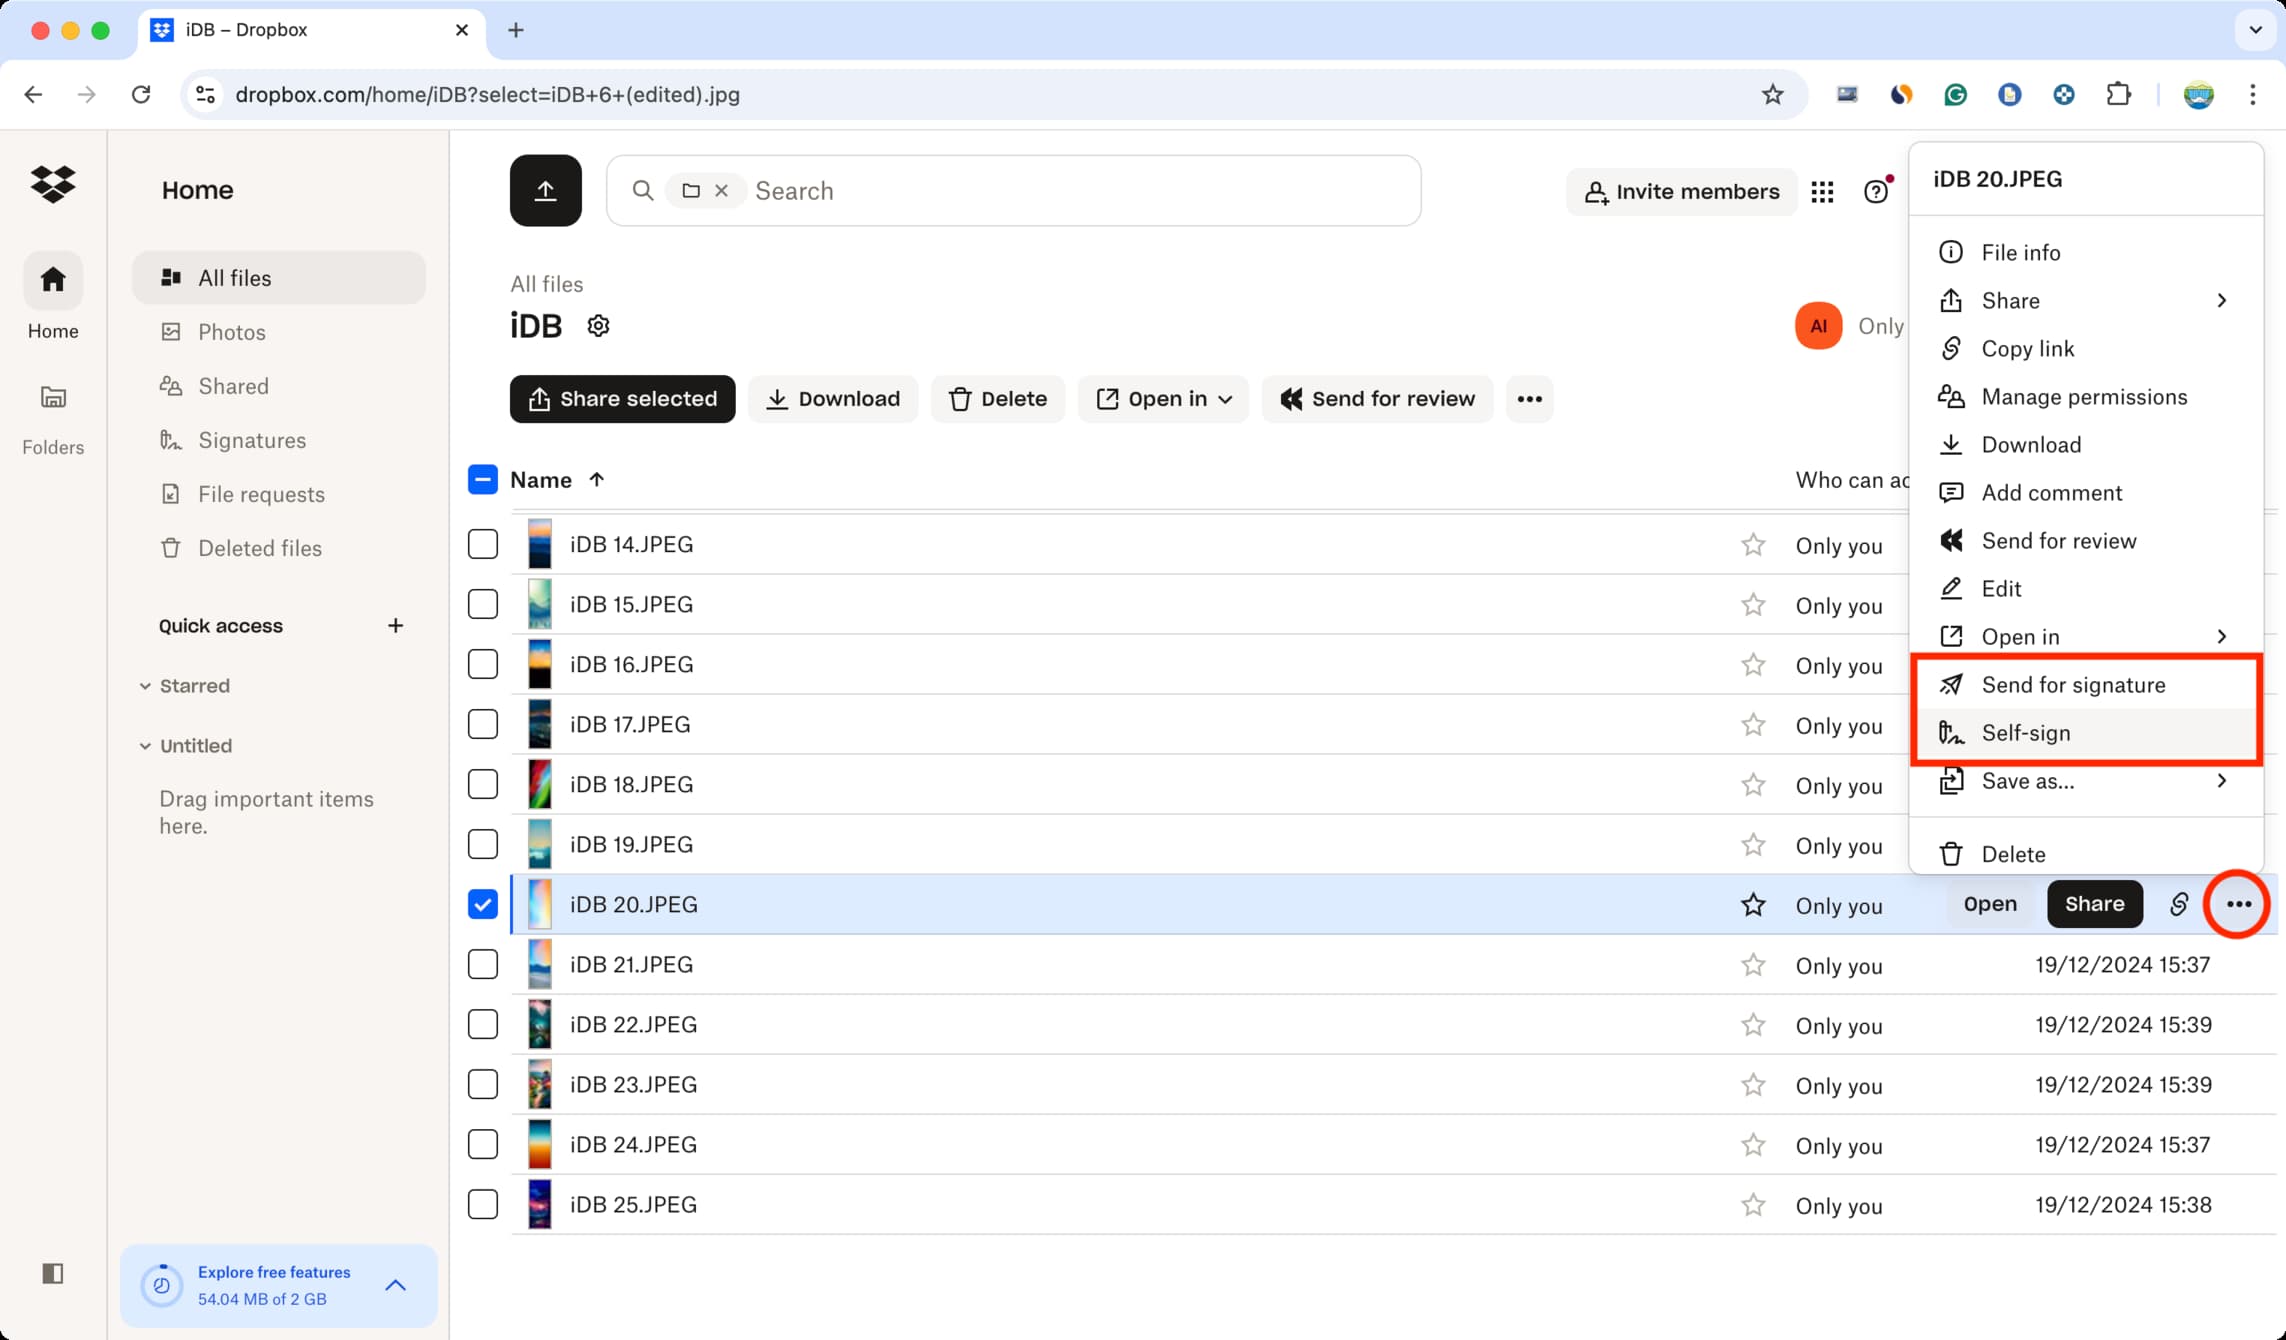
2) Click the three dots icon next to the photo file and select Self-sign or Send for signature.
Self Sign
Use this option to add your own signature to the image.
- After selecting Self-sign, the image will open in the Dropbox editor as a PDF and display a box to add your signature. You can draw, type, or upload your signature and insert it into the image.
- Once the signature is inserted, drag it to the desired spot, such as the bottom-right corner. Adjust its size or rotate it as needed.
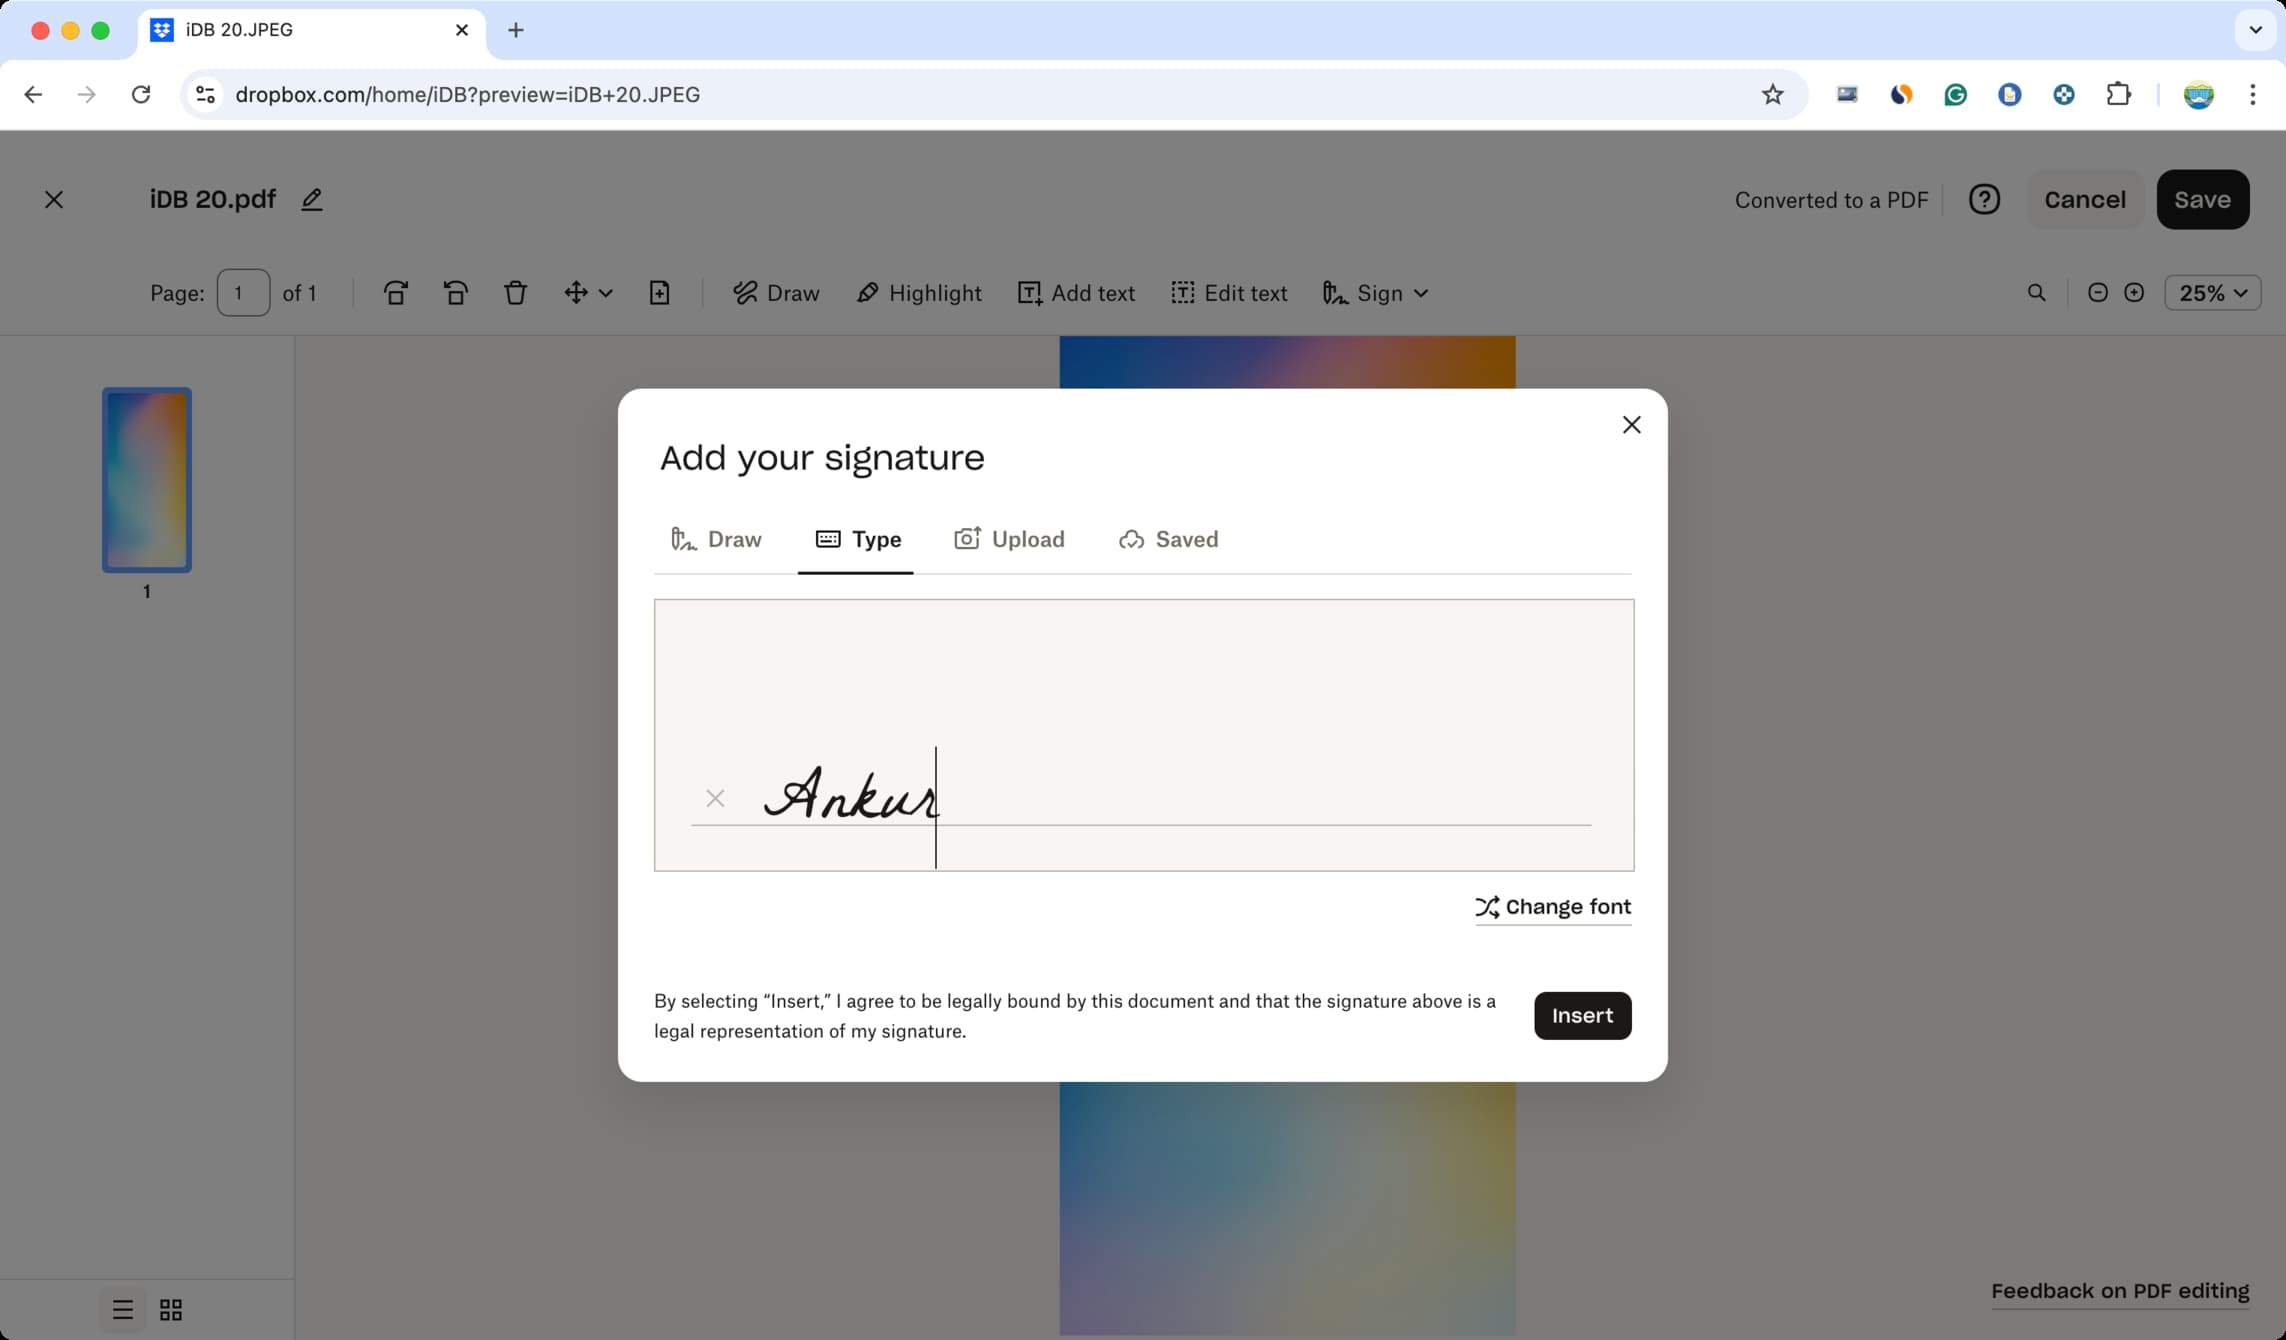
After adding the signature, click the save button, and Dropbox will prepare your signed document and save it as a PDF.
Send for signature
Use this option to have other people sign your document. The free version of Dropbox allows up to three signature requests per month, whereas the self-sign option mentioned above is unlimited.
- After selecting Send for signature, enter the names and email addresses of the people you want to sign your image. You can also enable an option to specify the order in which they should sign.
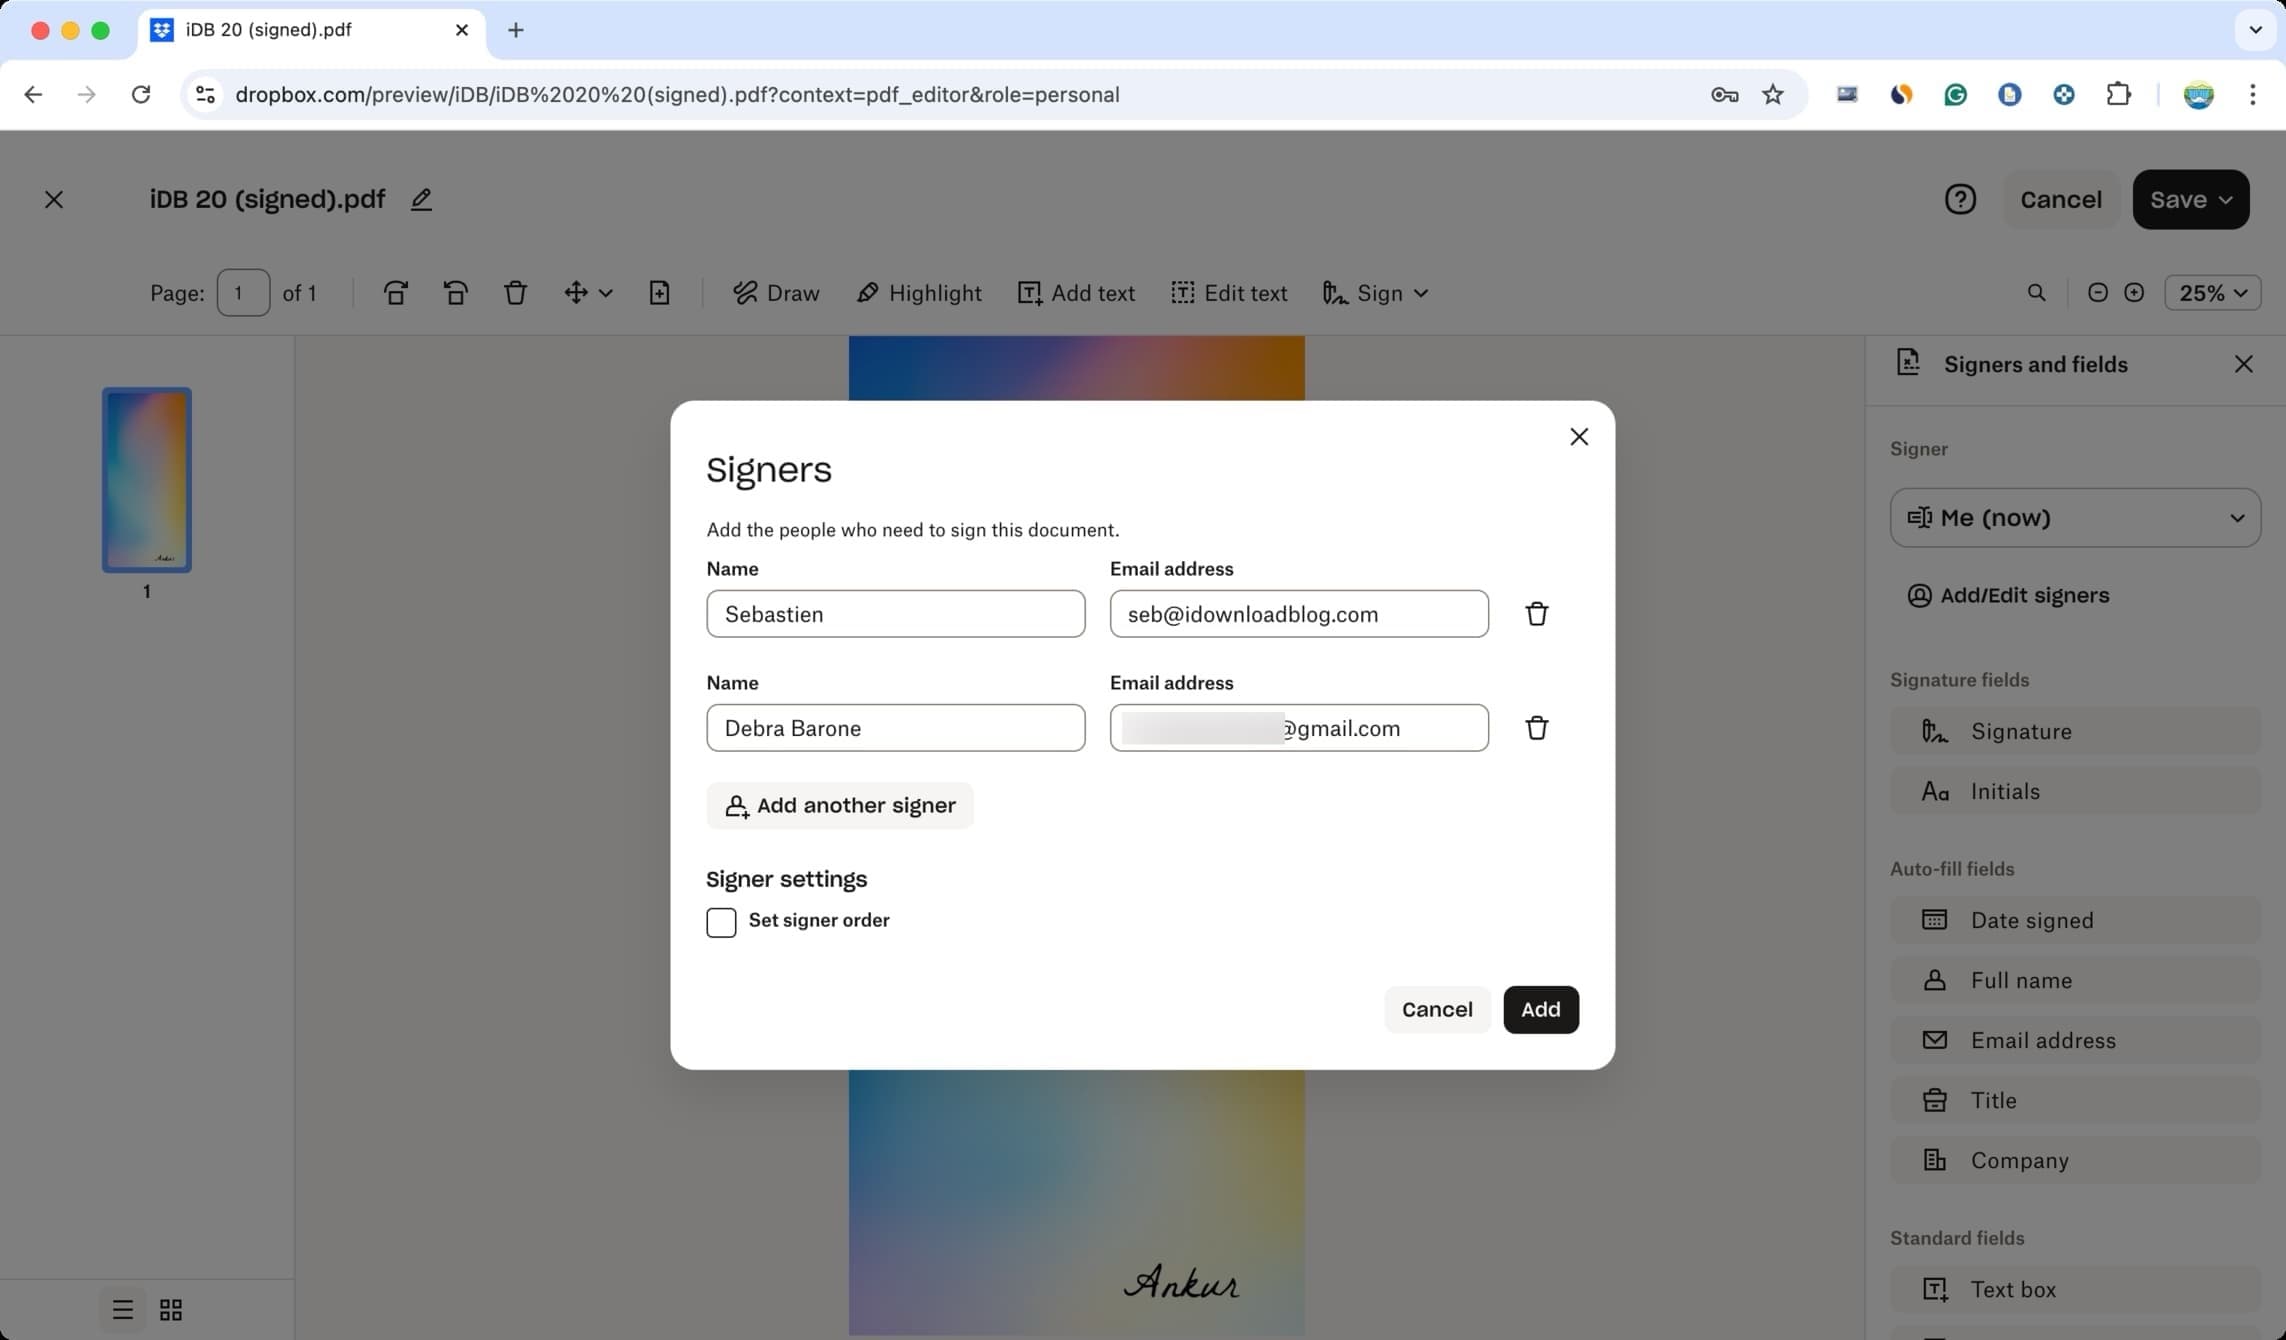
You can access all aspects of Dropbox Signature by visiting dropbox.com/signatures.
Can you edit images in the Dropbox mobile app?
The Dropbox app on iPhone doesn’t allow image editing. However, any edits you make to an image using Dropbox’s web version on a computer or iPad will sync to your iPhone.
If you need to edit a Dropbox image on your iPhone, download it to the Photos app and use its built-in editing tools to adjust the appearance, crop, rotate, flip, or modify the picture. You can also use the Markup tools on the editing screen to add a signature or hide sensitive areas.
Furthermore, the Photos app has a hidden feature that allows you to copy the edits made to one picture and paste them to several images, thus enabling quick batch edits!
Related: How to set up and use Dropbox on your Mac
Source link: https://www.idownloadblog.com/2024/12/20/how-to-edit-image-in-dropbox/


Leave a Reply