How to import iPhone photos videos directly into iMovie on Mac
This step-by-step guide will show you how to transfer photos and videos from your iPhone or iPad directly into iMovie on your Mac for a smooth movie-making experience.
There are a few different ways to transfer media from your iPhone to your Mac for use in iMovie.
To begin, you can select all the needed photos and videos in the iPhone Photos app and then use AirDrop to transfer them wirelessly or via a cable. Alternatively, you can use the Photos or Image Capture apps on your Mac to copy media directly to your Mac’s storage. Once the files are on your Mac, simply drag and drop them into your iMovie timeline.
You can also start your video-editing project in the iMovie app on your iPhone using all the required photos and videos. When you’re ready, tap the share button and save the project to iCloud Drive. Then, open iMovie on your Mac and click File > Import iMovie iOS Projects. Select the project from iCloud Drive to continue editing on your Mac.
However, instead of using the first two methods or relying on slow uploads and downloads with iCloud Drive, you can directly import iPhone photos and videos into iMovie on your Mac.
Importing directly using a cable is the and reduces the risk of errors. It also eliminates the need for extra steps like turning on All Photos Data when transferring Cinematic videos via AirDrop.
The process for importing media from other external devices, such as a camera SD card, thumb drive, SSD, hard disk, etc., is similar.
Import iPhone videos and photos directly to iMovie on Mac
1) Connect your iPhone or iPad to your Mac using a USB cable.
2) Open iMovie on your Mac and go to the Media tab at the top, or open a new or existing video project.
3) Click the arrow import button (↓) in the top left corner, and that should open the “Import” window. If any apps like Photos or Image Capture open, close them.
![]()
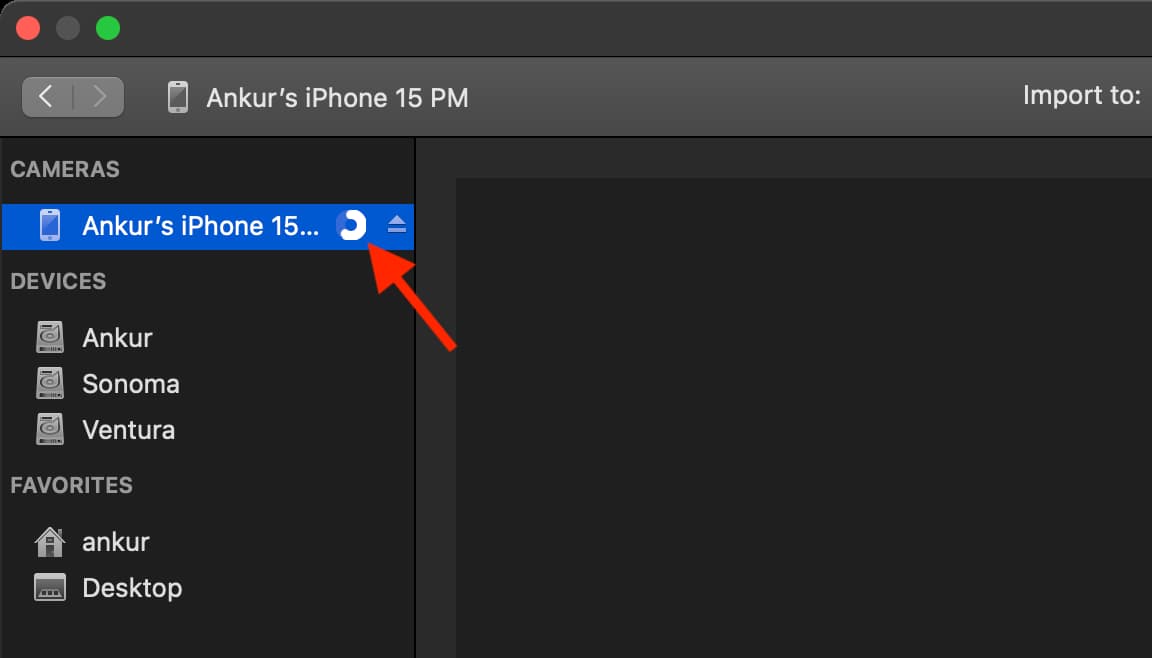
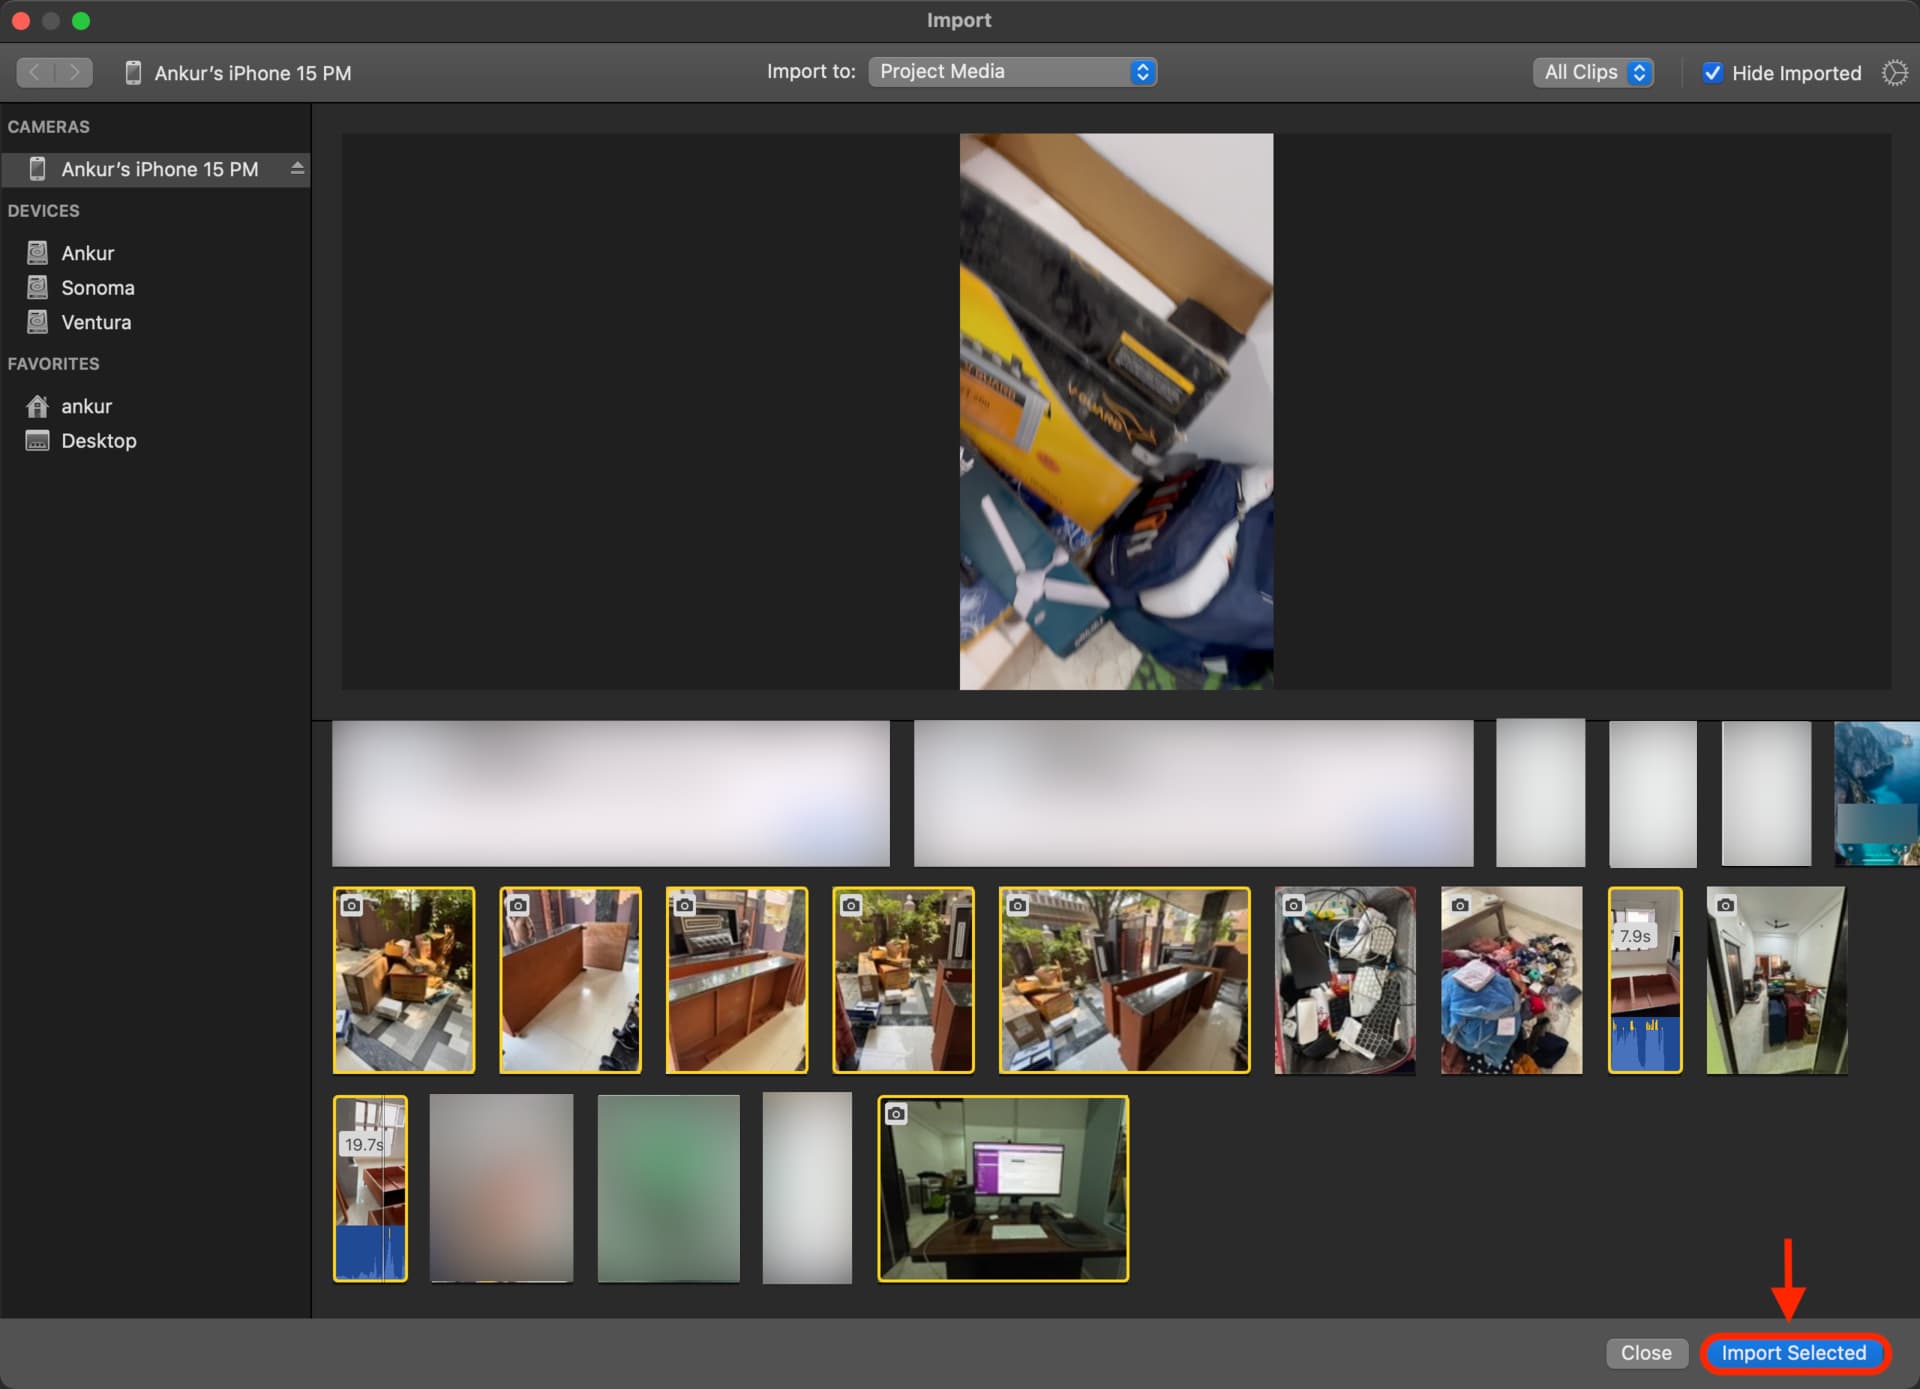
4) Look at the left sidebar of the Import window and click on your iPhone, iPad, or iPod touch listed under the Cameras section. Your iPhone’s media will now appear. If you have a large number of photos and videos, it may take a bit of time for everything to load. In this case, you’ll notice a progress bar next to your iPhone’s name in the sidebar.
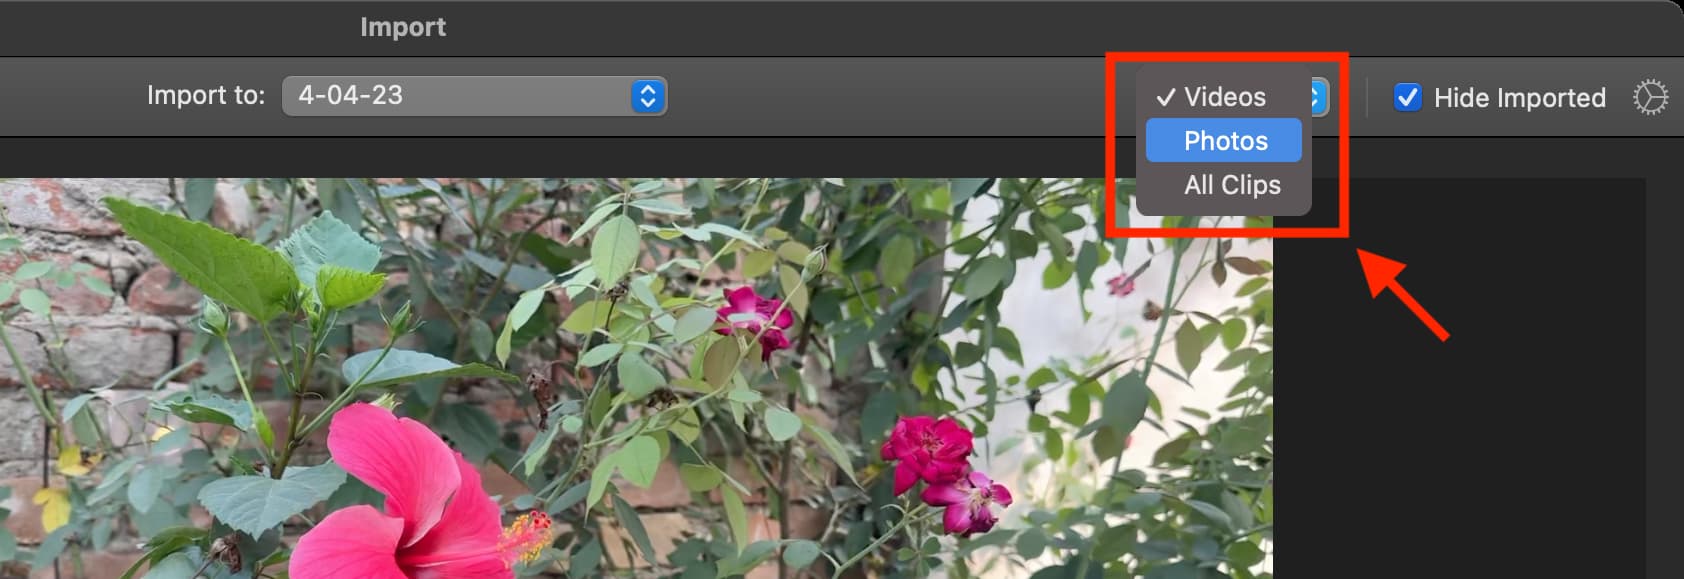
Click the drop-down menu in the toolbar to see just the Videos, Photos, or All Clips (both photos and videos).
Click the gear icon in the top right to change the thumbnail size for how the iPhone media is displayed in the bottom half of the Import window. You also have the option to show waveforms to get an idea of audio in video clips.

Next, you’ll see the “Hide Imported” box that’s already checked. It prevents iPhone photos and videos you have already imported from showing on the Import screen. This ensures your import window is clean and you don’t import the same file multiple times, thus saving local space. You can uncheck and recheck this option based on your needs.
The final point of interest in the toolbar is the “Import to” drop-down menu. You can set this to Project Media (if you are inside a project), another iMovie Library, or a new event.
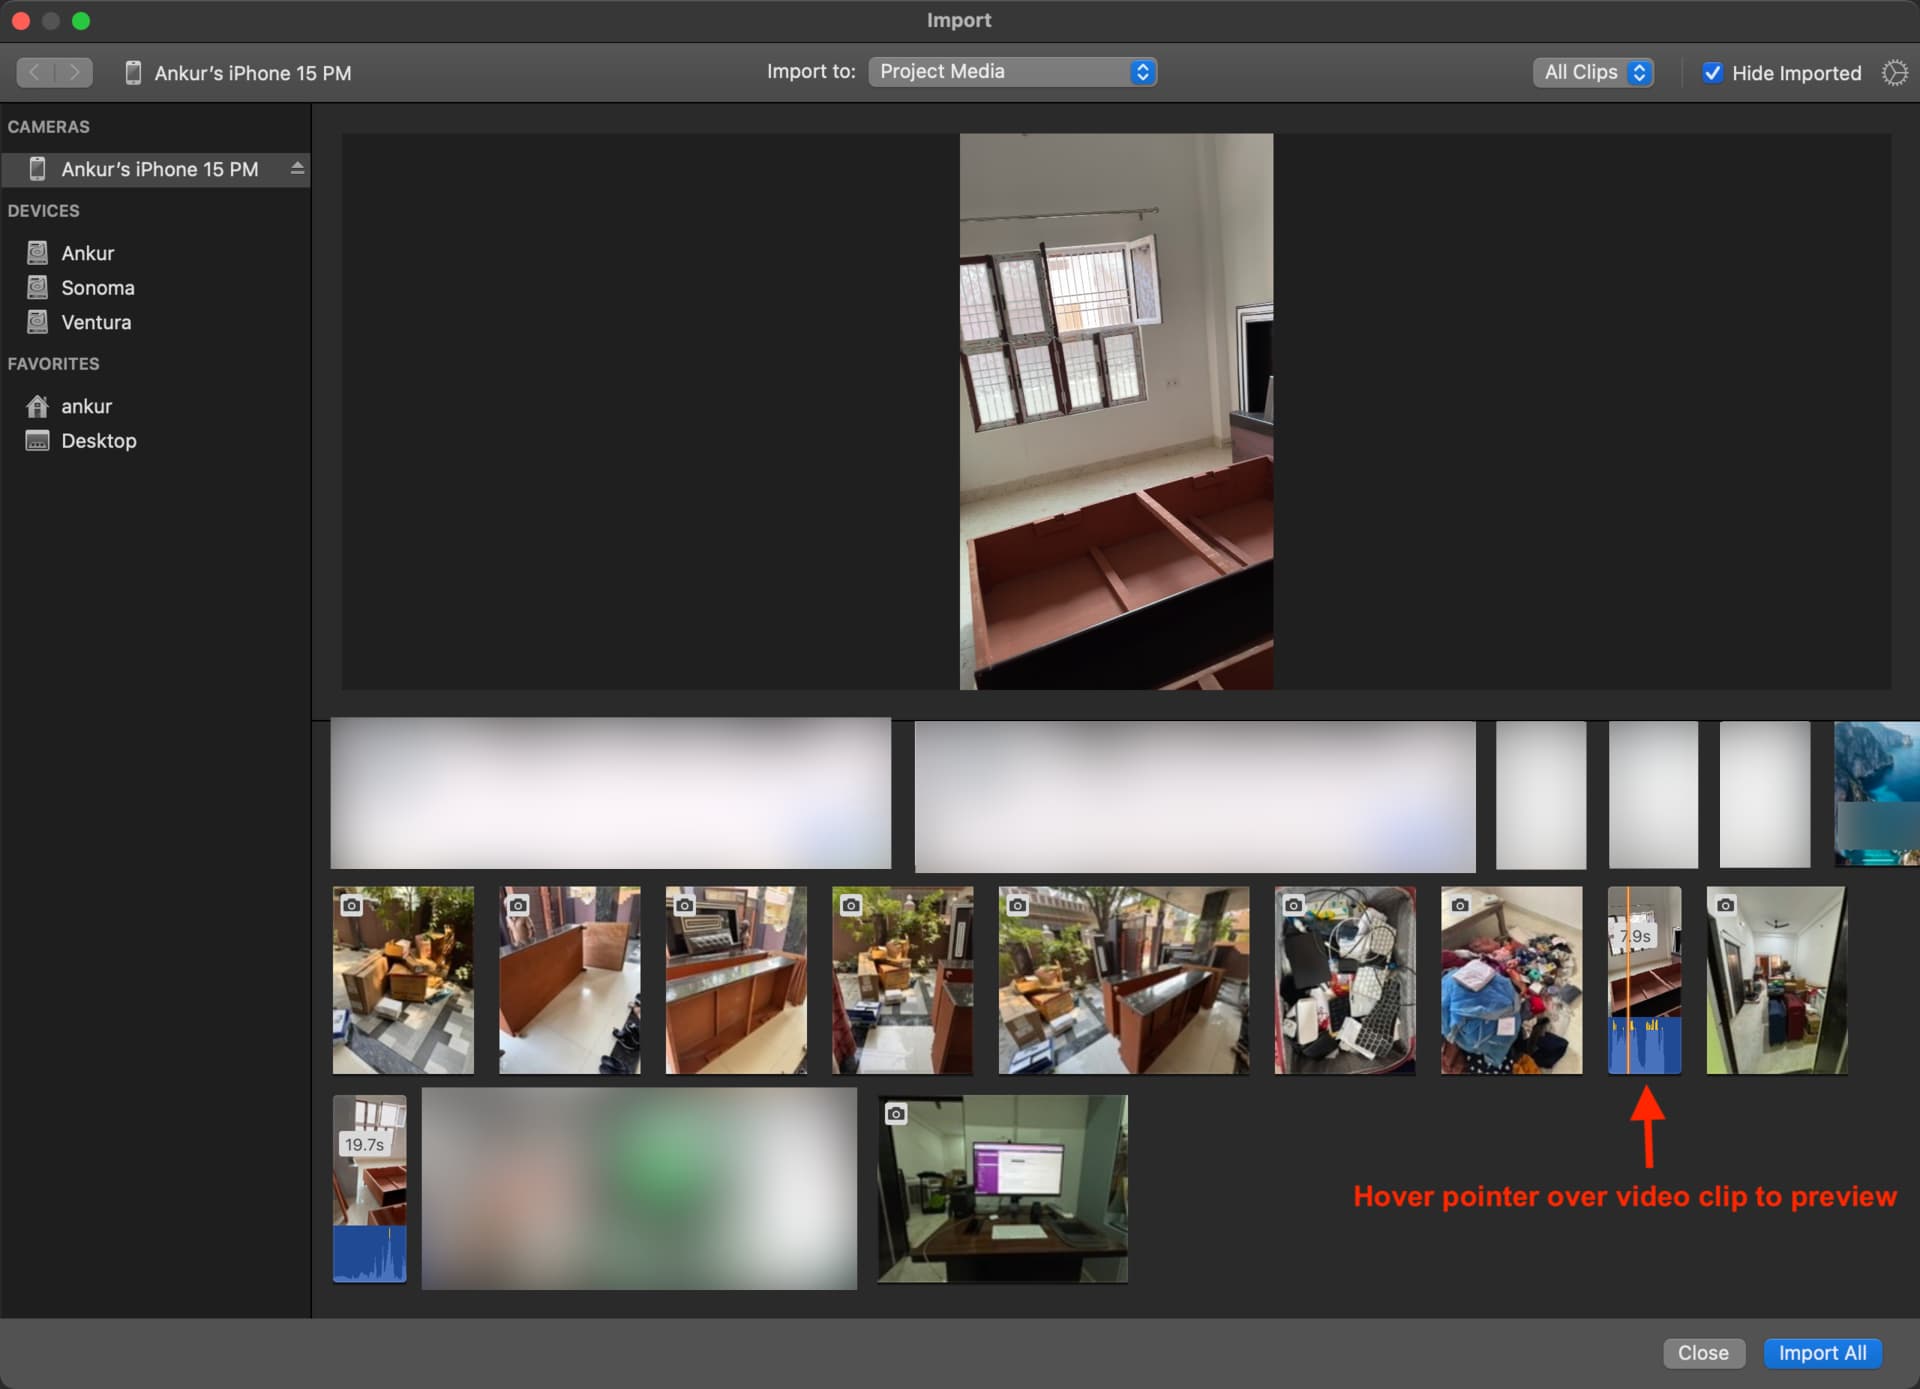
6) With videos visible on the Import window, hover the pointer over a clip to preview it.
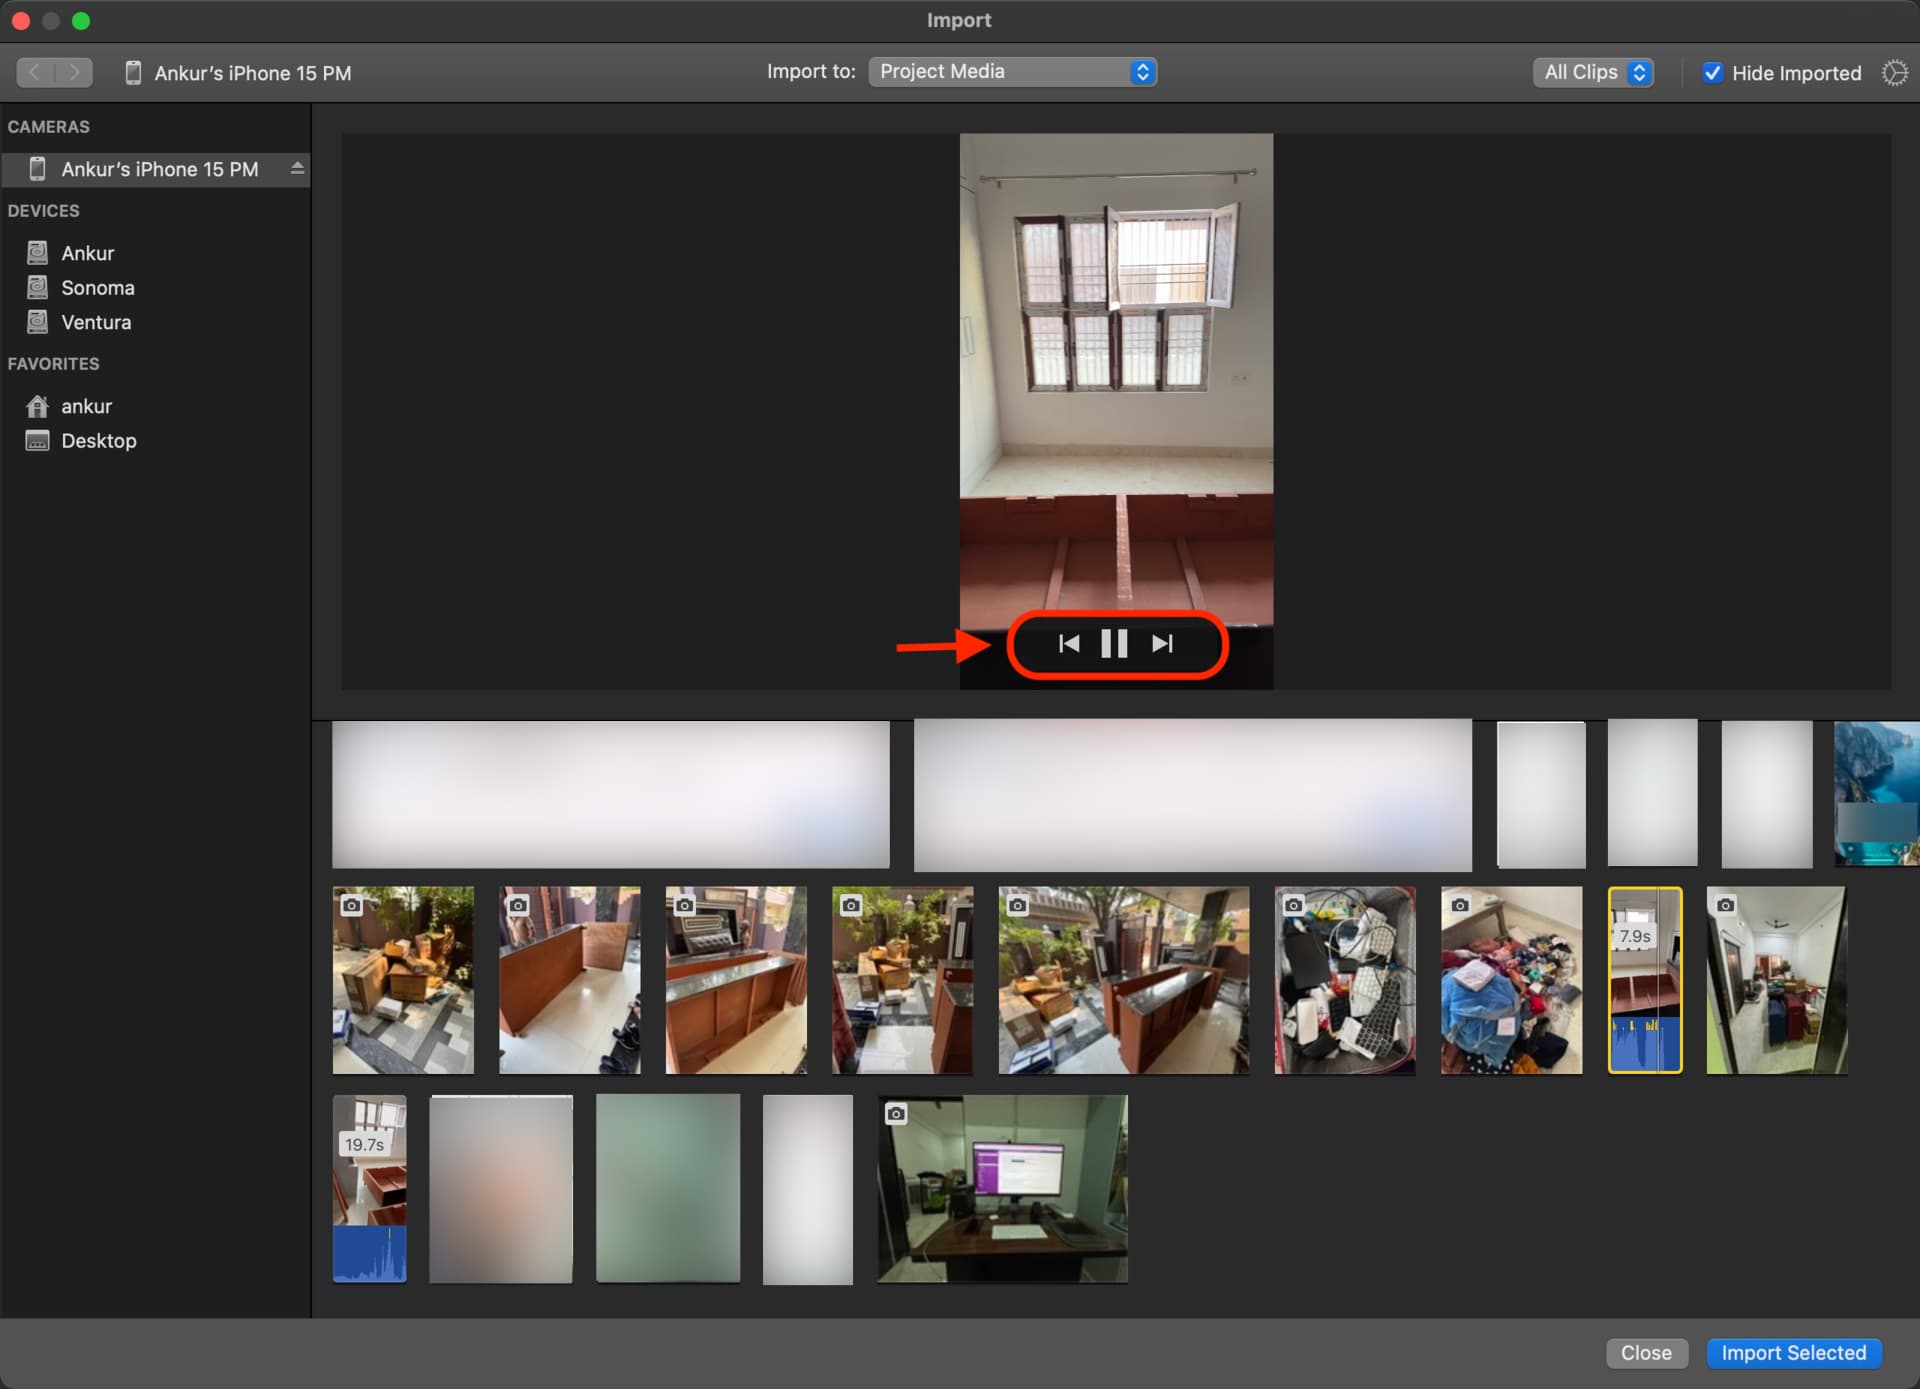
Additionally, you can select a video and use the play and pause buttons to preview it in a larger size. Note that holding down the next or previous buttons will fast forward or rewind the selected video.
7) Finally, select a photo or video, or hold the Command key to select multiple. Command + A will actually select all files for you. After that, hit the Import Selected button, and your Mac will copy these iPhone photos and videos to iMovie on your Mac.
You can keep working in iMovie while the media imports. You may also see a progress indicator if you’re importing several files or any that are extra large.
Once imported, you should see an Eject banner to eject your iPhone. You can do that or dismiss the alert so you can import other media from your phone to iMovie on Mac.

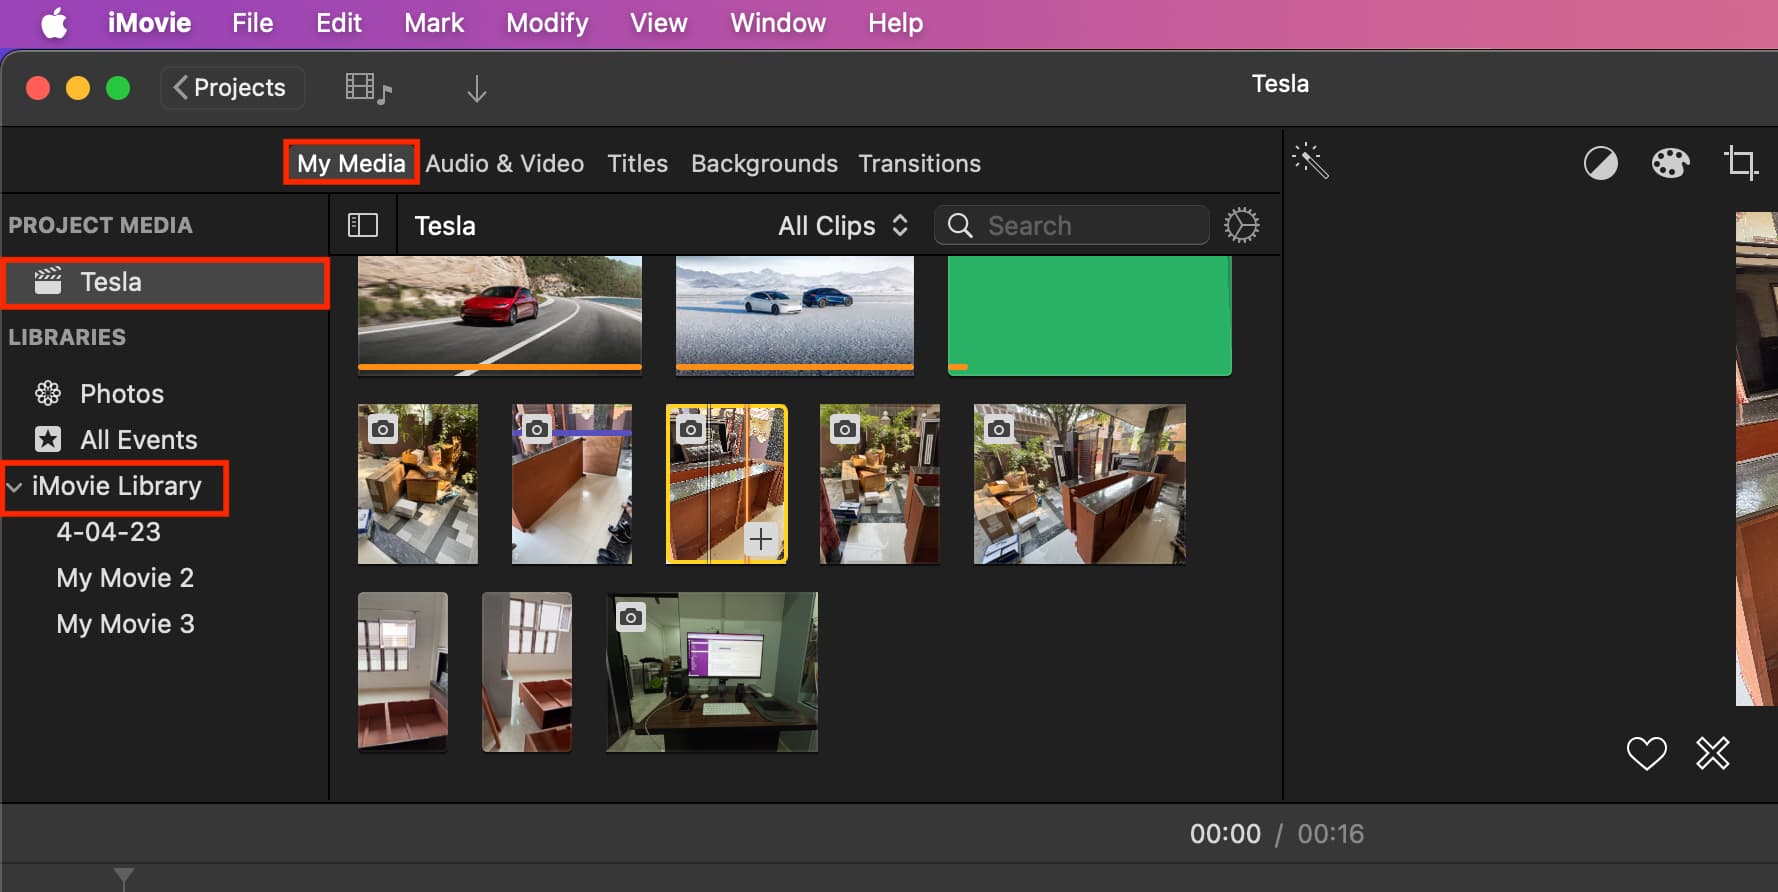
The imported photos and videos will appear in the “My Media” tab of your project. You can click on iMovie Library from the left sidebar, find your imported media under their respective project names, and organize these clips as needed.
If your iPhone doesn’t appear in the iMovie Import window
With your iPhone connected to your Mac, open Finder and select your phone under the Locations heading. Unlock your iPhone and click Trust in Finder. After that, tap Trust on your iPhone and authenticate with a passcode, Face ID, or Touch ID.

After following the above steps, you should see your iPhone in iMovie’s Import window. If for some reason you don’t, try these troubleshooting tips:
- Quit and reopen iMovie.
- Restart your iPhone and Mac and repeat the above steps.
- Reset Location and Privacy settings on your iPhone to untrust all computers and then trust your Mac again from Finder.
More on iMovie:
- How to record video or take a photo right in iMovie
- How to edit and save vertical videos without black bars in iMovie
- How to reduce background noise in iMovie
Source link: https://www.idownloadblog.com/2024/11/18/how-to-import-iphone-photos-videos-to-imovie-mac/


Leave a Reply