

How to erase and format external drives on iPhone or iPad
Learn how to use the stock Apple Files app on your iPhone or iPad to fully erase and change the format of external thumb drives, camera SD cards, SSD, hard disks, etc.
Before iOS 18 and iPadOS 18, if you had to erase or format a drive, you’d have to rely on Mac’s Disk Utility or Windows File Explorer.
However, you can now erase everything on an external pen drive, SD card, solid-state drive (SSD), or even a hard disk drive (HDD) directly from your iPhone or iPad.
So, if you’re a photographer who needs to reformat the drive on the go, or a student who needs to change a thumb drive from Apple’s APFS format to ExFAT to make it compatible with Windows PC or Chromebook machines, you can do that without a computer.
What you need
- iPhone or iPad running the latest version of iOS 18, iPadOS 18, or later
- An external drive that can connect to your iPhone or iPad’s charging port. You will need a USB-C hub if you have an SD card or a USB-A drive.
Note: I was able to format drives on my iPad and iPhone with USB-C ports. However, since I don’t have a drive or hub with a Lightning port, I couldn’t check if drive formatting is also available on iPhone 14 and older running iOS 18.
Caution: Erasing and reformatting an external drive will delete all existing data on it. So, if the files on the drive are important, make sure it’s backed up elsewhere. You can also use the iOS Files app to copy them to your iPhone or iPad’s local storage, iCloud Drive, or other third-party apps added here.
Erase and format external drive on iPhone or iPad
1) Connect your thumb drive, SSD, hard disk, or SD card to your iPhone or iPad directly or using a compatible USB-C hub.
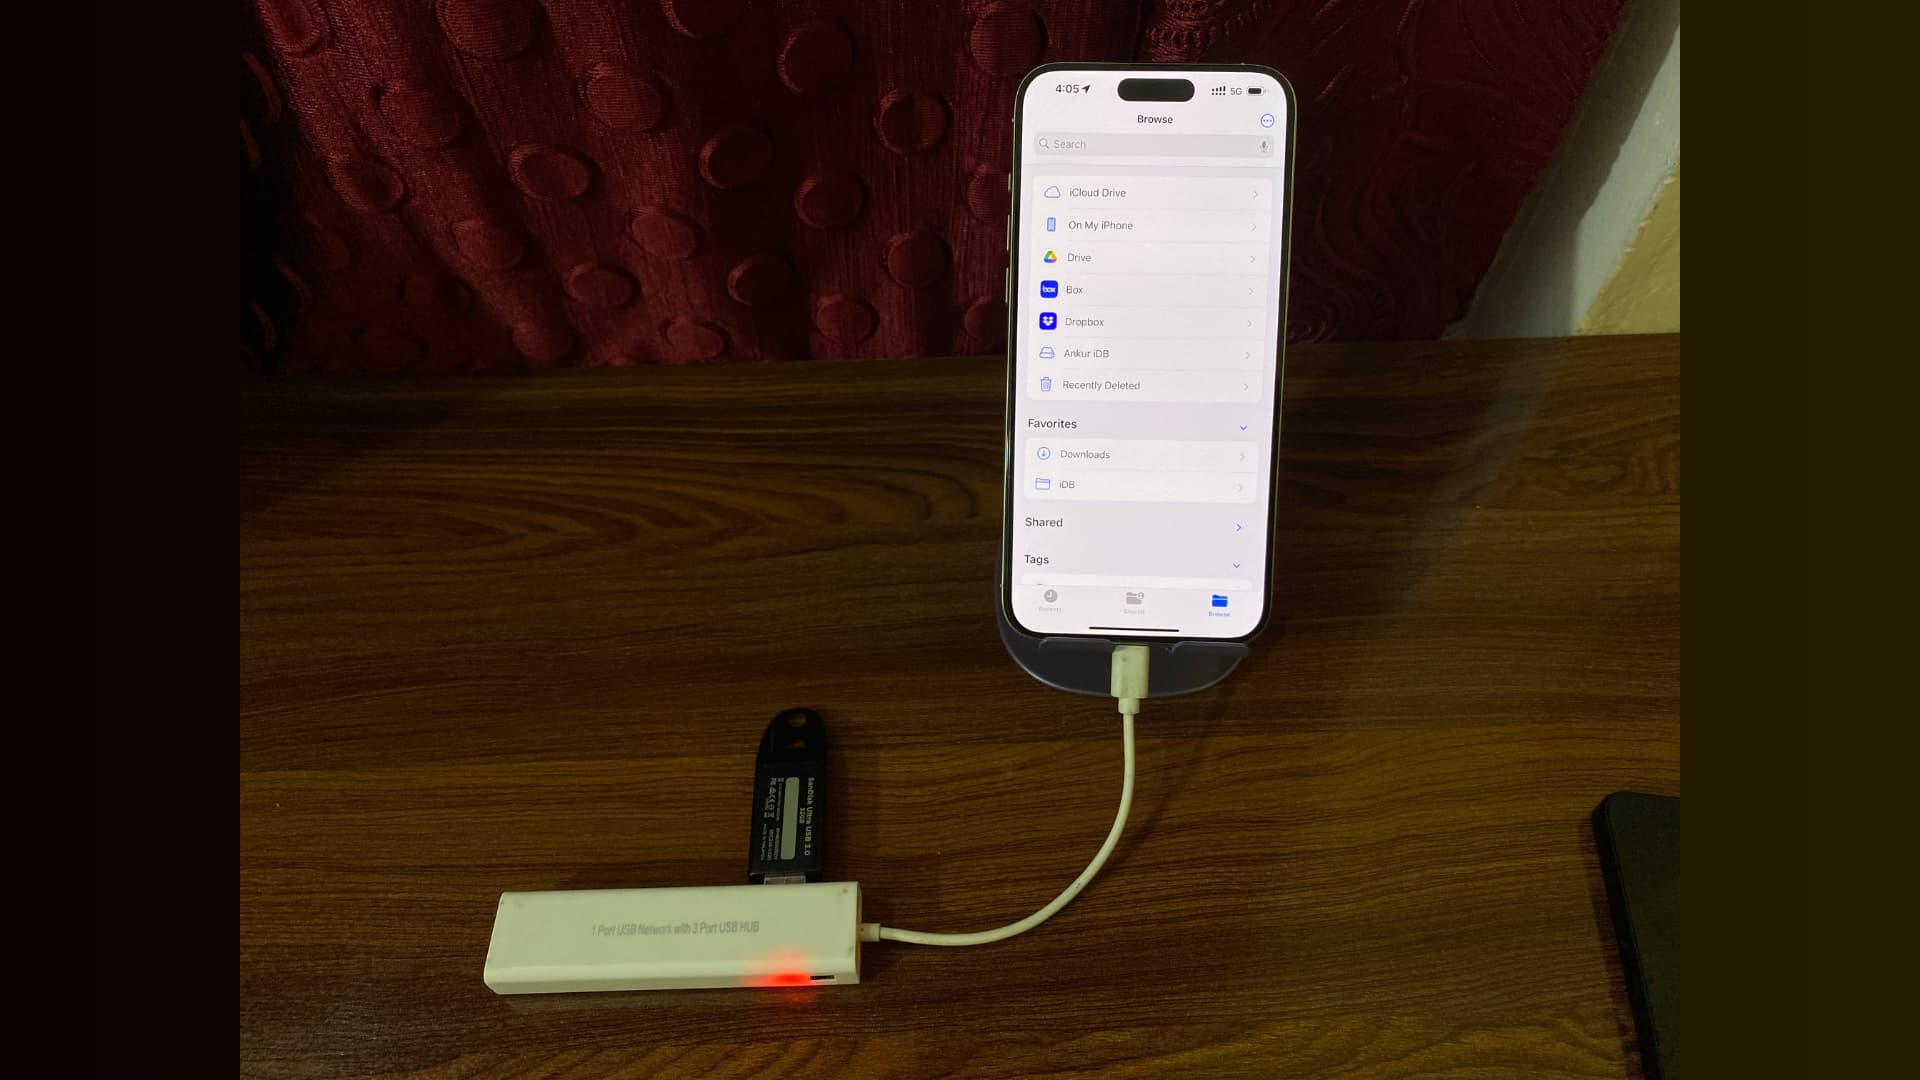
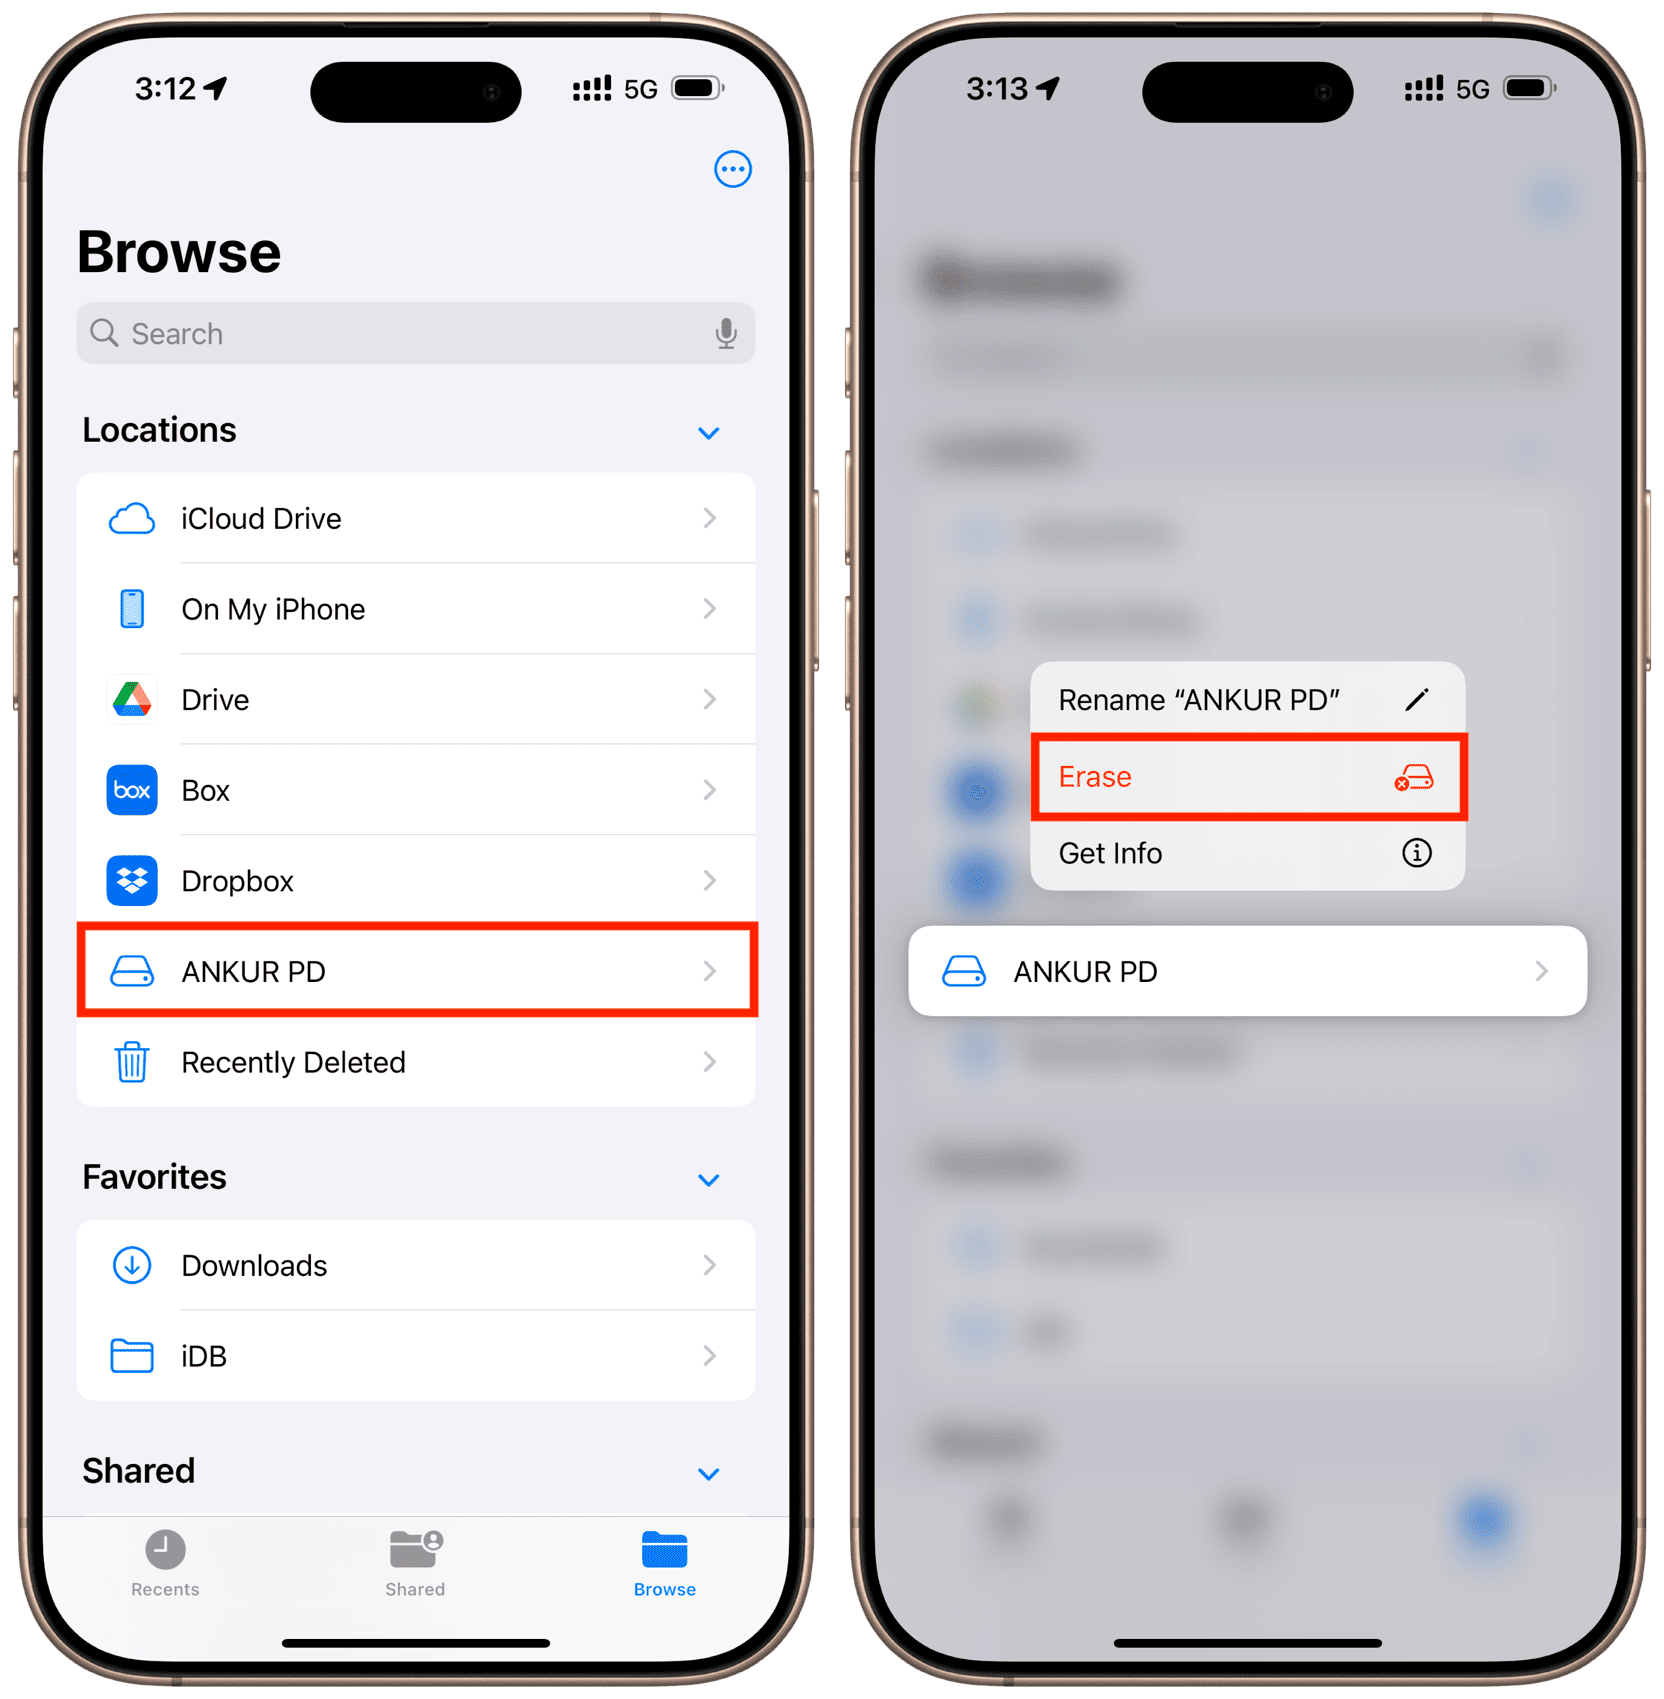
2) Open the Apple Files app and tap Browse. You will see the external drive under the Locations section.
3) Touch and hold the external drive name and select Erase. If you’re using a mouse, trackpad, and keyboard, you can also Control-click or right-click on the drive name.
4) Enter a new name if you want. Keep it short and without special characters like question mark (?), slash (/), period (.), etc.
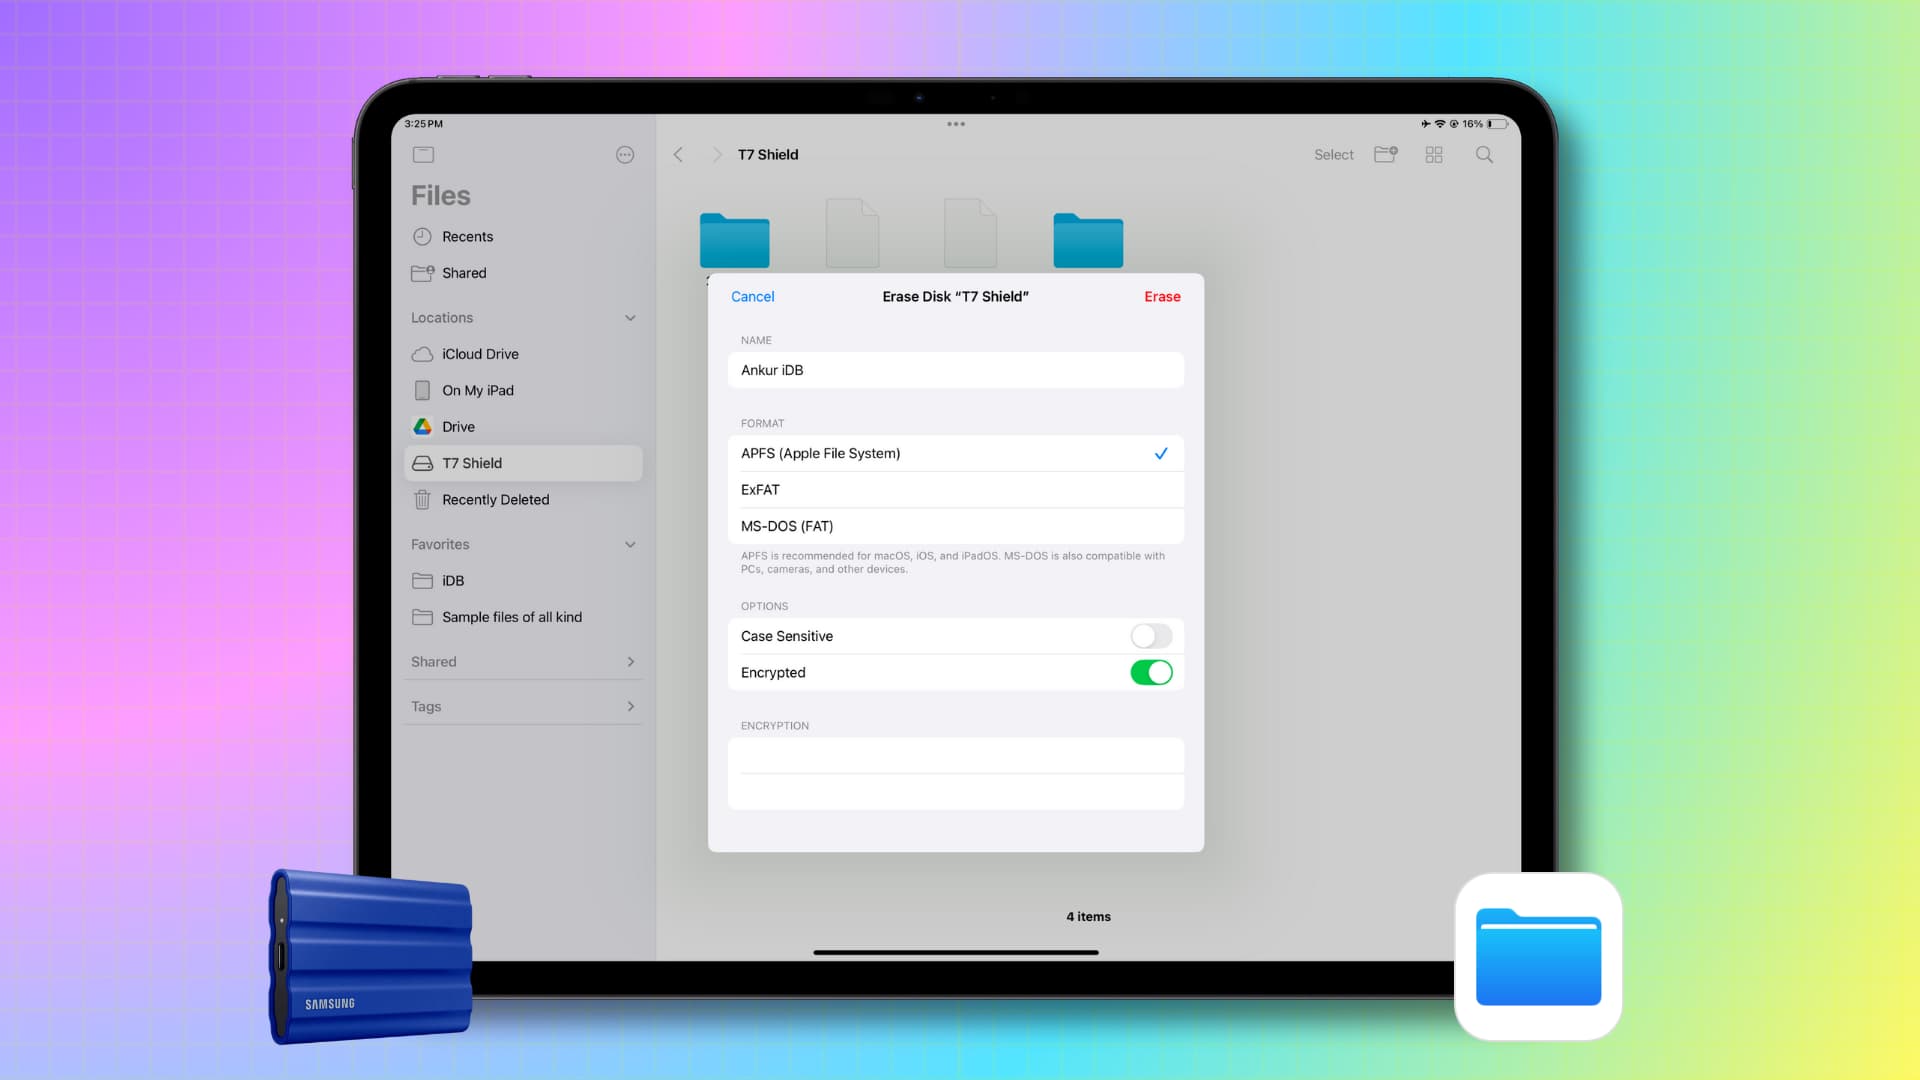
5) Now select one of the three Formats:
- APFS (Apple File System): Choose this if you want to use this drive only on Apple devices like iPhone, iPad, and Mac. You won’t be able to use this drive fully on Windows, Android, and other operating systems. In case you opt for this, you will get additional options to make it Case Sensitive or Encrypted.
- ExFAT: This is the best format to choose if you want to use this drive on nearly all platforms, such as Windows PC, Mac, iOS, iPadOS, Android, most digital cameras, TVs, etc.
- MS-DOS (FAT): This format is also supported across various operating systems. However, you should choose it only if the total size of the drive you’re formatting is 32 GB or less. Secondly, you won’t be able to add individual files larger than 4 GB. So, if you know that the individual files can be over 4 GB, opt for the ExFAT option.
6) After you select a format, tap Erase from the top right and then confirm.
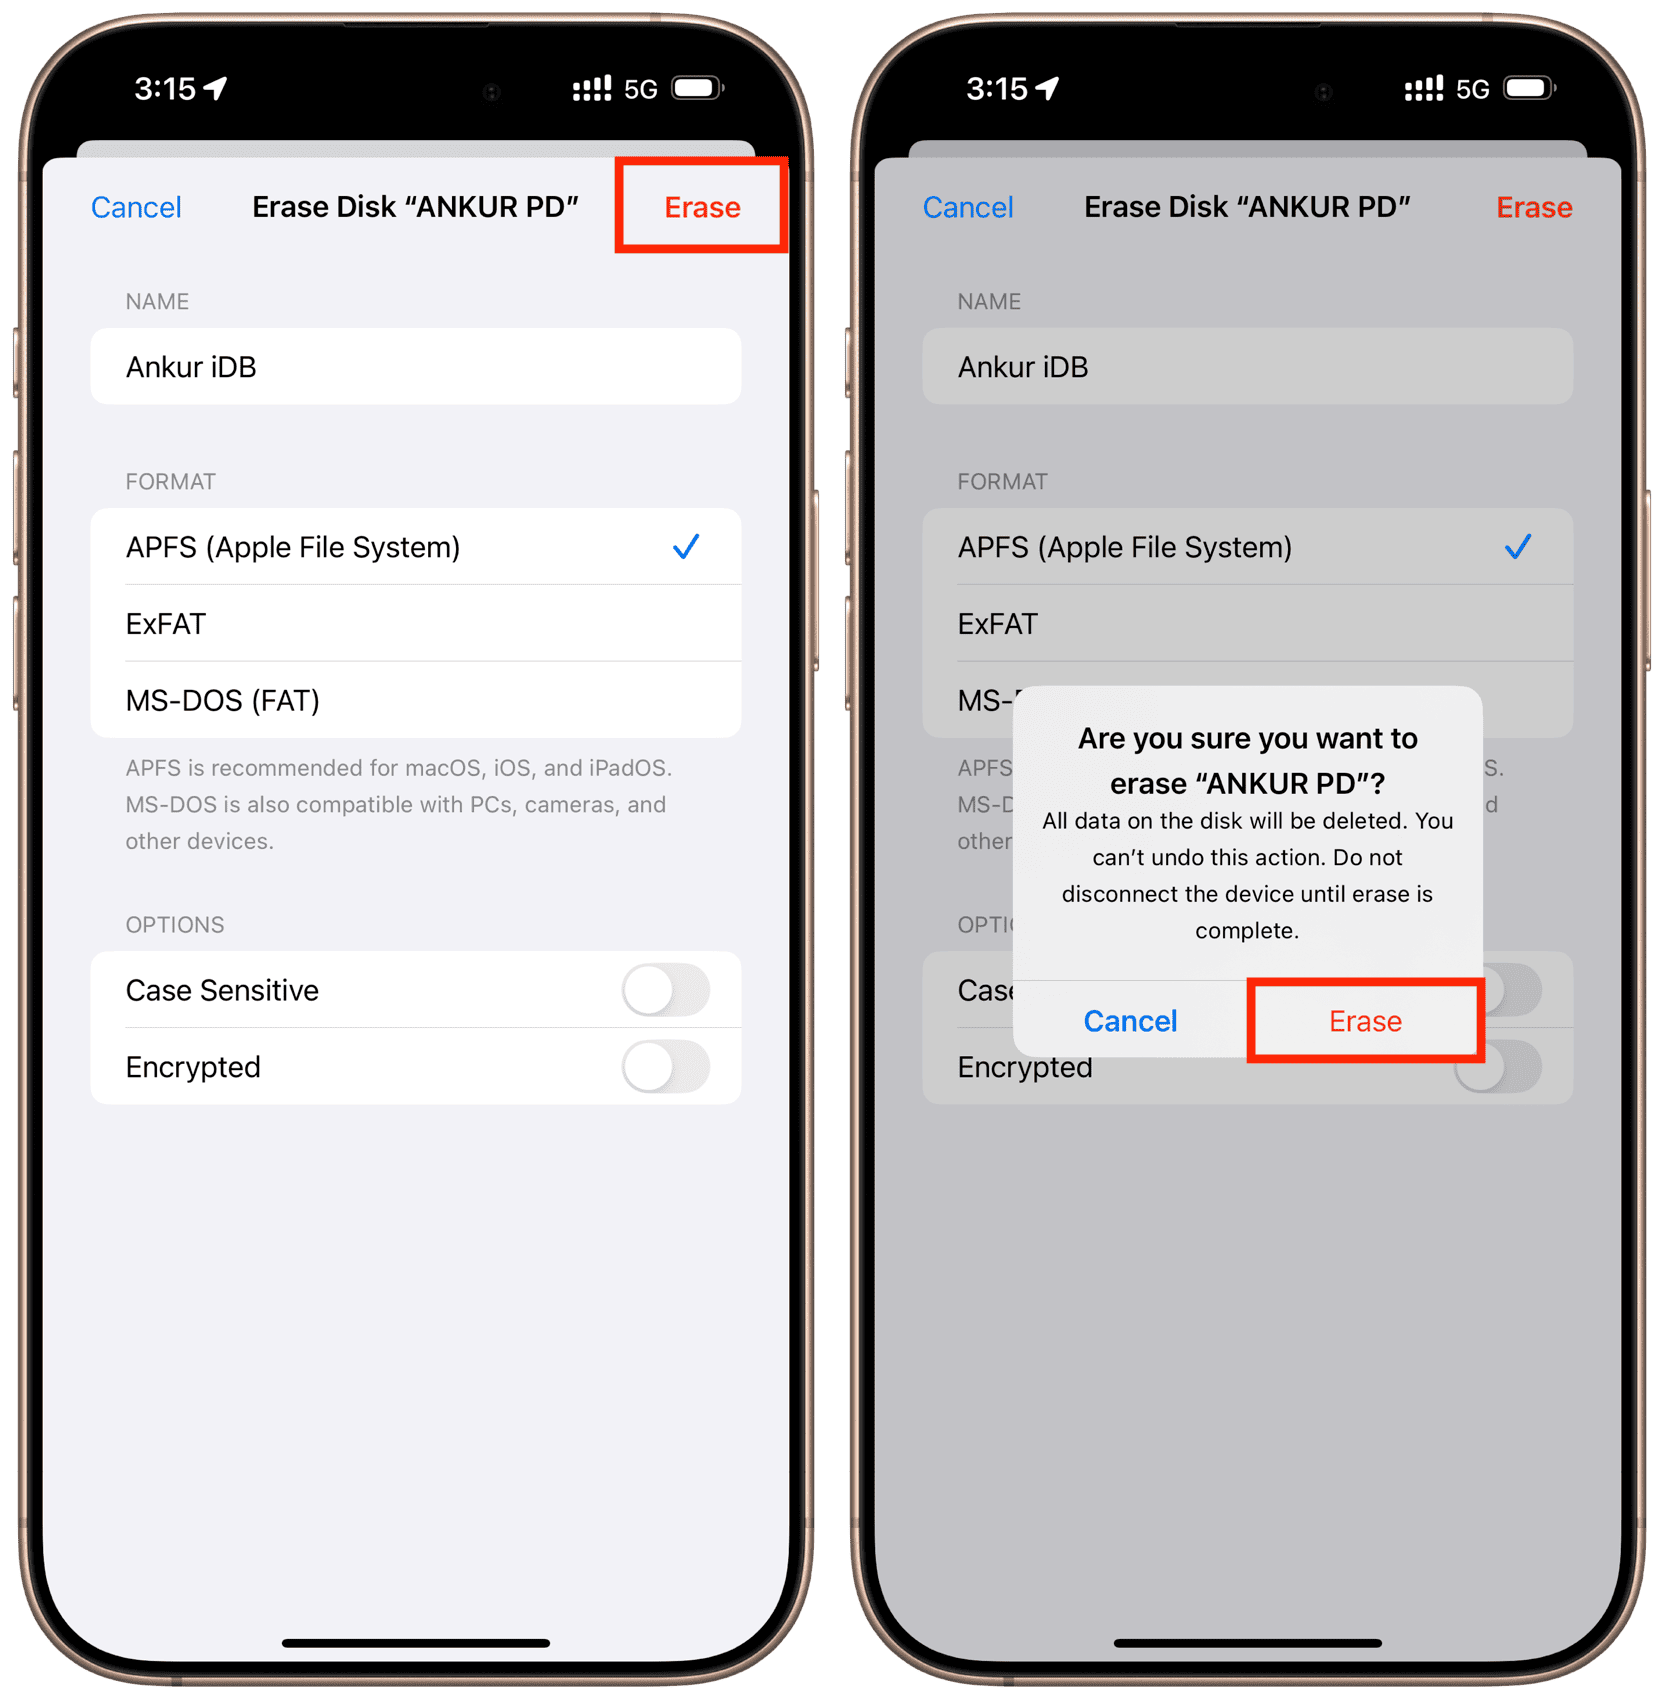
Unlike on Mac, there is no visual confirmation or progress bar that the drive is being formatted. So, just wait and don’t disconnect the drive.
The external drive will continue to show under the Locations heading of the Files app. The drive may even auto-select and show “Content Unavailable.” Just ignore these and leave the setup untouched.
After a while, the external drive will disappear from the Files app for about 15 seconds. After that, it will appear automatically in the Files app — with the new name — if you had followed step 4 above. Once you see the new name, you know for sure the drive was formatted.
Additionally, you can touch and hold the drive name and choose Get Info. The drive will be entirely empty. And if you had chosen to change the format, you will see the new format here.

Furthermore, unlike Mac, there is no eject button in the Files app that you have to hit before disconnecting the external drive. So, just unplug it from your iPhone or iPad’s USB port, and you’re good to go.
On a related note:
- How to connect and use a flash drive, hard disk, SSD, or SD card with your iPad
- How to use your iPhone or iPad as a USB drive on Mac or Windows PC
Source link: https://www.idownloadblog.com/2024/10/28/how-to-erase-format-external-drives-iphone-ipad/

Leave a Reply