

How to customize the Photos app on iPhone in iOS 18
Overwhelmed by the confusing design of the new iOS 18 Photos app? In this tutorial, we’ll show you how to hide sections you don’t need for a cleaner and less confusing experience.
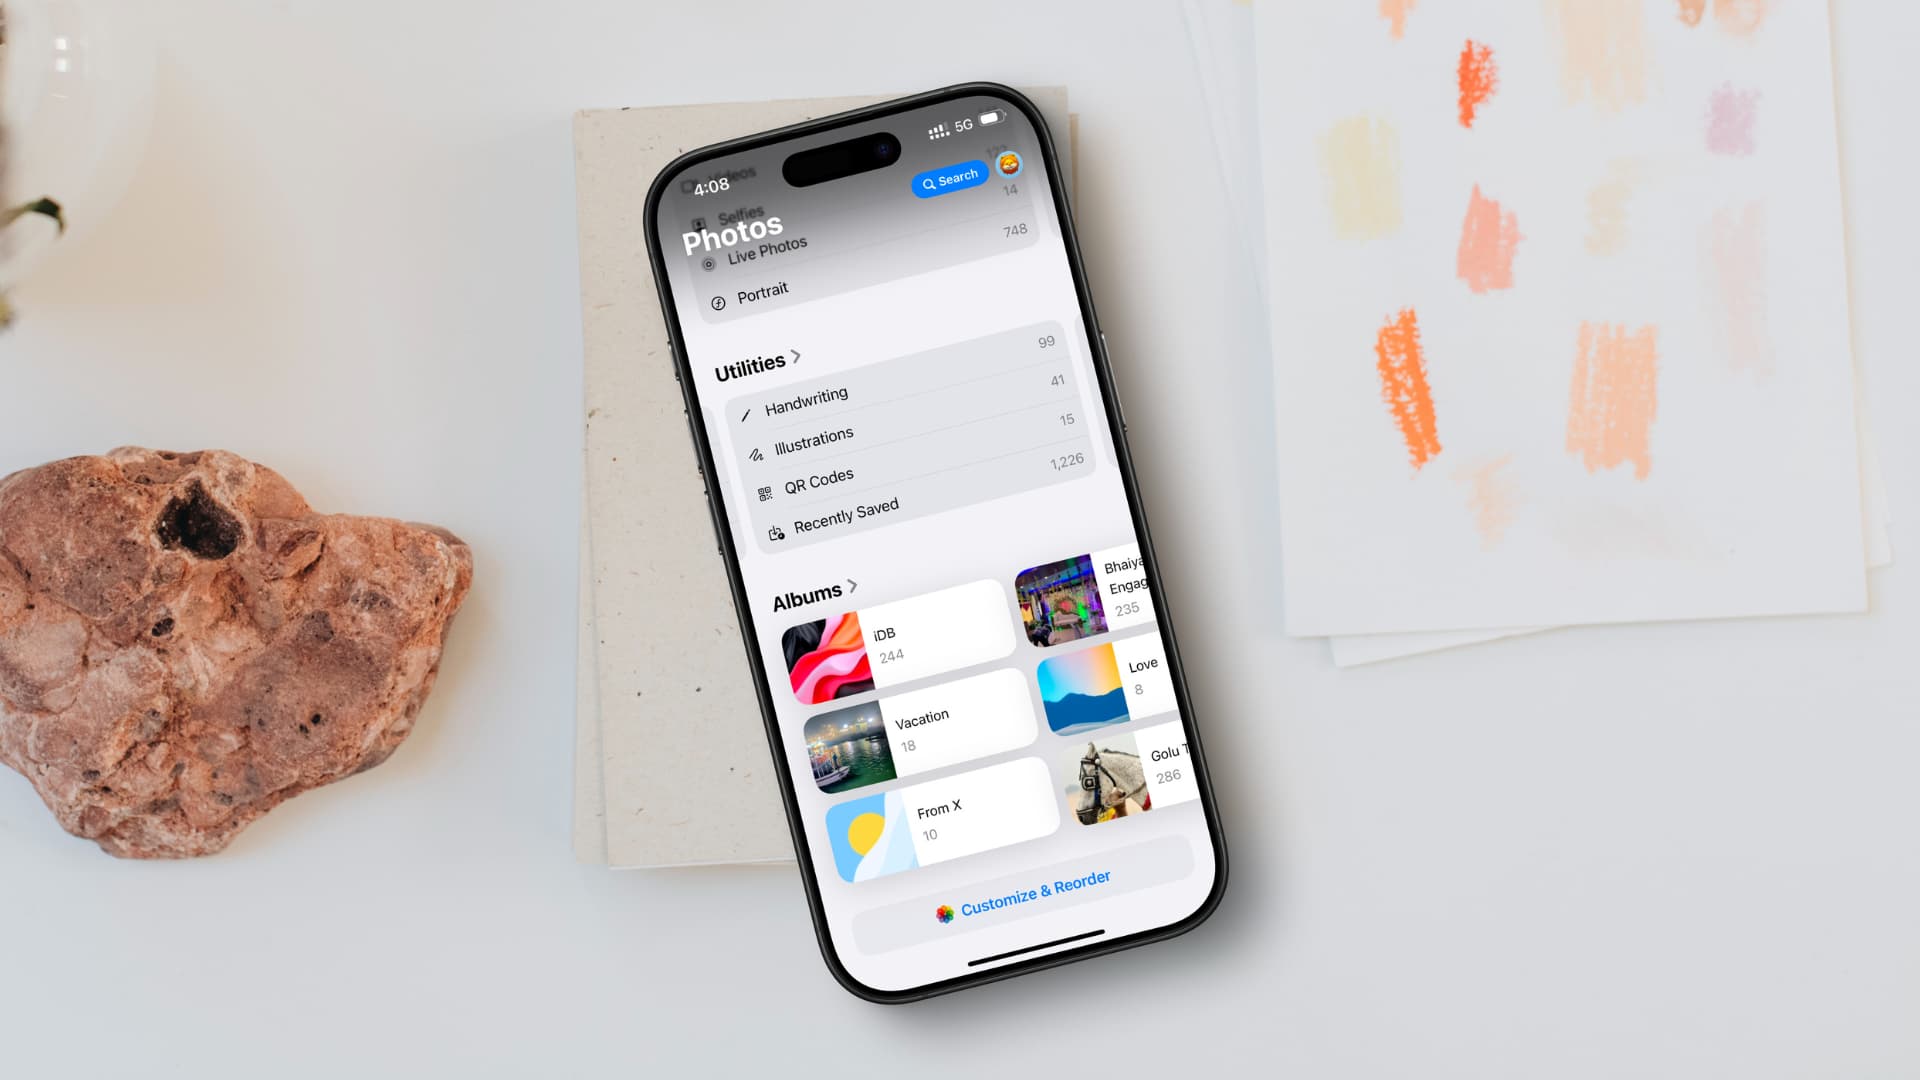
One of the biggest changes in iOS 18 has been the radically new Photos app. It no longer has tabs at the bottom as everything is now on a single screen. You can scroll up and down to see the sections like Memories, Albums, People, and more. Additionally, you can swipe left or right under a section to see more of it.
Having so many things of different sizes on one pane can feel overwhelming and confusing. However, to make the app work better for your specific needs, you can hide sections that don’t matter much to you.
For instance, even though they are pretty neat, I practically never use the People, Memories, Trips, Shared Albums, and Wallpaper Suggestions categories. So, I can hide them from appearing in my Photos app to make it less cluttered. This also ensures I do not have to swipe as much and can quickly get to sections that are more important to me such as Utilities and Media Types.
So if you too don’t appreciate the new Photos app design, you can use these three tips to customize it and turn it into something that works for you.
Hide or show relevant sections in the Photos app
- Open Photos on your iPhone or iPad running iOS 18 or iPadOS 18.
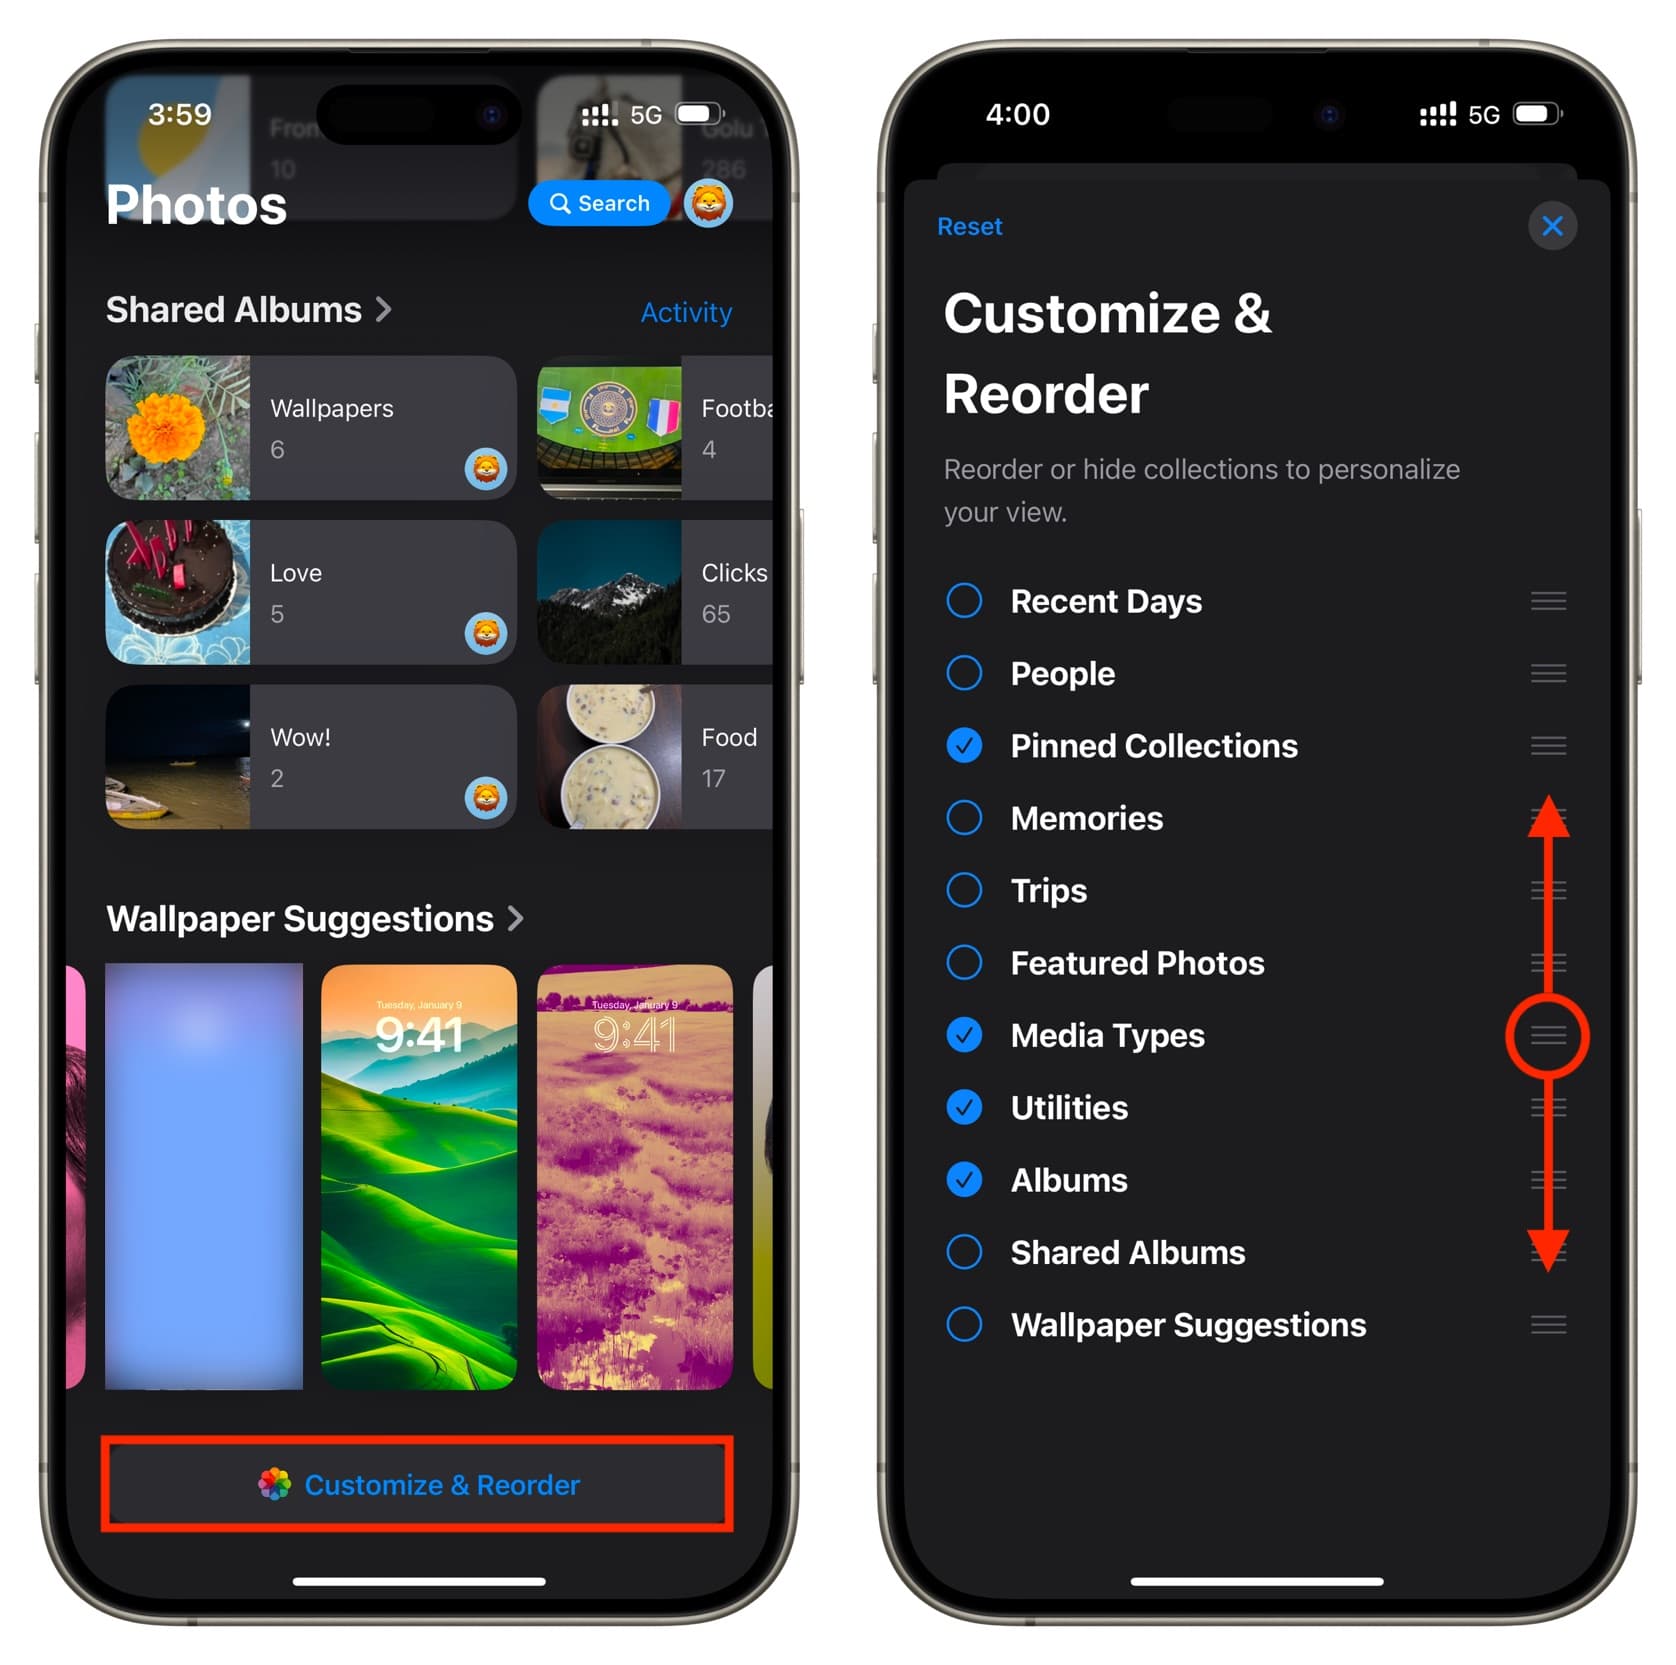
- Scroll down to the bottom and tap Customize & Reorder.
- You will see all the sections listed here. Uncheck the ones you do not want to see in the Photos app. Alternatively, you can check the ones you want to see.
- Now, tap the X button to save your changes and return to a personalized Photos app experience.

If you change your mind in the future or need to access a hidden section, repeat the above steps and check its box to see it again.
In case you have made too many changes and want to start over, you can tap the Reset button, and it will check all the boxes and reorder all the sections like before. Note that this reset will not delete your actual photos and videos.
Reorder sections of the Photos app on iPhone and iPad
If there is a category you use less but do not want to hide, you can move it to the bottom of the Photos app so it’s out of your way but still accessible with a swipe.
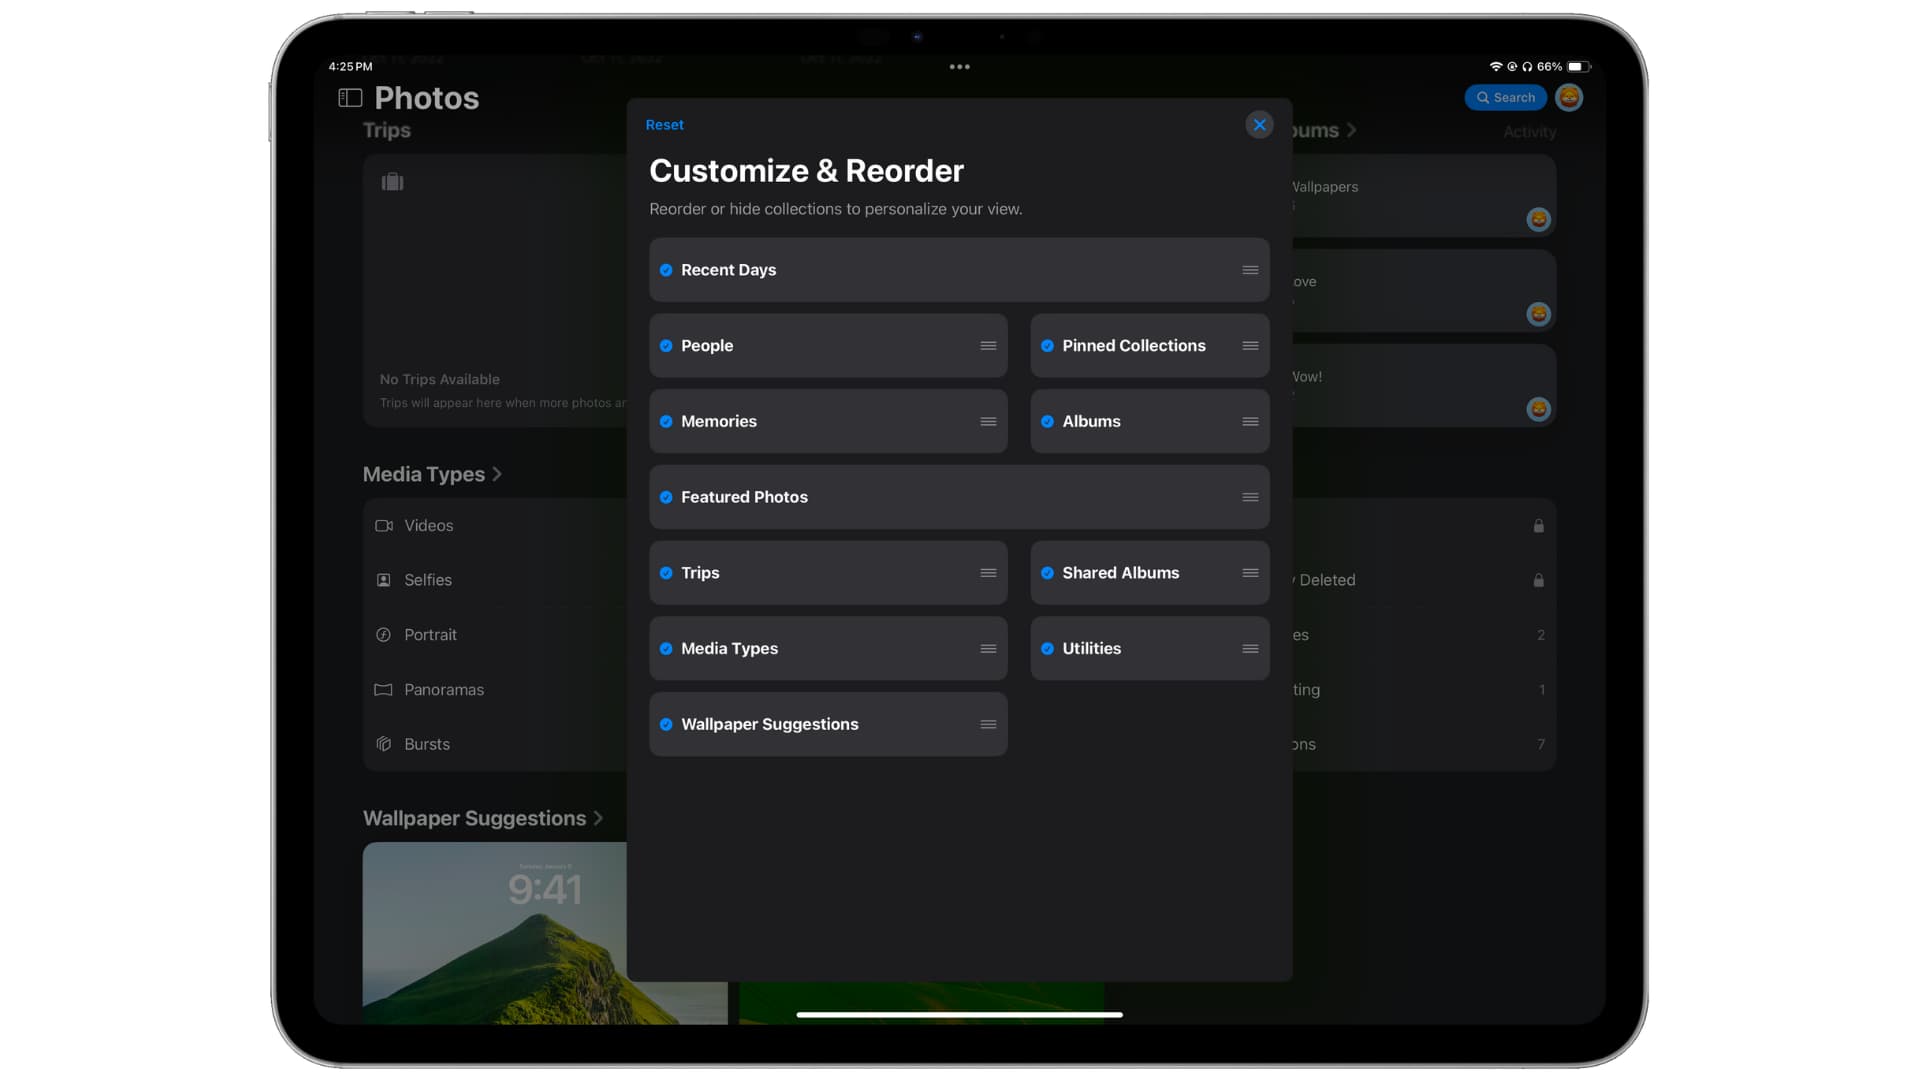
You can reorder the sections inside the Photos app by dragging the hamburger icon up and down on the Customize & Reorder screen.
If you are on an iPad, you can also place the sections side by side.
Pin important things in the iOS Photos app
I take dozens of screenshots on my iPhone daily to use them in iDB tutorials.
The “Screenshot” bundle is listed under the Media Types section, but I have pinned it to the top. As a result, all my screenshots are available right on the first screen, and I can access all of them quickly.
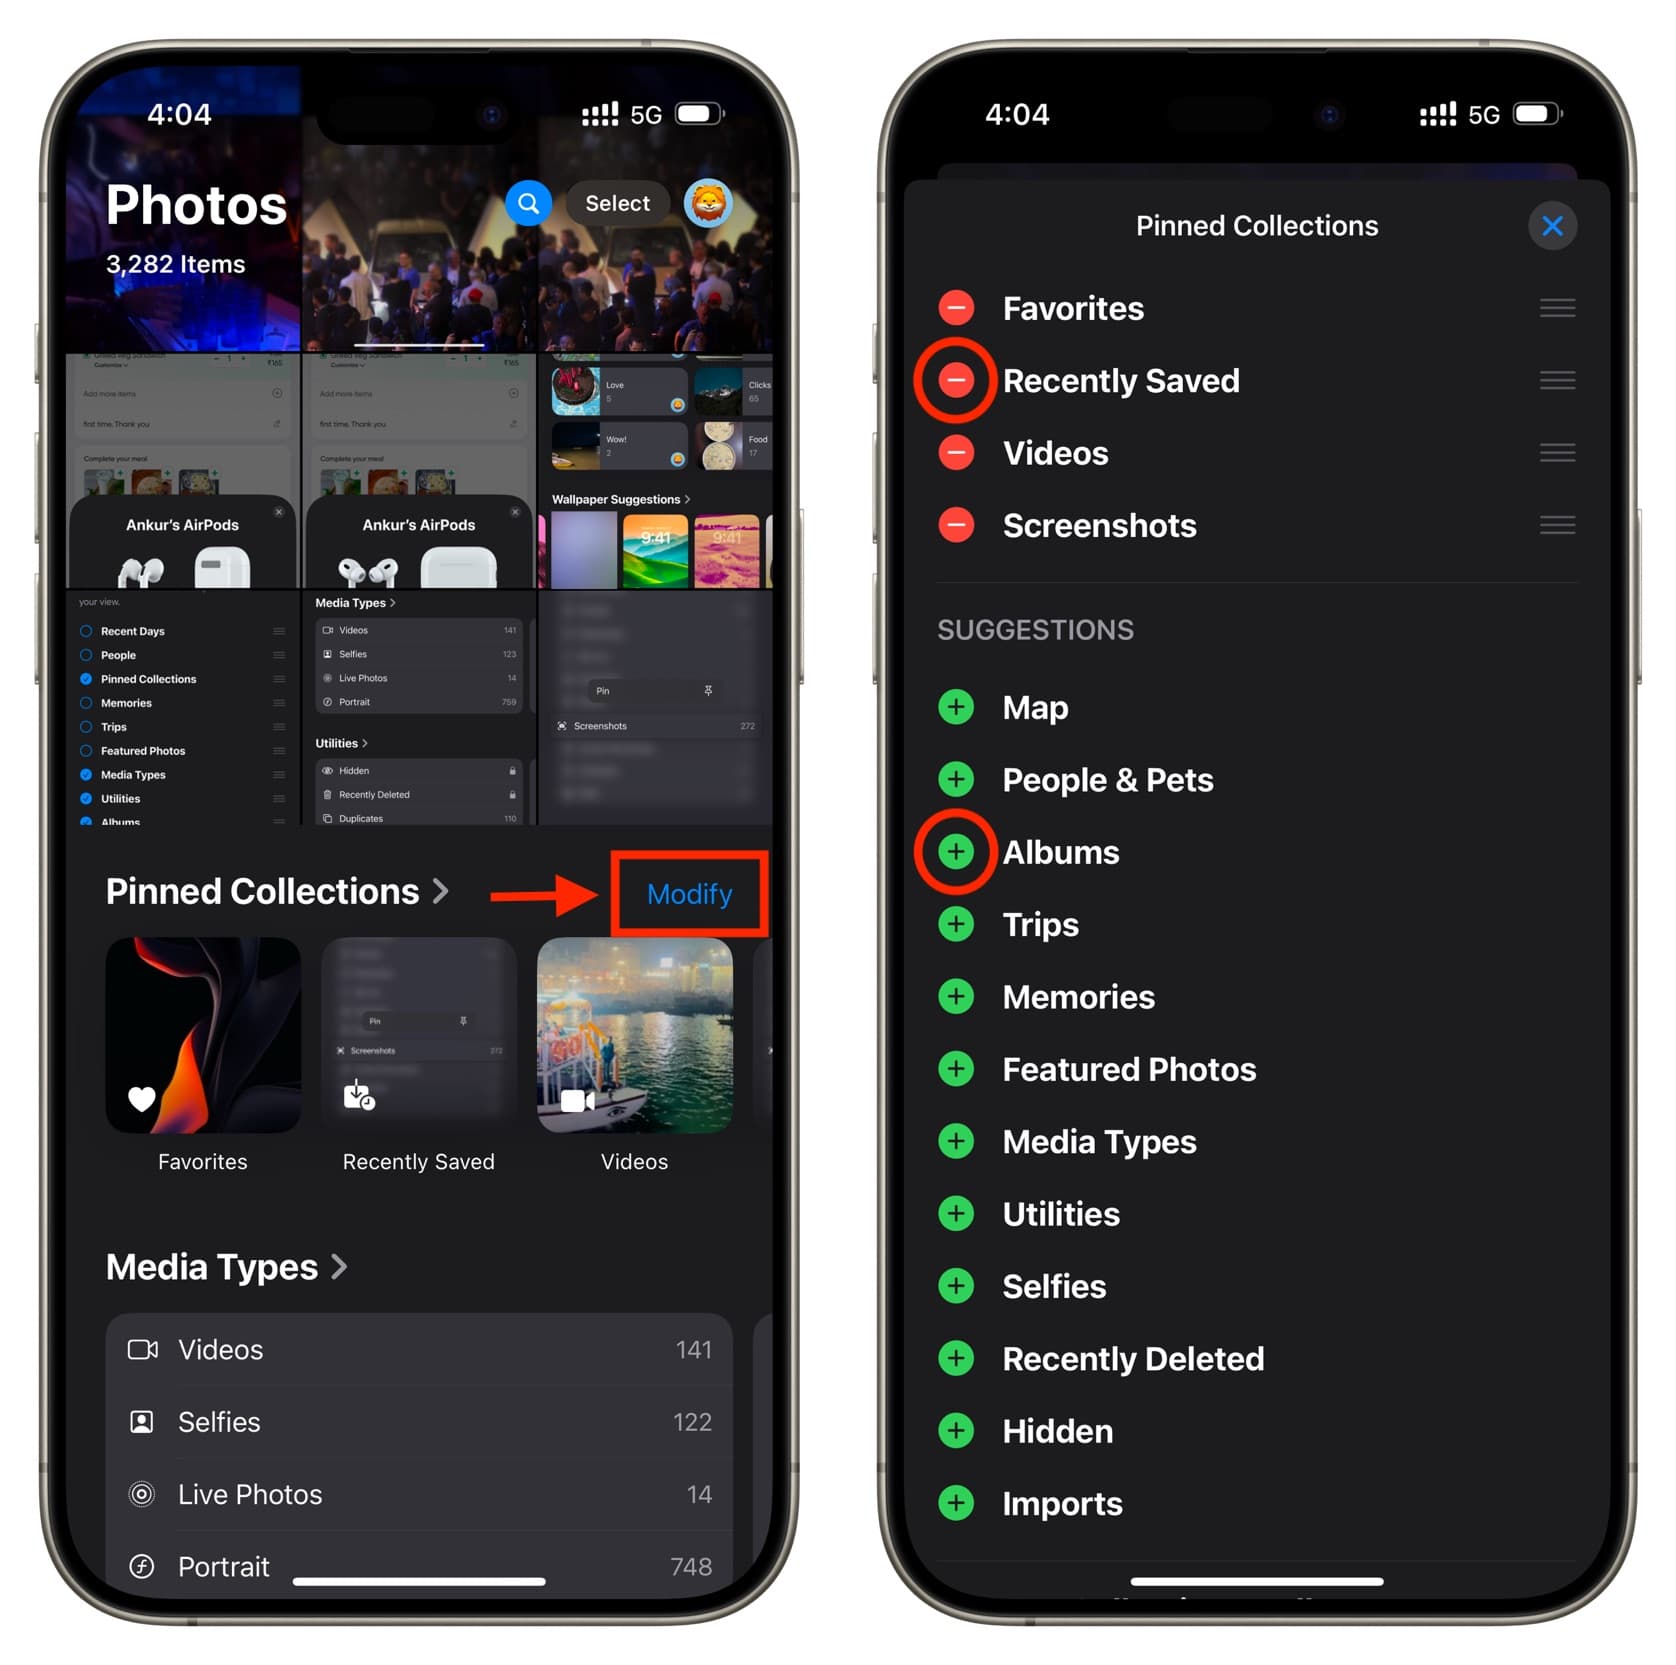
You can pin People, Memory, Trip, Album, and options under the Media Types and Utilities sections. All you need to do is touch and hold an item and tap Pin. This will add it to the Pinned Collections section of the Photos app, from where you can access it quickly.
You can also pin and unpin sections by tapping the Modify button next to Pinned Collections.
In addition to these tips, consider removing duplicate images and deleting unnecessary media to declutter the Photos app.
Check out next: 41 tips to make the most of the Photos app on your iPhone
Source link: https://www.idownloadblog.com/2024/10/11/how-to-customize-photos-app-iphone/

Leave a Reply