

How to connect your HomePod to a different Wi-Fi network
In this tutorial, we will show you how to change the Wi-Fi for your HomePod and connect it to a different Wi-Fi network or Personal Hotspot.
During its initial set up, your HomePod or HomePod mini connects to the same Wi-Fi network as your iPhone or iPad.
You can see what Wi-Fi network it is connected to if you go into the HomePod settings of the Home app, but there is no clear way to change that network.
However, the lack of an obvious option doesn’t mean you are locked with just the one Wi-Fi network on your HomePod. We’ll guide you through the right steps to change it when needed.
What you need
- Your iPhone or iPad. We’ll use an iPhone for the steps below.
- Make sure you are in the range of the new Wi-Fi network or Personal Hotspot you want to connect to.
Also see: How to AirPlay audio to HomePod without Wi-Fi
Connect your HomePod to a different Wi-Fi network
1) Open the Settings app on your iPhone, go to Wi-Fi, and connect it to the network you want to use on your HomePod.
2) Open Control Center on your iPhone, and ensure the Bluetooth icon is blue instead of white. This will help your phone communicate with your speaker.
3) Now, make sure your HomePod is powered on and open the Home app on your iPhone.
4) If you are in a different location where the known Wi-Fi network is unavailable, that means your HomePod is obviously not connected to any network. In this case, tap the HomePod tile from the Home app, followed by the settings icon from the bottom right.
You will see a Wi-Fi message at the top that says: “HomePod cannot connect to your Wi-Fi network and will try again when the network is available. This HomePod is on the “ABC” Wi-Fi Network, which is different than the network that this iPhone is on.”

If your HomePod is already connected to another previously known Wi-Fi network, you will see a “HomePod Network Mismatch” banner on the top of the Home app. Tap View Details, and you will see a message that reads: This HomePod is on the “XYZ” Wi-Fi network, which is different than the network that this iPhone is on.
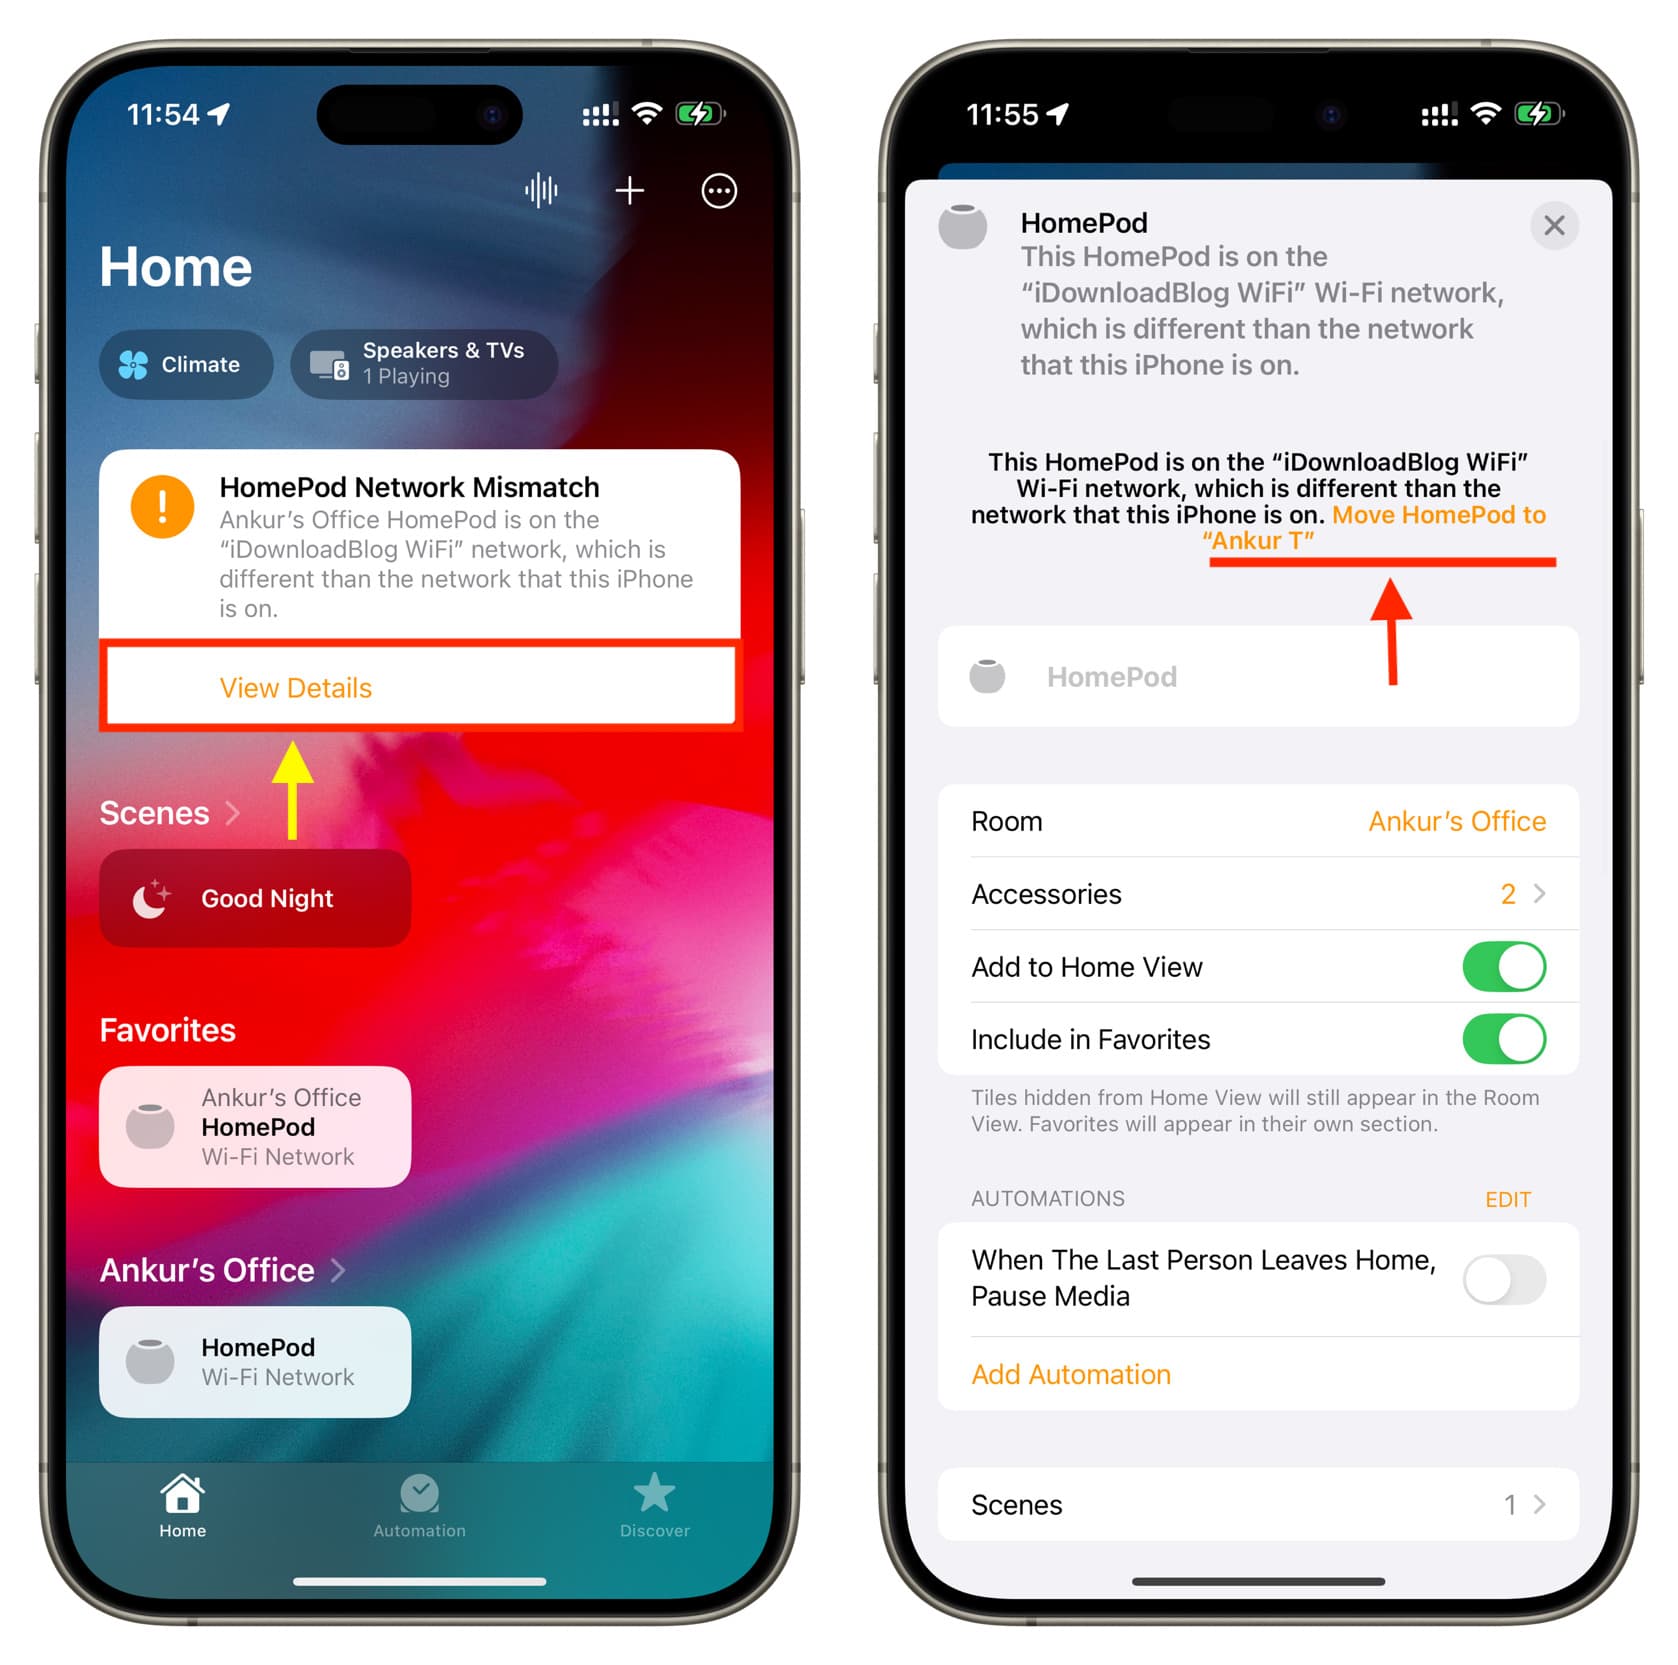
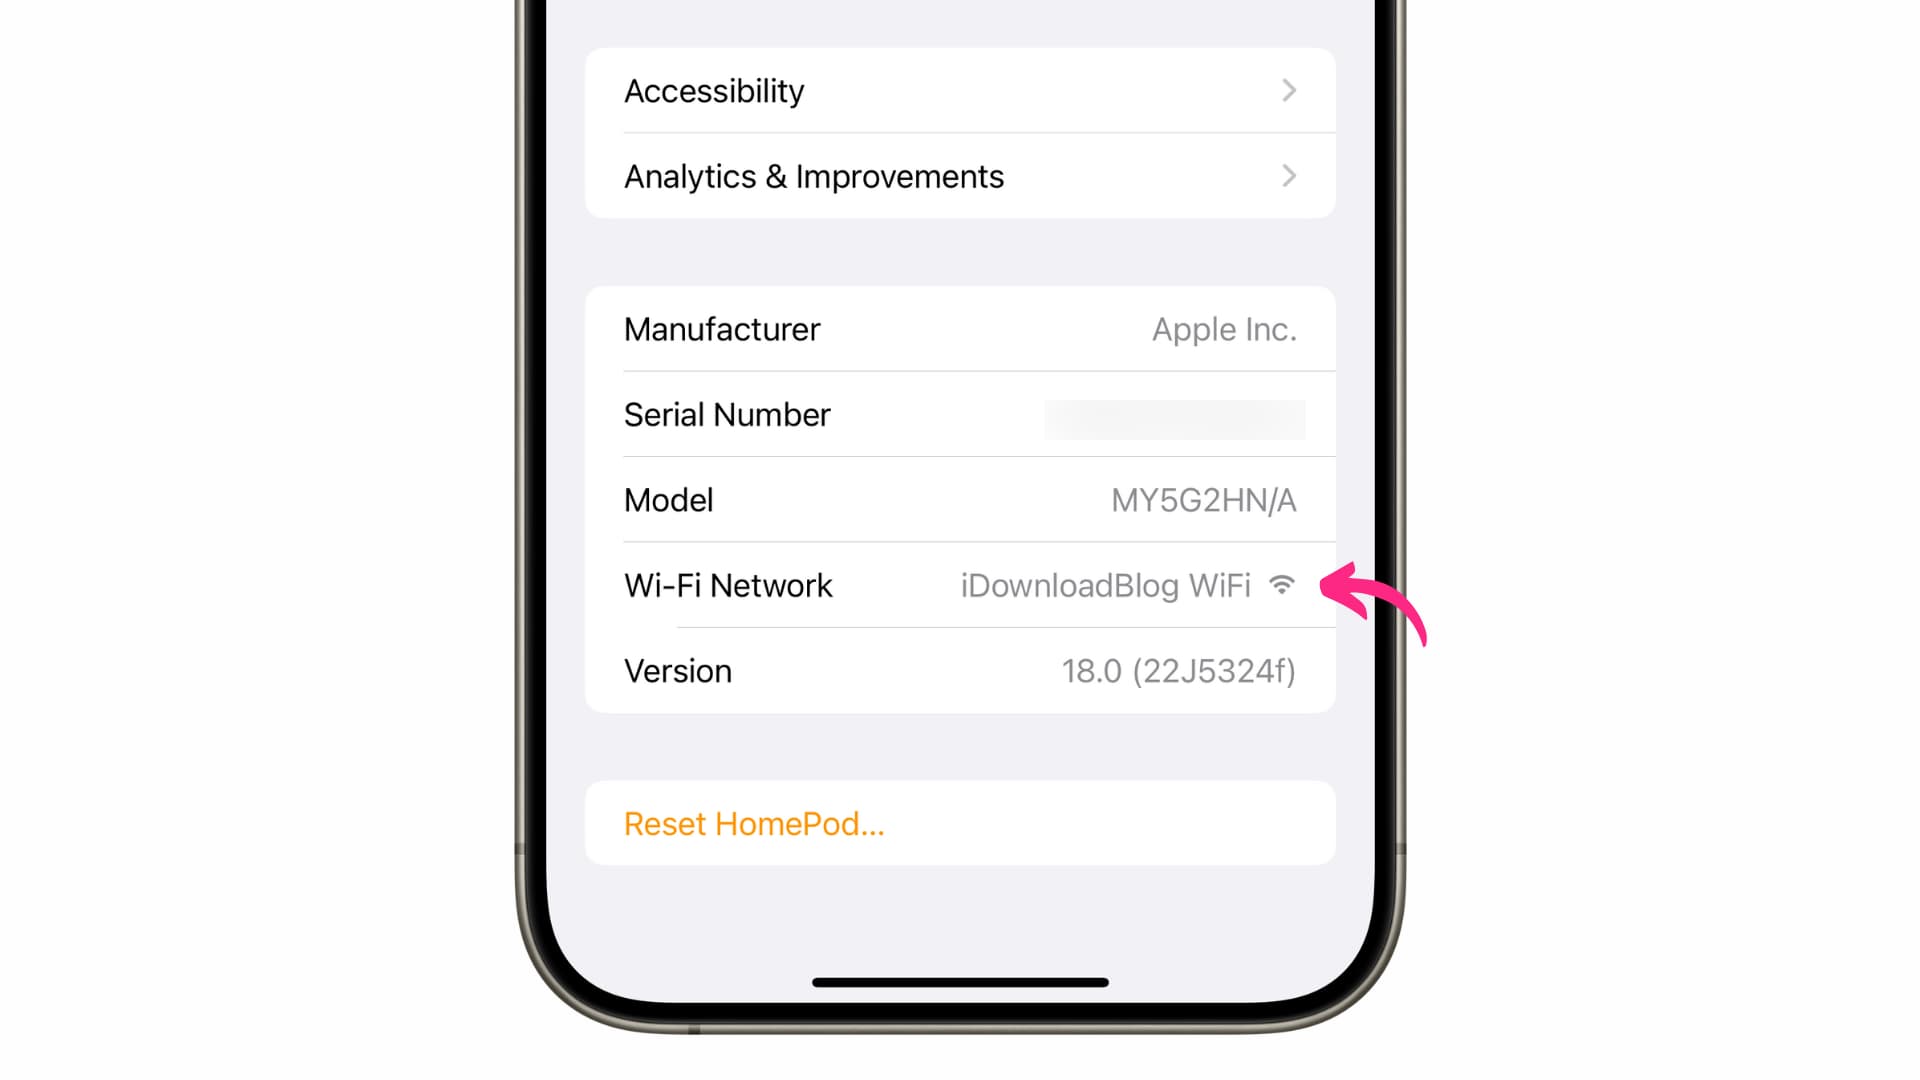
In both situations, all you need to do it tap the Move HomePod to “Wi-Fi name“ option shown in orange color. In about 10 seconds, your HomePod will connect to this new Wi-Fi network — the one your iPhone is connected to. You can confirm this by scrolling to the end of the HomePod settings screen and checking the name next to Wi-Fi Network.
Erase and set up your HomePod again
If the above method does not work for you, we’d recommend doing the following:
- Force quit the Home app and reopen it a couple of times.
- Restart your HomePod, iPhone, and the Wi-Fi router/Personal Hotspot device.
- Make sure your iPhone is updated. Since HomePod is not connected to Wi-Fi, you cannot update it.
If the above steps do not help and you still cannot change your Siri speaker’s Wi-Fi network, your last resort is to factory reset the HomePod and set it up again. The steps are not complicated, but it may take a few minutes to get everything up and running.
On a related note: How to connect HomePod to Wi-Fi networks in school, colleges, universities, hotels and more
Source link: https://www.idownloadblog.com/2024/08/08/how-to-change-homepod-wi-fi/

Leave a Reply