

How to use the new Apple Passwords app on iPhone and Mac

Learn about the new Apple Passwords app on iOS 18, iPadOS 18, and macOS Sequoia to conveniently see, save, autofill, and manage your various account login information.
Before iOS 18, you had to go to the Passwords section of the Settings app (or Safari settings and the iCloud Keychain app on Mac) to see and manage a saved password. This was a convoluted approach which prevented many users from actually using this otherwise great feature.
Thankfully, Apple simplified the process by introducing a dedicated Passwords app – similar to third-party password manager apps such as 1Password and Dashlane.
So, if you have installed iOS 18, iPadOS 18, or macOS Sequoia on your devices and want to learn more about this iCloud Keychain successor, this guide will help you get started with the Passwords app.
Find the Passwords app
You will see a new Passwords app on your iOS Home Screen and Mac Launchpad after updating to iOS 18, iPadOS 18, and macOS 15. In case you can’t locate it, use Spotlight Search or Siri to open it.
See your saved passwords
- Open the Passwords app and authenticate with Face ID, Touch ID, or device password.
- Tap All to see all your previous iCloud Keychain account credentials, emails, usernames, and passwords. New passwords you save in the future will also appear here.
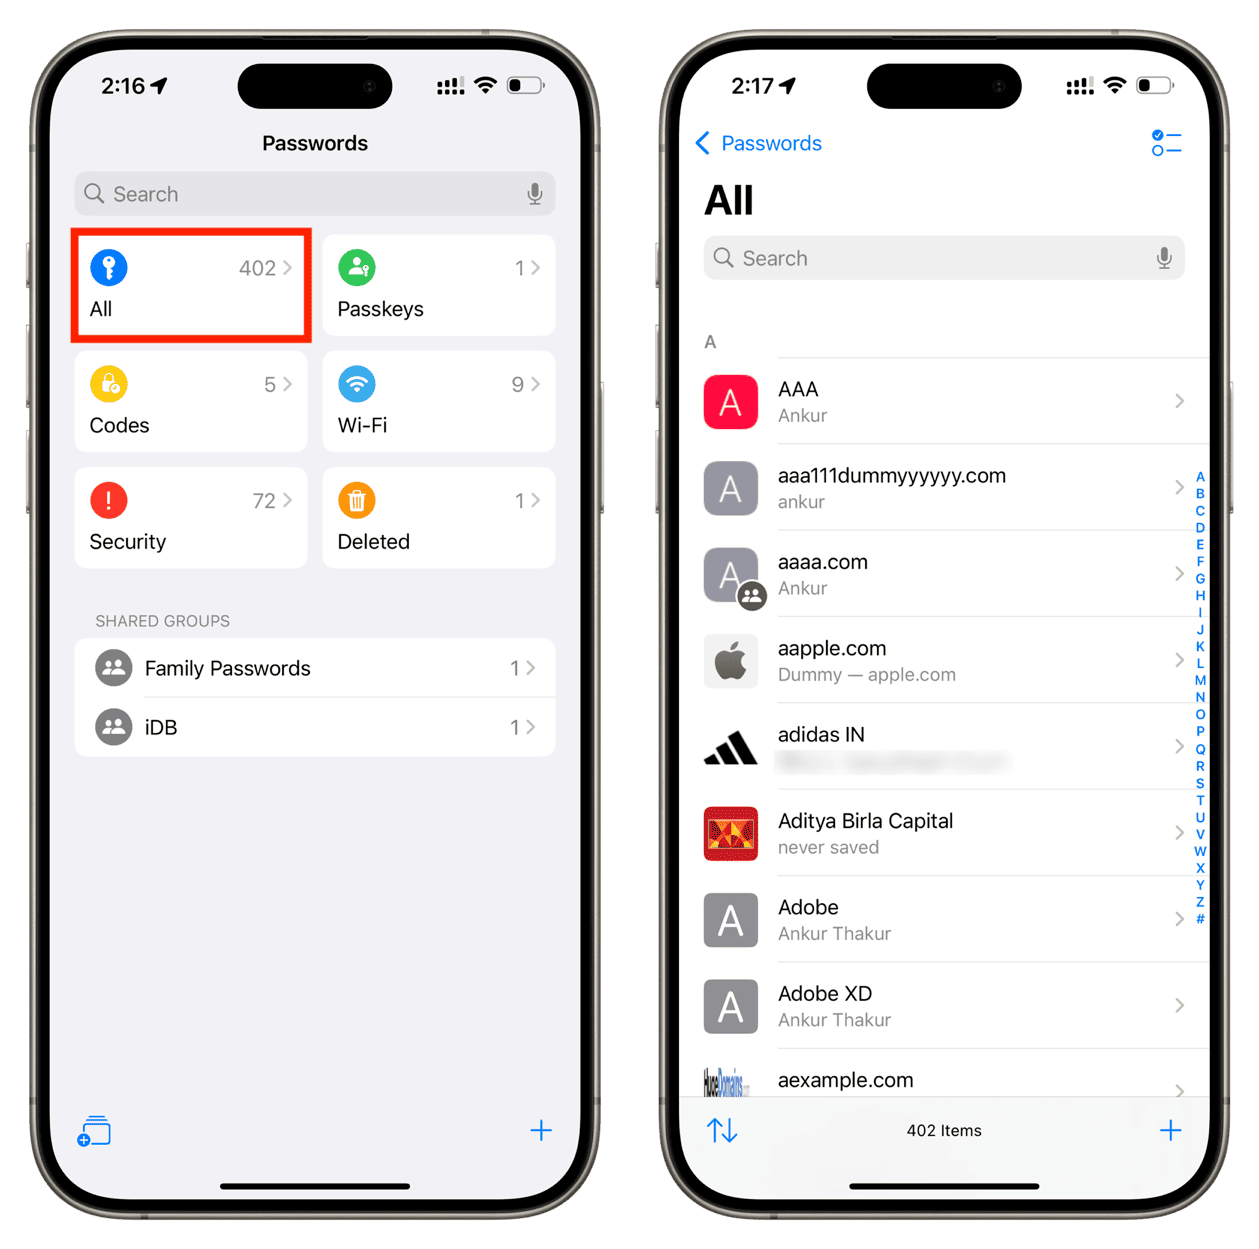
In addition to account passwords, you can also see Passkeys, two-factor authentication codes, and Wi-Fi Passwords inside the Passwords app.
Sort passwords: Tap the two-arrow button from the bottom left corner to view your saved details in a way that’s more productive for you.
Use Siri: You can also ask Siri to show you a saved password. You can give a voice command like “Hey Siri, show my Amazon password,” and it will automatically take you to the Passwords app, displaying the necessary account details.
Note: iOS 18 lets you lock and unlock apps, but the Passwords app is permanently secured behind biometric authentication, and you cannot do away with it.
Save passwords to it
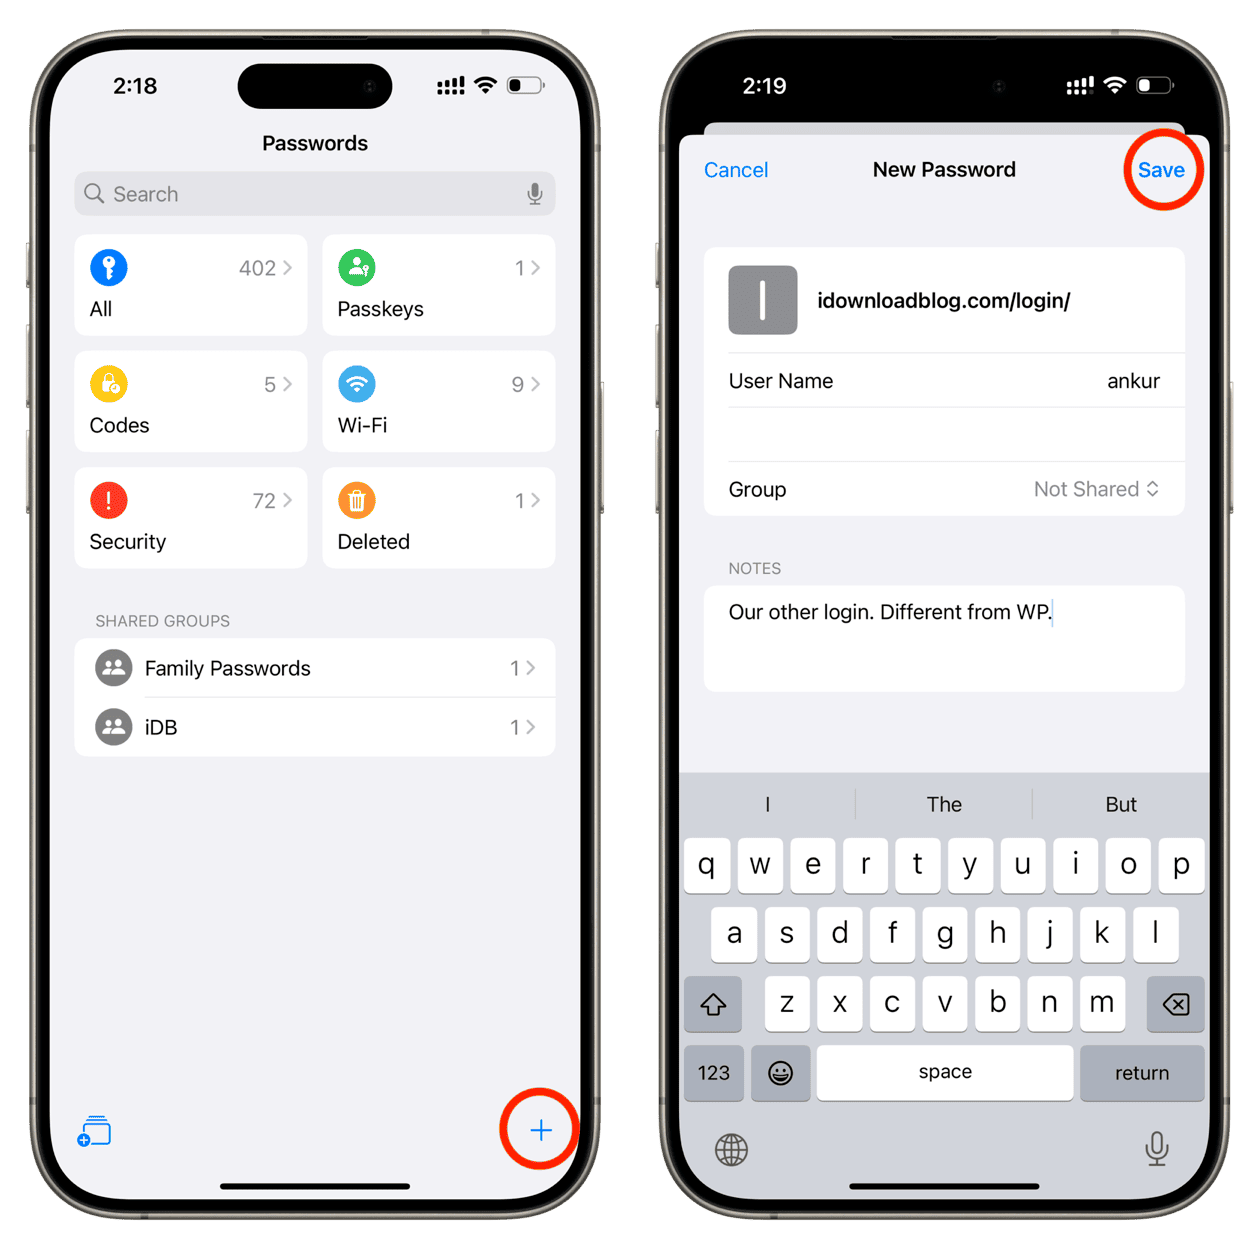
You are prompted to save a password when you create a new account or enter login details manually in Safari or other apps. In addition to that, you can add a login information right inside the app.
- Go inside the Passwords app and tap the plus button.
- Fill in the necessary details, choose a shared group if applicable, optionally add a note, and hit Save.
Set up 2FA codes
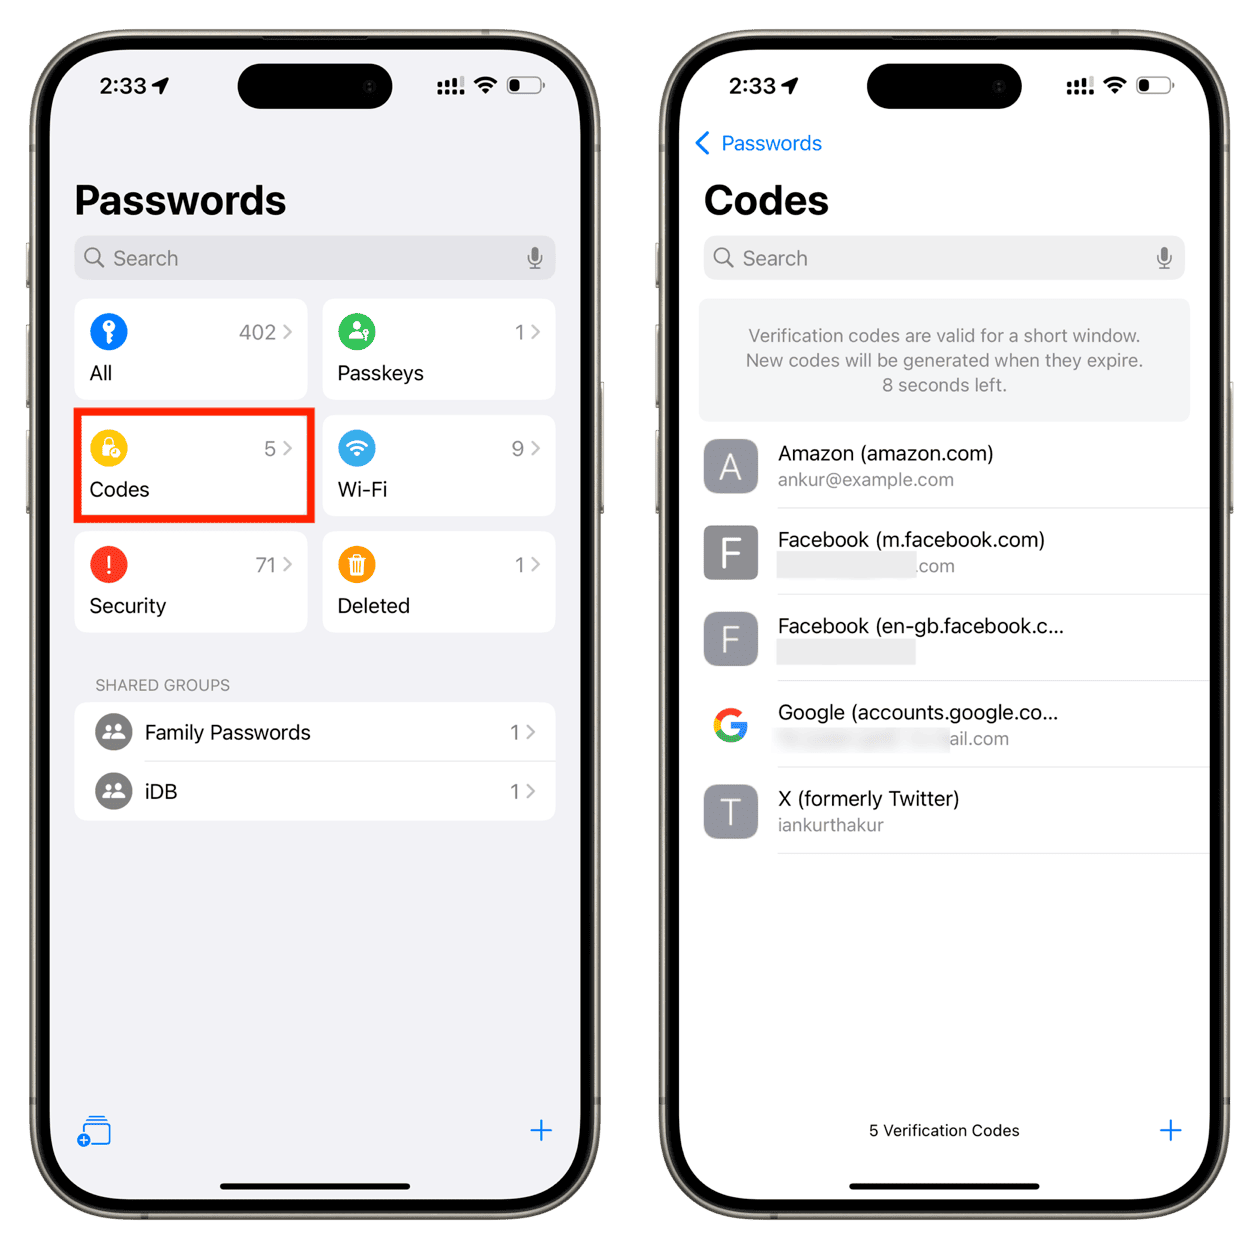
iOS Settings app had a built-in way to set up two-factor authentication (2FA) codes, and that’s now moved to the Codes section inside the Passwords app.
This feature is similar to what’s offered by apps like Google Authenticator and Microsoft Authenticator. You can set up two-factor authentication for services like X (Twitter), Facebook, and more in the Passwords app.
Autofill passwords
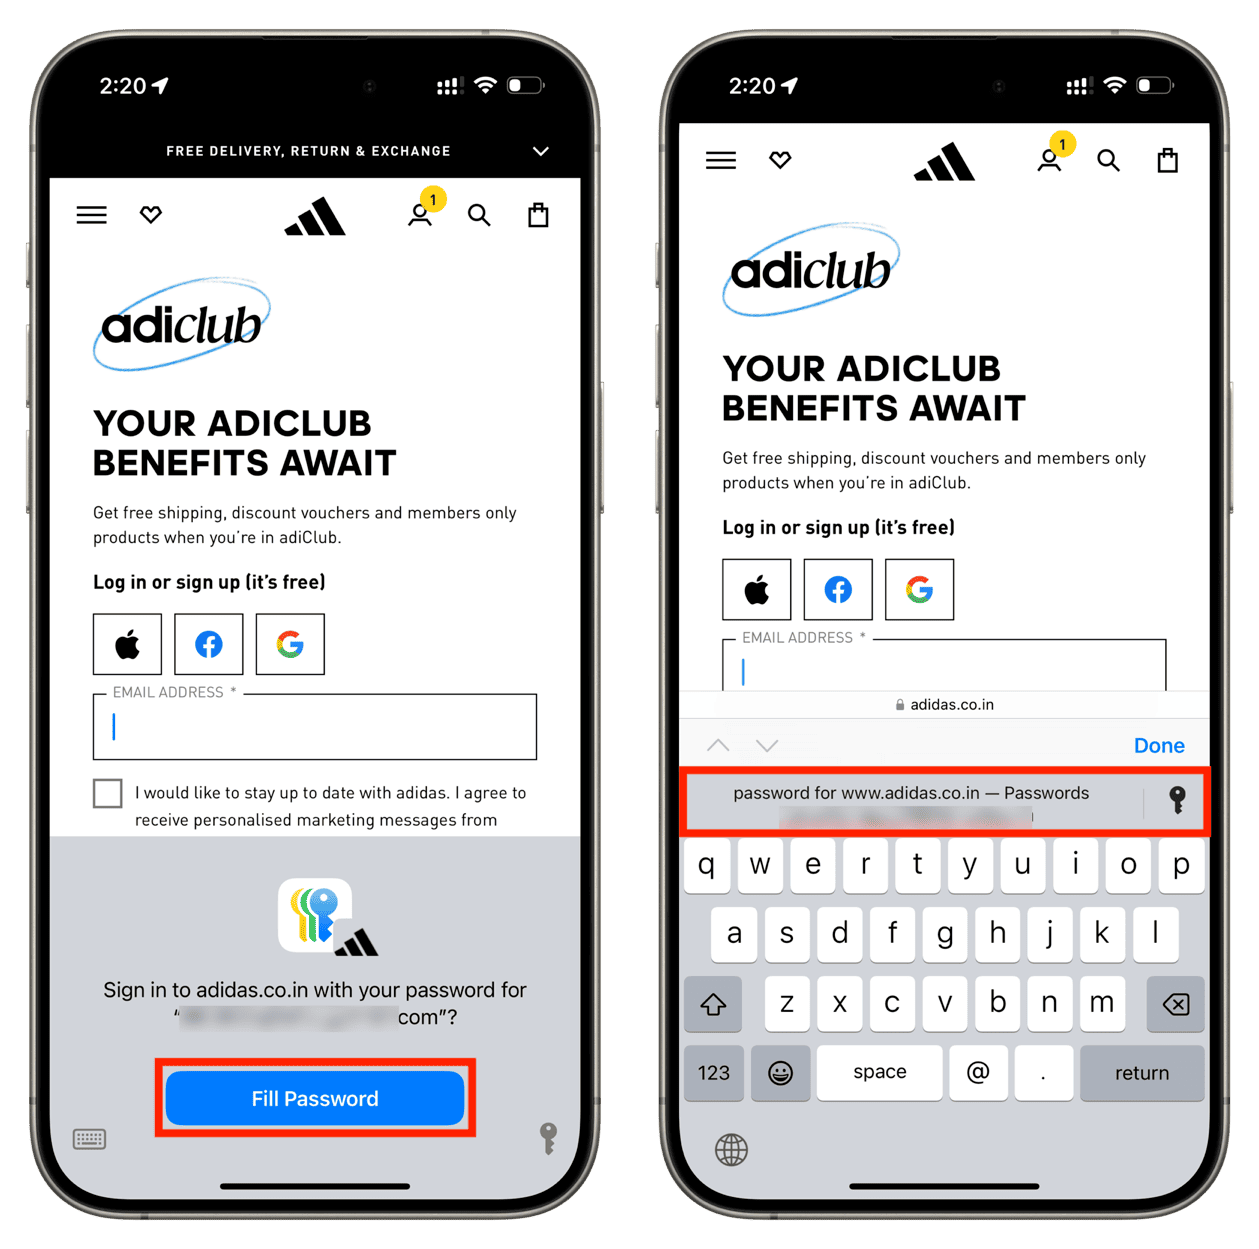
When you are on a login page in Safari and other relevant apps, the Passwords app will prompt you to autofill your username and password. The process is similar to what it was before, except for minor visual changes.
Use shared password group
Most of us have some account passwords that are useful for all family members, and I’m not just talking about Netflix or Hulu. You can create a shared group and add passwords so all your trusted family members can access, edit, and add to it.
See Wi-Fi passwords
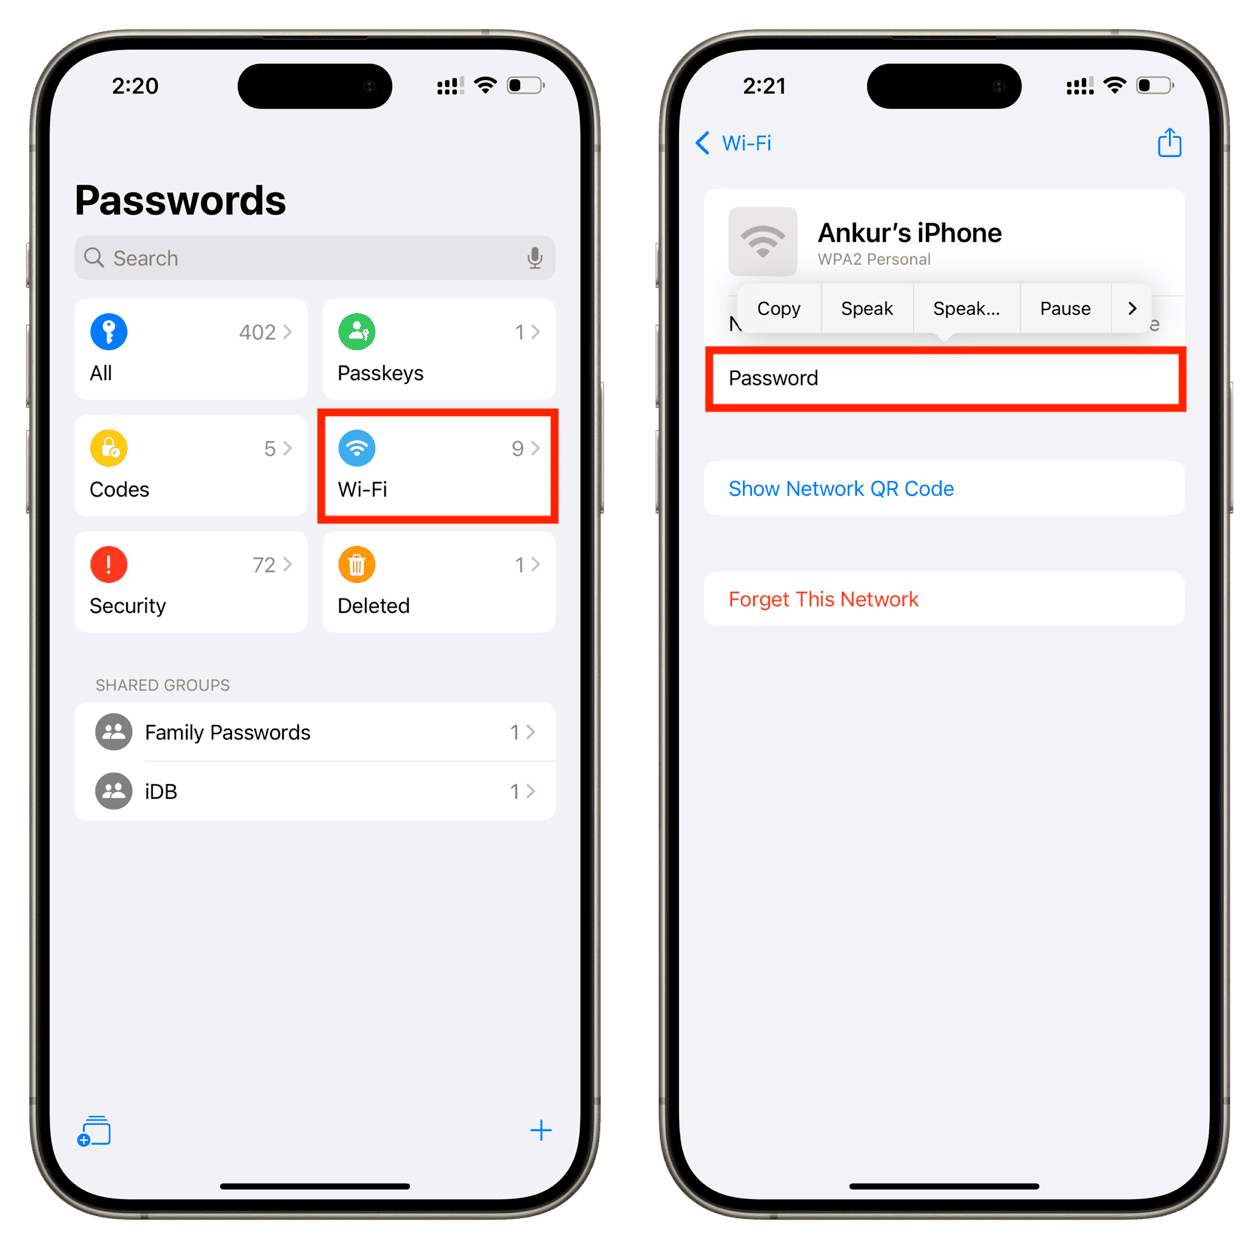
It’s easy to see the Wi-Fi password for current or past networks right in Wi-Fi settings. Still, the Passwords app now gives you an additional method to view all these network passwords in one convenient spot. Simply open the Passwords app and tap Wi-Fi. Select a network name and tap the Password field to unhide it.
Take action against unsecure passwords
If you have some saved account passwords that are too simple, weak, reused, easily guessable, or have appeared in a data breach, you will see a Security category inside the new Passwords app. You can use the Change Password button to visit that related website and update its password to something stronger and unique.
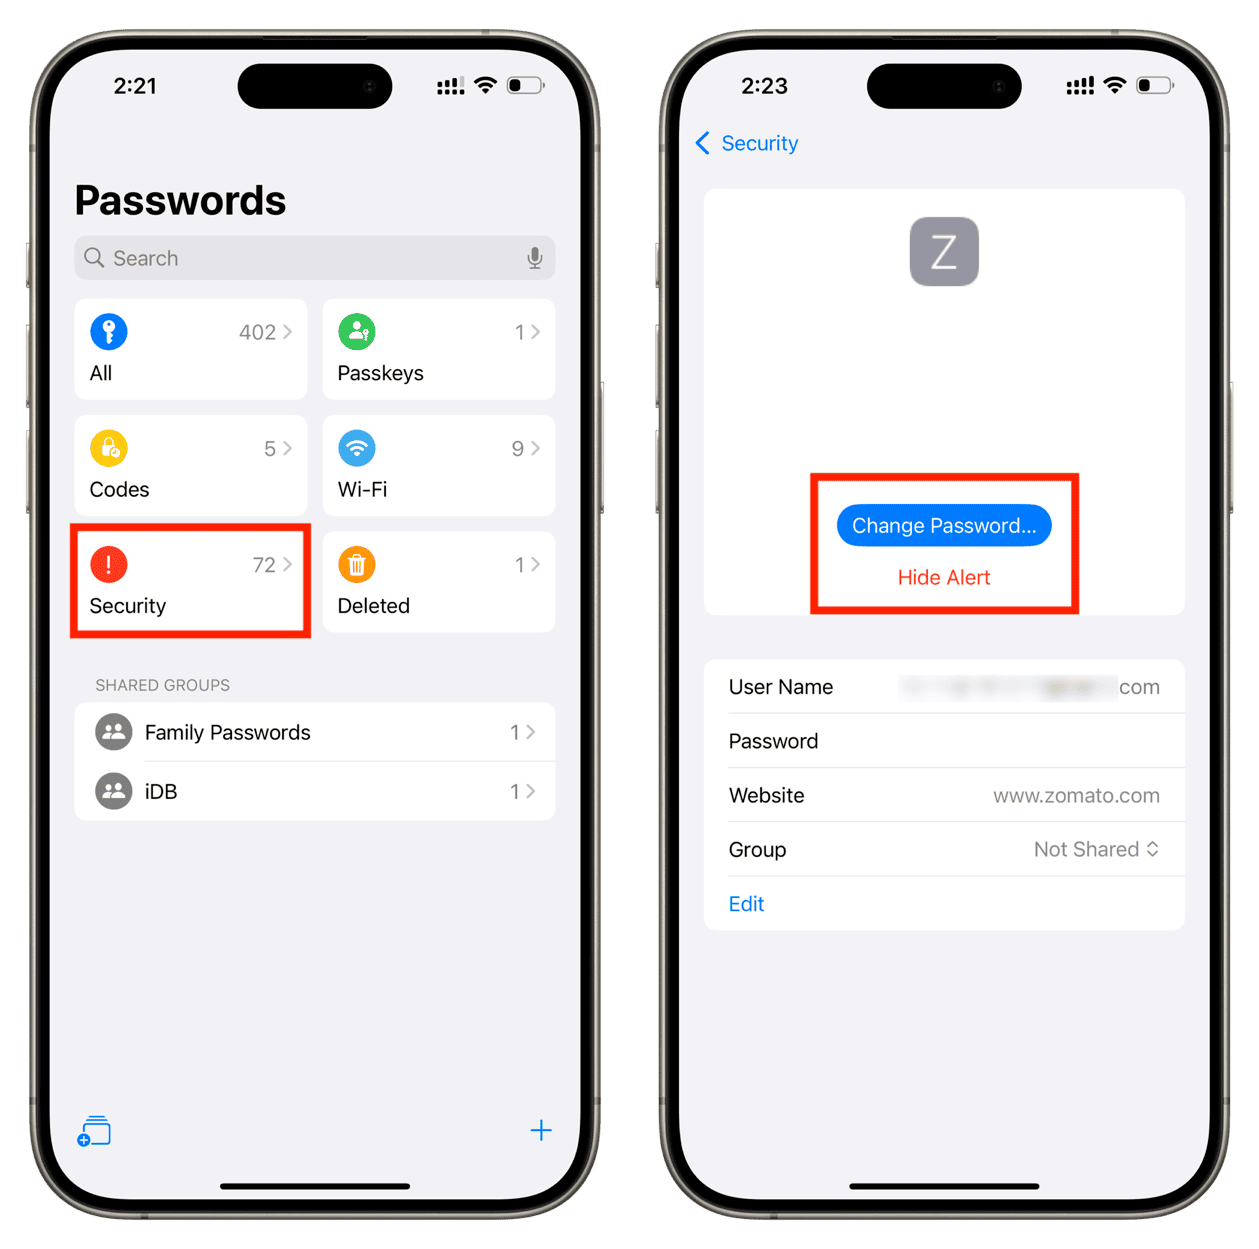
Note: Tap Hide Alert if you don’t want to update the password and ignore the suggestion. Remember to tap the crossed-out eye icon from the top right of the Security section to see these hidden entries.
Delete one or all passwords
Swipe left on a password and tap Delete. If, for some reason, you want to delete all passwords and start fresh, tap the checklist icon from the top right > Select All, and then hit Delete.
Important: Since these passwords sync via iCloud to all your devices like iPhone, iPad, Mac, Vision Pro, Windows PC, Chrome, and Edge (through an extension), deleting them from one will remove them from everywhere.
Recover deleted passwords or delete them permanently
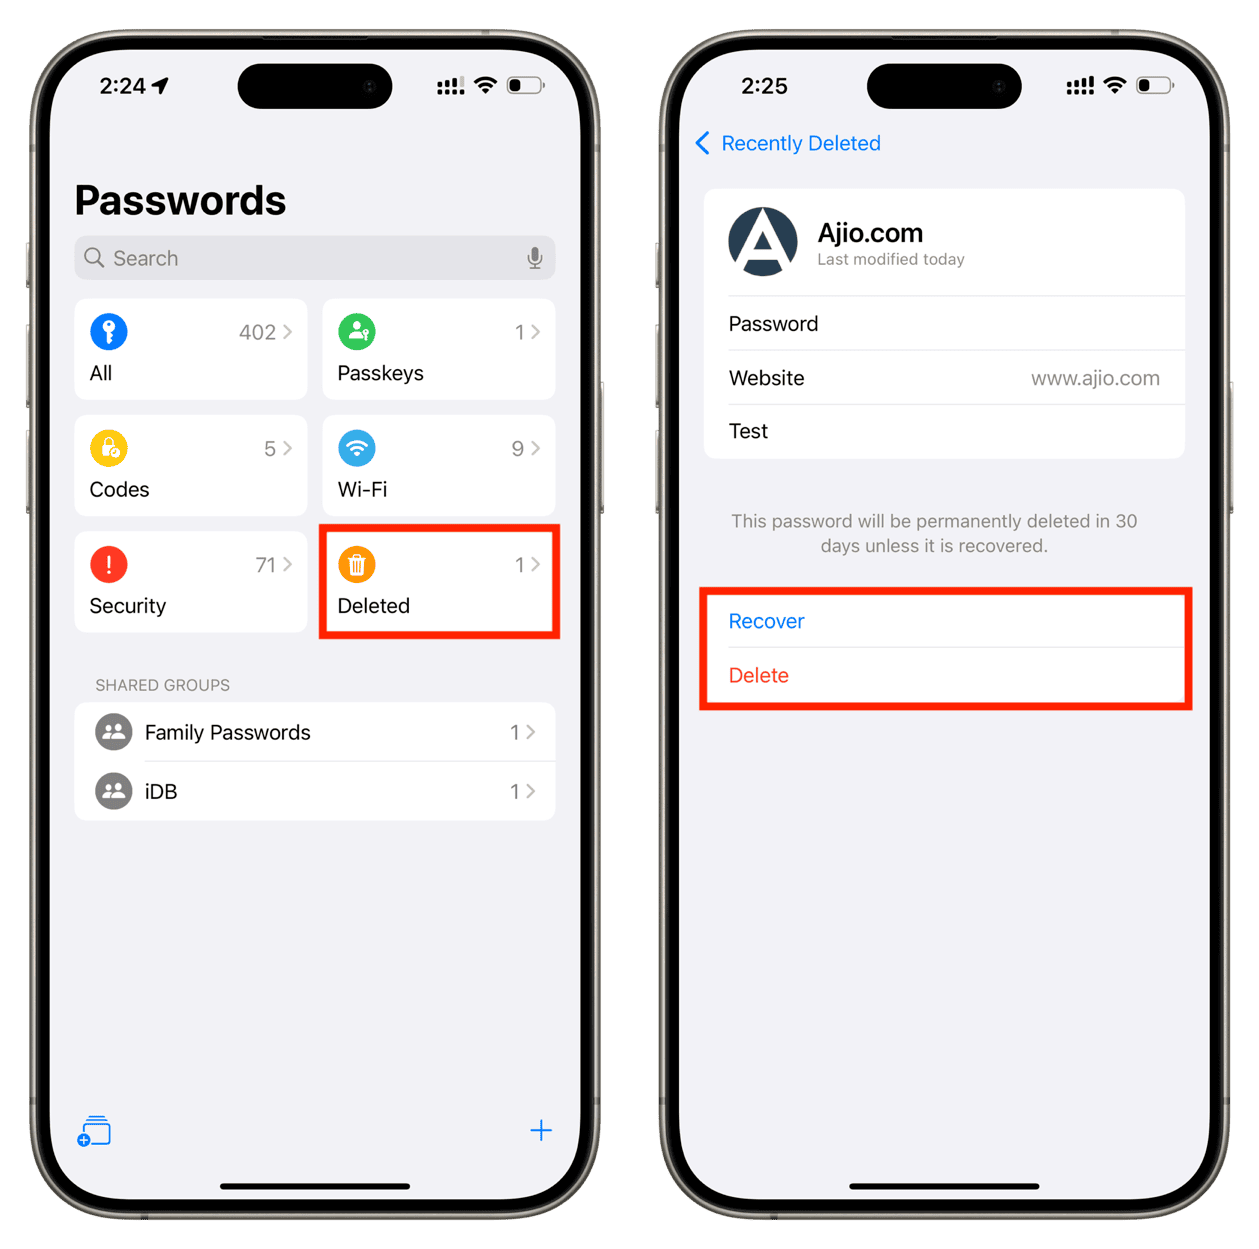
If you accidentally delete a password or two-factor account, you have 30 days to recover it. After that, it’s gone forever!
Go to the Recently Deleted section in the Passwords app and swipe left on a deleted password. Now, tap Recover to get it back or hit Delete to remove it permanently without waiting for 30 days. You can also tap an entry and use the Recover or Delete buttons.
Furthermore, you can tap the checklist icon, select all or several deleted passwords, and hit Recover or Delete.
Make sure passwords sync to all devices
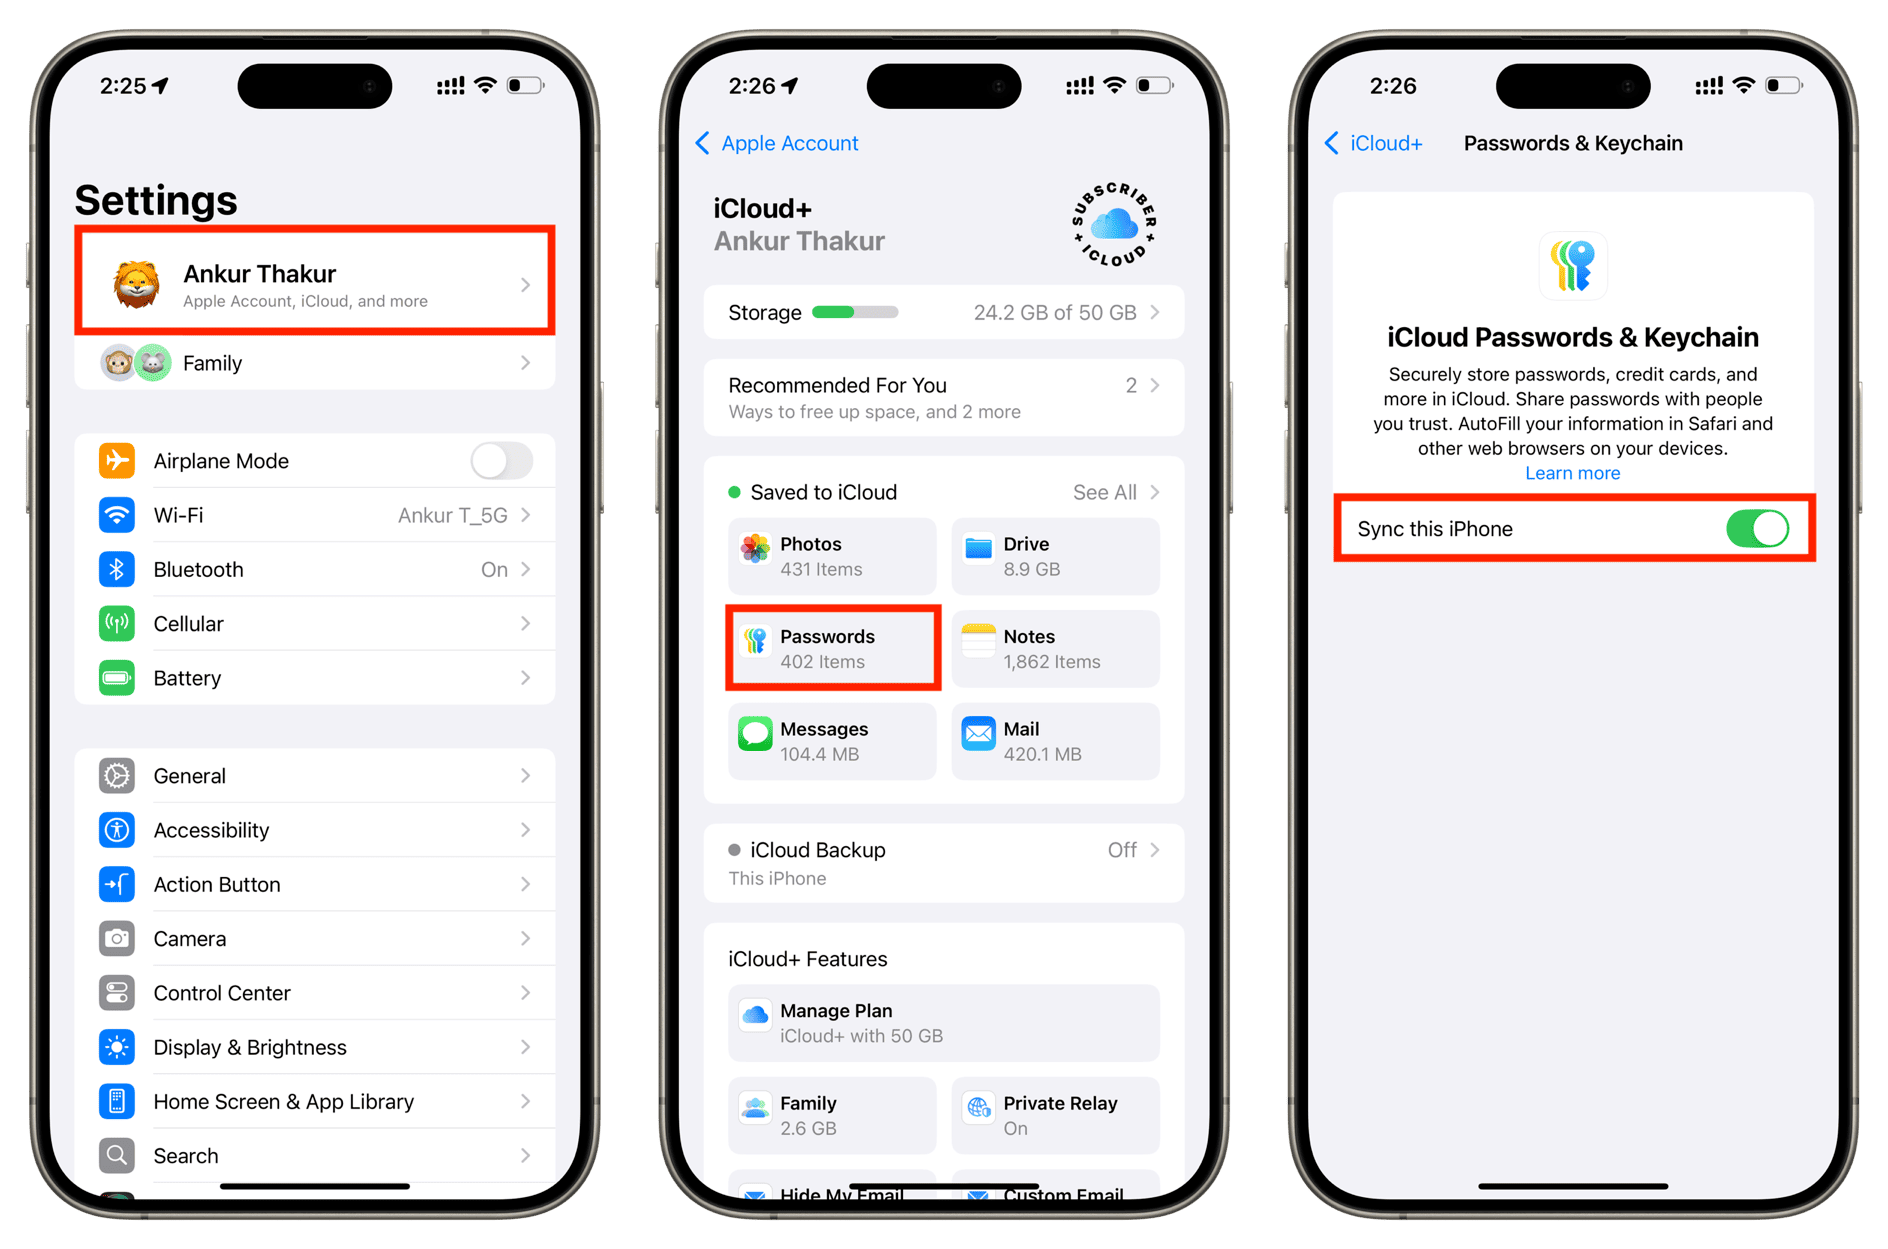
All your saved account details sync via iCloud, provided you have enabled it in the device settings.
Go to iOS Settings or macOS System Settings and select your name from the top. Now, navigate to iCloud > Passwords and turn on Sync this iPhone/iPad/Mac.
On a related note: How to use AutoFill Passwords with third-party password managers on iPhone and iPad
Source link: https://www.idownloadblog.com/2024/06/26/how-to-use-apple-passwords-app/

Leave a Reply