How to use the iPhone’s camera horizontal and vertical levels to align your shots
Use your iPhone camera’s level feature to guide horizon placement in your photographs and perfectly align overhead and top-down shots.
You’ve been able to take perfectly level top-down photos on your iPhone and iPad since iOS 11, with a bit of help from the hidden vertical level feature.
With iOS 17, Apple gave the camera level its own separate toggle while expanding its functionality to help you take shots at a perfectly straight angle.
Camera leveling is a very helpful feature; too bad it’s turned off by default. In this post, we’ll show you how to enable the camera level option and use it to guide horizon placement and align overhead shots on your iPhone.
How to turn on the camera level feature on iPhone
Turning iOS 17’s new camera level setting enables both the new horizontal level and the existing crosshair level, which appears when standing directly over your subject.

Here are the steps to turn on the camera level:
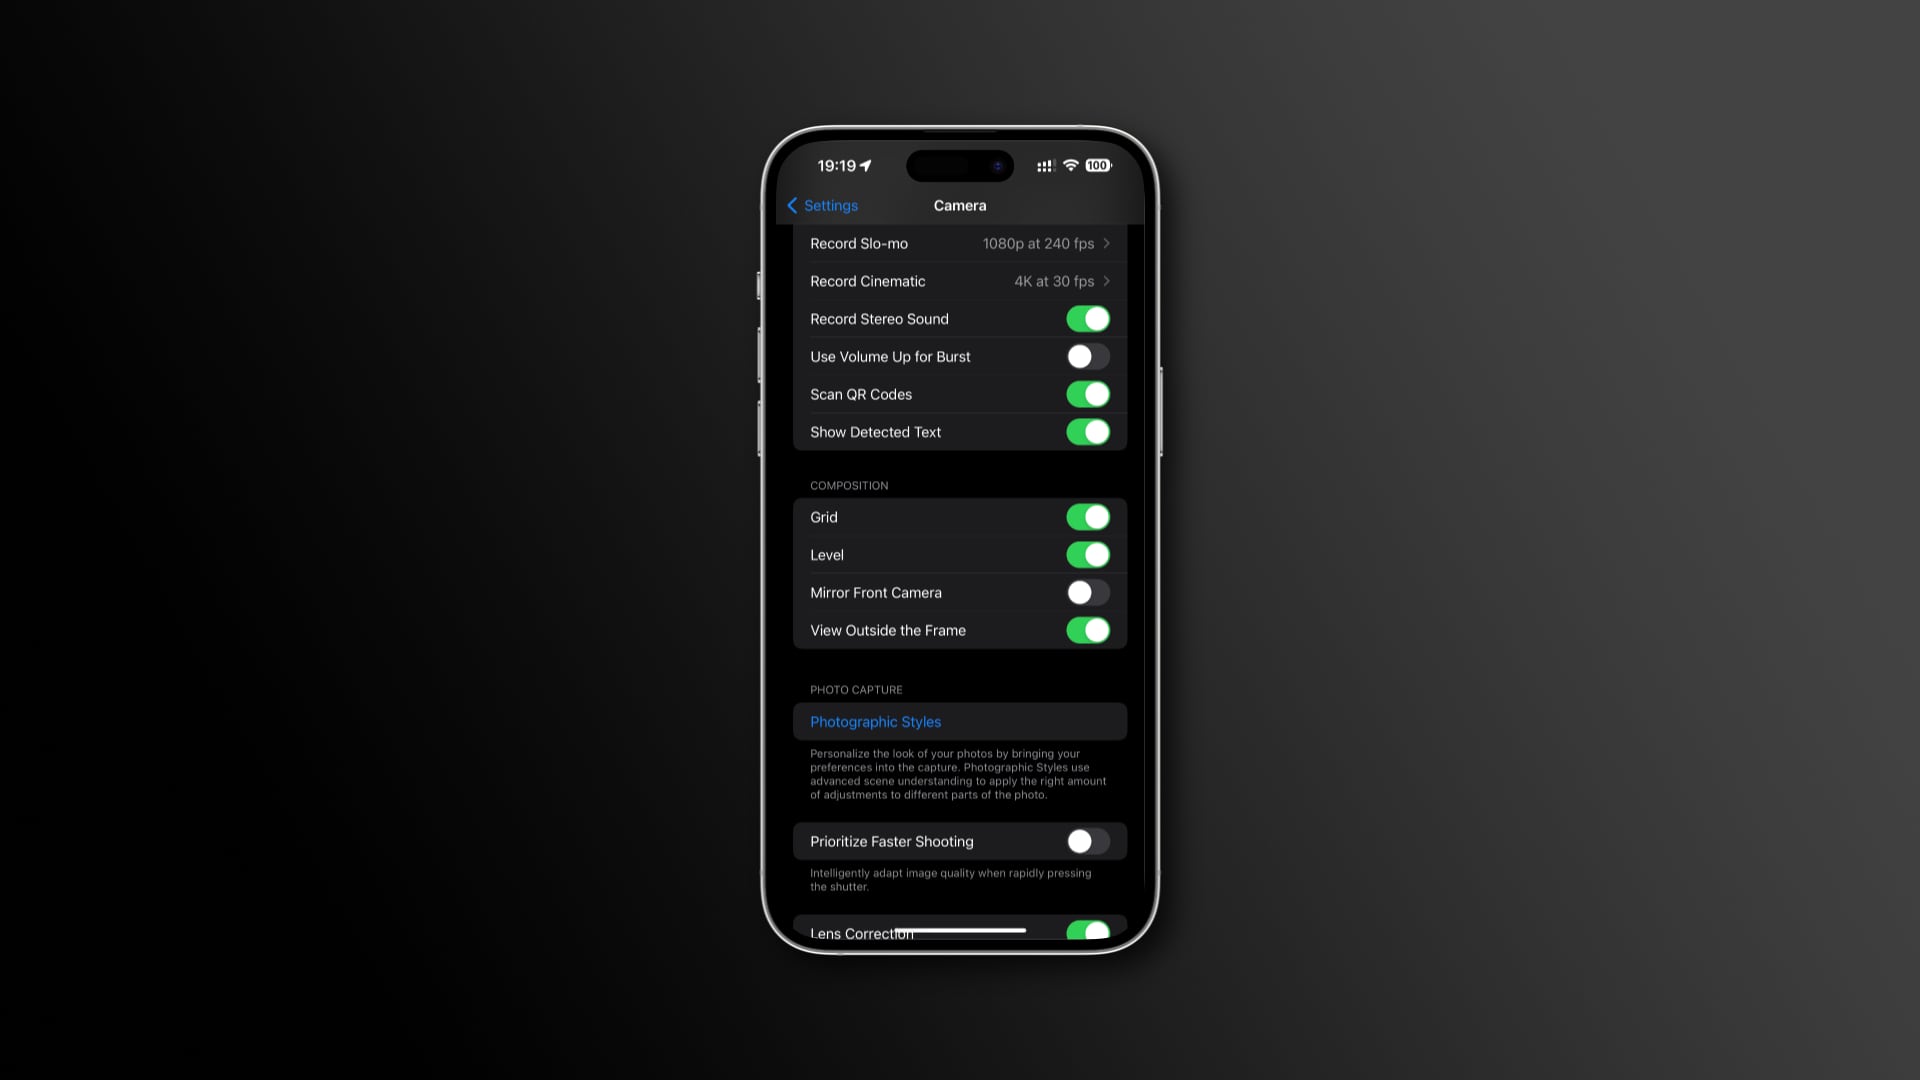
- Open the Settings app on your iPhone or iPad.
- Find and hit the Camera option in the main list of options.
- Turn on the Level option under the Composition heading.
This will turn on horizontal lines in the Camera app that automatically show up when your iPhone detects you’re out of level. The camera level uses your iPhone’s built-in accelerometer and gyroscope sensors to determine its relative position in space.
How to use the iPhone’s camera level for horizon alignment

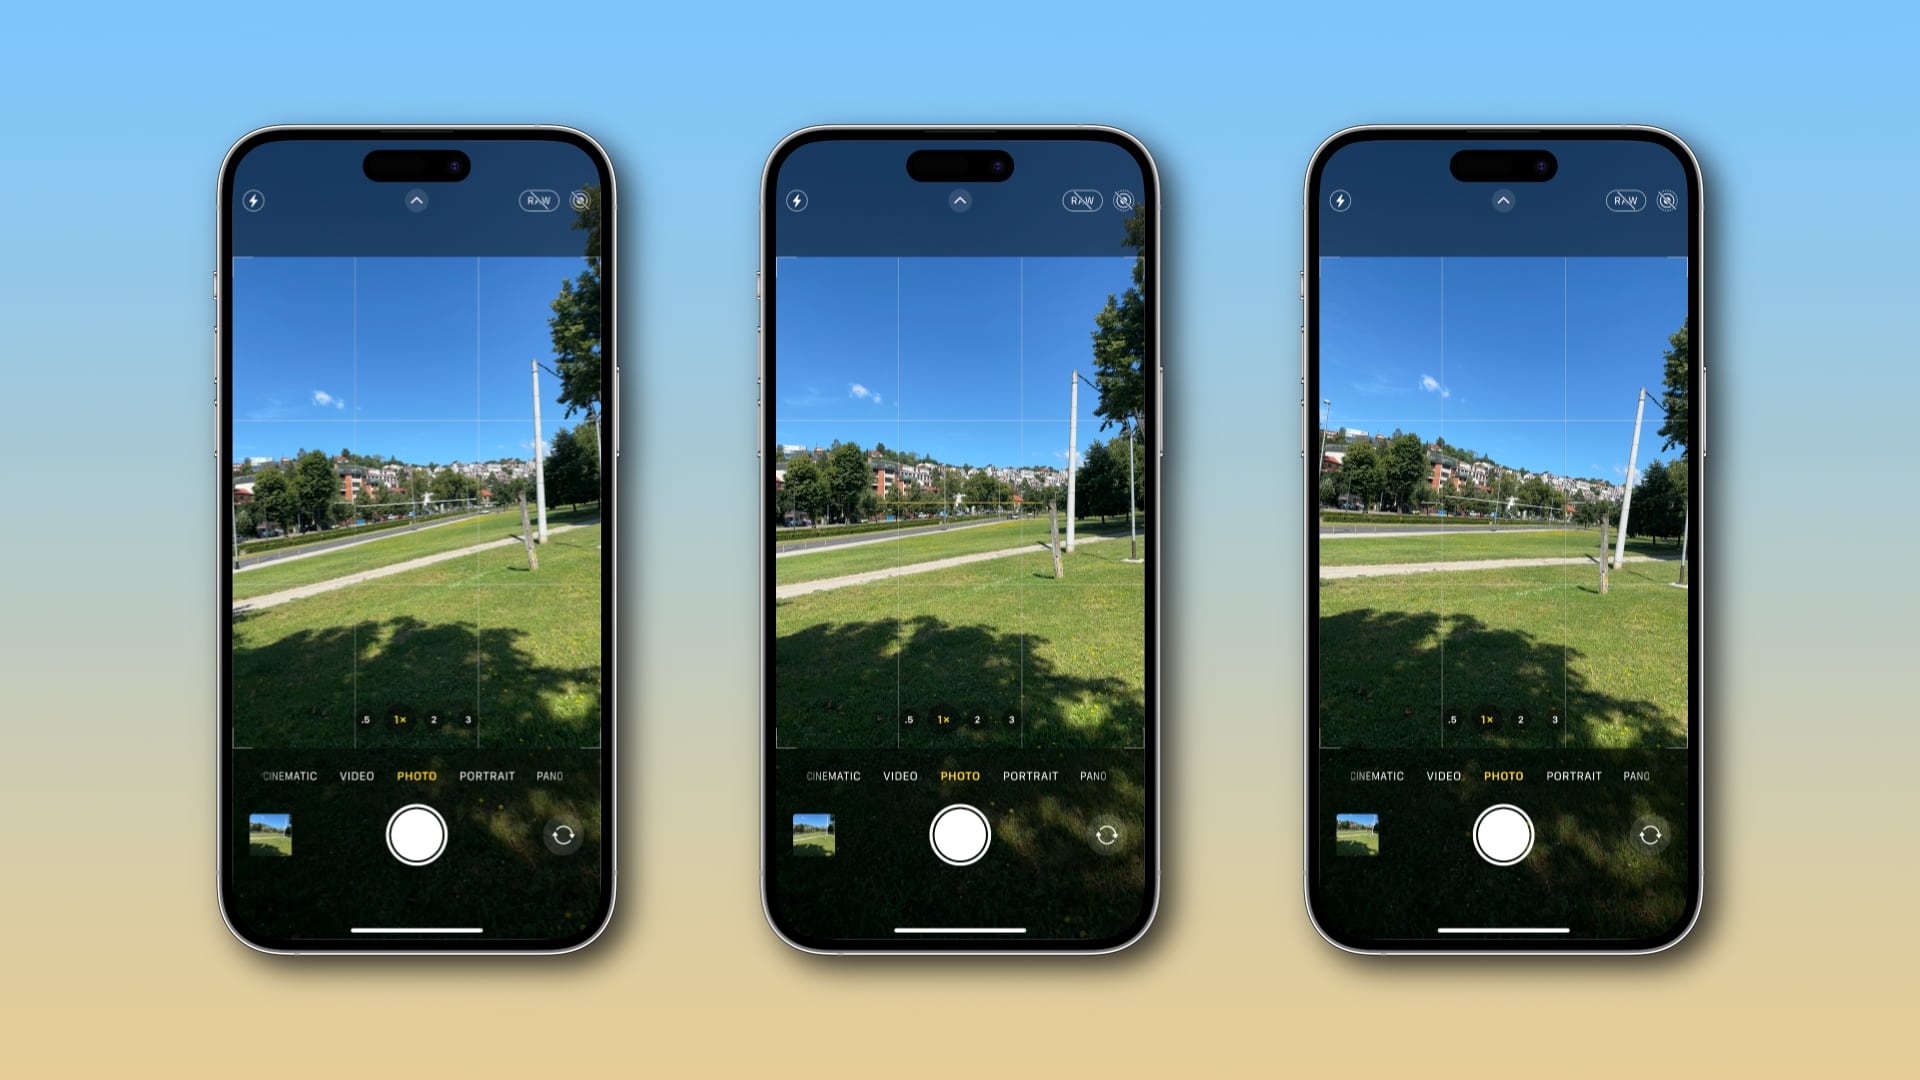
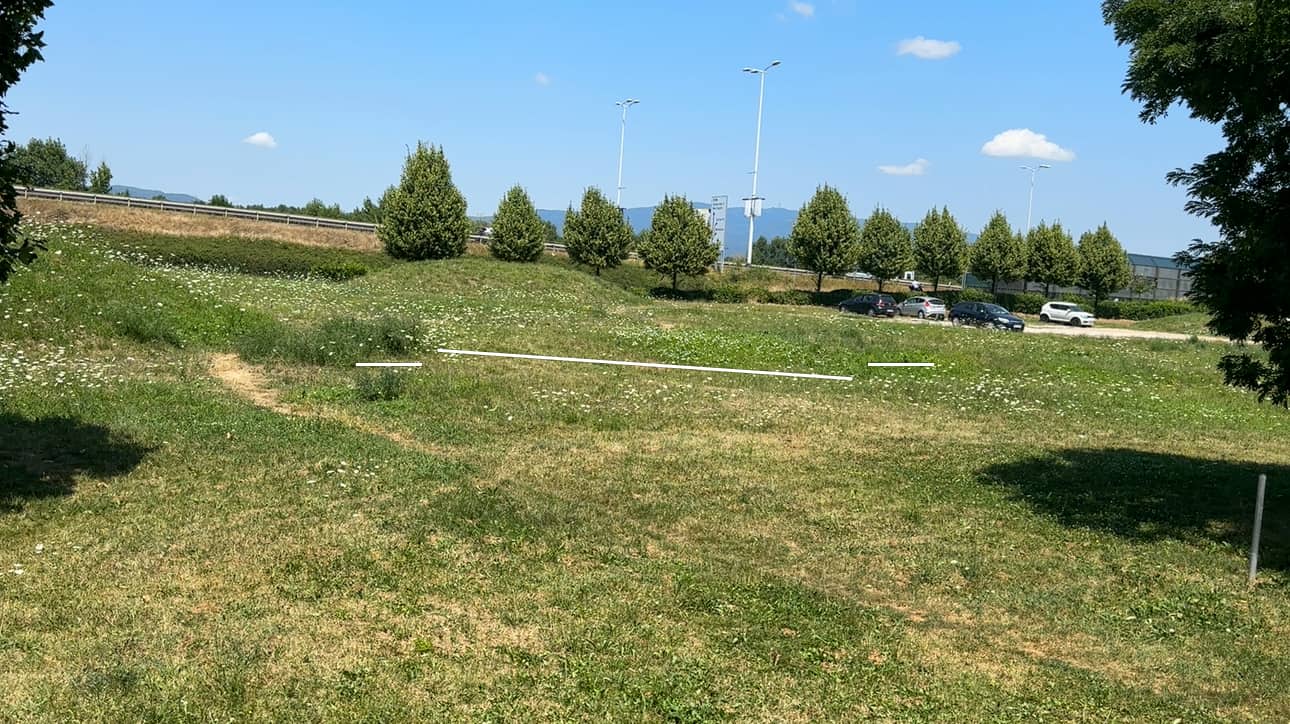
To align the iPhone’s camera with the horizon line, tilt your device until the broken lines in the viewfinder reconnect and turn into a single straight yellow line.
Congratulations, the camera is now perfectly aligned with the horizon. Quick, hit that shutter button before you’re out of level again!
The camera level works on any iPhone camera in both portrait and landscape, but you won’t see it at sharp angles as it’s limited to low angles close to horizontal.
The new horizontal level in iOS 17 is available across all shooting modes except for panoramic photography. The vertical level, however, is restricted to the Time-Lapse, Photo and Portrait modes. It’s unavailable during video recording.
How to use the iPhone’s camera level to take perfectly aligned overhead and top-down photos

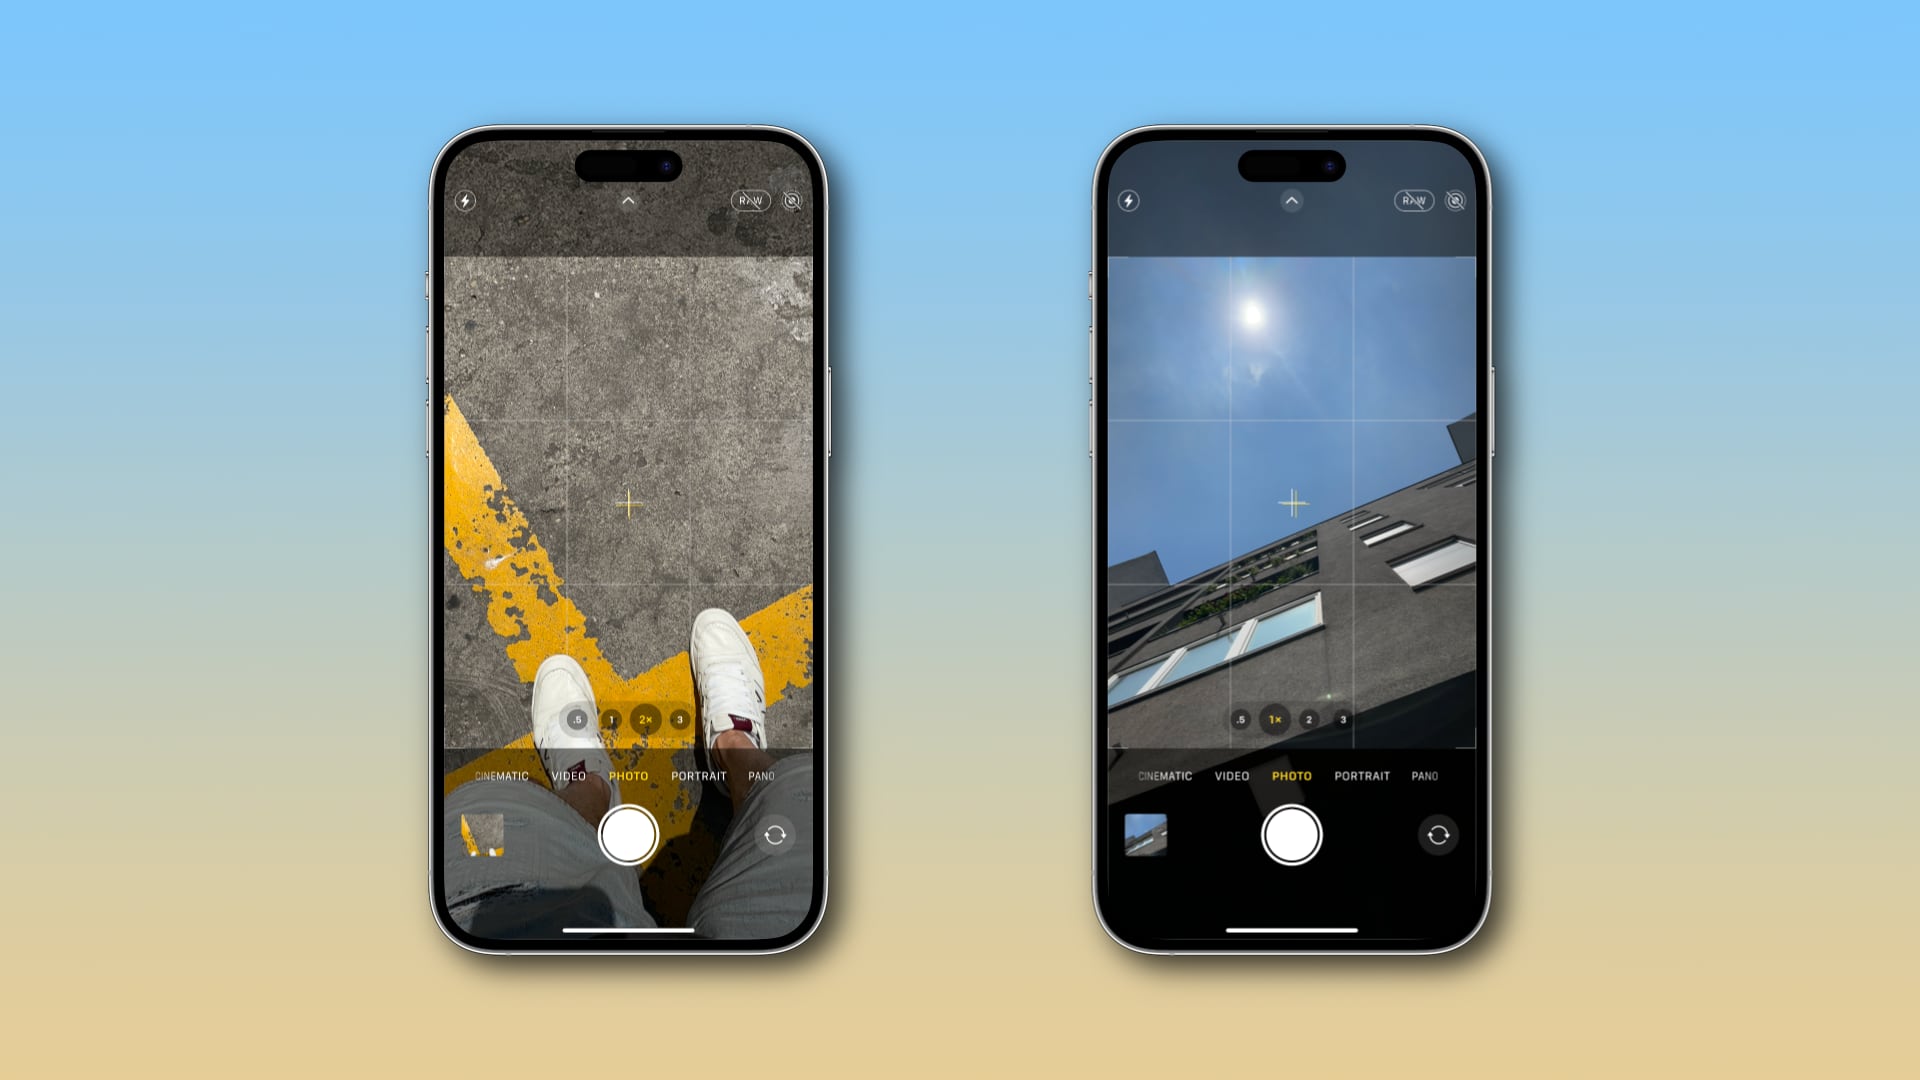
Aside from the horizontal level, your iPhone also has a hidden vertical level. A pair of crosshairs show up in the viewfinder when shooting things directly above you, like the sky, or below you, such as your food. The vertical level guides your alignment so you can take balanced shots without a tripod arm or mount.
The shot is perfectly aligned when the two crosshairs overlap and turn yellow and your iPhone subtly vibrates. Hit the shutter button and admire your perfectly balanced photograph! Unfortunately, iOS 17 lacks separate switches to independently toggle the horizontal and vertical levels on or off.
The Grid switch in iOS 17 and 16: What’s the difference?
In iOS 16, flipping the Grid switch also enables the hidden crosshair level in the Camera app. In iOS 17, however, flipping this switch only toggles the grid because the camera leveling capabilities now have their own dedicated switch in Settings.
Camera level options in iOS 16:
- Settings > Camera > Grid toggles both grid lines and the vertical level that automatically appears when taking overhead and top-down shots.
Camera level options in iOS 17:
- Settings > Camera > Grid only toggles grid lines in the Camera app.
- Settings > Camera > Level toggles the old vertical level (crosshairs) for overhead and top-down shots, plus the new horizontal camera level.
The camera level is an incredibly useful option. With little effort, you can straighten up your horizontal shooting angle and align your images perfectly.
Align those lines!

Whether you’re new to iPhone photography or not, the grid can help you apply the Rule of Thirds, even though some people use it to guide the placement of the horizon in their photos. You can turn the camera grid on or off within the Composition section in Settings > Camera > Grid.
You can also use the grid to align the horizon, but the problem with that is precision. Grid lines are just that—lines. They don’t respond to movement like the level feature, which takes advantage of the iPhone’s accelerometer and gyroscope sensors to detect the slightest changes in the camera’s position across all three axes.
Unfortunately, Apple keeps the level feature turned off by default to avoid overwhelming the Camera app’s interface, but it should be enabled out of the box if you ask me. Doing so would ensure everyone could easily adjust their shooting angle and perspective without necessarily knowing this option exists.
Source link: https://www.idownloadblog.com/2023/07/18/iphone-camera-level-tutorial/


Leave a Reply