

How to reduce video size on iPhone and Mac

Video files can consume a lot of space on your Mac or iPhone. Movies, videos shot on your iPhone or other cameras, TV shows, etc, can eat up your storage space rapidly. If you’re running out of space, then you can either delete some video files, or you can reduce the size of the file. The latter allows you to keep the files, and recover some space at the same time.
In this tutorial, we will show you some simple ways to reduce video size on Mac and iPhone. It must be noted that reducing the file size of a video will result in loss of quality to some extent.
Also see: How to reduce photo size on iPhone and Mac
How to reduce video size on Mac
On macOS, there are a couple of simple ways to reduce the size of a video file. Of course, you can download a video compressor that’ll do the work for you, and there are plenty of such apps available. However, you can also reduce the video size on macOS with the help of built-in tools.
Using iMovie
You can use iMovie on your Mac to reduce video size. iMovie is a basic video editing tool available on Mac as a free download. It is usually pre-installed on macOS, and can be found via Applications in Finder, or LaunchPad. If the app isn’t installed on your Mac, then you can download it from the Mac App Store. Here’s how to reduce the size of a video on iMovie.
1) Launch iMovie on your Mac.
2) Click on Create New and Movie.
3) Select File from the Menu Bar and choose Import Media, or click on Import Media in Project Media.
4) The video should appear in the Media window. Select the file and drag it to the Timeline below.
5) Click on the Share button on the top right corner of the app, then select Export File. Or you can click on File > Share > File.
6) Adjust the Resolution, Quality, and change the Compress option to Faster to reduce the file size.
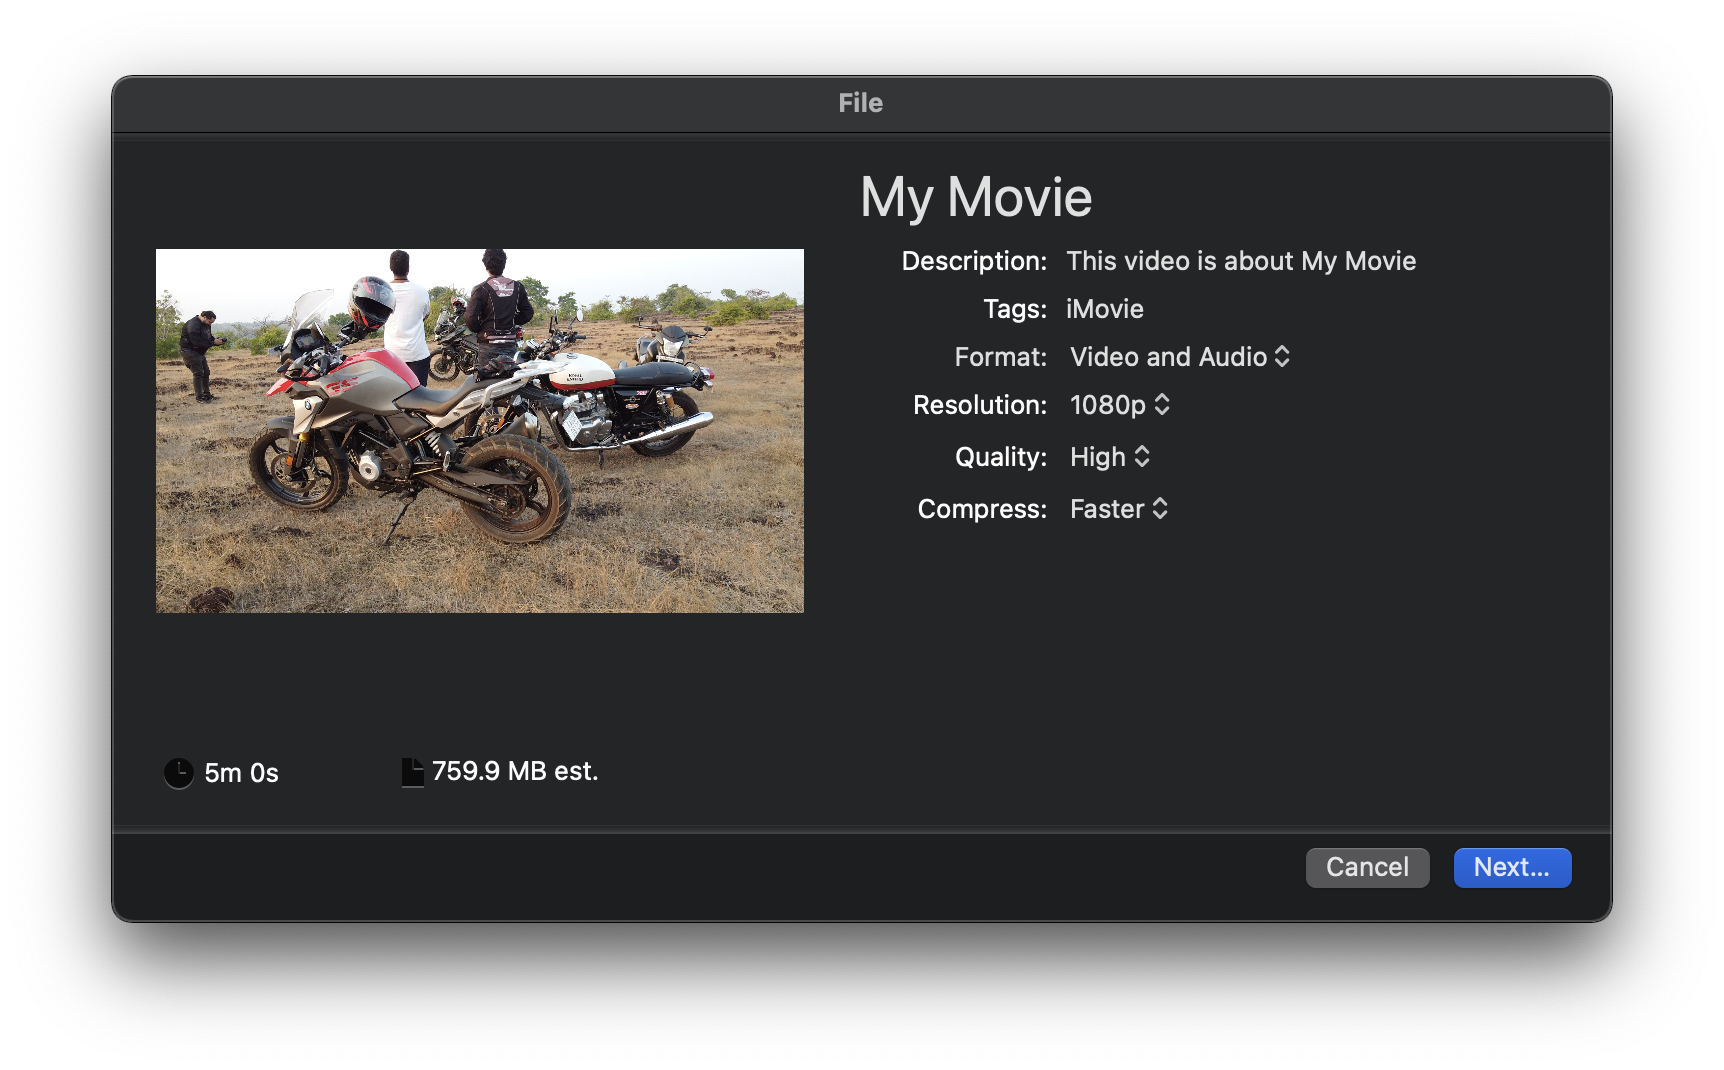
7) Finally, choose a filename for your new video and select a location. Hit Save to start the conversion.
Once the export is completed, you’ll have a video file that’s smaller in size. However, the quality is obviously going to be lower than the original file.
Using QuickTime
QuickTime is the built-in video player available on all Mac computers. You can use QuickTime to quickly reduce the size of a video. Here’s how you can do this.
1) Launch QuickTime on your Mac.
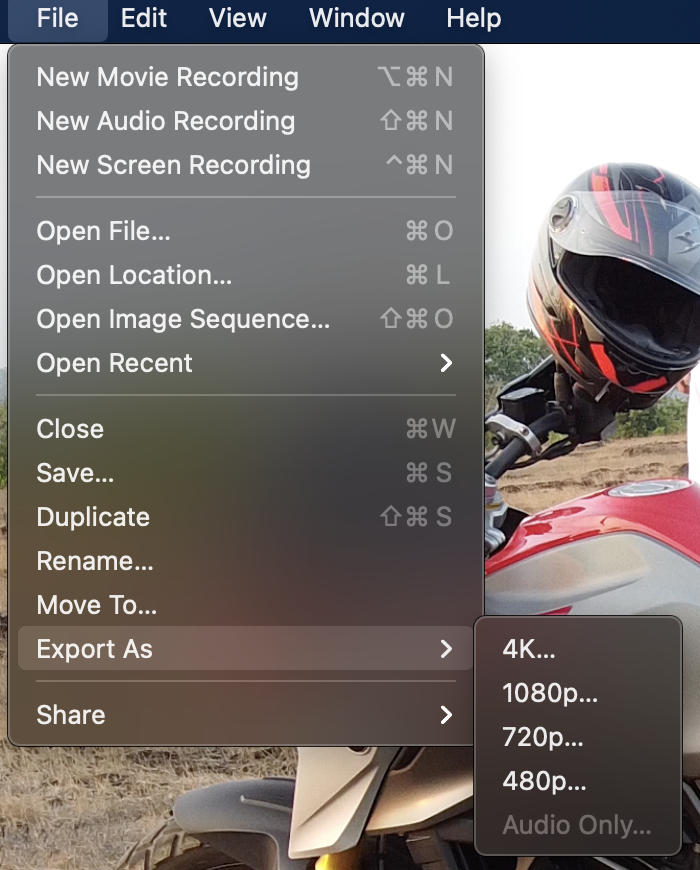
2) Open a video, and then click on File > Export As > Choose an available lower video resolution.
3) You can then name the output file and hit the Save button.
The output video file will now be smaller in size than the original file.
How to reduce video size on iPhone
Now, moving to the iPhone, there are a couple of ways to reduce the video size. You can use the camera settings to record videos in lower quality to save space to begin with, or you can use third-party apps to do the job for you.
Record at a lower resolution
This is useful for users who like to take a lot of videos on their iPhone, but are worried they’ll fill up all the storage space. You can simply record video at a lower resolution to save space, and here’s how to do this.
1) Open Settings app on your iPhone.
2) Navigate to Camera.
3) Now use a lower resolution under Record Video option.
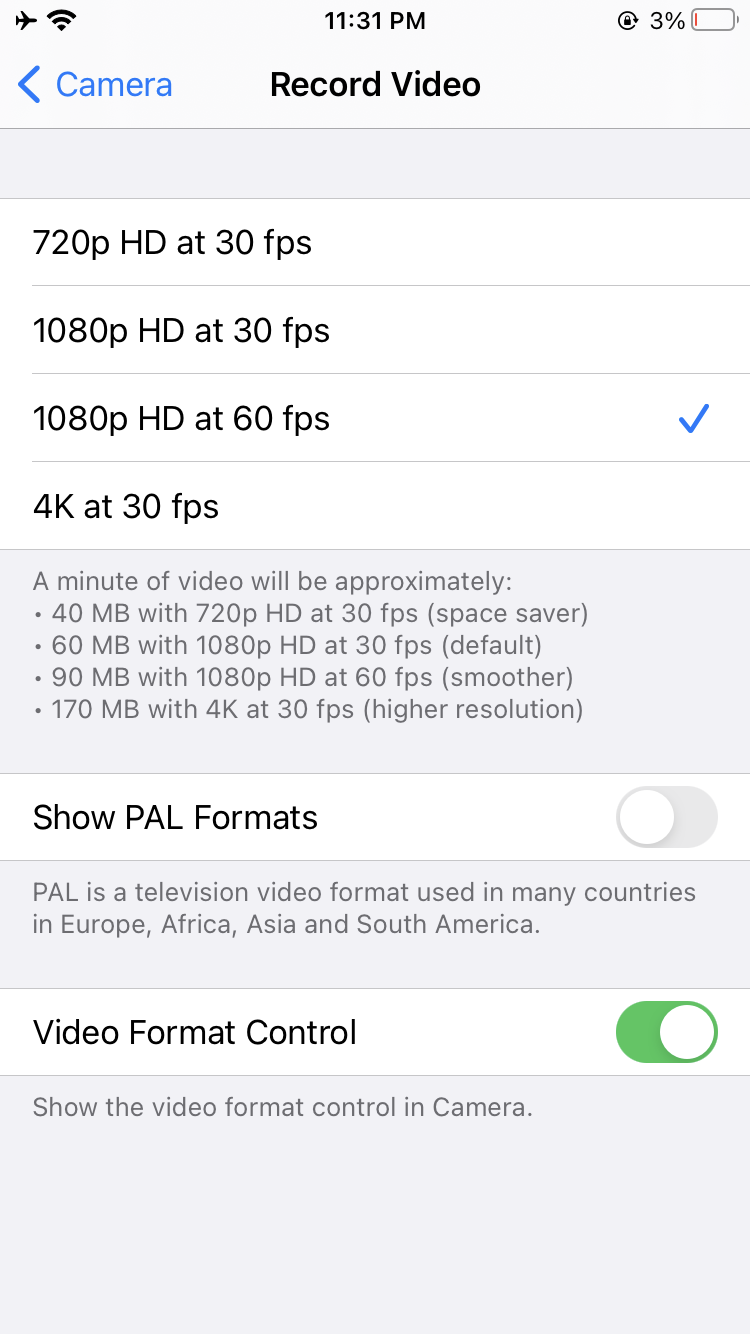
Choosing a lower resolution for video recording will ensure that the videos shot on your iPhone are lower in size and easier to share.
Using Compress Videos app
You can also use the Compress Videos app, which was developed by iDB and is available for free in the App Store. Here’s how to use the app to compress or reduce video size on your iPhone.
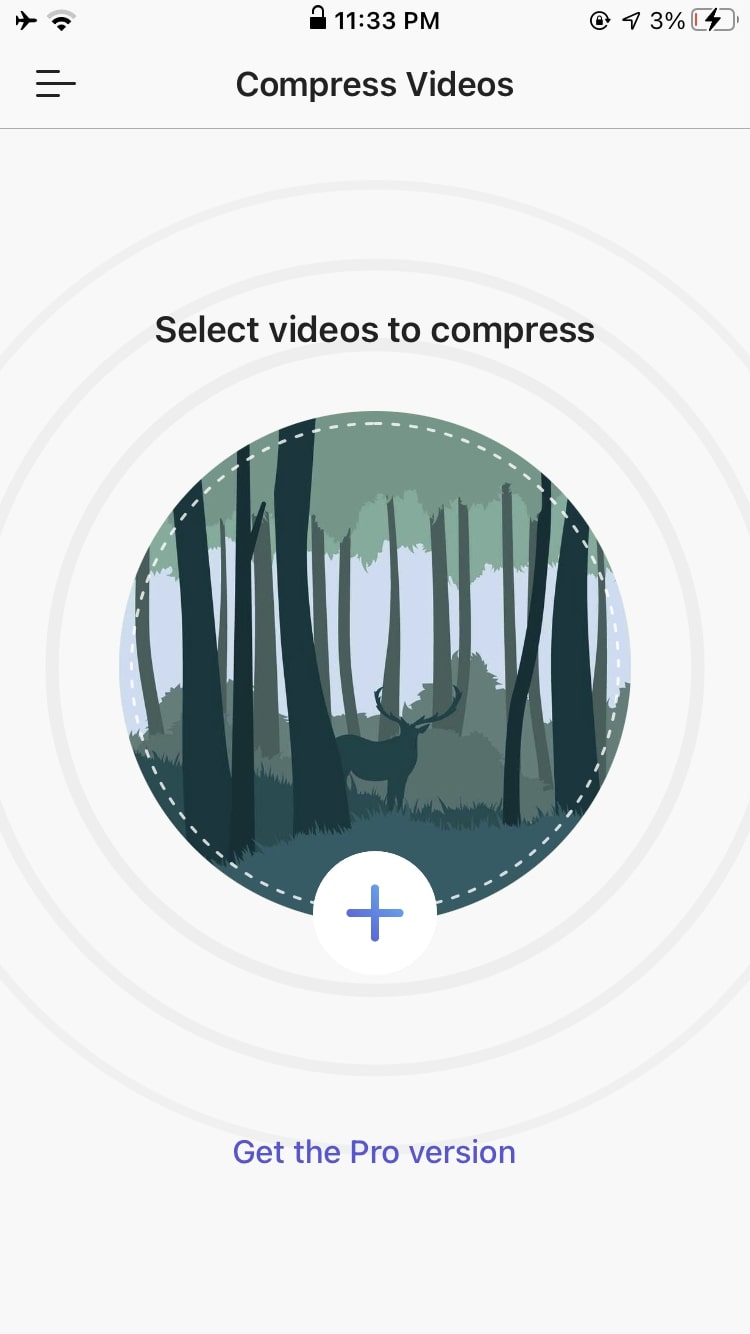
1) Launch Compress Videos on your iPhone.
2) Tap on the ‘+’ button on the main page to add a video.
3) Click Next on the top right corner and choose the video frame rate and video dimensions.

4) You can reduce the frame rate to up to 24, and we recommend video dimensions to be left at 80 percent.
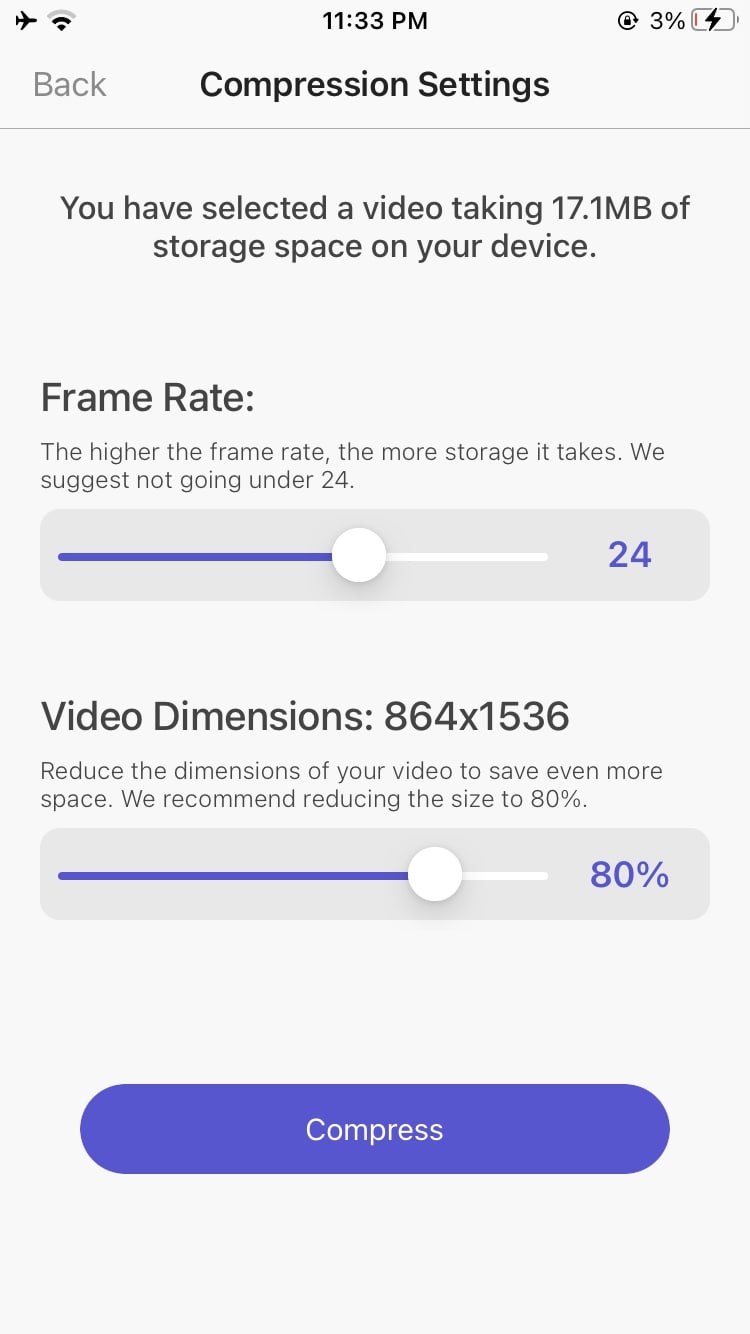
5) Tap on Compress and wait for the video to be automatically saved to your Photo library.
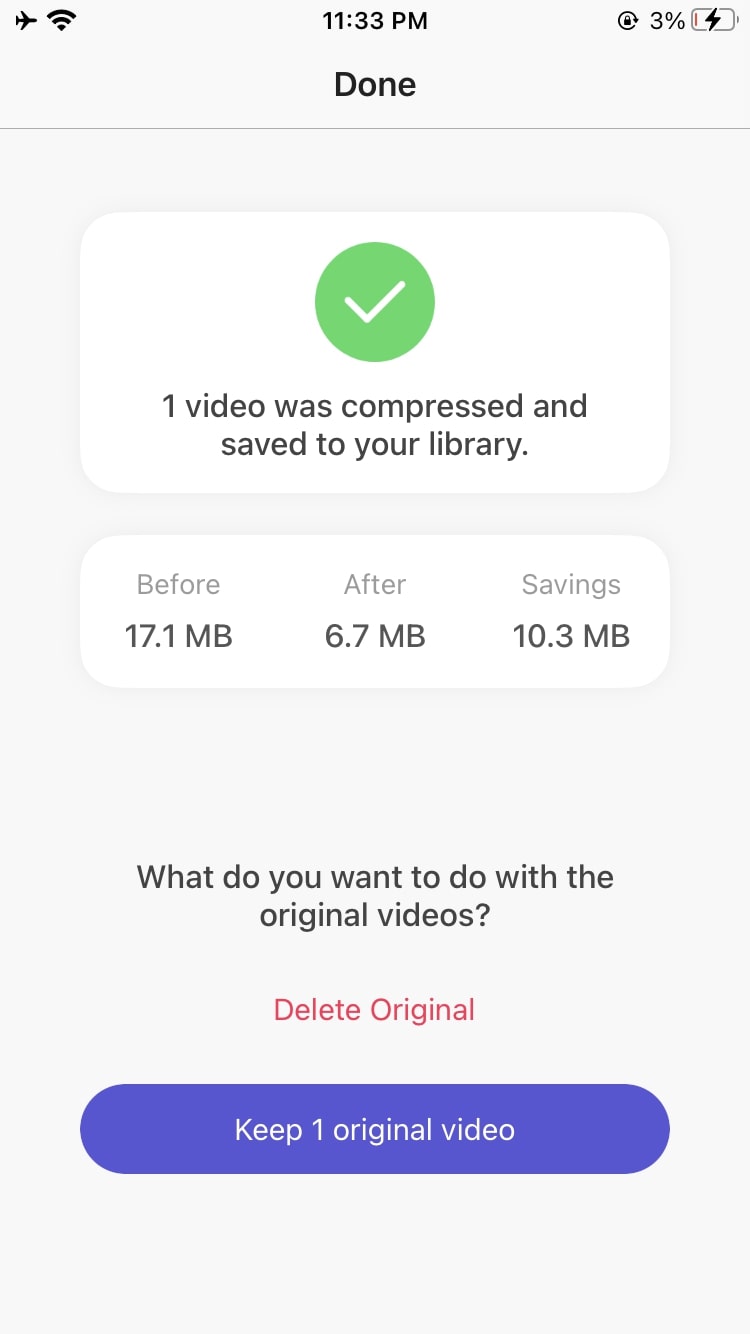
You’ll see that the app has compressed the video and reduced its file size. This is an excellent app for reducing video file size on your iPhone, and is super easy to use.
Send videos to yourself on WhatsApp, Telegram, and more
Another great option to reduce video file size on iPhone is to send the video to yourself on WhatsApp or similar messaging apps. The app will automatically compress and reduce the size before sending it to you. Simply download the new file and delete the old one.
Wrapping up
Reducing the video file size on Mac and iPhone is easy, but it will also bring down the quality. If you’re not worried about the output video quality, then you can go ahead and reduce the size. It’ll not only help save space on your device, but will also make it easier to share the smaller file.
Source link: https://www.idownloadblog.com/2021/05/19/how-to-reduce-video-size-iphone-mac/

Leave a Reply