How to email documents and books to your Kindle Paperwhite

You may not realize it, but your Kindle has an email address. And if you use the Kindle app on your iPhone or iPad, it has an email address too. This lets you send documents and book files directly to your device.
Before you start using this email address; however, you should take a moment to add your “from” email address to the approved senders list. Otherwise, the file you’re emailing may be delayed by Amazon’s watchful eye.
Here, we’ll show you how to add your email address to the safe sender’s list, how obtain the email address for your Kindle Paperwhite, and other tips you need to know.
Sending files to your Kindle
Add your address to the Approved Senders List
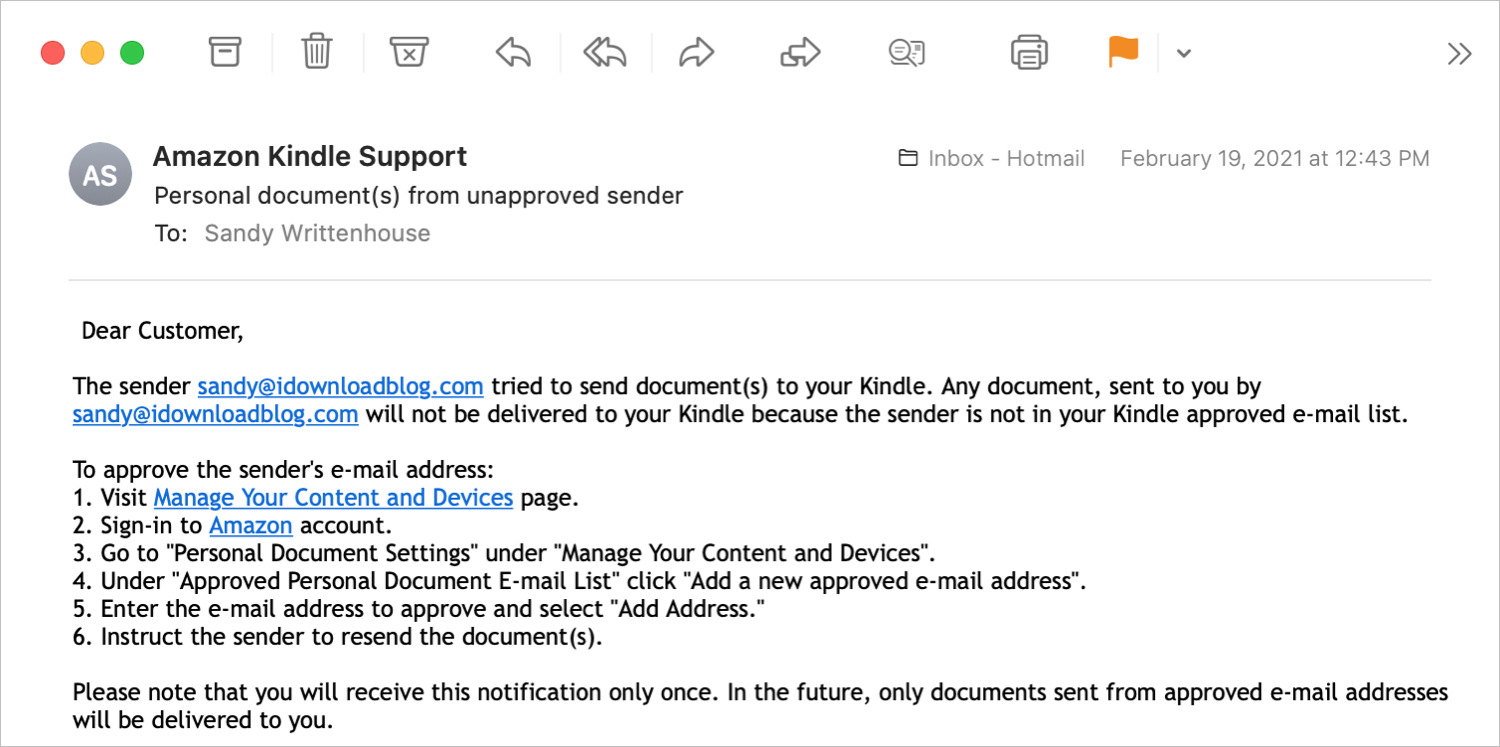
If you try to email yourself a file before adding the sending email address to the list, it may be stopped by Amazon. Instead of receiving the item to your Kindle, you may receive an email like the one below to the address connected to your Amazon account. This lets you know someone is trying to send you a file.
To avoid a delay in getting the document or book you’re sending to yourself, you can skip receiving this alert by adding your address to the Approved Senders List for your Kindle on Amazon.
1) Head to Amazon.com, sign in, and select the drop-down below your name at the top to display the menu.
2) Select Content & Devices.
3) Choose the Preferences tab at the top of the page.
4) Scroll down to and click Personal Document Settings to expand the section.
5) Here, you’ll see the Kindle email addresses for all your devices. So if you want to copy your email from here, it’s a convenient spot. But we’ll also show you another place to obtain it below.

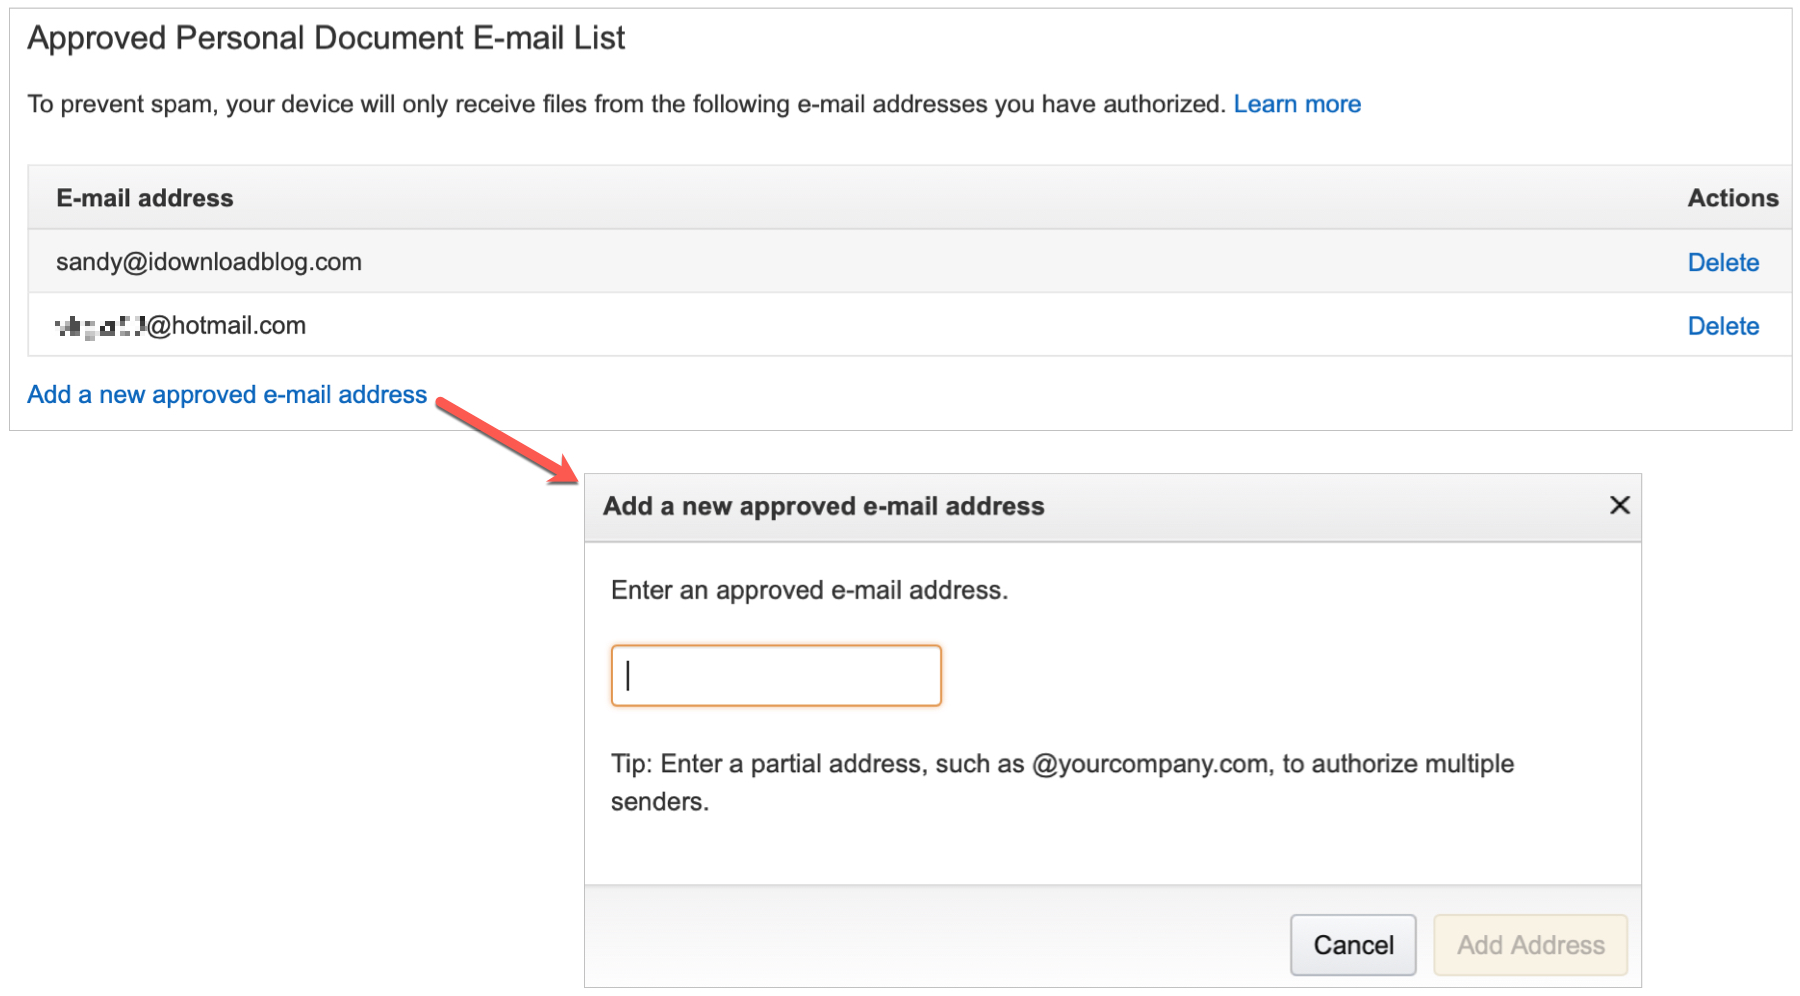
Below the email addresses, you’ll see Approved Personal Document E-Mail List.
6) Click Add a new approved e-mail address enter the address. You’ll notice you can also enter partial email addresses for multiple senders from the same domain.
7) Hit Add Address.

The email address will be added to your list and you can now freely email documents and books to your Kindle. You can have up to 15 approved email addresses.
Get your Kindle email address
Along with the above way to get the email address for your Kindle, there is another spot on Amazon that gives you this.
1) Follow the same steps as above to navigate to Content & Devices.
2) This time choose the Devices tab at the top and select your Kindle beneath.
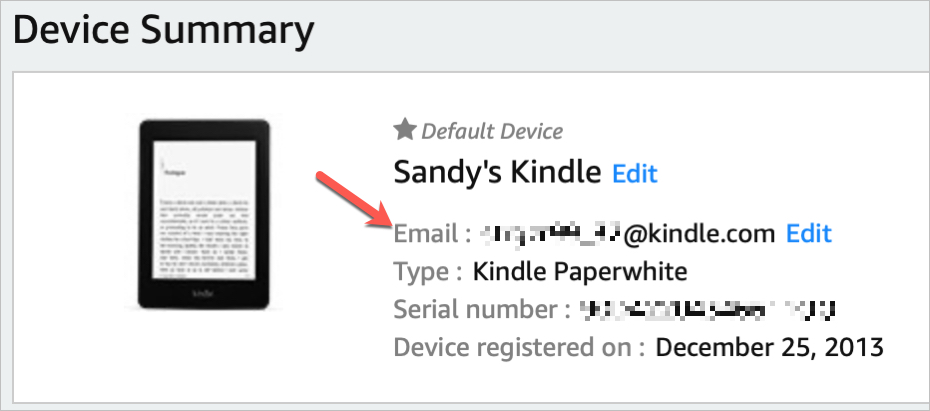
3) Click the name of your Kindle.
You’ll then see the email address for your device in the Device Summary below its name. You can copy the email address and plop it into the message and save it right to your contacts for quick access. You can even customize this email address if you choose to.

File types you can email to Kindle
Here’s a list of the types of files, documents, and books that you can email to your Kindle.
- Books: MOBI and AZW
- Documents: PDF, DOC, DOCX, TXT, and RTF
- Images: JPEG, JPG, GIF, PNG, and BMP
- Other: HTM and HTML
You can attach up to 25 files per email for a total of 50 MB or less. If your document total is more than 50 MB, you can compress them into a ZIP file. The conversion service will automatically unzip and convert your files to a Kindle-friendly format.
Email your document or book
Now anytime you want to send a document or book file to your Kindle or the Kindle app, just attach it to an email and send it to your Kindle email address. It’s that easy and you should receive the file directly to your device pretty quickly.
Pro tip: For documents like a PDF, Amazon suggests that you enter the word “Convert” into the subject line of the email. This will convert the document into a more Kindle-friendly format.
Are you going to email a file to your Kindle Paperwhite? If so, let us know what you think of the process!
Source link: https://www.idownloadblog.com/2021/03/01/send-email-to-kindle-paperwhite/


Leave a Reply