

How to manage permissions for files and folders on Mac
If you share your Mac with others and don’t set up separate user accounts or allow others to connect via file sharing, you may have some items that you want to protect. You can password-protect and encrypt folders and you can add passwords to certain files. But maybe you just want a fast way to make sure no changes are made to your items.
Believe it or not, it’s very simple to change permissions for the files and folders on your Mac. You can decide what access to give, if any, and apply those permissions to groups along with individuals. Here’s how to manage permissions for files and folders on your Mac.
File and folder permissions on Mac
Allowed privileges
Before you start changing file and folder permissions on your Mac, you should become familiar with your options. These are the choices you have for user privileges.
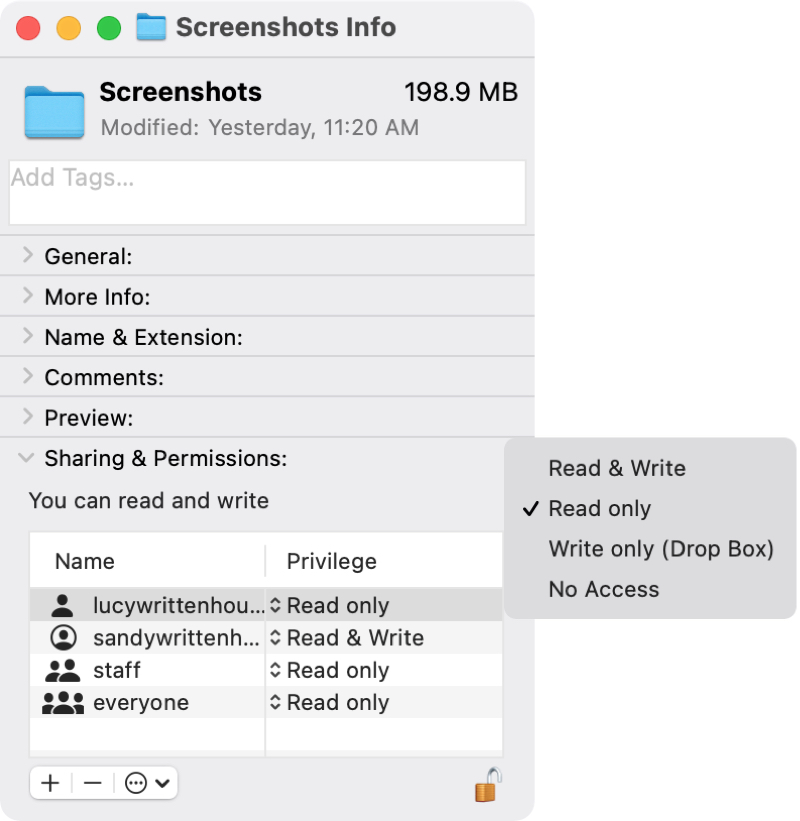
- Read & Write: Let the user open and edit the item.
- Read only: Lets the user open and view the item, but not edit it.
- Write only: Make a drop folder for users to copy items to; the owner of the drop box is the only one who can open it.
- No Access: Blocks access.
Assign permissions
When you want to manage the permissions to a file or folder, you’ll access the Get Info tool for it.
1) Either right-click the item in its folder and select Get Info or select it and click File > Get Info from the menu bar.
2) You may need to unlock the Get Info tool to make changes. Click the padlock on the bottom right and enter your administrator password.
3) At the bottom of the Get Info window, click the arrow to expand Sharing & Permissions if it’s collapsed.
4) You’ll see a list of users that also includes groups like Staff and Everyone in the Name column. To the right of the user or group, in the Privilege column, choose the access you want to allow.
Add or remove users or groups
If you don’t see the user or group you want to assign permissions to, you can simply add them in the same section of the Get Info window. You can also remove users or groups if needed.
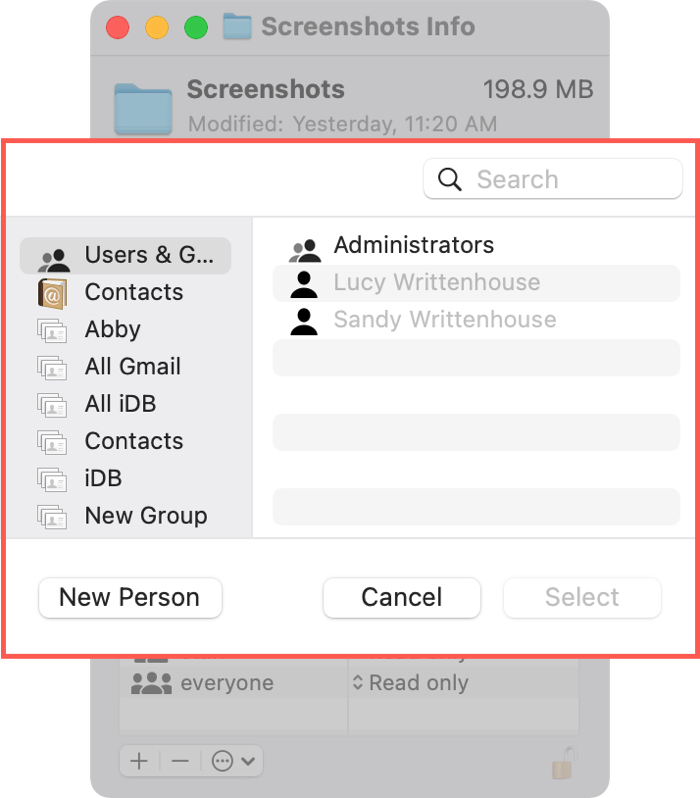
To add a user or group, click the plus sign button on the bottom left. Choose the person or group or click New Person to create a new user. Click Select and they will be added in the Name column.
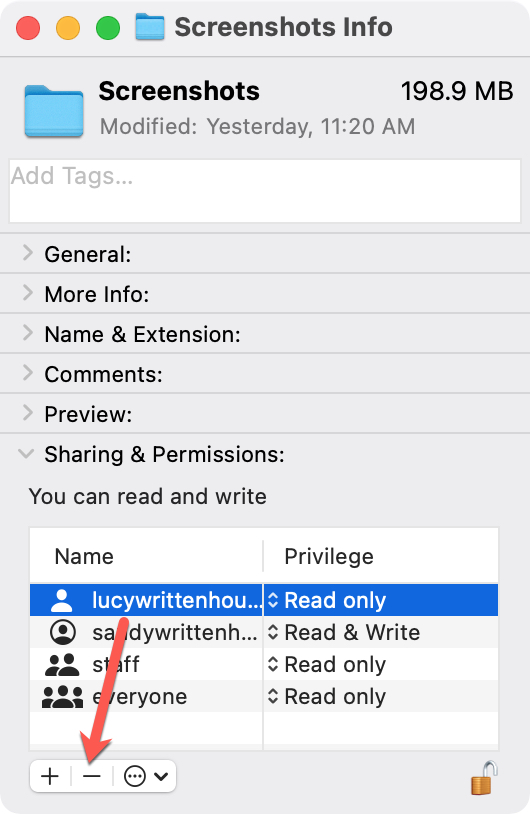
To remove a user or group, select them in the Name column and click the minus sign button at the bottom.
Assign permissions for all items in a folder
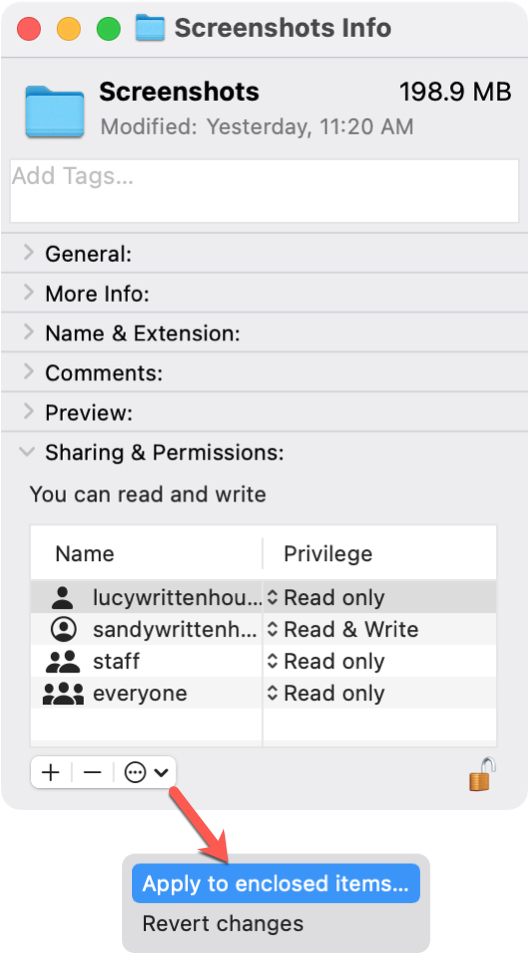
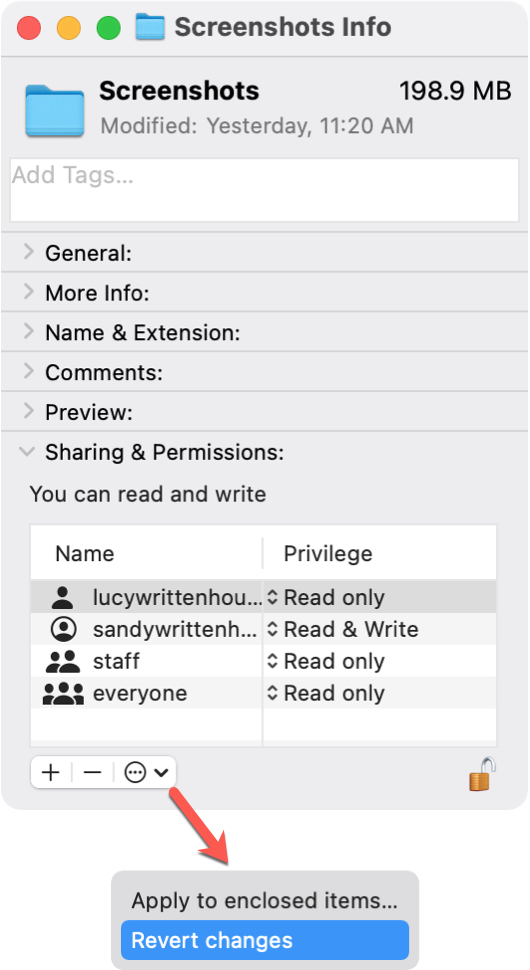
If you are adjusting the privileges to a folder (you can also do this for a disk on your Mac), click the Action button (three dots) at the bottom of the Sharing & Privileges section. Choose Apply to enclosed items.
Undo permissions changes
If you decide to undo the permission changes you make, you can do so before closing the Get Info window. Click the Action button at the bottom and select Revert Changes.
Wrapping it up
Before you go through the process of protecting a file or folder with passwords or encryption, consider simply changing the permissions for the item. This gives you a quick and easy way to keep another user from making changes or even viewing the file or folder.
Are you going to take a few minutes to assign specific privileges to items on your Mac? Let us know if this tutorial is helpful!
Source link: https://www.idownloadblog.com/2021/01/20/manage-file-and-folder-permissions-mac/

Leave a Reply