How to get detailed cycling directions with Apple Maps on your iPhone, iPad & Apple Watch

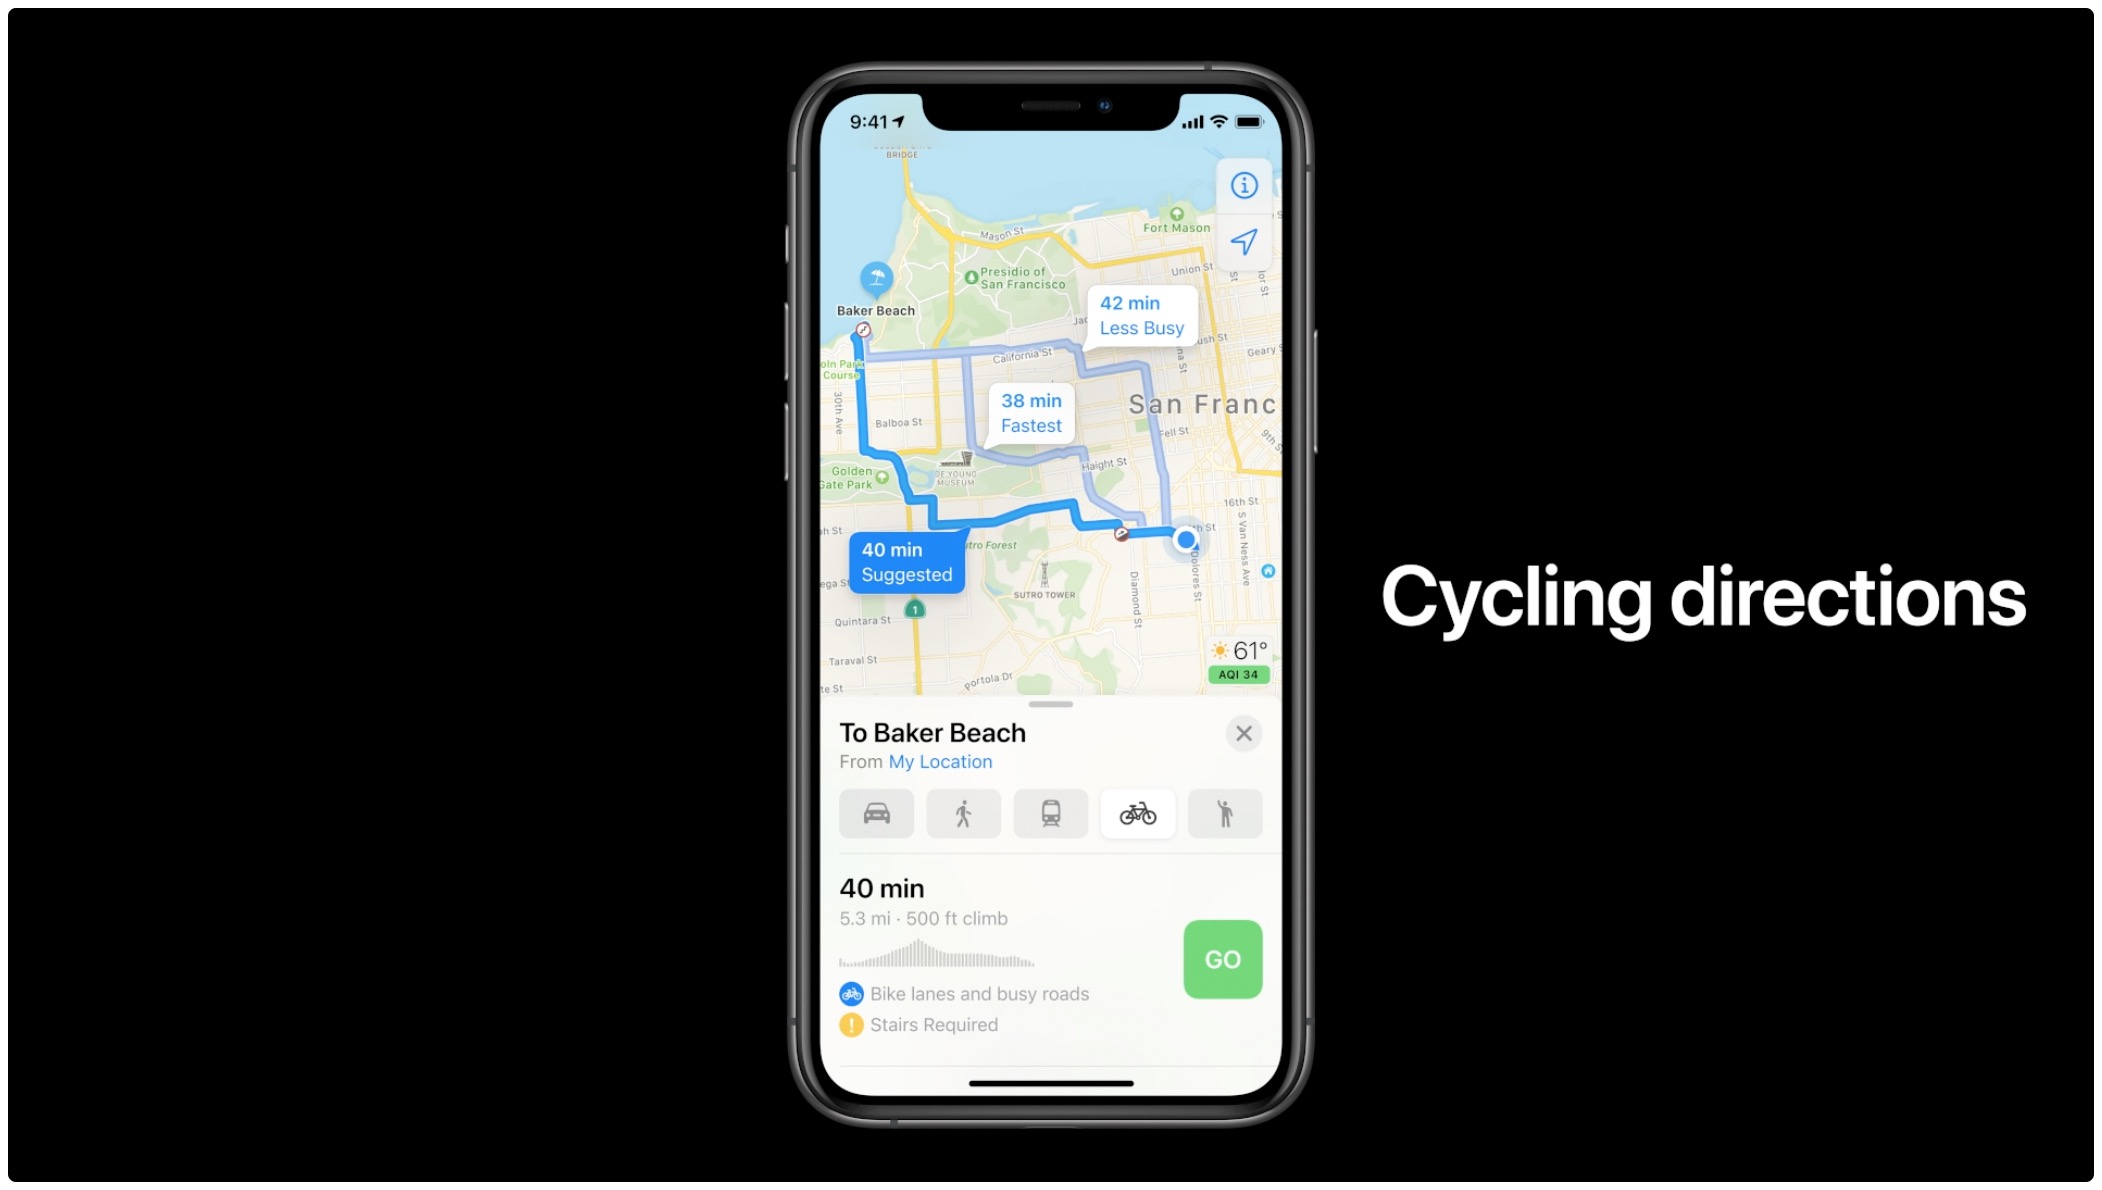
Whether you’re an avid cyclist or someone who happens to ride their bike every now and then as a way of stating in shape, Apple Maps offers biking routes as one of the transit options when looking up a specific location. Follow this tutorial to learn how to request and use Apple Maps cycling directions on your iPhone, iPad and Apple Watch.
Apple Maps has cycling directions
With the Maps app in iOS 14, iPadOS 14 and watchOS 7, you can request cycling directions on your iPhone, iPad, iPod touch and Apple Watch. This very well-thought-out feature takes into account all the challenges that cyclists typically face when exploring city streets.
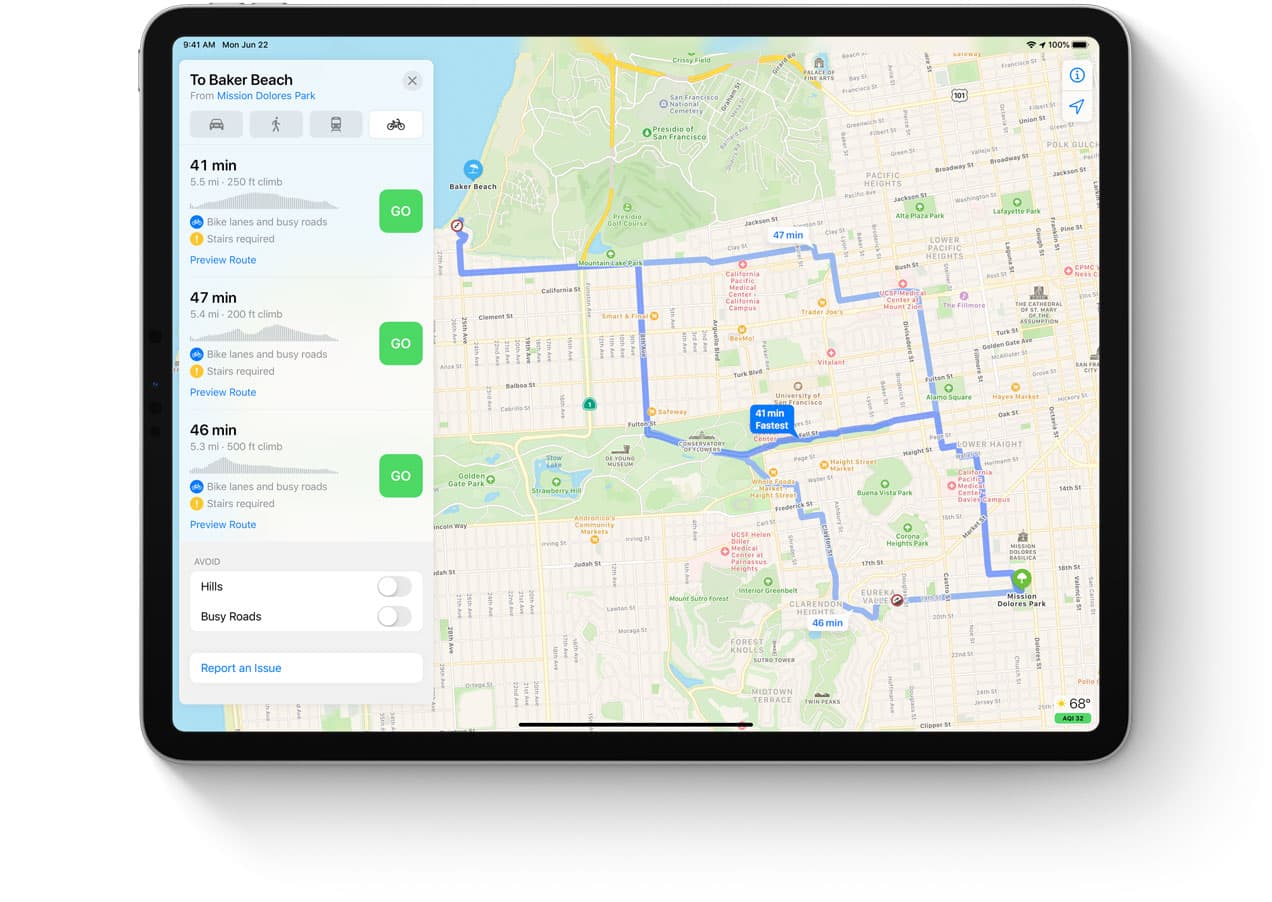
For instance, you can get cycling directions along bike lanes and other bike paths. The Maps app even offers cycling directions along bike-friendly roads. You can see important information when planning a bike trip, like elevation. Plus, Maps takes into account other factors such as how busy a street is and whether there are stairs along the route.
→ How to use electric vehicle routing in Apple Maps
Like with other Apple Maps features, you’re in control. The Maps app allows you to configure your routes to avoid steep inclines or stairs. You can also preview the elevation for your ride. And with the Siri assistant, you can request cycling directions hands-free, using just your voice.
→ How to customize Apple Maps on iPhone, iPad & Mac
The Maps app on your Apple Watch supports cycling directions, too. And with custom cycling voice guidance in watchOS, you can navigate without taking your eyes off the road.
For optimal convenience while biking, cycling directions are available right on the wrist. Directions are large and easy to read and Maps can direct when to dismount and walk the bike or take the stairs to save time. The wearer can choose a route that avoids steep hills, gets to the destination the quickest or takes the most direct path.
As the cherry on the cake, there’s a new cyclist helmet headwear style available for your Memoji so you can proudly show off your passion for cycling to the world.
Requirements & coverage
Cycling directions in Apple Maps are available on these devices and OS versions:
- iPhone and iPod touch with the iOS 14.0 software or later
- iPad with the iPadOS 14.0 software or later
- Apple Watch with the watchOS 7.0 softer or later
Apple Maps provides cycling directions in these select areas:
- Beijing
- China mainland
- Los Angeles
- New York City
- San Francisco Bay Area
- Shanghai
For up-to-date coverage info, visit the iOS and iPadOS Feature Availability webpage.
Getting cycling directions in Apple Maps
Follow these instructions to get detailed cycling directions in Apple Maps on your devices.
iPhone and iPad
Here’s how to request cycling directions on your iPhone or iPad:
- Open the Maps app on your iOS device.
- Touch your destination on the map, then choose “Directions.“
- Hit the cyclist icon to choose cycling as your transportation type.
- Lastly, touch the “Go“ button for your preferred route to start cycling directions.
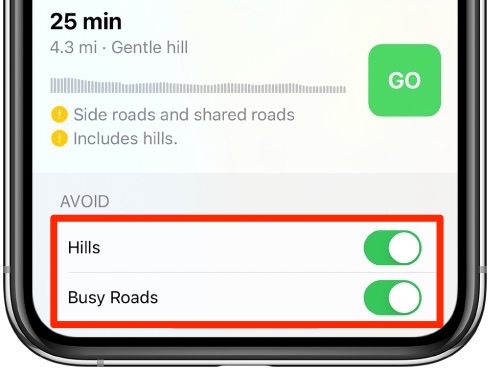
As you’re following your route, you’ll hear cycling-specific directions for turns and maneuvers. You can enable these options underneath the heading “Avoid“ when previewing routes:
- “Hills“: Choose this to avoid hills.
- “Busy Roads“: Choose this if you’d like to avoid busy roads.
To end your session, tap the “End“ button or ask Siri to “stop navigating.”
In the Maps settings, you can optionally disable the voice for spoken directions or change whether to automatically pause podcasts and other spoken audio when directions are spoken.
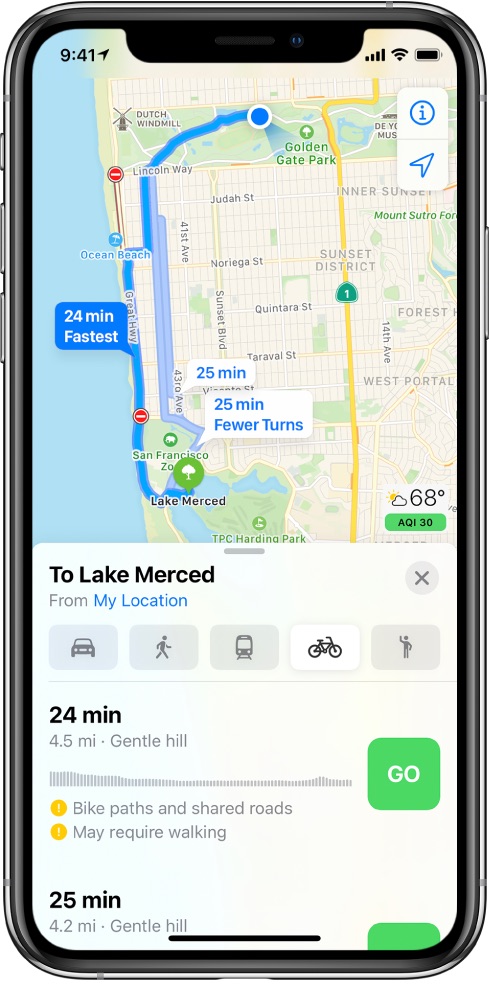
Multiple routes
If you’d like to see the route overview at any time while following directions, tap the banner at the top of the screen, then touch the route card at the bottom. Now choose “Details“ to see all directions in a list or “Overview” to see the whole route.
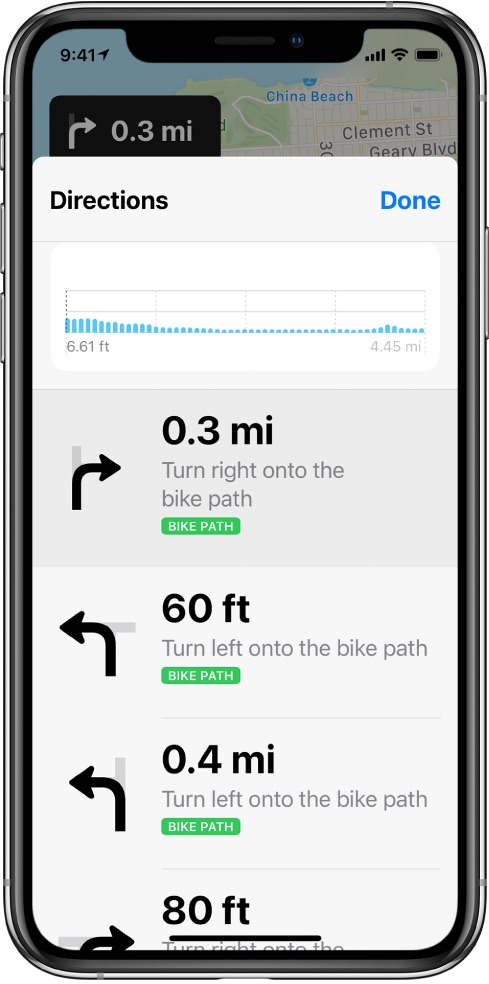
Cycling directions as a list
To help avoid traffic accidents and injury, you are wholeheartedly recommended to invest in a handlebar mount for your iPhone. Such accessories allow you to just glance at the directions on the iPhone screen without having to take your eyes off the road for too long.
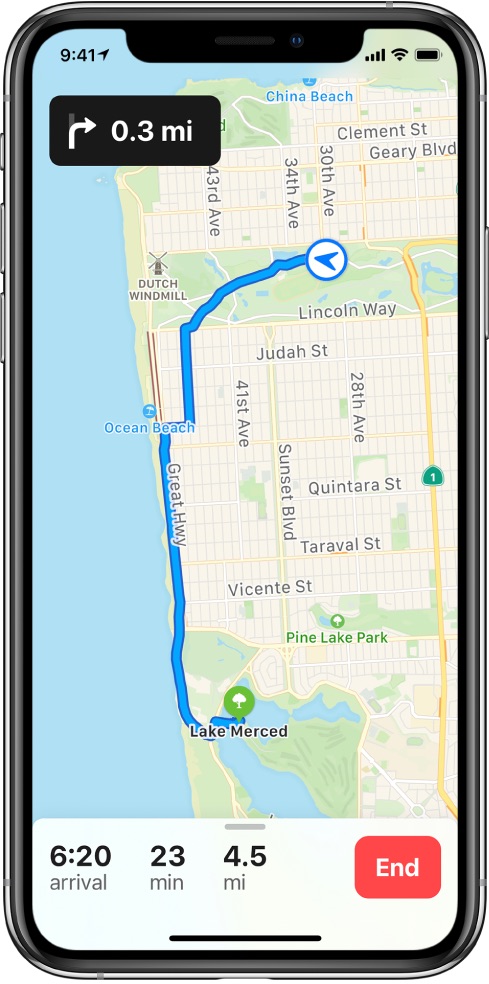
Checking out the entire route
If you have an Apple Watch, you can glance at cycling directions on your wrist.
Apple Watch
This is how you get cycling directions on your wrist:
- Open the Maps app on your Apple Watch.
- Turn the Digital Crown to scroll to the “Favorites,” “Guides” and “Recents” sections.
- Touch a desired entry, then choose “Cycling” underneath the “Directions” heading.
- Tap a route to start cycling directions.
If you’d like to get directions to a landmark or map pin, tap “Location” in the Maps app, then choose cycling directions. You can also tap “Search” to find a place to navigate to.
The Maps screen will display an overview of your selected cycling route. Scroll a bit down and you’ll see your turns in a handy list, distance between turns and street names. Similar to Maps for iOS, Maps in watchOS displays a handy overview of elevation changes along your route before you even start navigating. You can also touch any entry to learn whether that road has a bike path, if it’s a side or main road or whether it requires you to dismount your bike and walk.
And with a cycling route showing, you can tap the “>” in the top-left corner, then turn on the option to avid hills or busy roads.
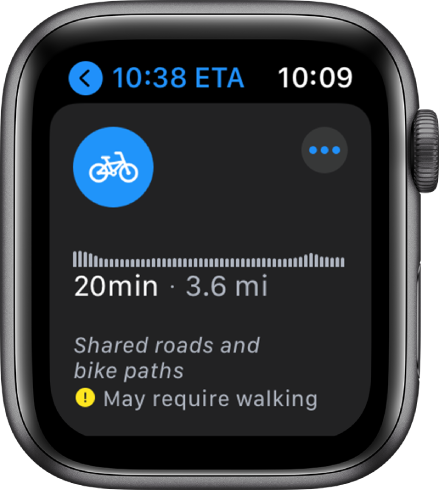
Notice the “may require walking“
In a true Apple fashion, cycling directions are implemented with utmost care for safety and convenience. If you’ve ever used turn-by-turn directions on your wrist, you’re familiar with wrist taps that signal when it’s time to turn. It’s great that this handy little feature also supports bike rides — now you can follow your cycling directions without ever taking your eyes off the road.
→ How to change your home address in Apple Maps
Of course, you can disable alerts for specific transportation types. To do so, open the Watch app on your paired iPhone, then touch the “My Watch” tab. Next, choose “Maps” from the root list to enable the alerts you wish to receive—Driving, Driving with CarPlay, Walking and Cycling.
→ How to share your ETA in Apple Maps with Siri
Thanks to these surprisingly thoughtful improvements in Apple Maps across Apple devices, active cyclists who are well aware about the importance of responsible cycling can now be even more aware of their surroundings when riding a bike along busy city streets.
Setting cycling as default travel type
If you’re an avid cyclist, you can set cycling as your preferred type of travel in the Maps app. This will let you get cycling directions with fewer taps, and this is how you do it:
- Open the Settings app on your device.
- Choose “Maps“ from the root list.
- Touch the “Cycling“ option underneath the heading “Preferred Type of Travel.“
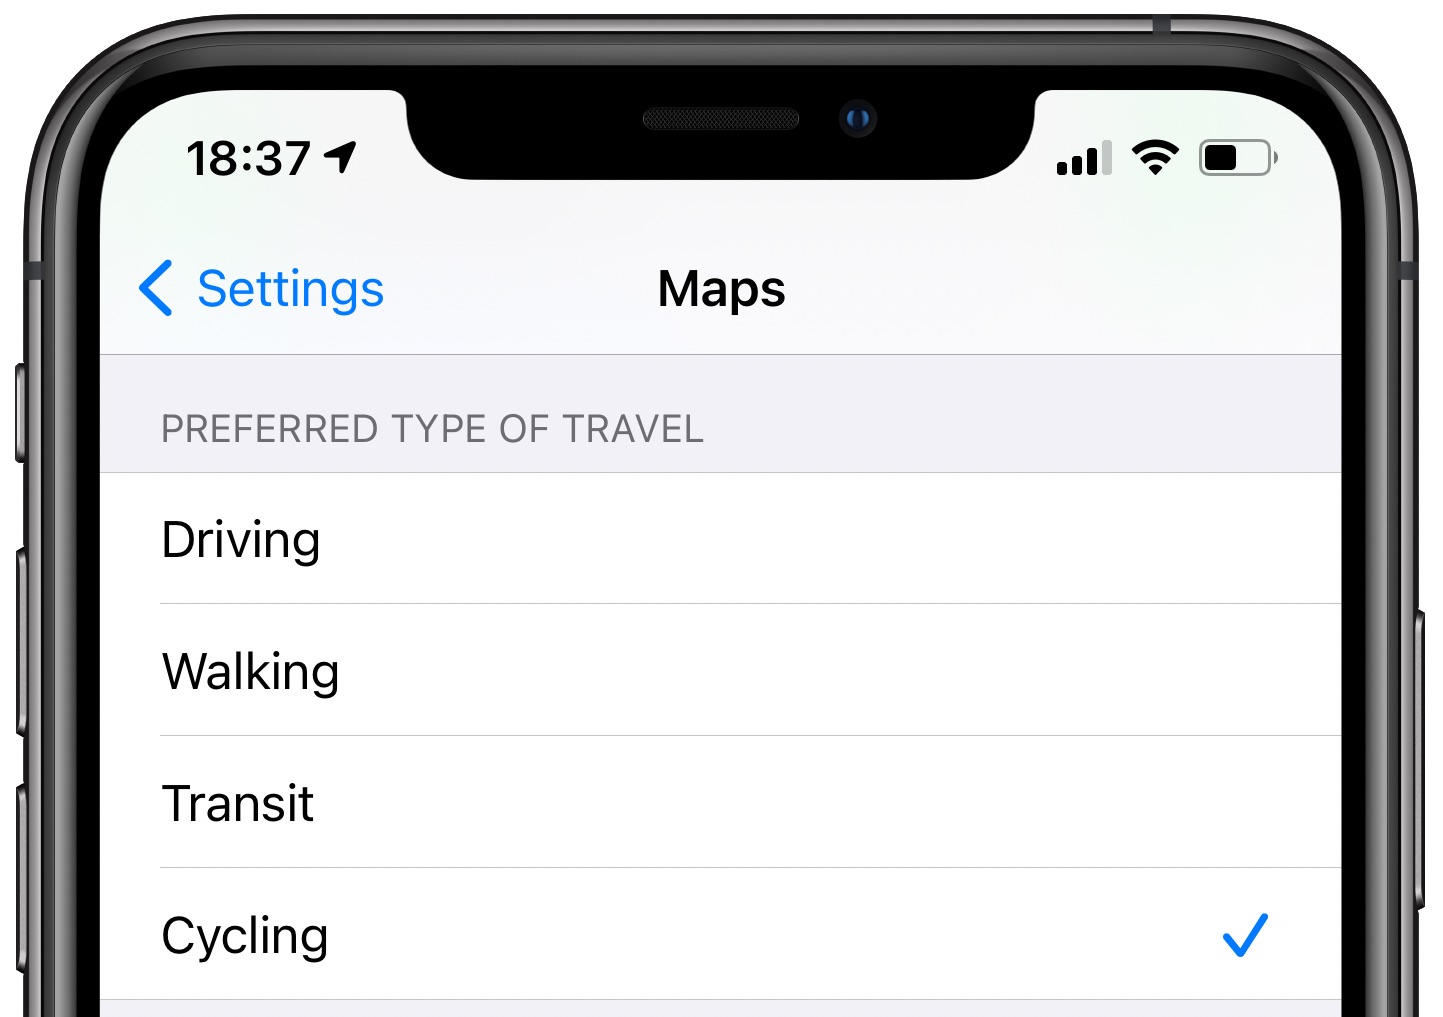
Going forward, the Maps app on that particular device will use cycling as your default transportation type when getting directions and to estimate your travel time.
A few cool Maps tips for avid cyclists
In addition to the thoughtfully executed cycling navigation in Apple Maps, iOS 14 and iPad OS 14 bring other perks to cycling fans. You can add a cyclist helmet to your Memoji to show off your passion. You can request cycling directions even faster, through Siri. And with Apple’s Maps widget, you can start cycling navigation right from the Home screen.
Personalize that Memoji
With 19 new headwear styles in iOS and iPadOS 14, you can further customize your Memoji (your custom 3D avatar in Messages and elsewhere). Aside from additions like a nurse cap that let you show off your profession, you can now add a cyclist helmet to your Memoji.
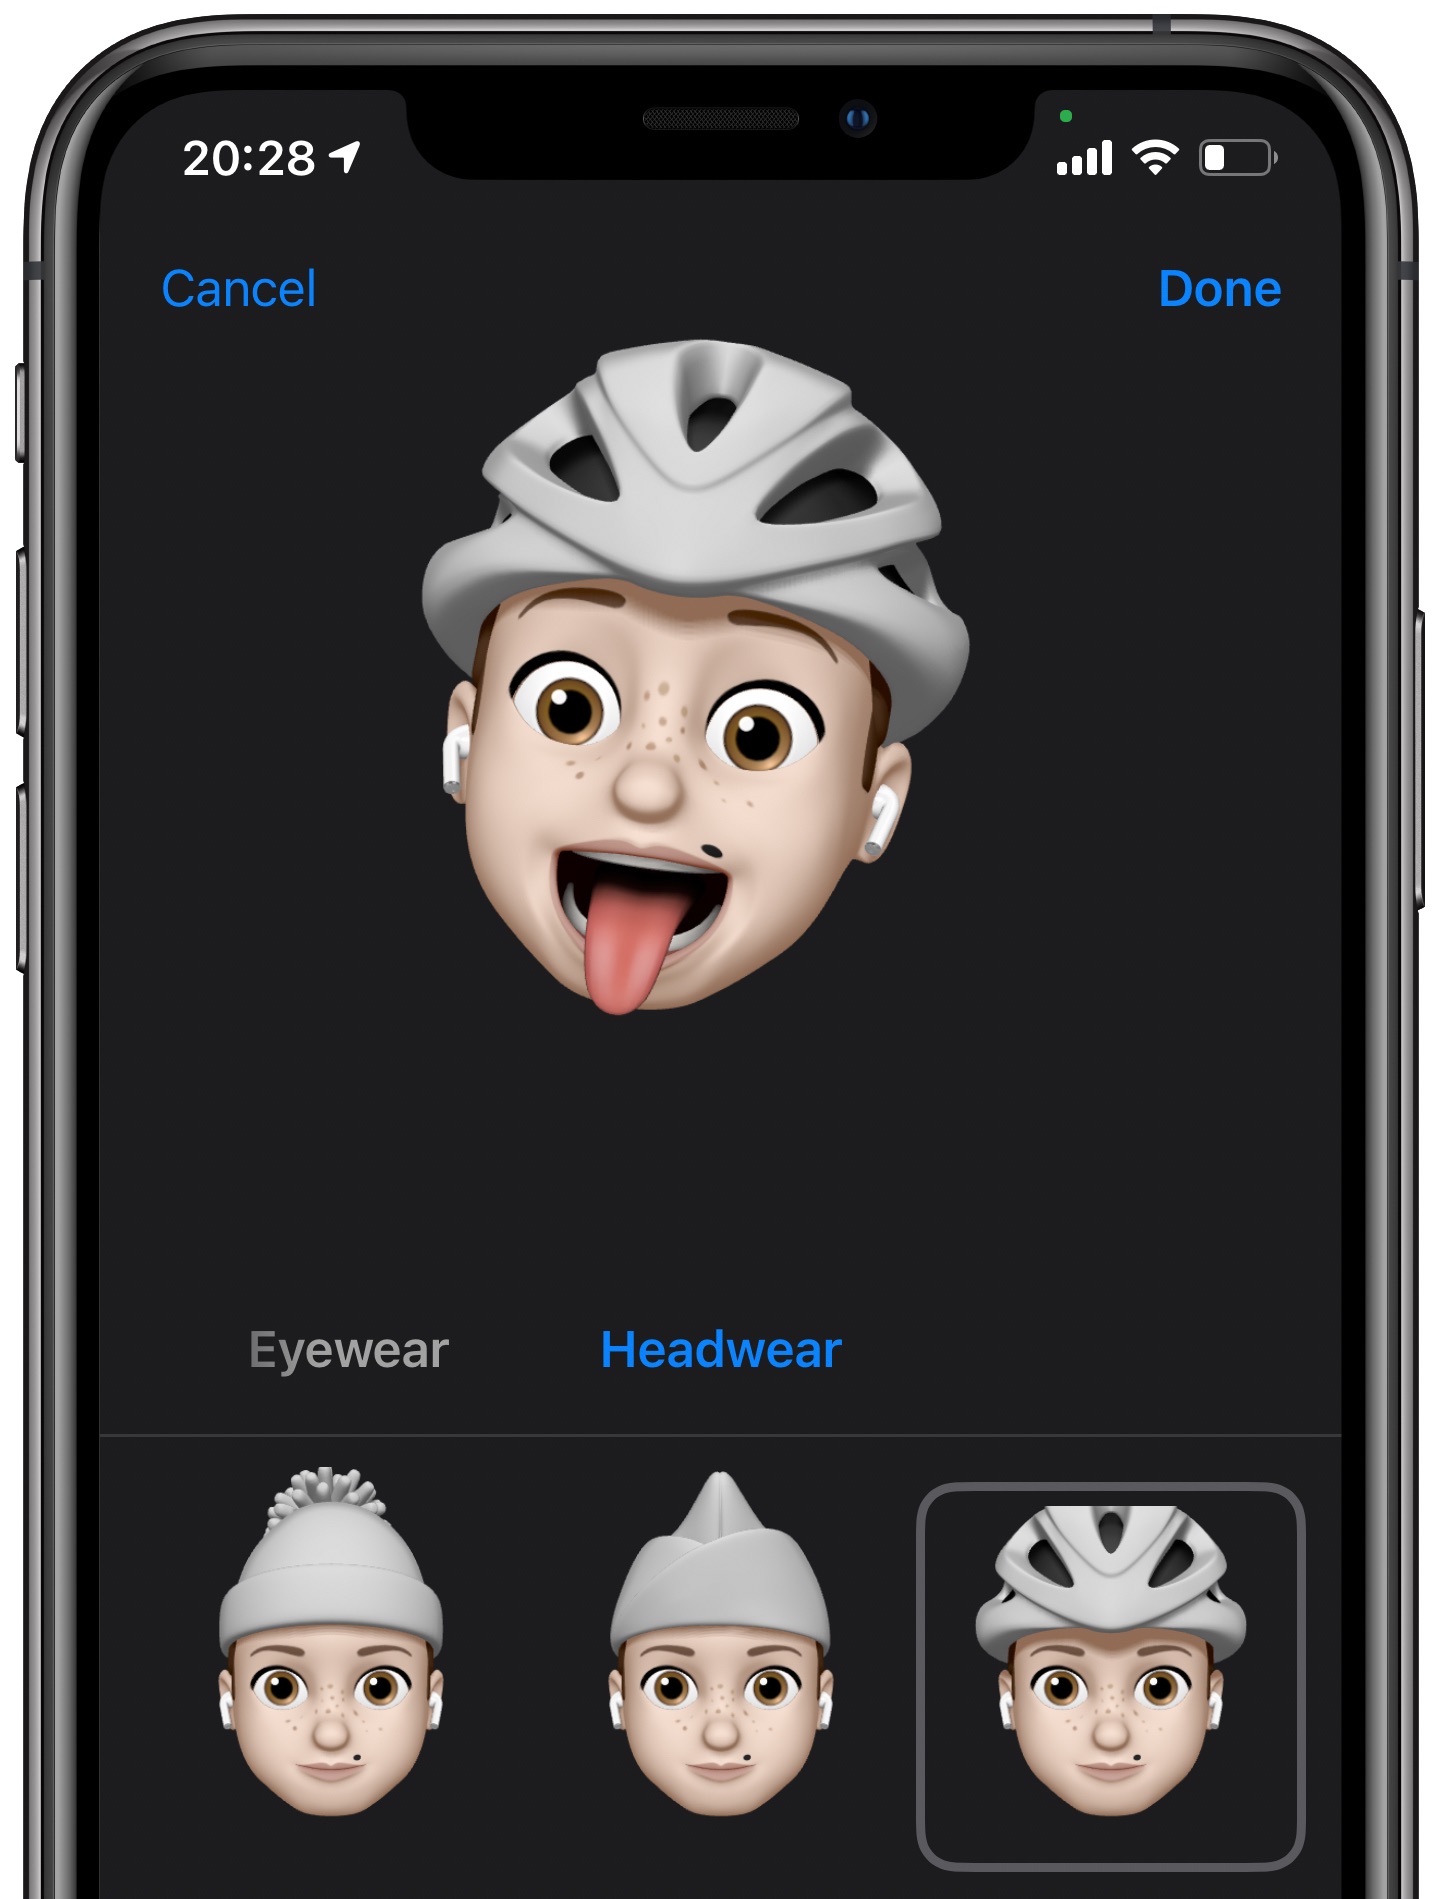
To update your existing Memoji, open Messages and create a new message or choose an existing conversation. Now tap the Memoji button in the app drawer below the text field, scroll to your Memoji and tap the three-dotted menu, then choose “Edit“ and make your changes.
Get cycling directions via Siri
Instead of tapping your way through the Maps interface, use Siri to request cycling directions with your voice. If your request is basic (“Hey Siri, cycling direction“), the assistant may pose follow-up questions (“Where would you like to go?“) or use your currently selected type of transportation. Or, you can be really specific and tell Siri everything in a single command.
Here are a few examples:
- “Get cycling directions home“
- “Cycling directions to work“
- “Cycling directions to [LOCATION NAME]“
- “Cycling directions to the nearest restaurant“
- “How far to the nearest gas station by bike?“
Put the Maps widget on the Home screen
Don’t forget about the excellent Maps widget on iOS 14. With it, you can get directions to a likely destination, as determined by Siri intelligence based on your device usage patterns and other signals. In addition, the Maps widget tracks and updates your ETA during navigation.
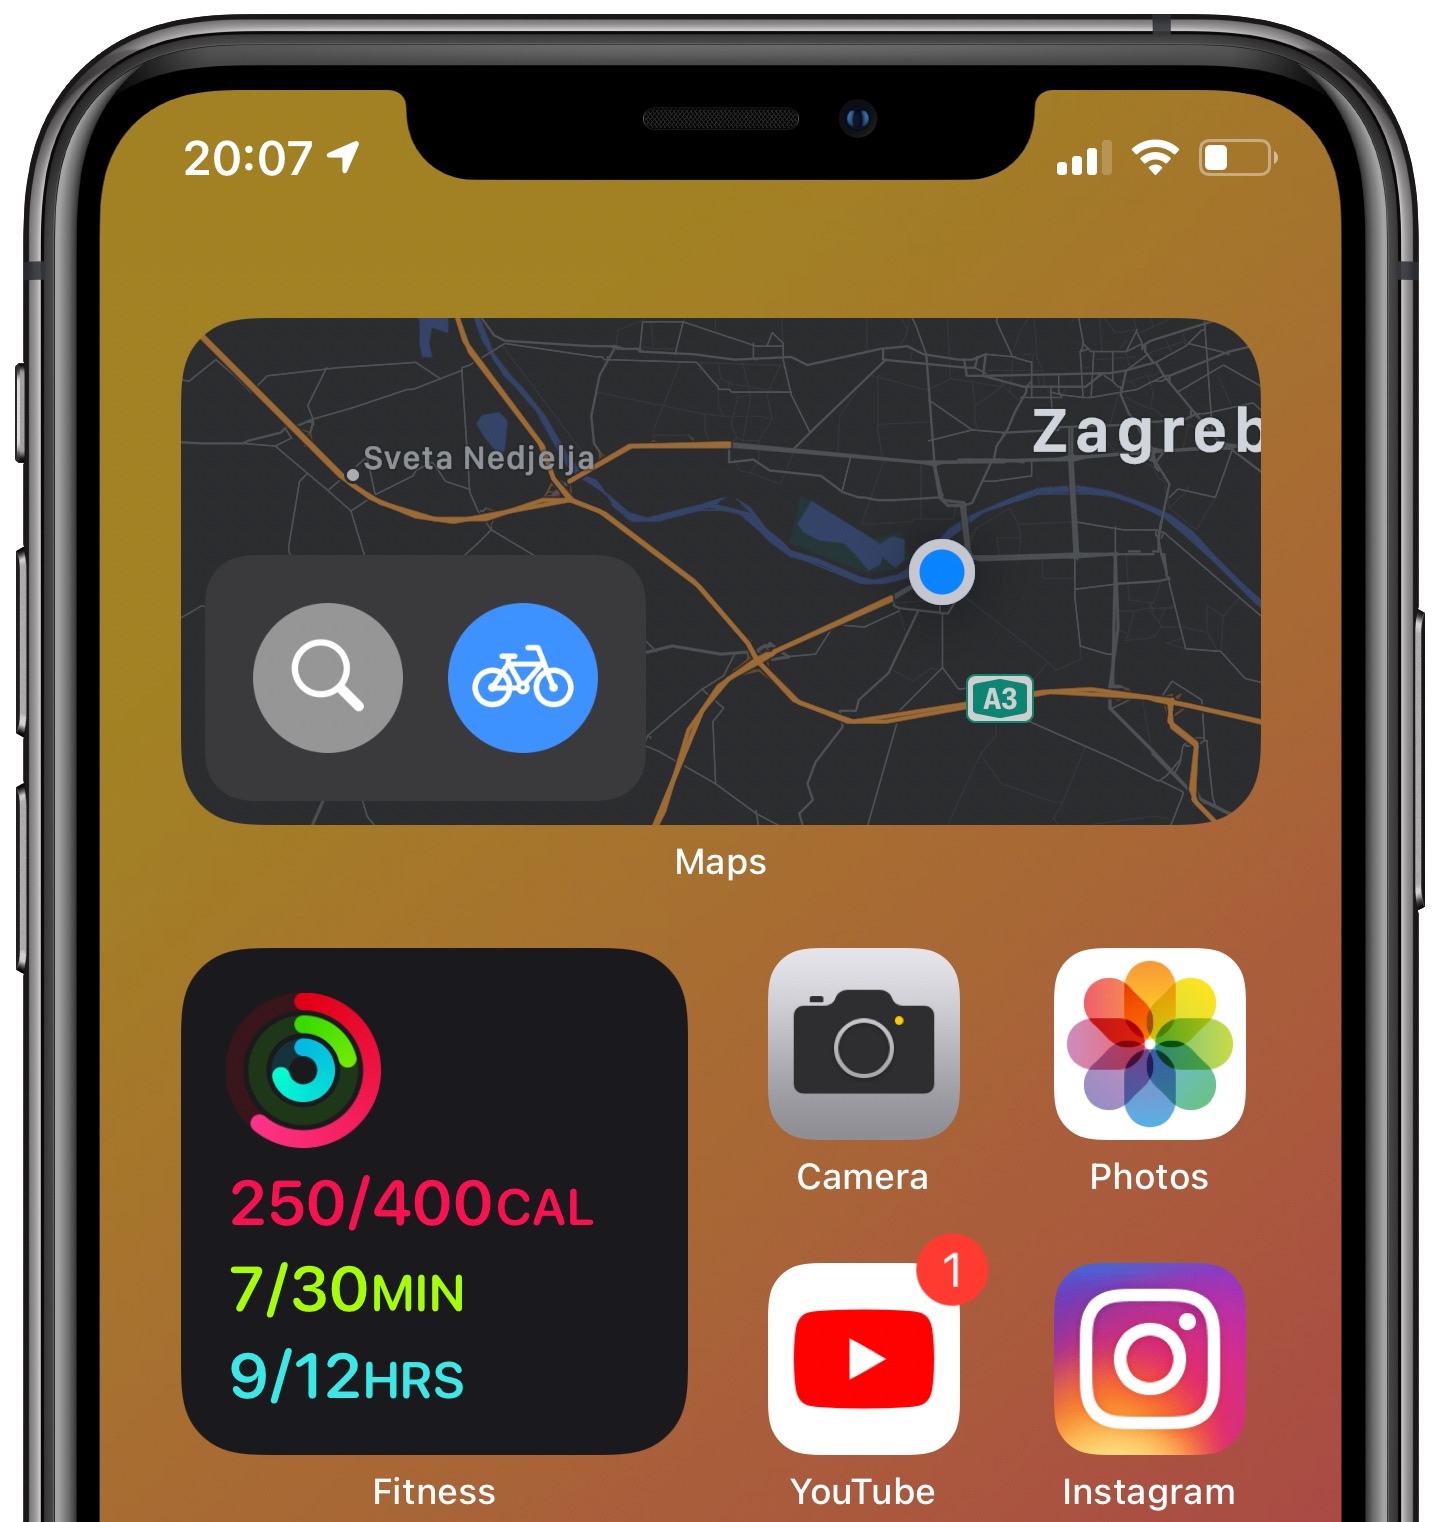
This lets you quickly start cycling directions to a common destination from the Home screen of your iPhone or iPad (you cannot get directions if the device is not connected to the Internet).
Close those rings
And for my last tip today: whenever you’re riding your bike, don’t forget to open the Workout app and select the outdoor cycling workout to help close those activity rings.
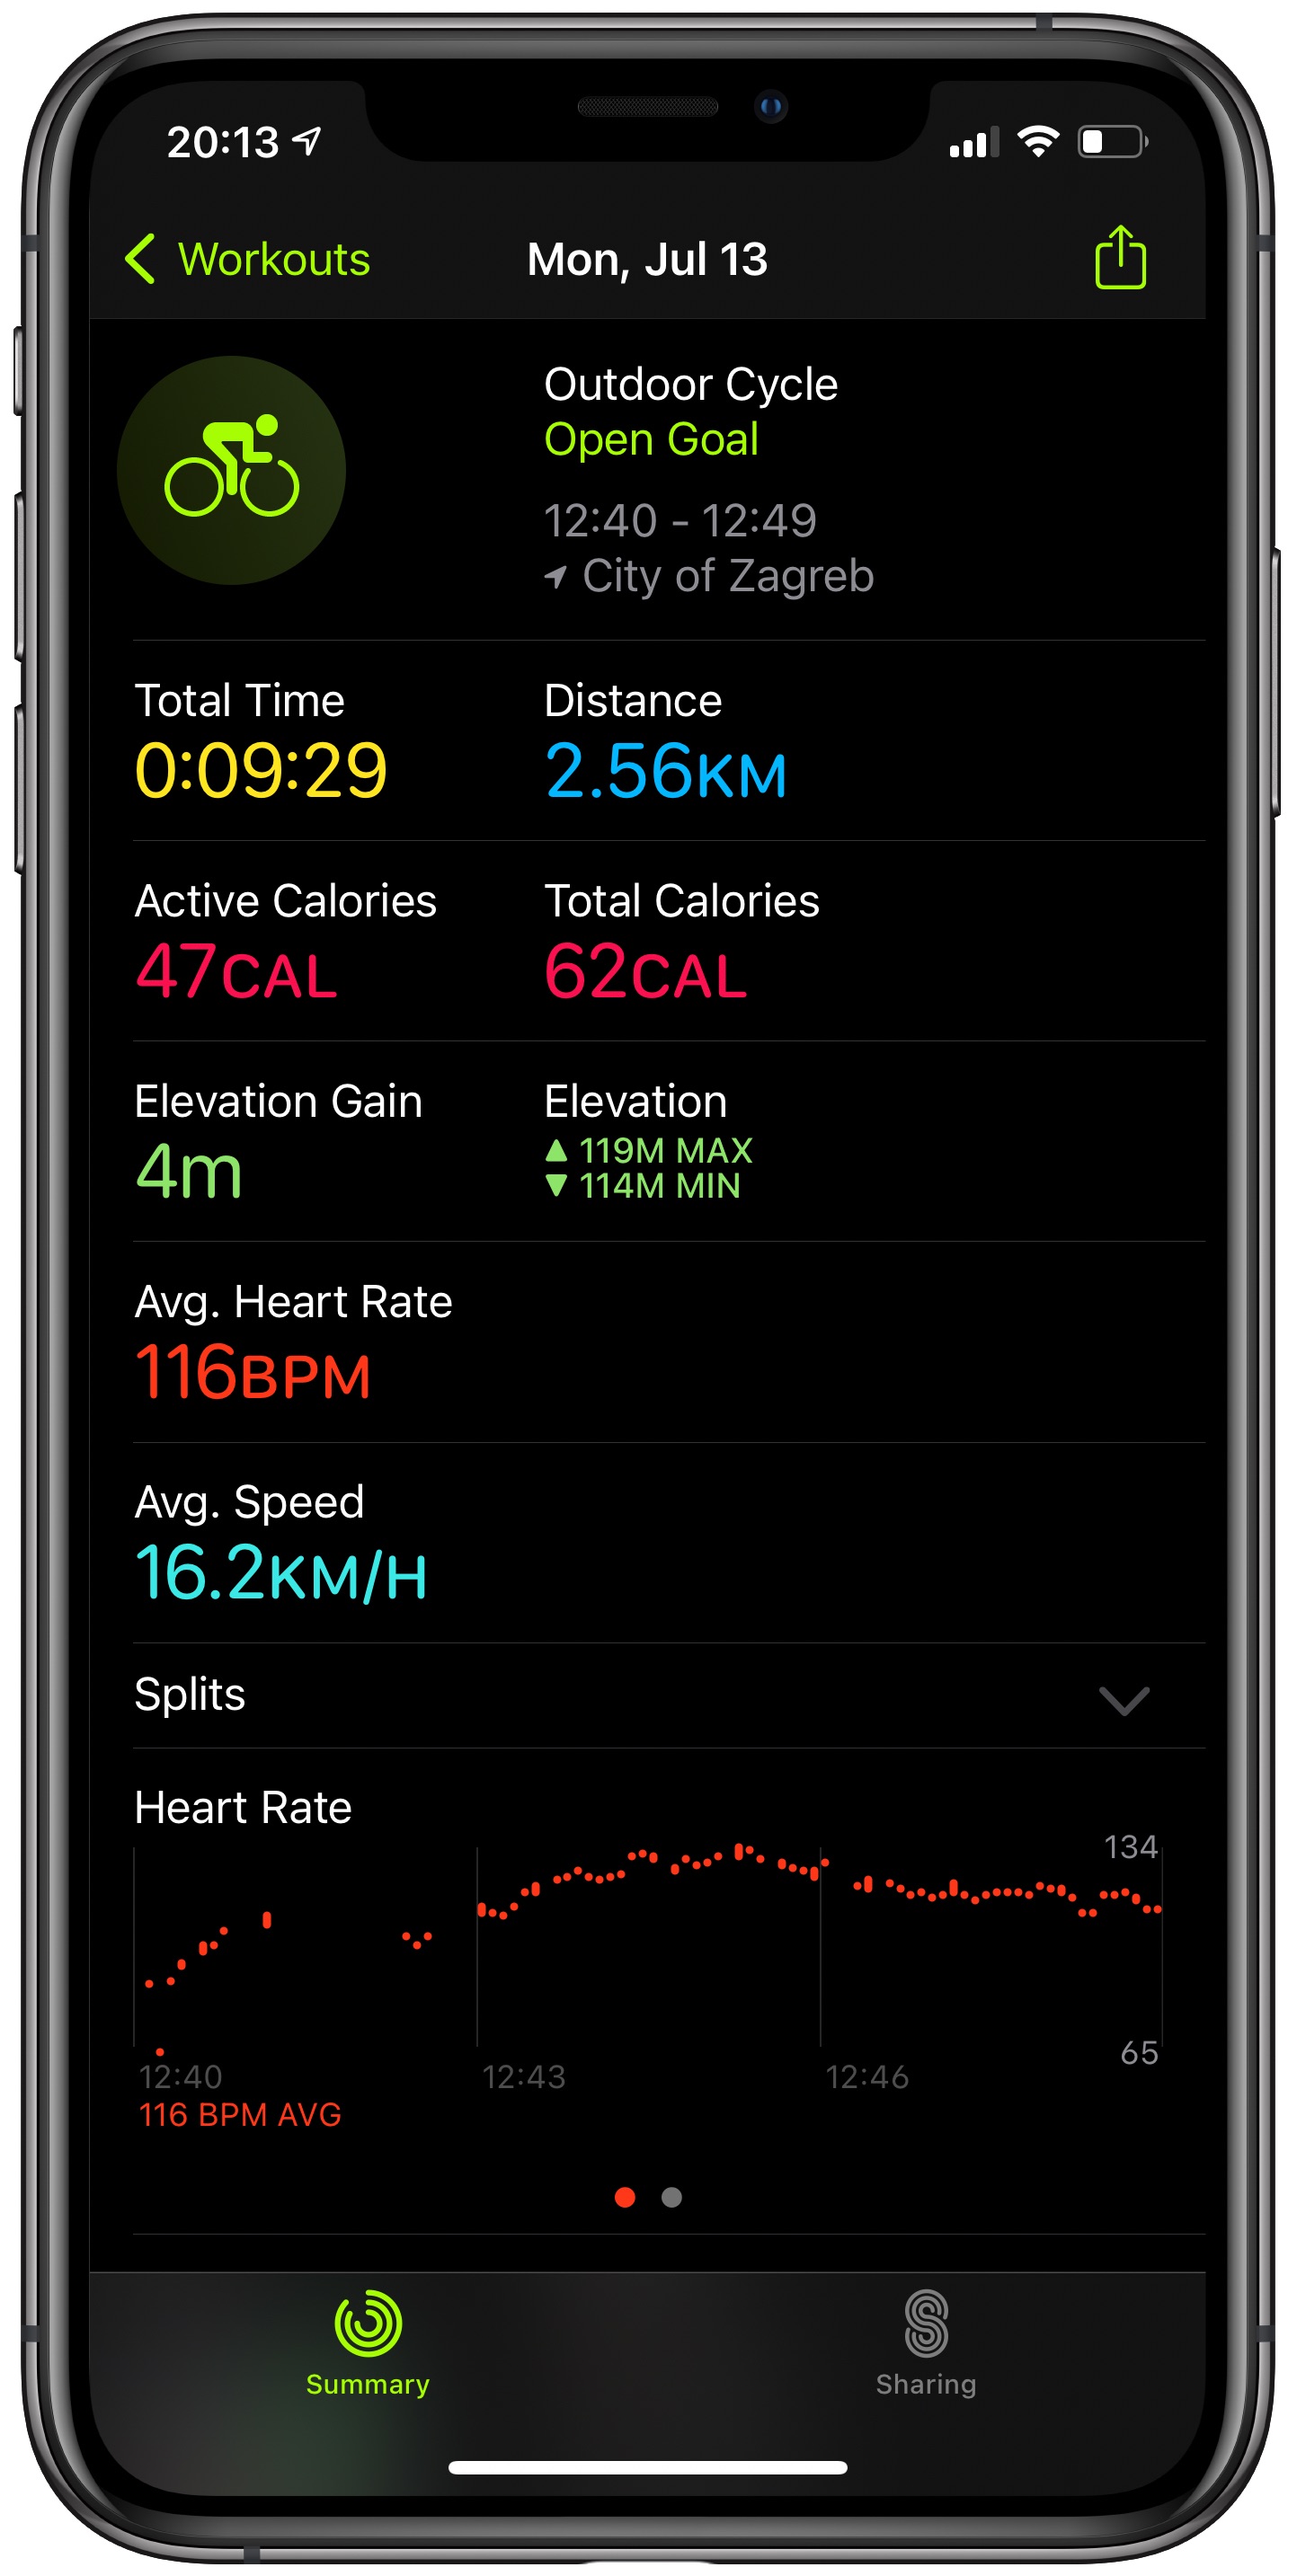
These workouts calculate metrics such as distance, pace, elevation and more. You can later browse that data in the Fitness app on your iPhone, see a map of your bicycle ride and so forth.
Source link: https://www.idownloadblog.com/2020/10/05/apple-maps-cycling-directions-tutorial/


Leave a Reply