

How to control your Roomba with Siri

Even though the iRobot line of smart vacuums doesn’t support Apple HomeKit, there is a way to control your iRobot Roomba with Siri. It’s not as simple as downloading an app and pushing a button, but it’s not overly complex either. If you’re in a tinkering mood, then you’re going to have a blast, and in about 10 minutes, you should be able to command your Roomba using Siri, or actions programmed into the Shortcuts app on your iPhone.

How controlling a Roomba with Siri works
In order to be able to command a Roomba using Siri, we’ll have to create webhooks. In short, webhooks are snippets of code linked to a web application which are triggered by a specific event. When that event occurs, the source makes an HTTP request to the URL configured for the webhook. If the URL is configured correctly, we can make it do whatever we want. In our case, we want the URL to start our Roomba.
If all that is confusing, here is a breakdown of what will happen once we are done:
- We’re going to create a specific URL that, when requested, will start your Roomba
- You will tell Siri to start the Roomba
- Using the Shortcuts app, Siri will essentially make a request to your specific URL in the background
- The URL will talk to your Roomba and command it to start
In the end, you don’t have to understand any of this as long as you follow these simple instructions below.
How to control your Roomba with Siri
1) Create an IFTTT account
First, create a free account at IFTTT.com. This is the service we will use to create webhooks that will in the end command your iRobot.
Once you’re all set up, create a new automation by clicking on the Create link in the header. You will see a screen that invites you to create a new automation with the words “If this, then that.”
If this URL (to be created below) is being called, then that action (start the Roomba) will happen.
2) Create a webhook
Click on This. It will open a page where we can select the service we want to use. Type webhooks in the search box, and select the service.
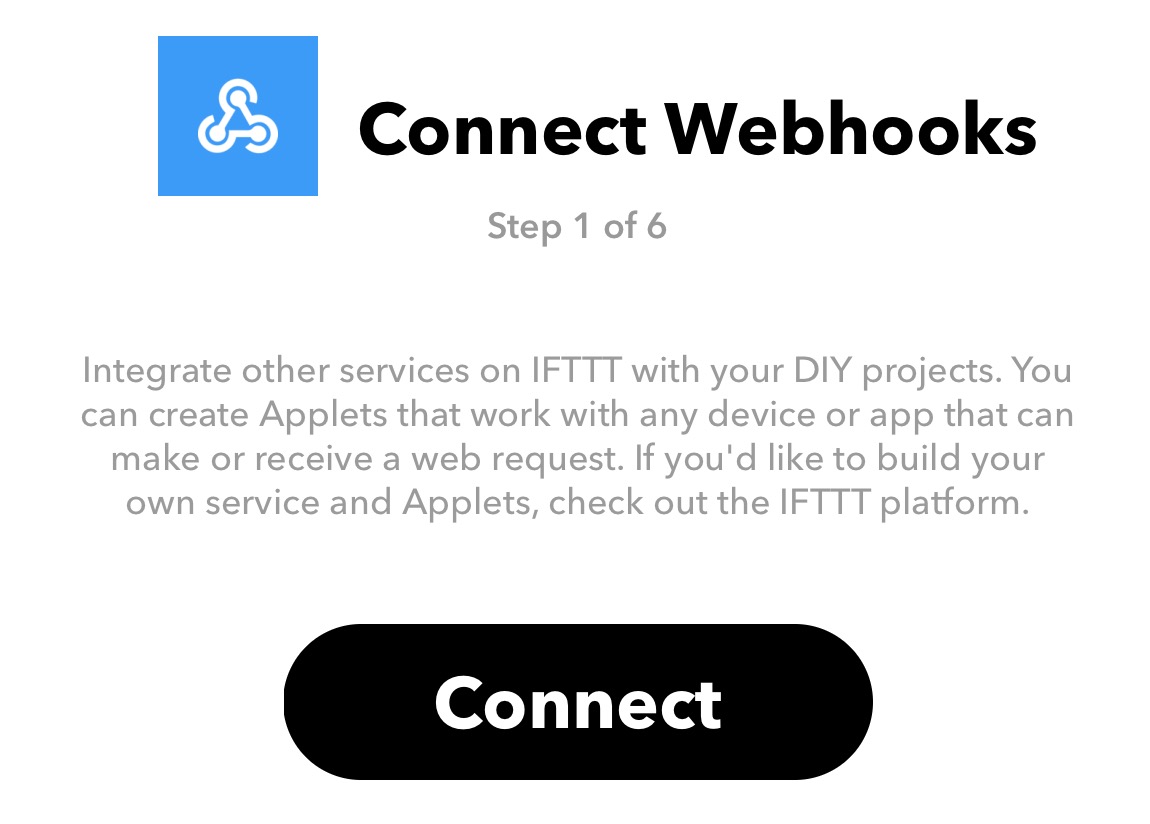
3) Connect the webhook
On the next screen, click on the Connect button.
4) Create event name and trigger
Next step is to choose the trigger associated with this service. At the time of writing, only one trigger is available. Click on the Receive a web request trigger. Then type in start_roomba as the event name. Don’t forget the underscore between the two words.
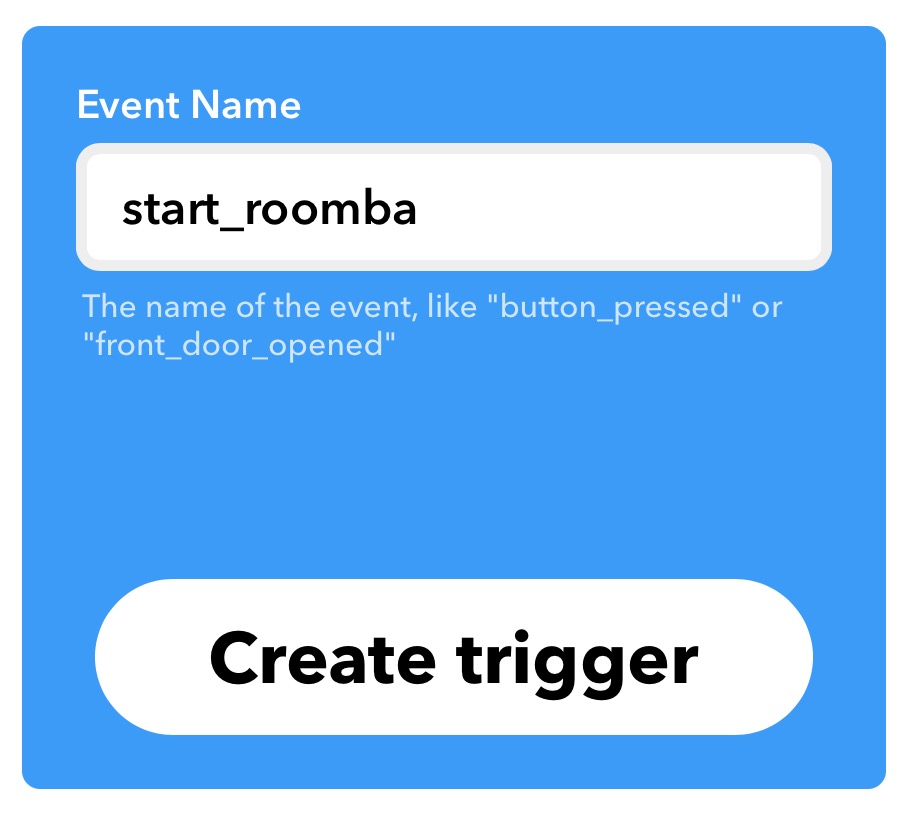
Click on Create trigger to move forward.
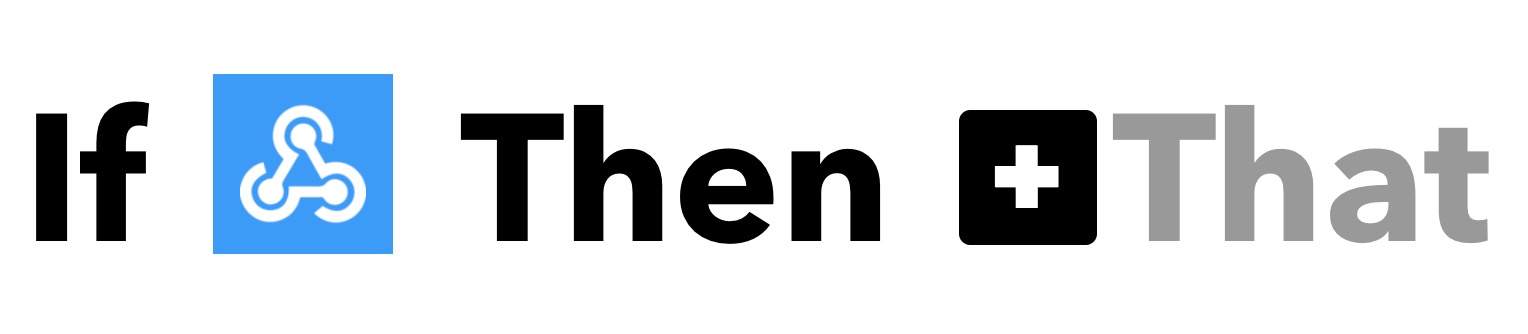
We have now completed the “if this” part of our “if this, then that” recipe. We now have to complete it by telling the service what happens when the web hook is triggered.
Click on That to continue.
5) Select an action service
On this screen next screen, type iRobot in the search box, and select this action service.
6) Connect the iRobot service
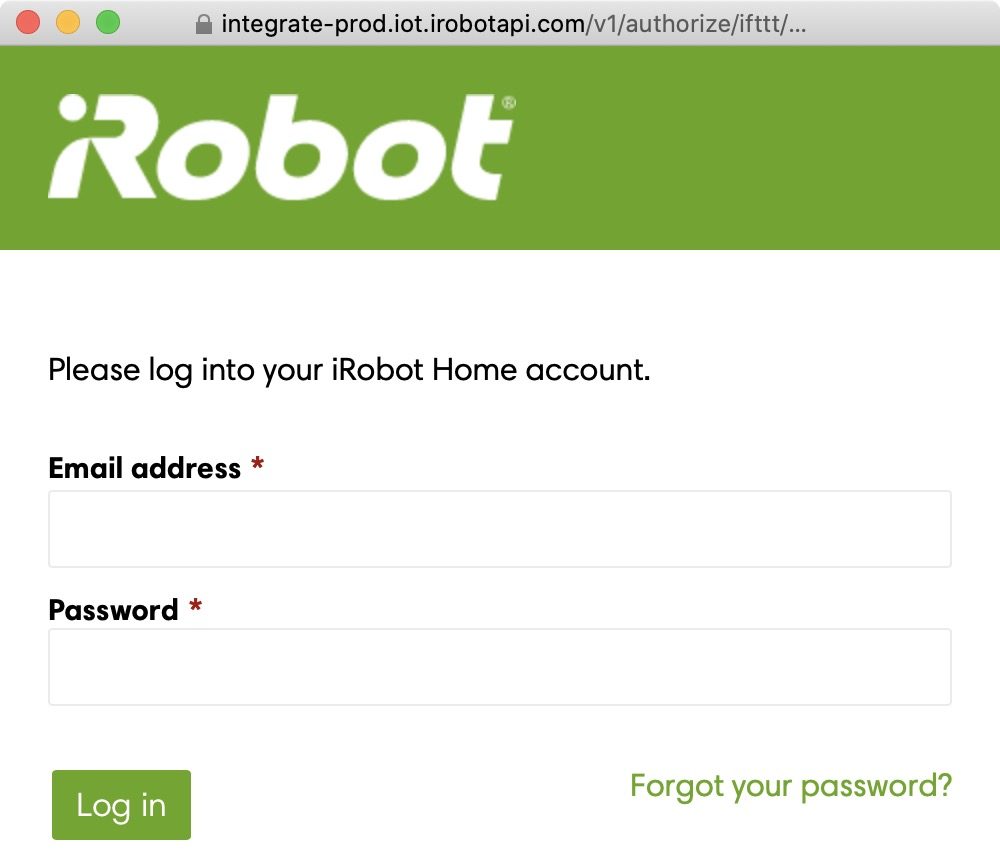
Just like we did above for the webhook, we have to connect the iRobot service. Click on the Connect button. This will open a new window asking you to log into your iRobot Home account. Enter your username and password.
7) Choose the action you want your Roomba to accomplish
On that next screen, you are presented with all possible actions your Roomba can accomplish when triggered. To get started, we want to choose the most obvious action, which is Start Robot.

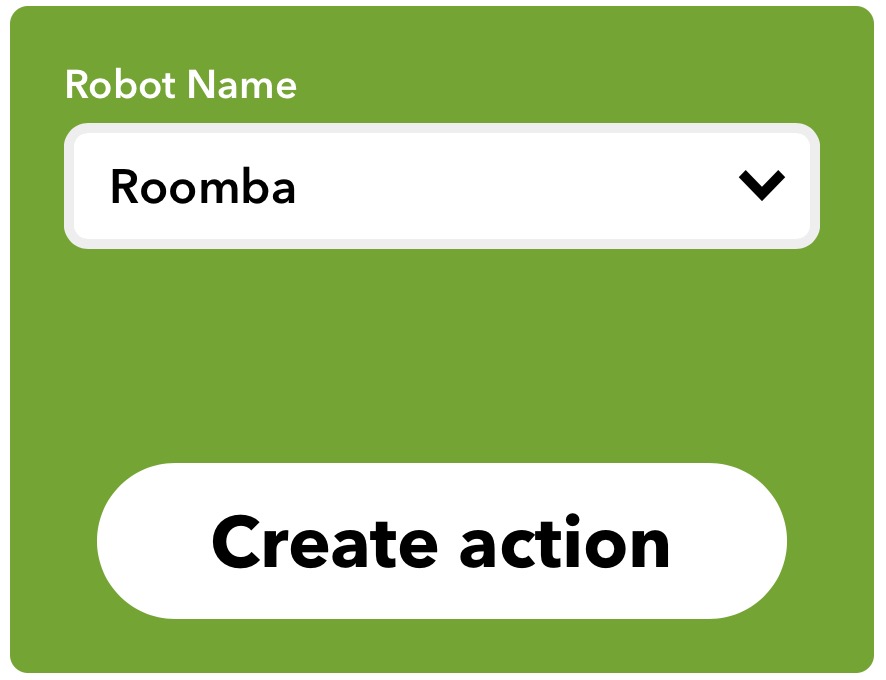
8) Create the action
Under Robot name, select the Roomba you want to control. That is if you have multiple Roombas. Or else, the one Roomba will be selected by default. Click Create action.
9) Review and finish
Finally, you can review the created action. I suggest disabling notifications when this applet is run so it doesn’t bug you every time you run it. Click Finish.

We have now created our trigger and its action. Going back to “if this, then that,” you can see that we have successfully set up an action that is activated with a trigger. If the “start_roomba” URL is triggered, then start the Roomba.
What’s left to do is to set up the way this webhook is triggered in the first place.
10) Find out the webhook URL
Back on the IFTTT home page, click on your account in the upper right, then select My services. Click on the Webhooks section. Finally, click on Documentation in the upper right.
11) Save your secret webhook key
You are now presented your secret webhook key. Make sure you keep this private and do not share it with anyone.
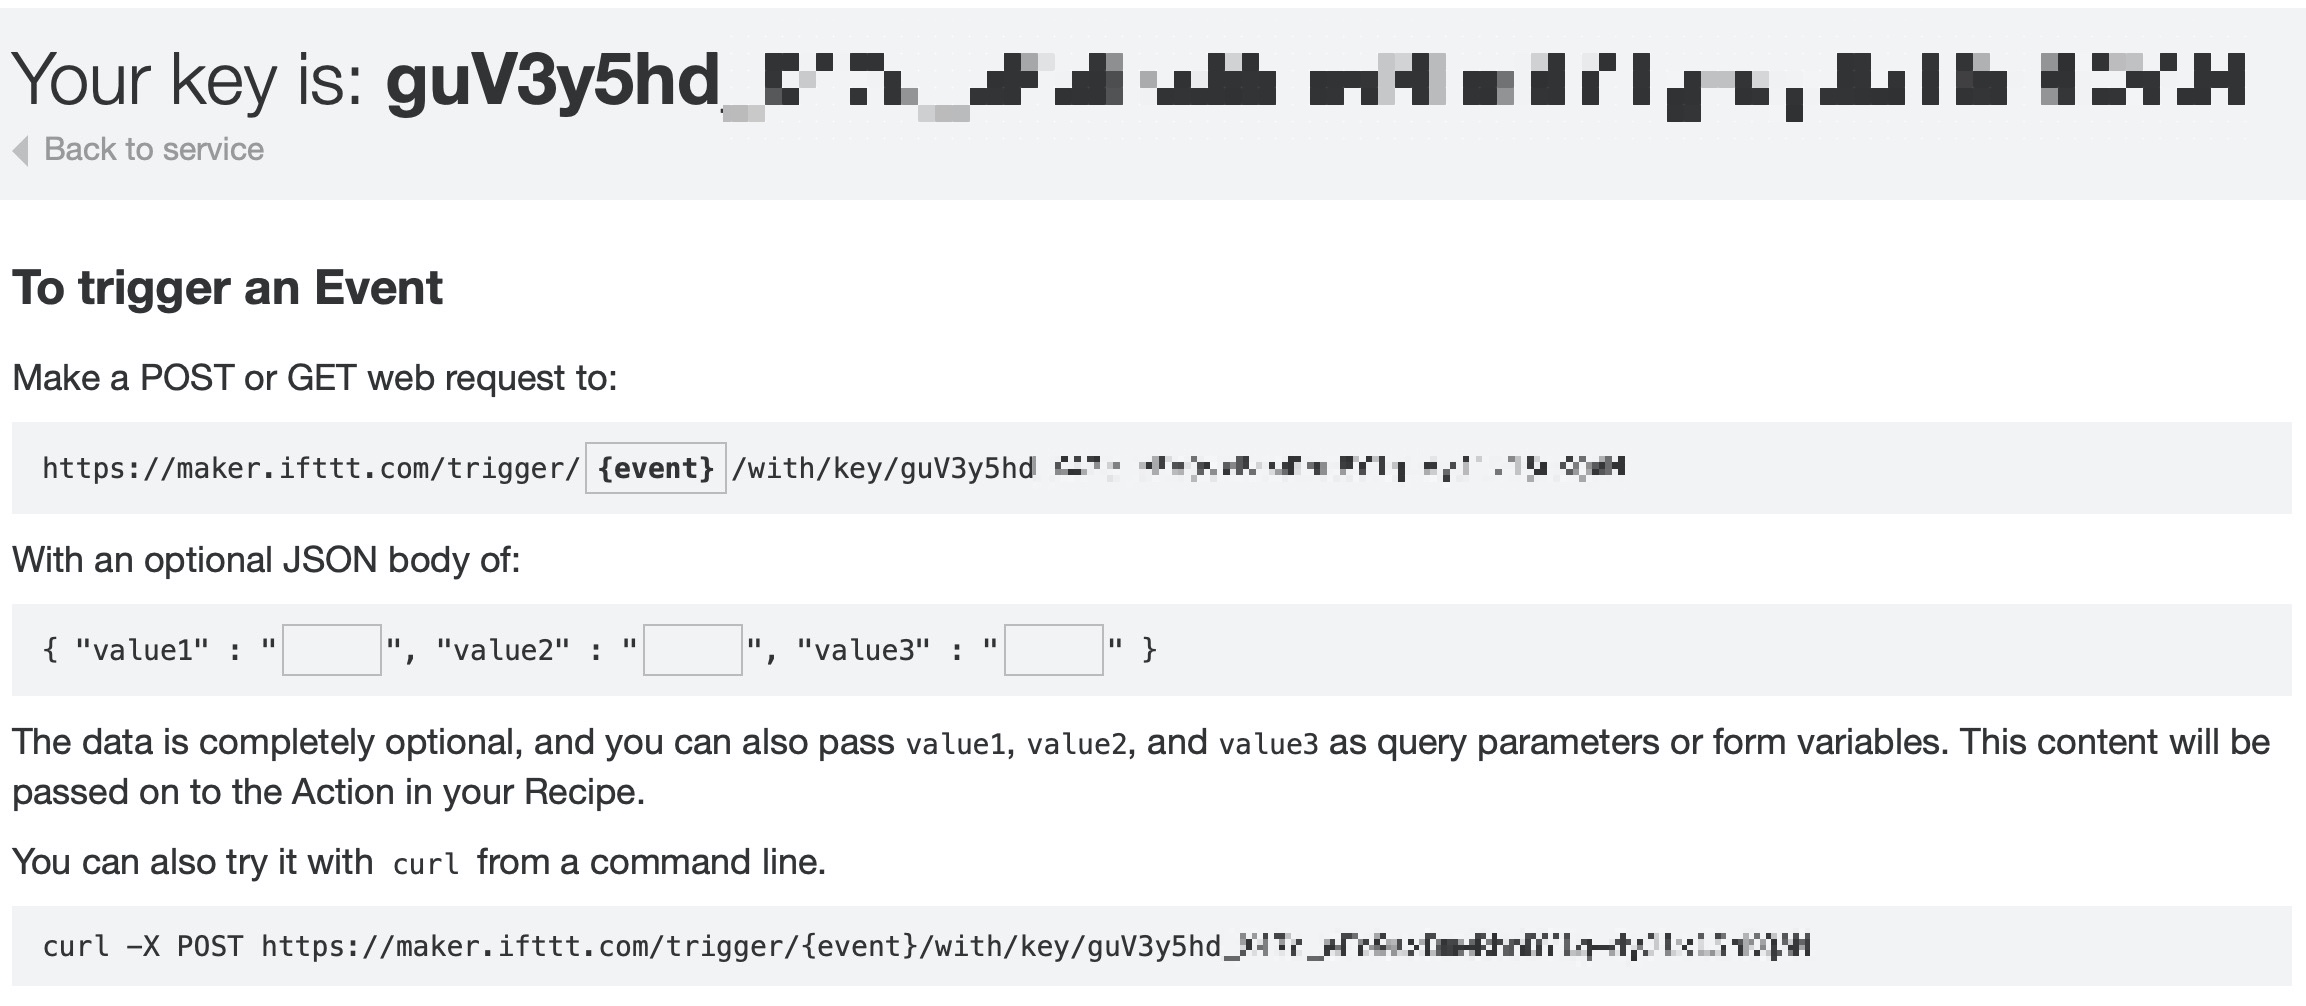
On your computer, open up a new note in the Notes app, and copy/paste this key.
Also copy/paste the web request URL showed at the top. It should look something like this:
https://maker.ifttt.com/trigger/{event}/with/key/guV3y5hd_XXXxxxXXXxxxXXXxxxXXX
Note the {event} section of this URL. This is the event name we created in step 4 above. This event name should be start_roomba.
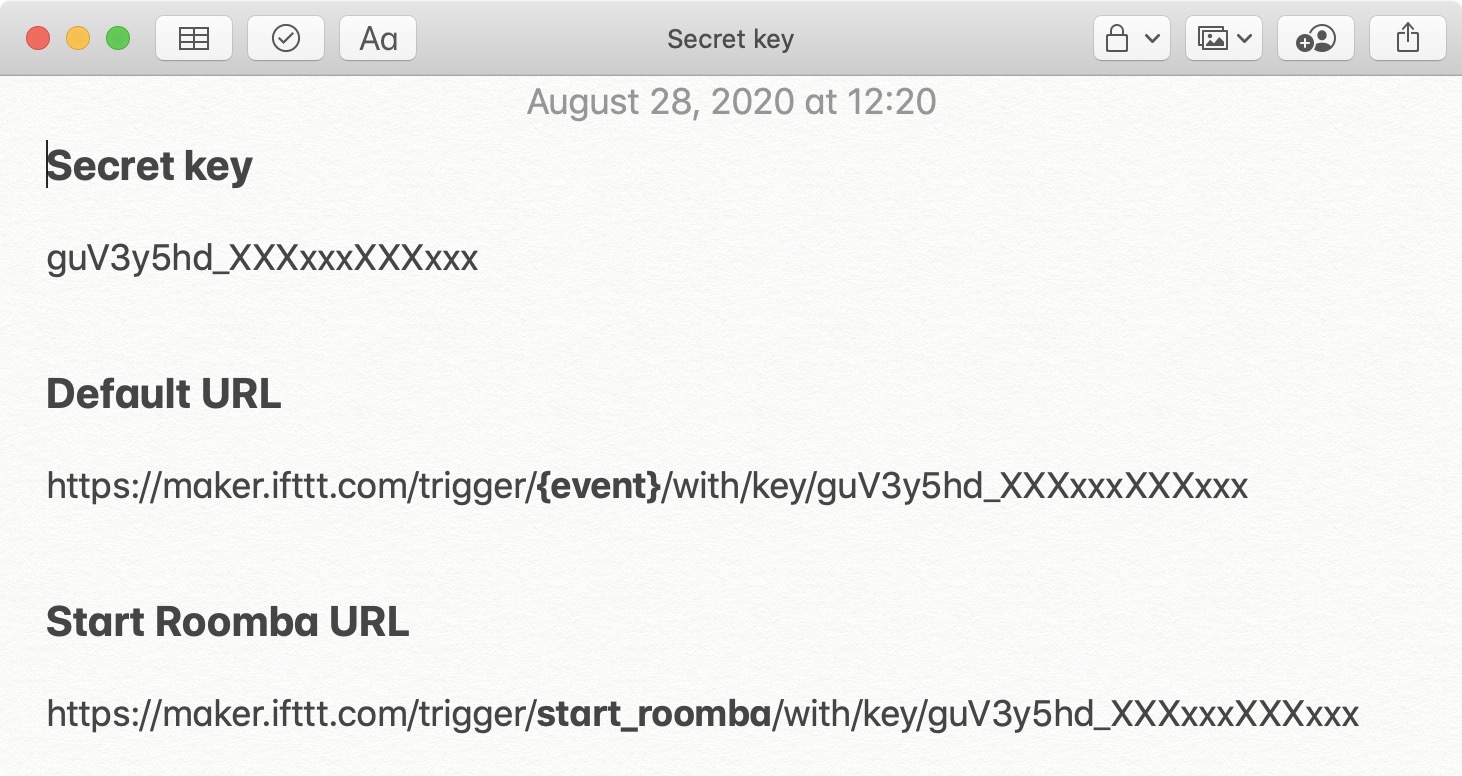
12) Create your GET URL
Using you own URL containing your secret key, replace the {event} section of the URL by start_roomba. Your URL should now look like this:
https://maker.ifttt.com/trigger/start_roomba/with/key/guV3y5hd_XXXxxxXXXxxx
Your note should be looking something like this:
13) Add the Start Roomba URL to Shortcuts
We’re now going to create a new shortcut in the Shortcuts app that comes with your iPhone. This shortcut will basically call our URL on demand, thus commanding our Roomba.
Open the Shortcuts app, and tap the + icon in the upper right to create a new shortcut. In the search box at the bottom, search for URL, and select URL from all actions available.
Now search for Get Contents of URL and select the action.
As you can see, the default URL provided is apple.com. We want to replace this with our own URL that we created in step 12, as seen below.

Next we can give a name to our shortcut. Tap the ellipsis icon ( … ) in the upper right and rename this shortcut Start Roomba. You may even customize it with its own icon, if you choose to.
Finally, press the Play triangle icon at the bottom of the screen to test your shortcut. The first time you run the shortcut, you will be asked to give access to maker.ifttt.com. Make sure you allow access.
Upon pressing the Start Roomba shortcut, you should hear your Roomba starting within a few seconds.
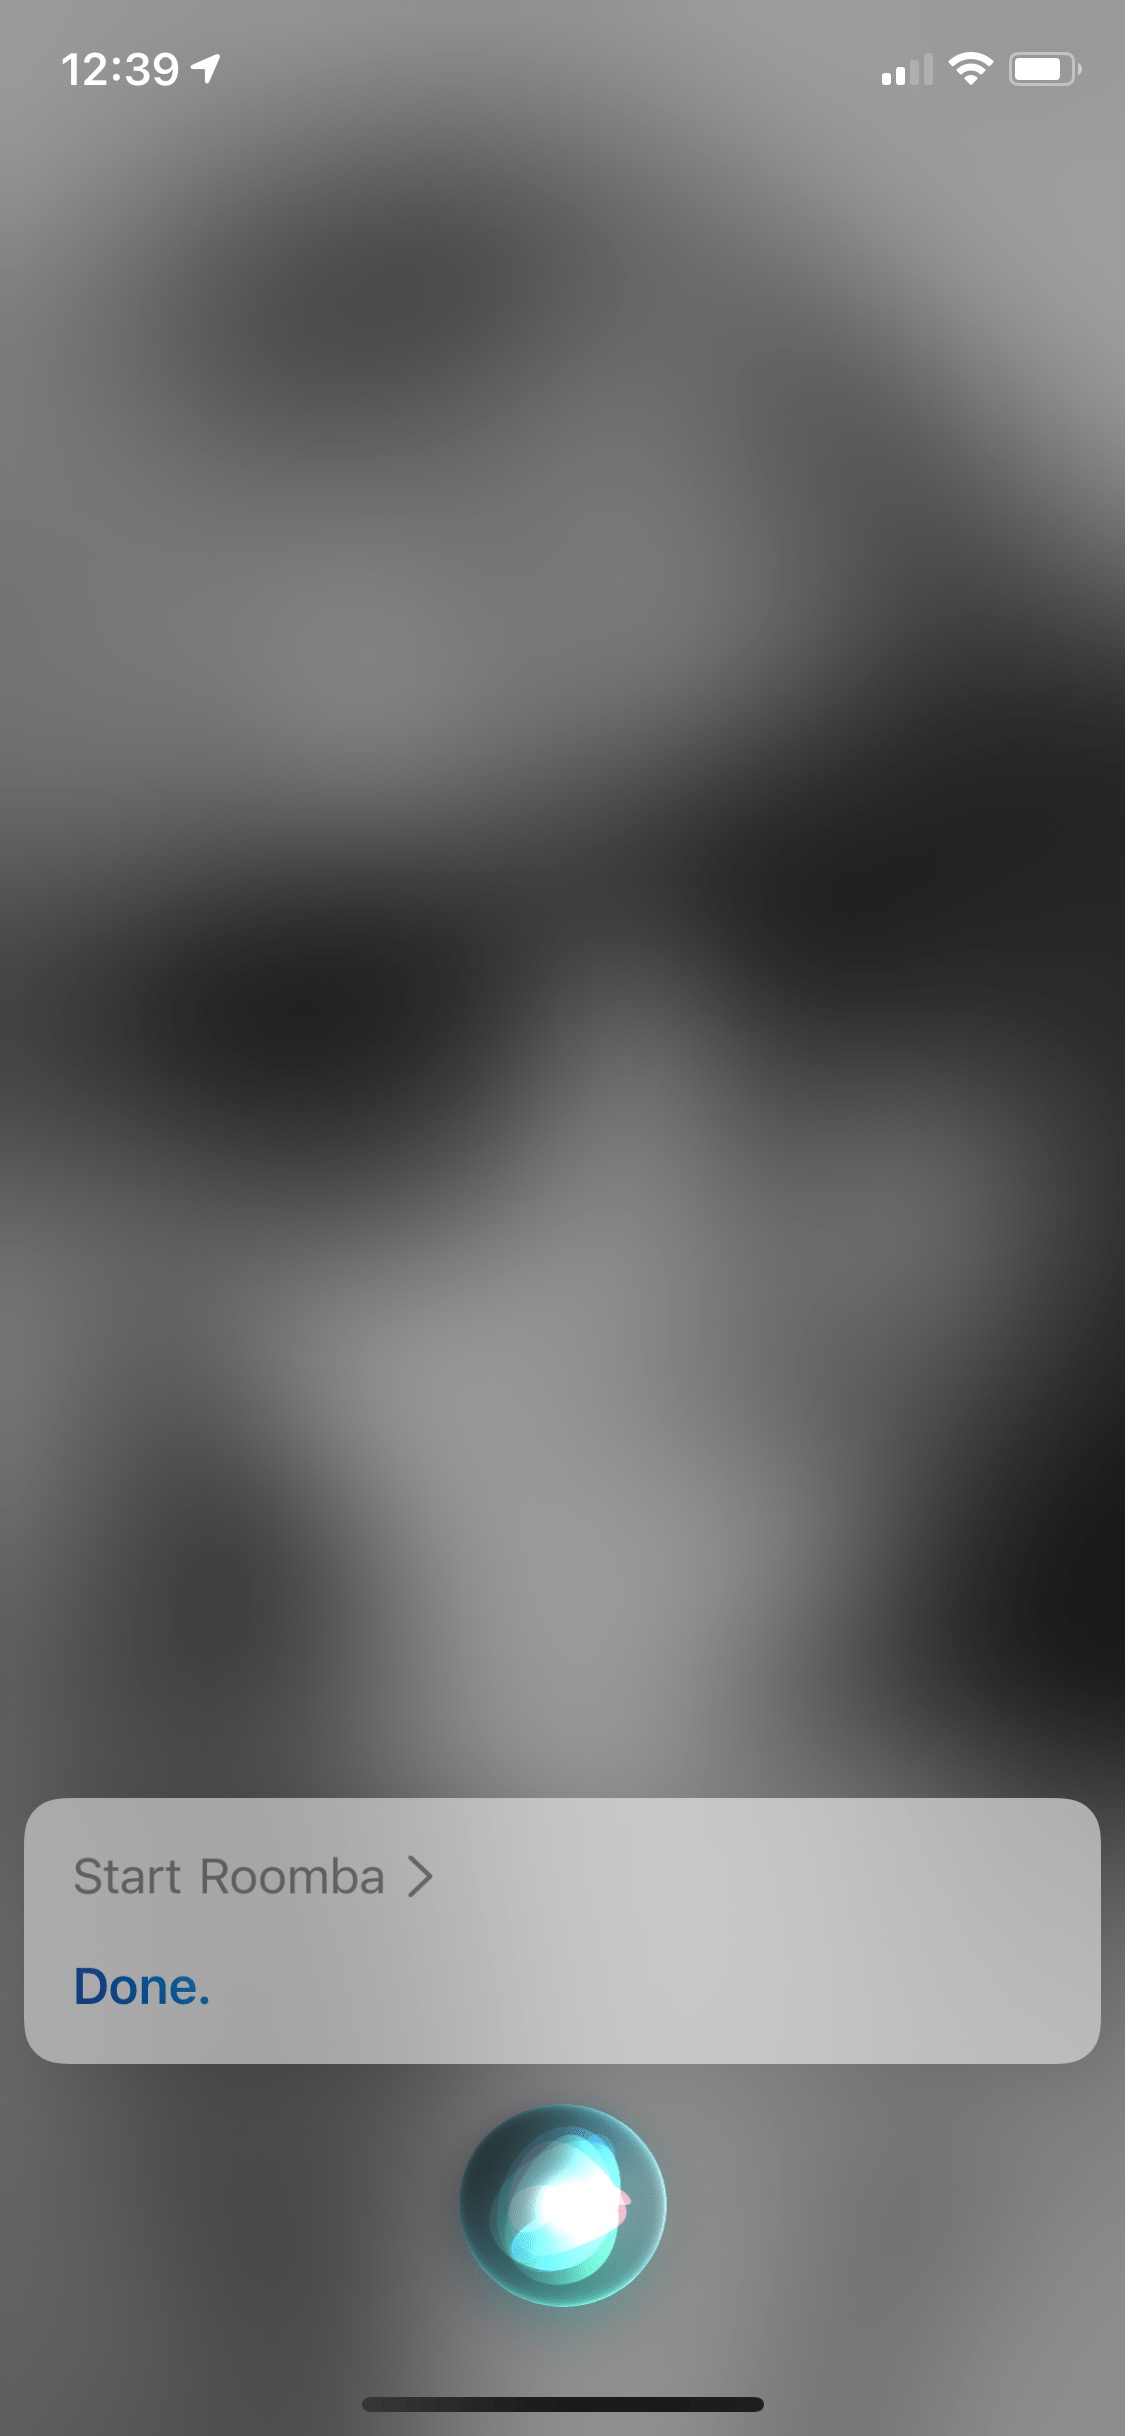
14) Start your Roomba with Siri
We’ve now confirmed that the shortcut works. Last step is to test the control of the Roomba with Siri. To do that, say “Hey Siri, start Roomba.” If you don’t have Hey Siri enabled, you will have to press and hold the side button of your iPhone, then say “Start Roomba” when the Siri interface appears on the screen.
15) More ways to control your Roomba with Siri
At this point, we have only crated one action to start the Roomba, but as you may recall from step 7 above, there are other actions that can be created to:
- Pause the Roomba
- Resume the Roomba
- Dock the Roomba
- Stop the Roomba
- Locate the Roomba
You’re obviously more than welcome to create more actions to complete any of the tasks above. Personally, I suggest creating additional actions for pausing, resuming, and docking the Roomba.
To create more actions, go over all the steps above. Obviously, you won’t have to create another IFTTT account. You also won’t have to connect webhooks and your iRobot account since these are already connected. All you’ll have to do is to create new triggers (see step 4) for each action you want.
To sum up, you will have to essentially start from step 1 for each new action, but now that you have accomplished the bulk of the work, additional actions will take just seconds to create. And of course, for each action, you will have to create a new shortcut as well.
Siri will only work with the exact phrase you created
By default, Siri will only start/pause/etc the robot based on the name of the shortcut you have created. So you have to make sure you tell Siri the exact name of the shortcut every time you want to run it.
You can also customize the phrase you want to use to control the Roomba. So instead of saying “Start Roomba” to start the robot, you can rename the shortcut to be called “clean the house”, which is actually what I use. Instead of having to say “pause Roomba”, you can rename that shortcut to be called “pause the cleaning”. You may repeat these steps for each shortcut.
An alternative method is to duplicate your shortcuts. In essence, you could have multiple identical shortcuts that have different names. They would all do the same thing, but they would trigger Siri using different key phrases.
For instance, you can duplicate the “Start Roomba” shortcut a couple times. You could name one duplicate “clean the house” and the other duplicate “start the robot.” This way, it gives you a little bit of flexibility in the way you ask Siri to command the robot. In the end, you will always have to tell Siri one exact shortcut name for this to work.
In conclusion, the process of creating ways for Siri to control your Roomba is fairly easy and it gets easier as you add more controls to the mix. But if you have any question about the process, feel free to ask down in the comments.
Source link: https://www.idownloadblog.com/2020/08/28/how-to-control-roomba-siri/

Leave a Reply