

How to add backgrounds and borders to slides in Keynote
Getting your Keynote slideshows just right is important. Whether they’re for your company, an organization, or educational purpose, of course, you want an attractive look and feel.
One way to spruce up your Keynote presentations is to add backgrounds to your slides. This lets you create a consistent appearance for your slideshow. Another way is to add borders to your slides. This can help keep your objects and elements within the slide area and gives a neat and clean visual.
In this tutorial, we’ll show you how to do both. Here’s how to add backgrounds and borders to slides in Keynote.
Backgrounds and borders in Keynote
Add slide backgrounds on Mac
Adding a background to a slide is the easier of the two options. So that’s the one we’ll begin with. Open your presentation in Keynote or create a new one. Then select the slide you want to start with and follow these steps.
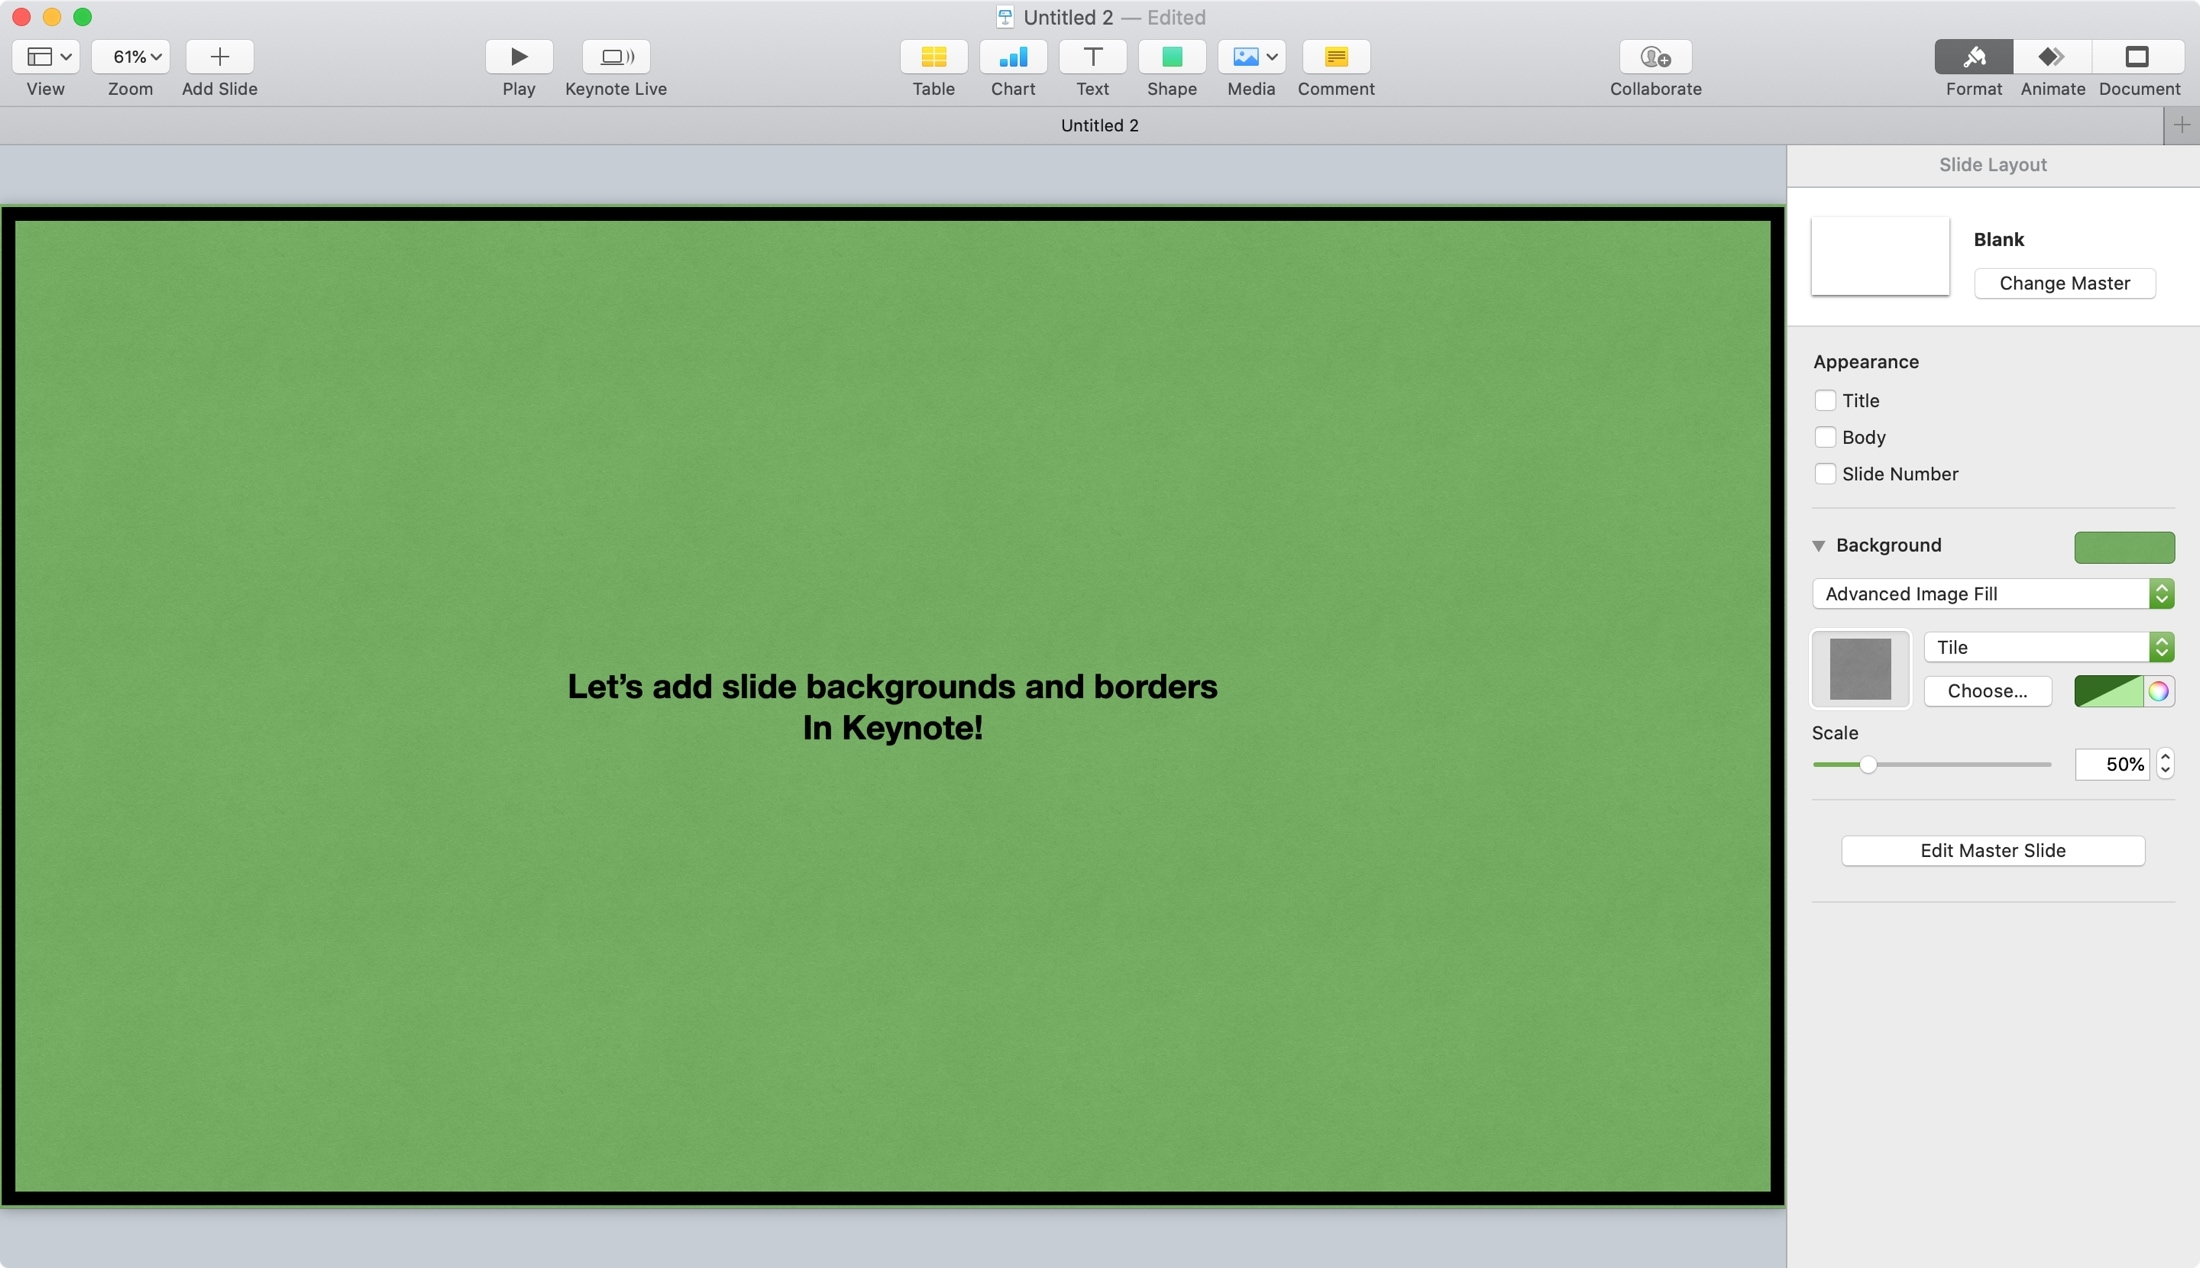
1) Click a blank area on the slide. Make sure not to select an element on the slide otherwise you’ll be changing its formatting instead of the slide’s.
2) Click the Format button on the top right to open the sidebar.
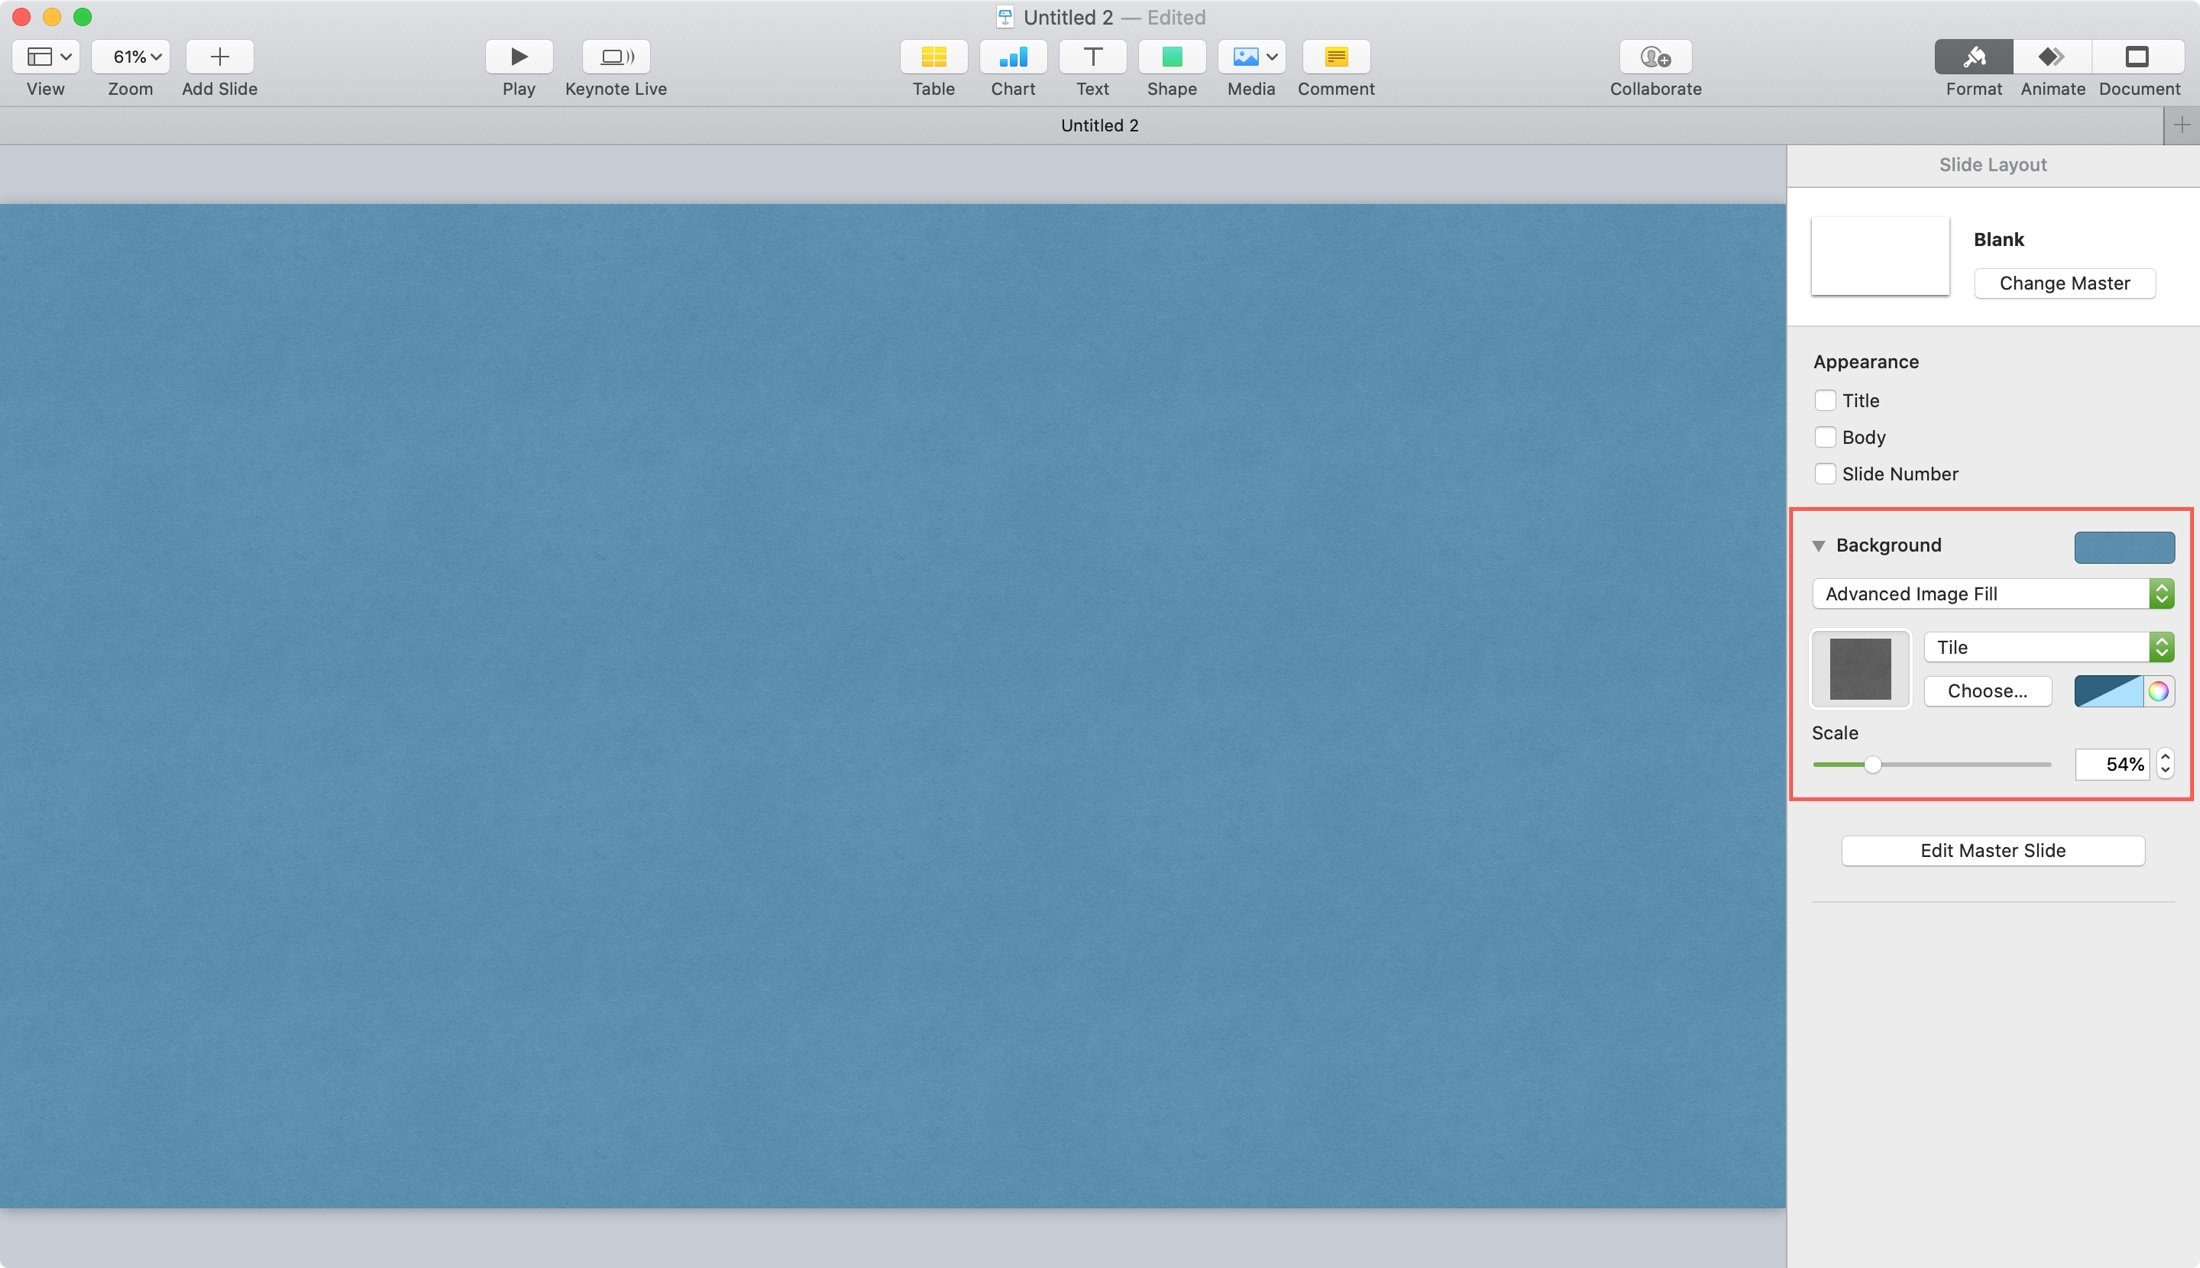
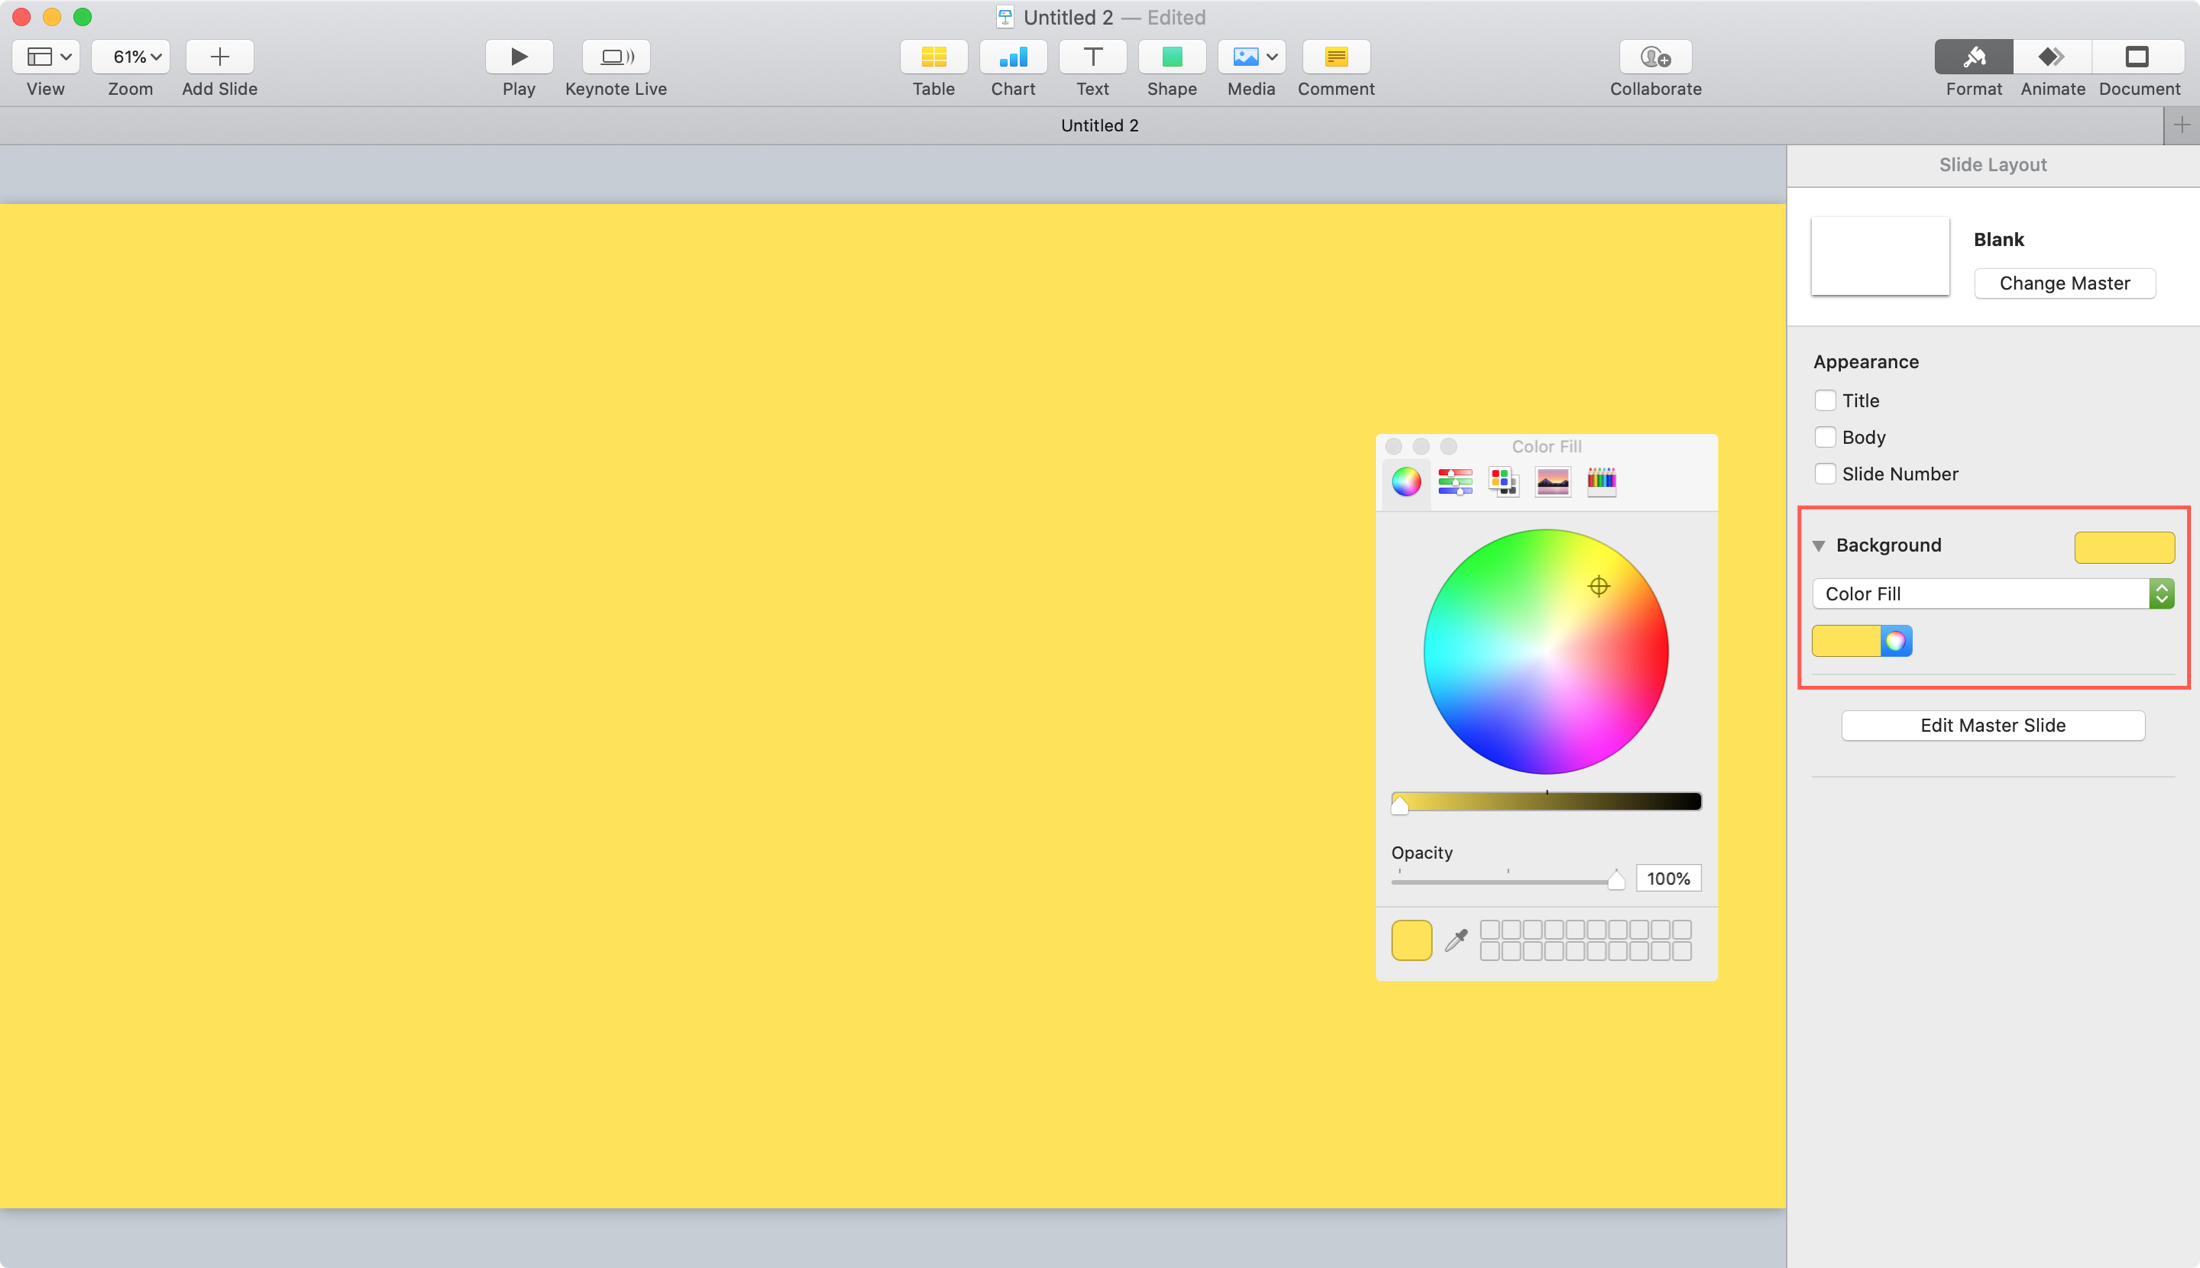
3) Next to Background, you can click the triangle to expand the options or pick a Preset color using the box to the right.
If you choose the expand the Background section, you’ll see a drop-down menu that lets you pick from different types of background rather than just solid colors. So you can select a gradient or image for your background.
For both of those kinds of backgrounds, you can pick the Advanced options that let you customize the angles (gradient), scale (image), and other options.
If you pick a solid color for your background, this section of the sidebar has a palette button next to the color drop-down so you can get the exact shade you want.
Add slide backgrounds on iPhone and iPad
In Keynote on iOS, you can add a background to your Keynote slides just as easily as on Mac. Open a presentation, select a slide, and then do the following.
1) Tap a blank area on the slide and then tap the Style button (brush icon) at the top.
2) Choose Appearance.
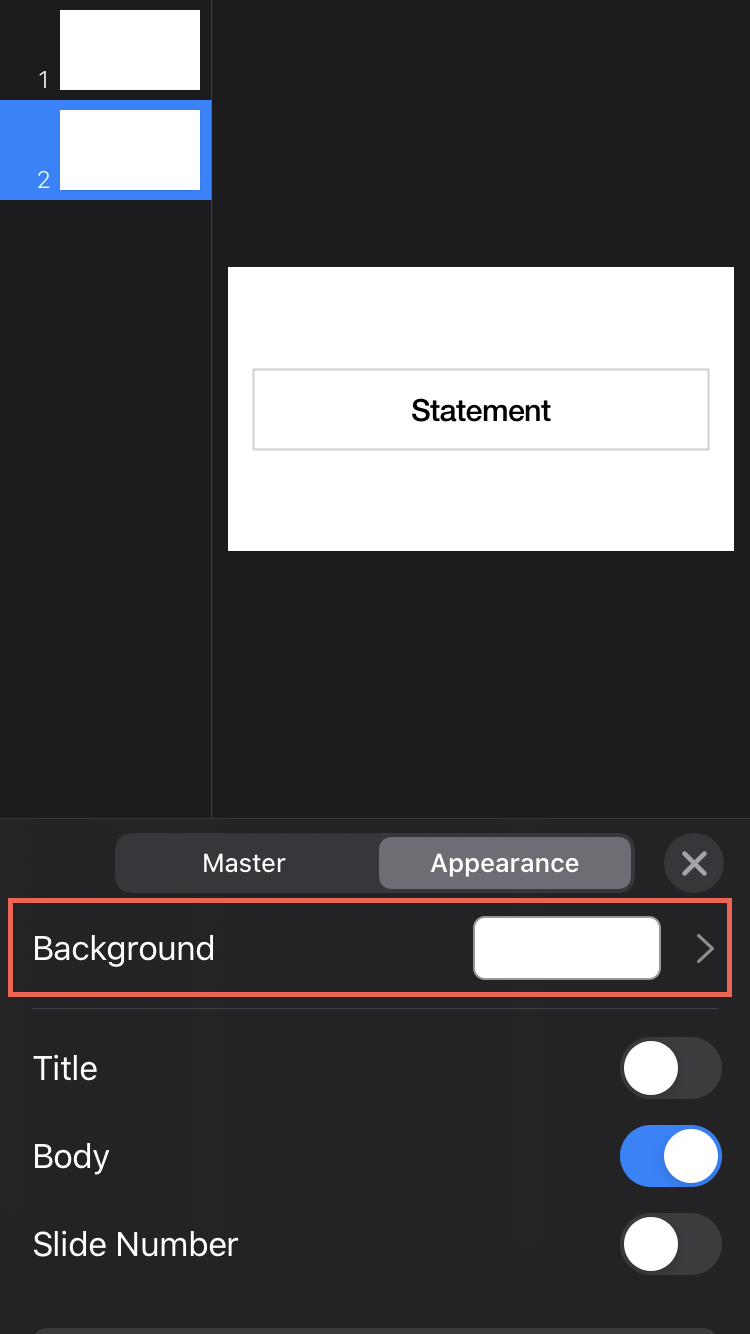
3) Select Background. Like on Mac, you can pick a Preset, fill Color, Gradient, or Image. Just pick that option from this area and then use the settings provided to customize it.

When you finish, just close the Style area. You can continue to add backgrounds to additional slides the same way.
Add slide borders on Mac
As mentioned above, adding a background to your slides in Keynote is easier than adding a border. This is because Keynote does not currently offer a border formatting feature like it does for backgrounds.
In order to create a slide border in Keynote, you’ll use a shape. Here’s how.
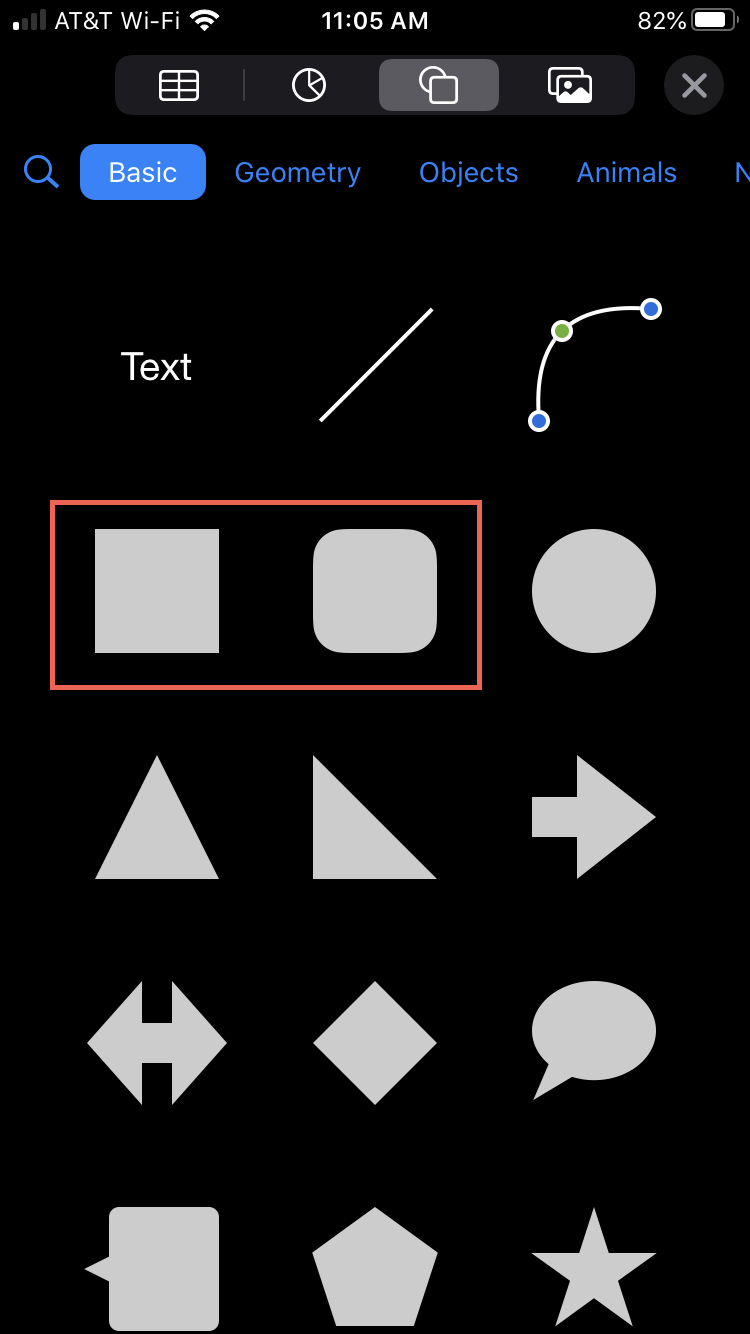
1) On the slide where you want to add the border, click the Shape button in the toolbar.
2) In the Basic category of shapes, pick either a square or rounded rectangle.

3) With the shape you pick on your slide, drag the edges and corners of it to cover your slide. You’ll want those edges and corners to line up with where you want the slide border.
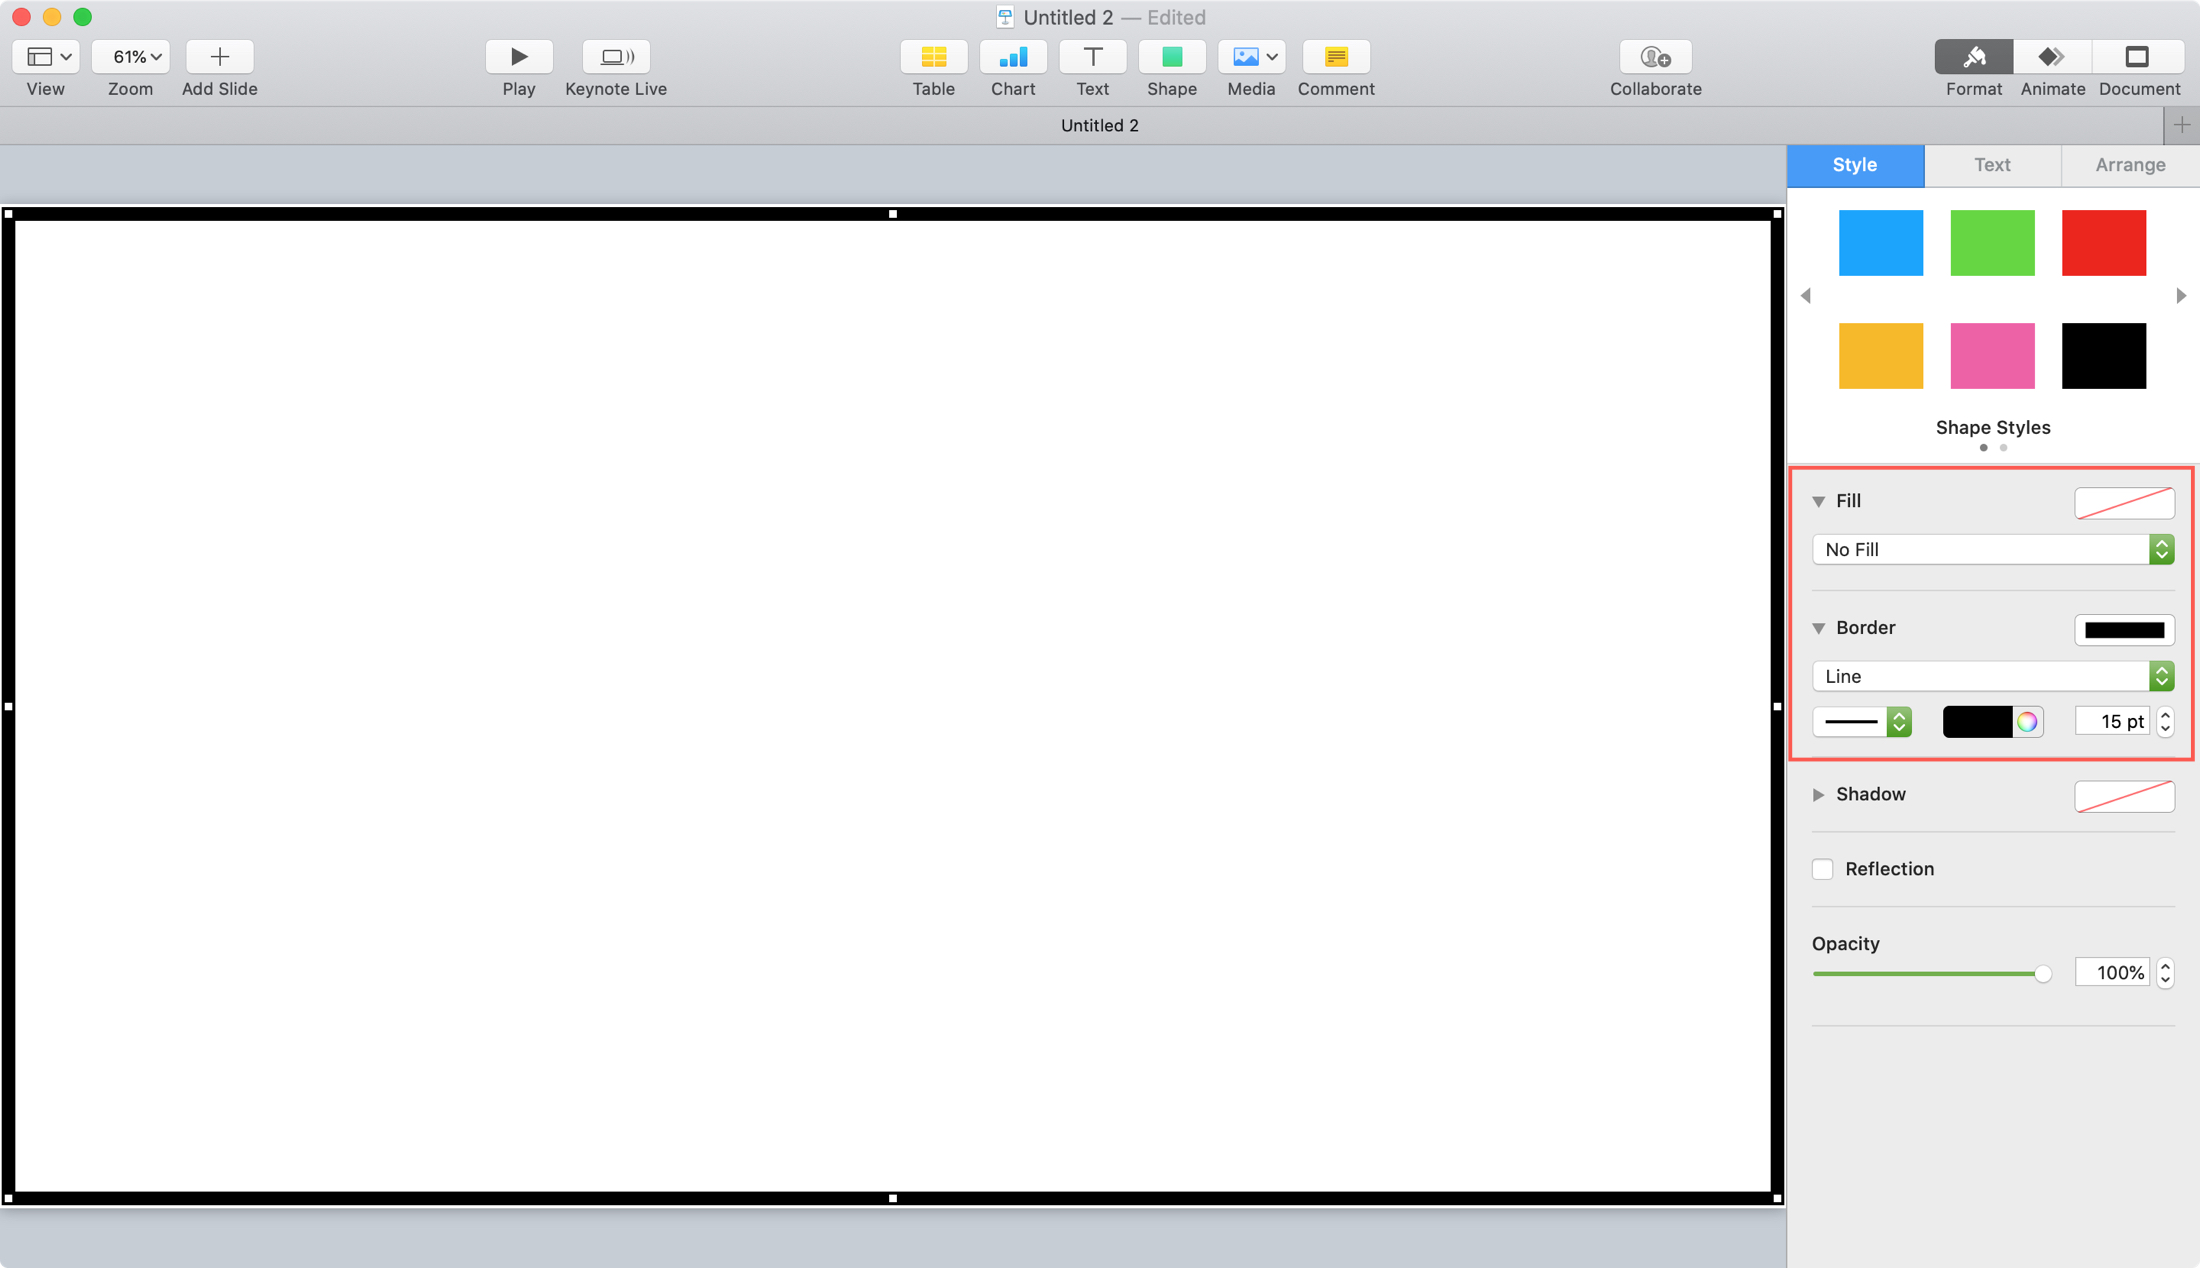
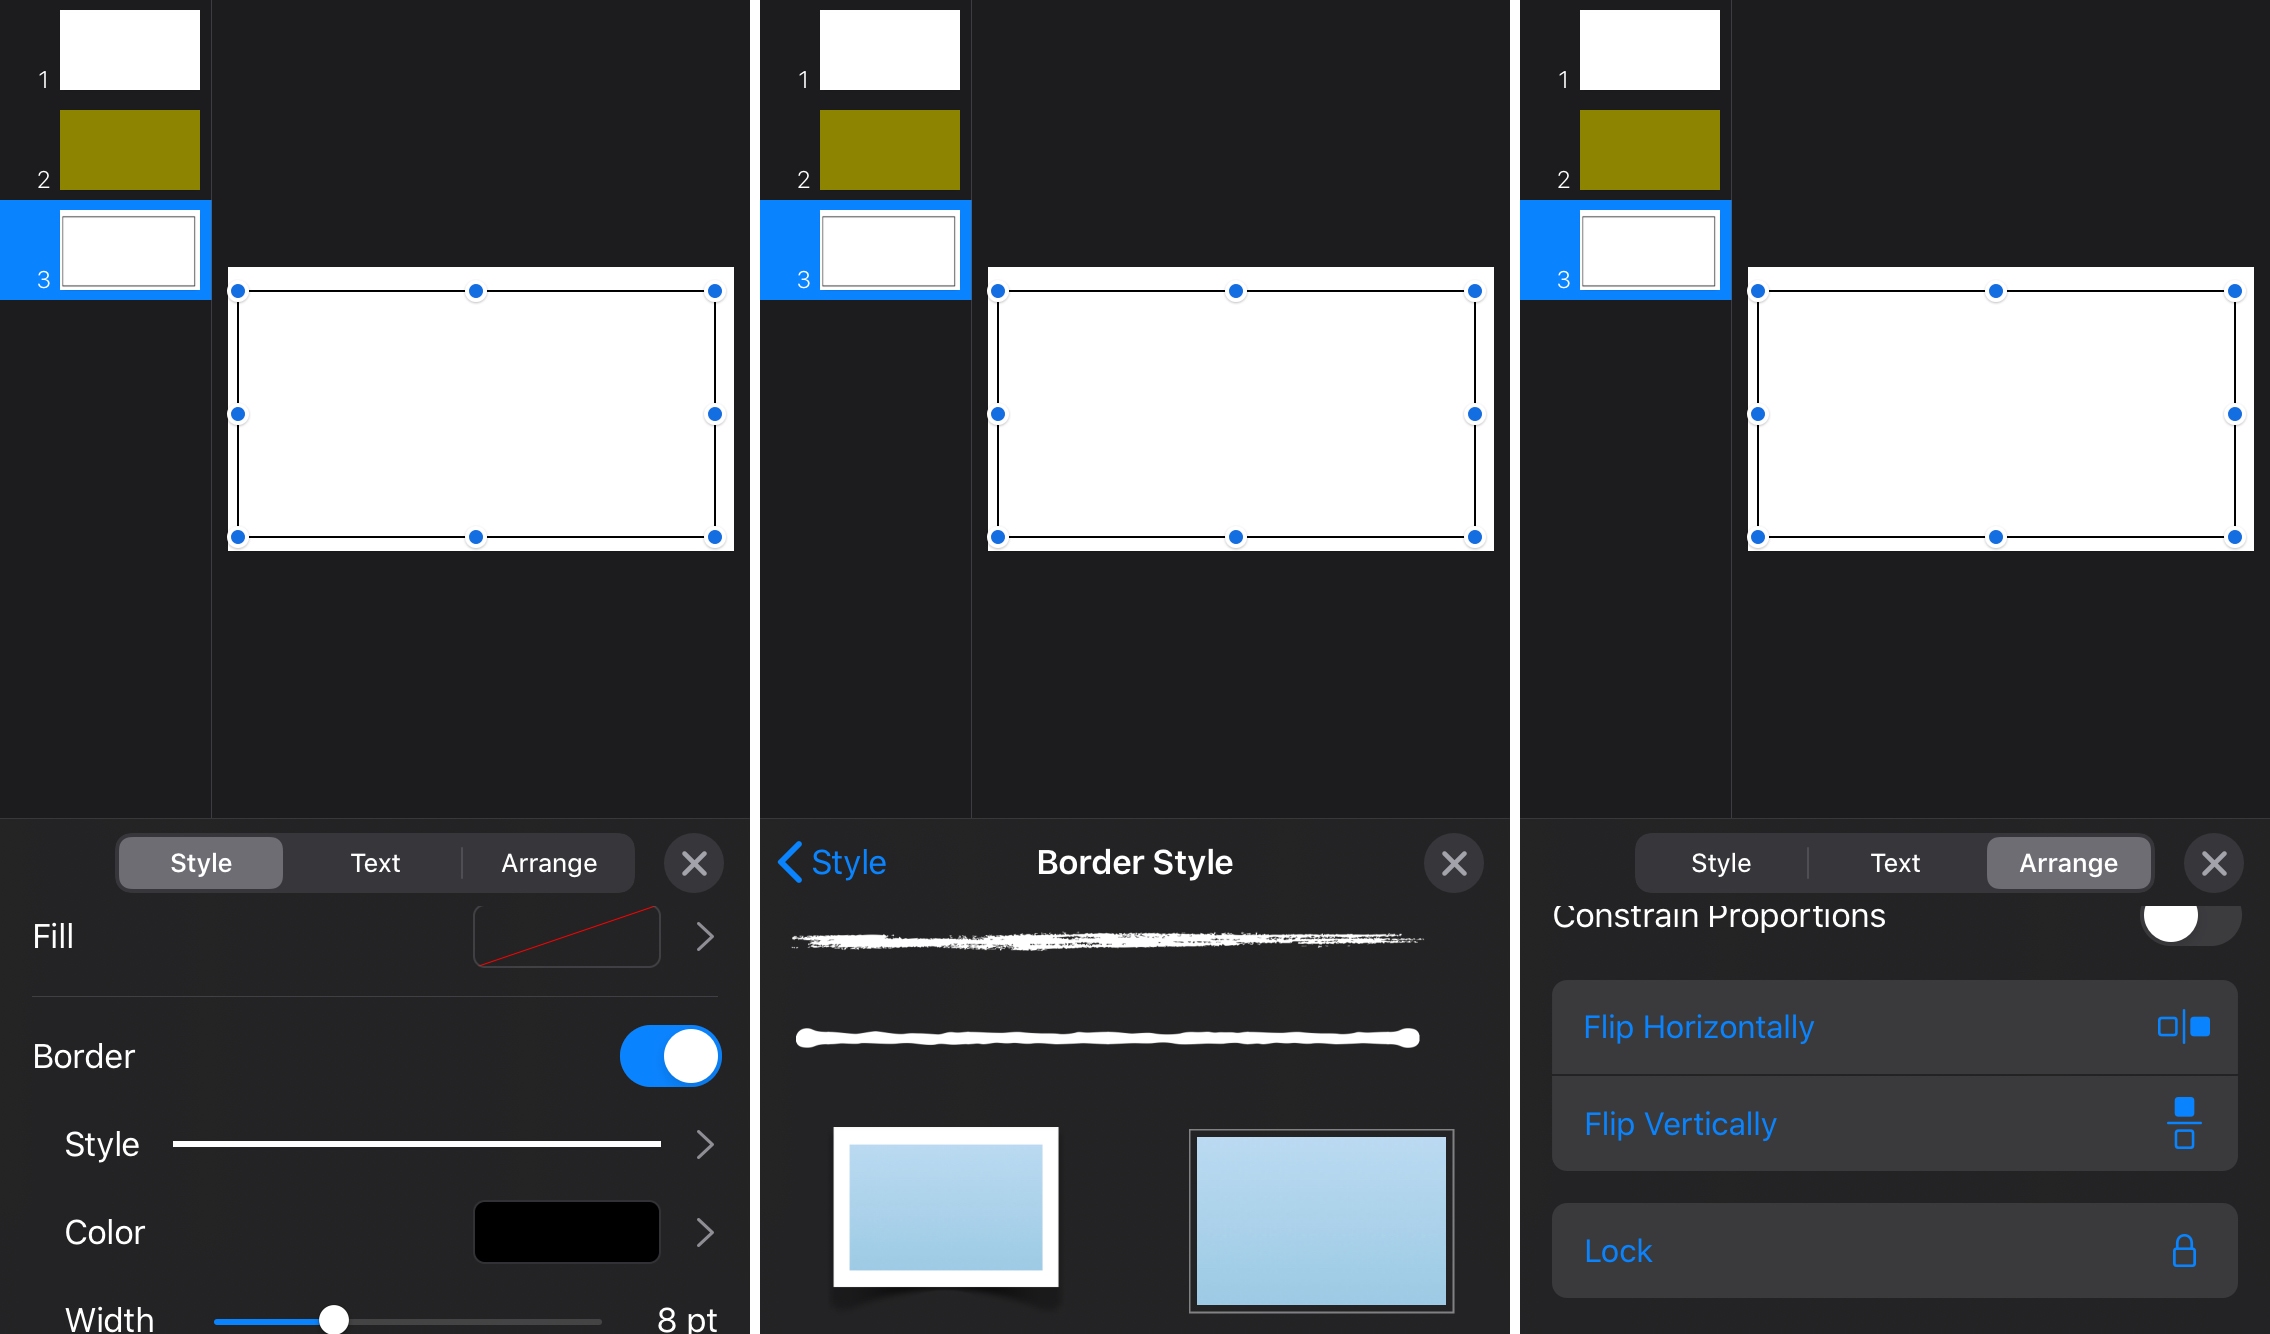
4) Keep the shape selected and click the Format button to open the sidebar and pick Style at the top.
5) Next to Fill, click the Preset box and select No Fill.
6) Next to Border, you can pick a Preset in the box or click the triangle to expand to see additional options.
If you expand, you can use the drop-down box to select a Line or Picture Frame border. Then use the settings that display for that option to customize the border.
7) When you finish getting your border just right, click the Arrange tab at the top of the sidebar.
8) Go to the bottom and click the Lock button. This will lock your shape into place, so you don’t risk moving, deleting, or editing it accidentally.
Then you can place your slide objects and elements right on top of that shape because it now blends into the slide as the border you want.
To use the border shape on all slides in your presentation, you can copy and paste the shape onto the other slides or create a Master Slide that uses the shape as a border.
Add slide borders on iPhone and iPad
Just like on Mac, adding a slide border in Keynote on iOS requires you use a shape. So, open your slideshow, select your slide, and follow these steps.
1) Tap on the slide and then tap the plus sign at the top.
2) Select the Shape icon, tap Basic, and then pick the square or rounded rectangle.
3) Drag the edges and corners to cover the slide, lining the edges up with where you want the border.
4) Tap the Style button (brush icon) at the top and pick Style in the pop-up.
5) Choose Fill and pick No Fill.
6) Tap the arrow to go back and enable the toggle for Border.
7) Tap each option to pick the Style, Color, and Width of the border as they apply. Note: When you pick Style, be sure to scroll through the options to see all that’s available for Line and Picture Frame borders.
8) To make sure the shape isn’t moved or edited by mistake select Arrange in the Style window and tap Lock.
Close the Style area when you finish.
To use the border shape on all slides in your presentation, you can copy and paste the shape onto the other slides or create a Master Slide that uses the shape as a border.
Tip: If you plan to copy and paste the shape, do it before you lock it. Otherwise, you’ll have to unlock it to perform the copy and paste actions.
Wrapping it up
Adding a background or border to a Keynote slide can give it that little extra that might be just what your presentation needs.
Are you going to add backgrounds or borders to your next slideshow? Let us know!
Source link: https://www.idownloadblog.com/2020/06/10/add-keynote-slide-backgrounds-borders/

Leave a Reply