

How to add a watermark in Pages on Mac, iPhone and iPad


If you use Pages to create documents for your own business or the company you work for, you may want to add a watermark. Whether a word like “confidential” or an image of your logo, you can add that watermark so that it blends into the background and appears on every page of your document.
In this tutorial, we’ll walk you through how to add a watermark in Pages on Mac, iPhone, and iPad.
Create and add a watermark in Pages
Add a watermark in Pages on Mac
In this how-to we’re going to start with the instructions for Mac simply because the process is easier on a computer than a mobile device. If you use Pages with iCloud on all your Apple devices, then I’d suggest creating the watermark on Mac where you have more workspace and control over the object.
If you don’t use Pages on Mac, you can jump down to the instructions for adding watermark on iPhone and iPad.
Open a document in Pages on your Mac. You can create a new document or add the watermark to an existing one. If you choose to add it to an existing document, it’s easiest to add a new blank page and create the watermark there where you have more space.
1) Choose an object to insert from the toolbar. You’ll likely pick Text for a simple word or phrase or choose Media > Photos if you have a logo you want to use.
If you want to add text, go ahead and enter the word or term in the text box you insert. And for either type of objects, you can click the Format button to open the sidebar and format, rotate, or change its size as you like.
You should also move the object where you want to display it on each page.
2) If you haven’t already, click the Format button to open the sidebar and then select Style.
3) Make sure your object is selected and then adjust the Opacity using the slider or arrows. This is what gives your watermark transparency.

4) Once your object is on the page where and how you want it, click Arrange from the menu bar.
5) Go down to Section Masters and pick Move Object to Section Master.

Now your watermark will display on every page in your document the same way.
Edit your watermark on Mac
If you decide later that you want to edit or even remove your watermark, you can do so easily.
Click Arrange > Section Masters and check Make Master Objects Selectable from the menu bar.
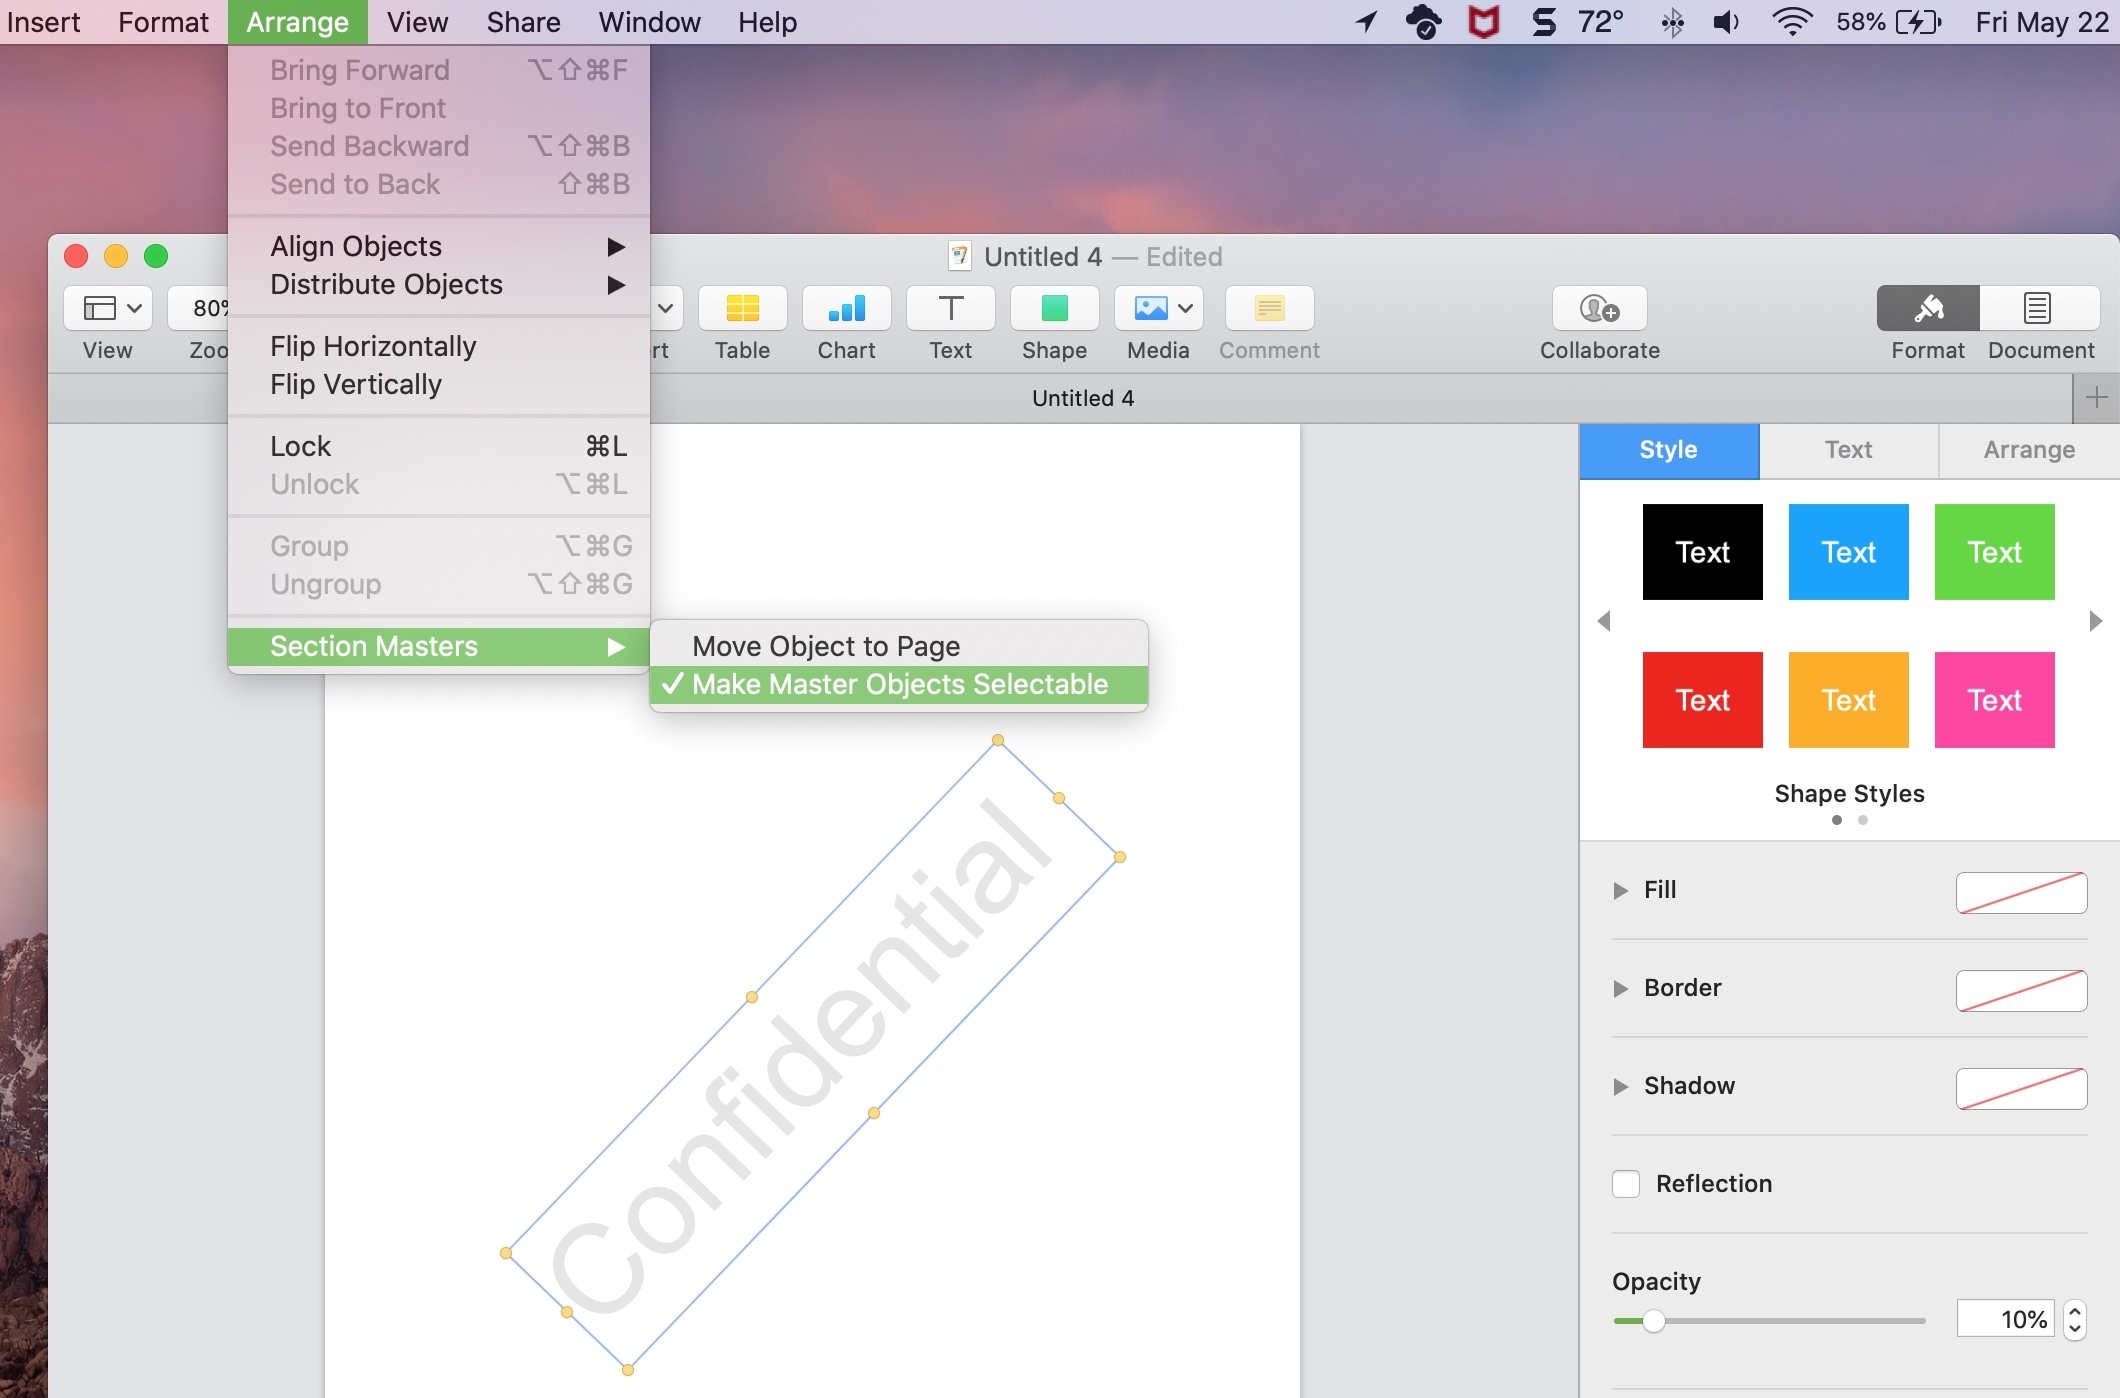
You can then make your edits or remove the watermark. When you finish, head to that same spot in the menu bar and uncheck Make Master Objects Selectable.
Add a watermark in Pages on iPhone and iPad
As mentioned, you can add a watermark in Pages on iOS, but it may be a bit more difficult because of the area you have to work and amount of control you have over the objects.
To get started, open Pages to a document on your iPhone or iPad. Then, follow these steps to add your watermark.
1) Tap an empty space on the page so that nothing is selected.
2) Tap the Style button (brush icon) at the top.
3) In the pop-up window, choose the Document tab.
4) Scroll to the bottom and tap Document Setup.

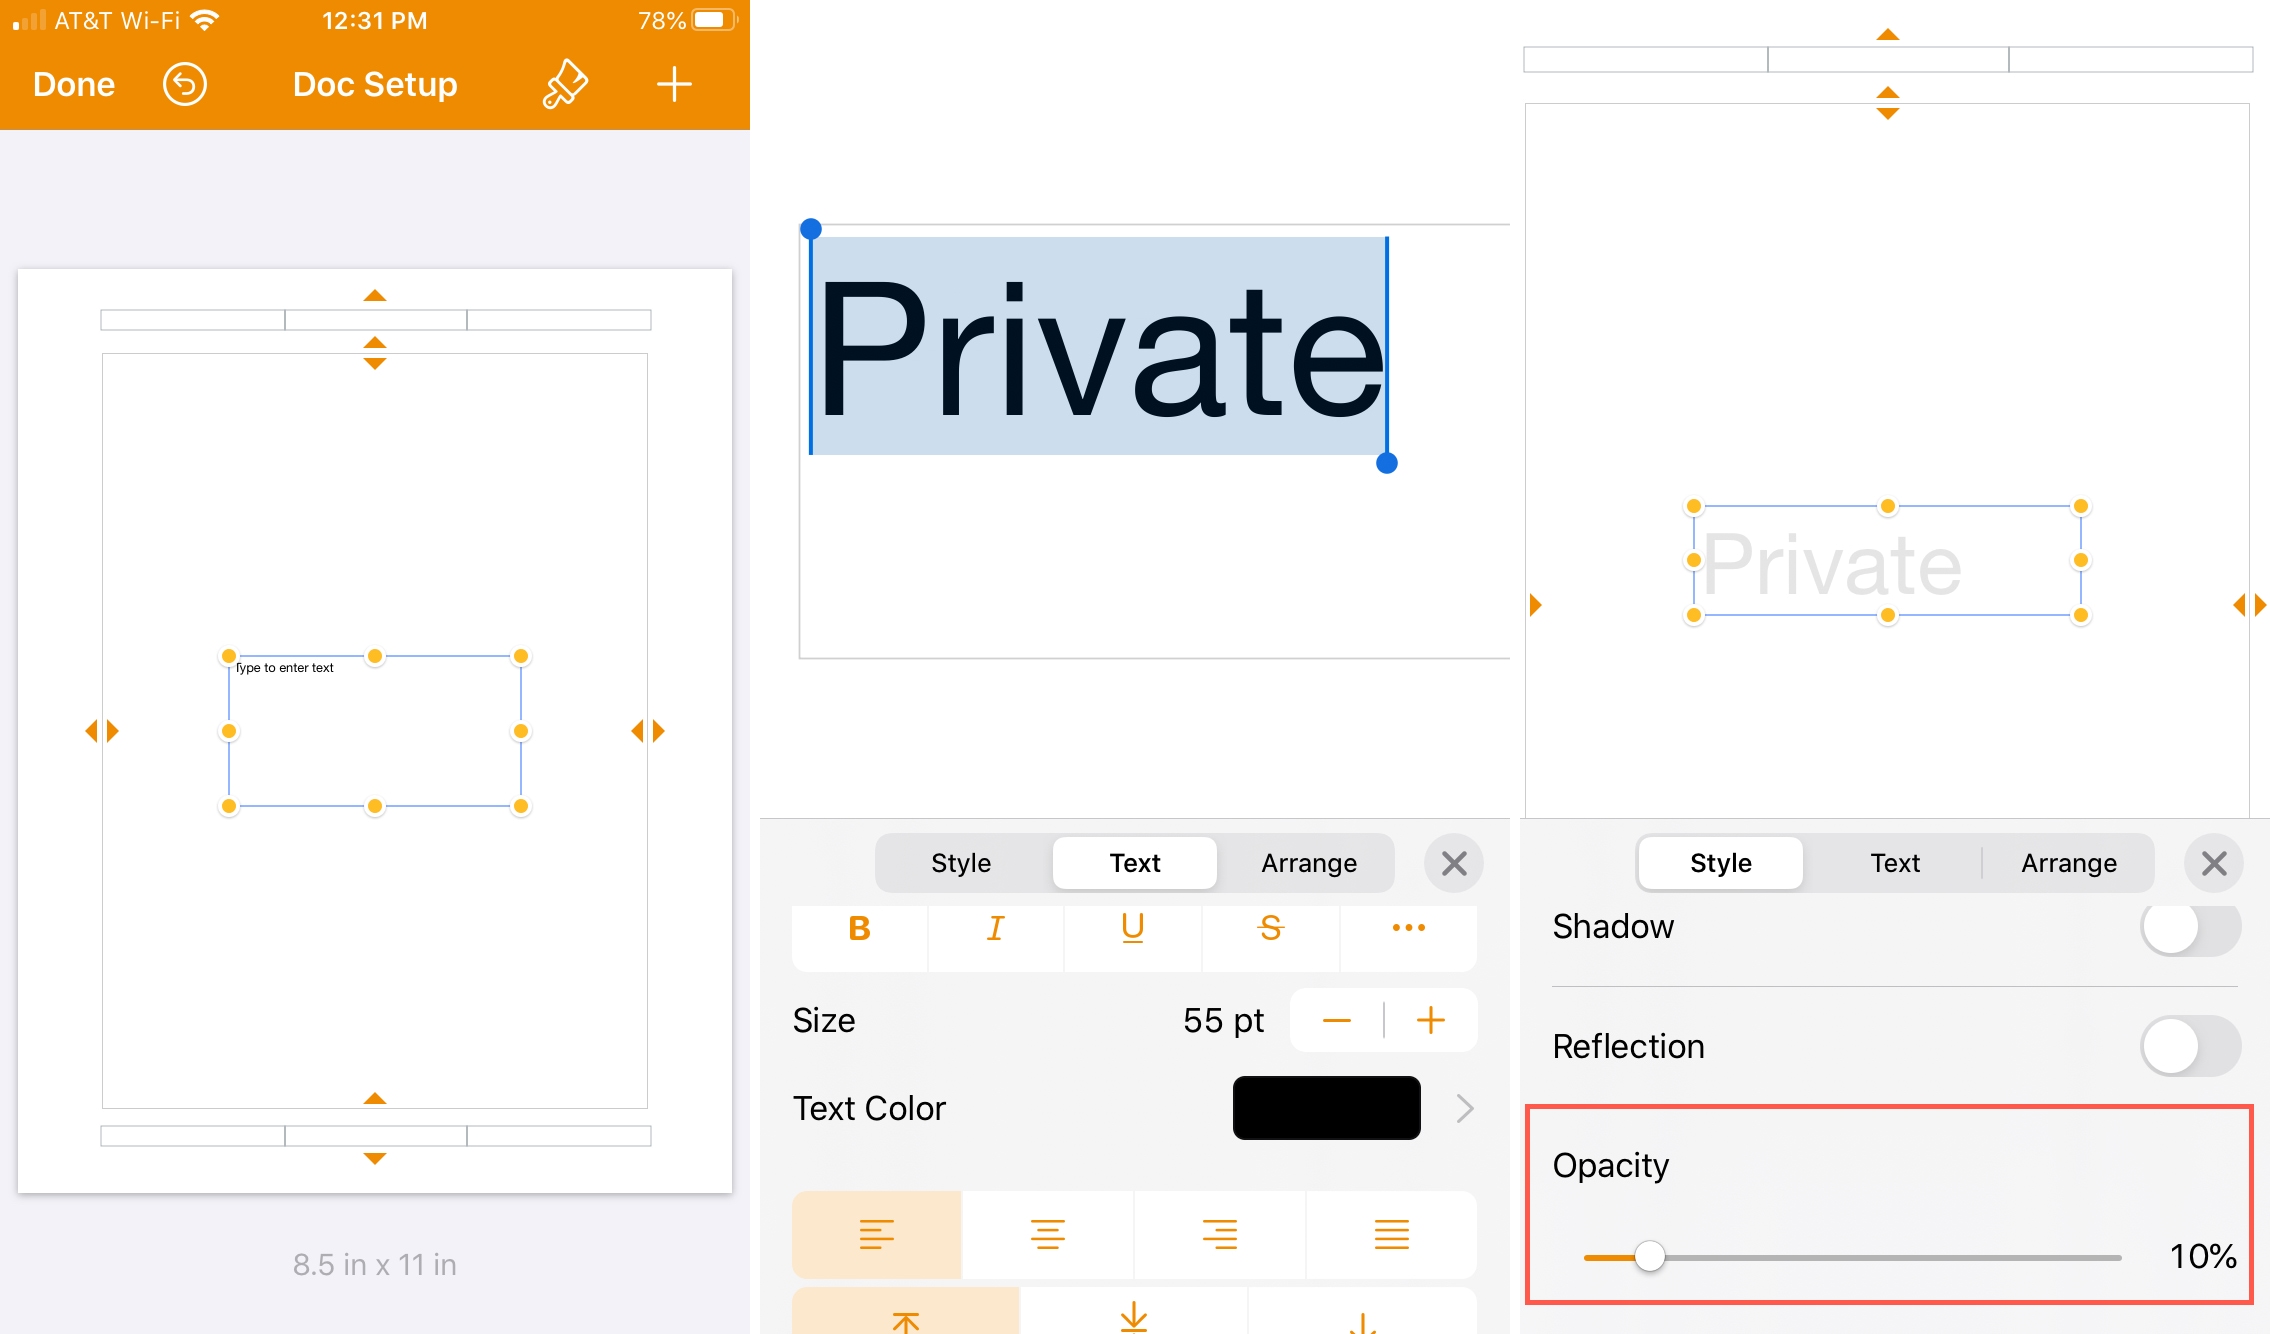
5) Tap the plus sign at the top to add your object. Note: If you want to add a text box, this option is in the Shapes > Basic section.
Format, move, and adjust your object so that it’s on the page the way and location you want it.
6) Tap the Style button again, making sure the object is selected, and pick Style.
7) Move the slider for Opacity to give the object the percentage of transparency you want.
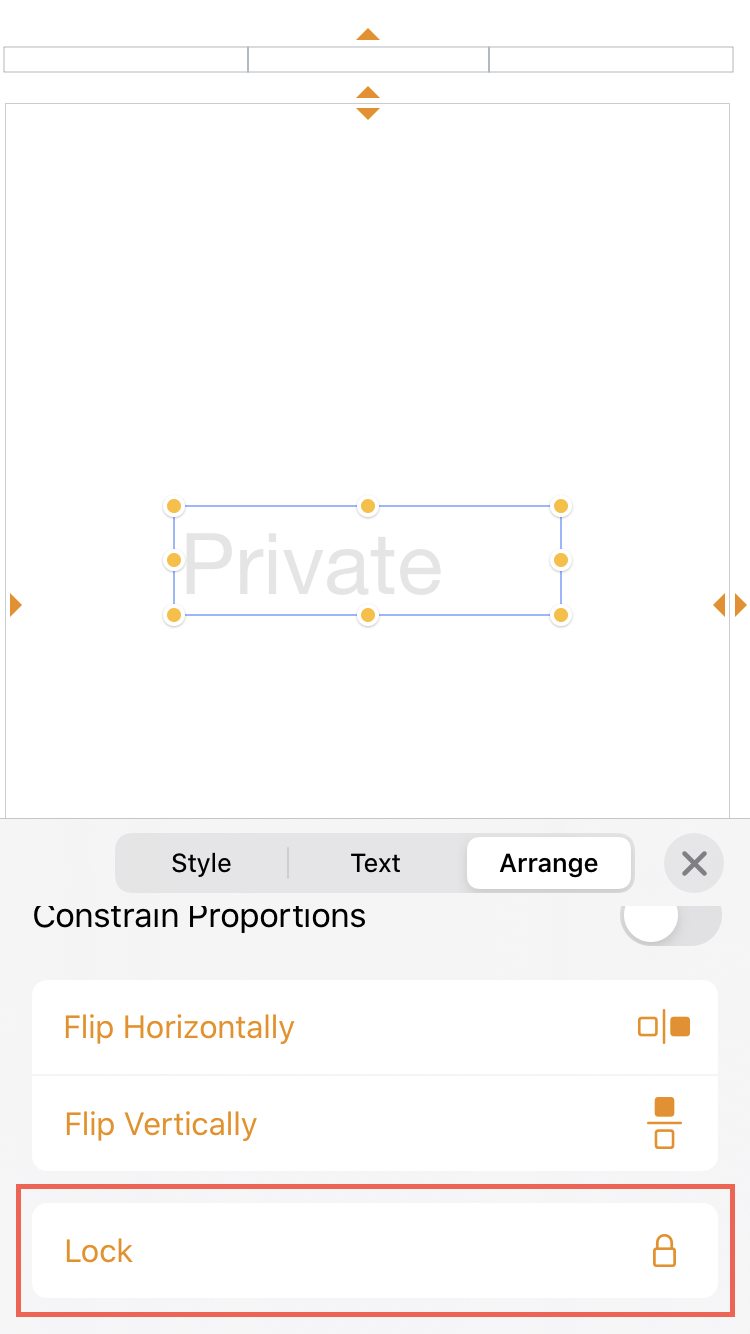
8) Tap Arrange in that same window and then Lock. By locking the object, you’ll prevent it from being edited or accidentally moved.
9) Tap Done.
Your watermark will now appear on every page in your document.
Edit your watermark on iOS
If you want to change or remove your watermark, start by following Steps 1 to 4 above so that you’re back in the Document Setup area.
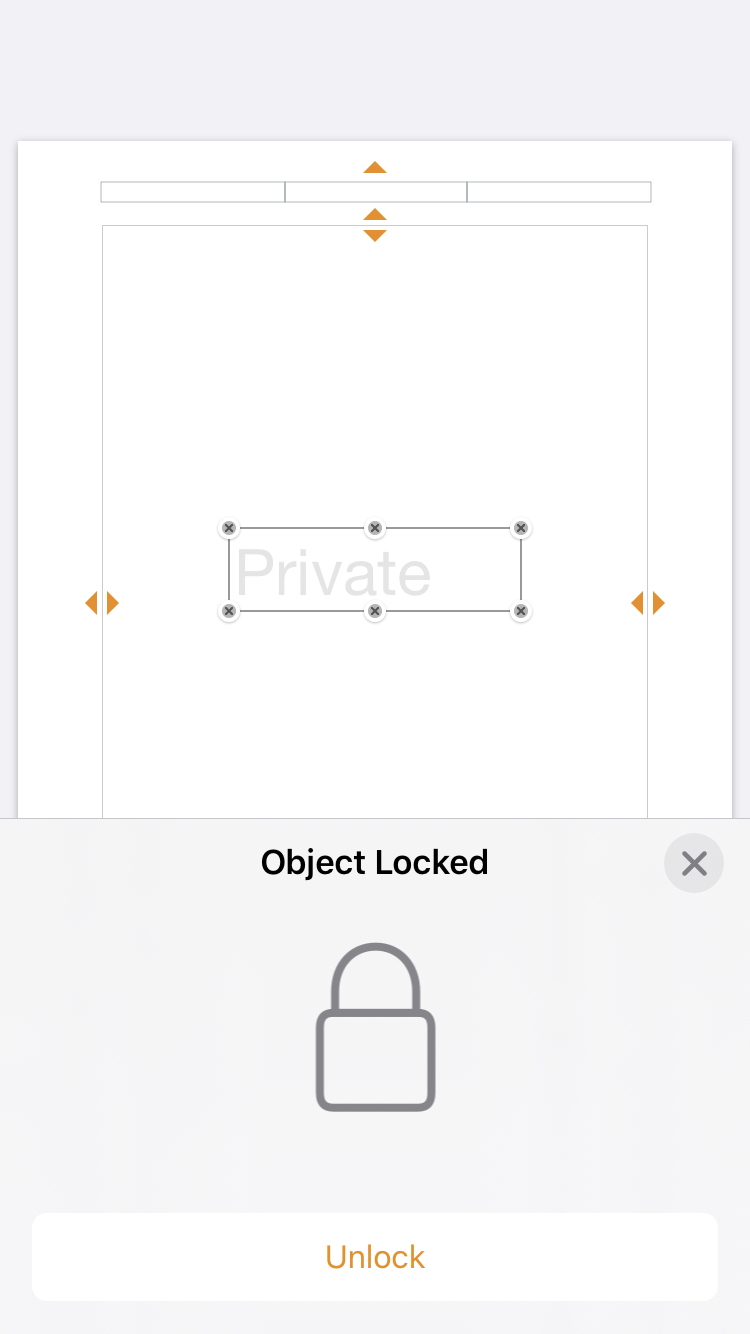
1) Select your object and tap Unlock. You can then edit or remove your watermark.
2) If you simply make edits to it, rather than deleting it, you should lock it again when you finish.
3) Tap Done.
Wrapping it up
Adding a watermark to your Pages document is convenient in some cases and necessary in others. So knowing how to do this on Mac and iOS for your business documents should help.
Let us know if you run into any problems creating and adding your watermark in Pages. And if you discover tips or tricks as you go through the process, feel free to come back and add them to the comments below!
Source link: https://www.idownloadblog.com/2020/06/02/how-to-add-a-watermark-in-pages/

Leave a Reply