How to toggle macOS Catalina’s Dark Mode with a custom Touch Bar shortcut on your Mac
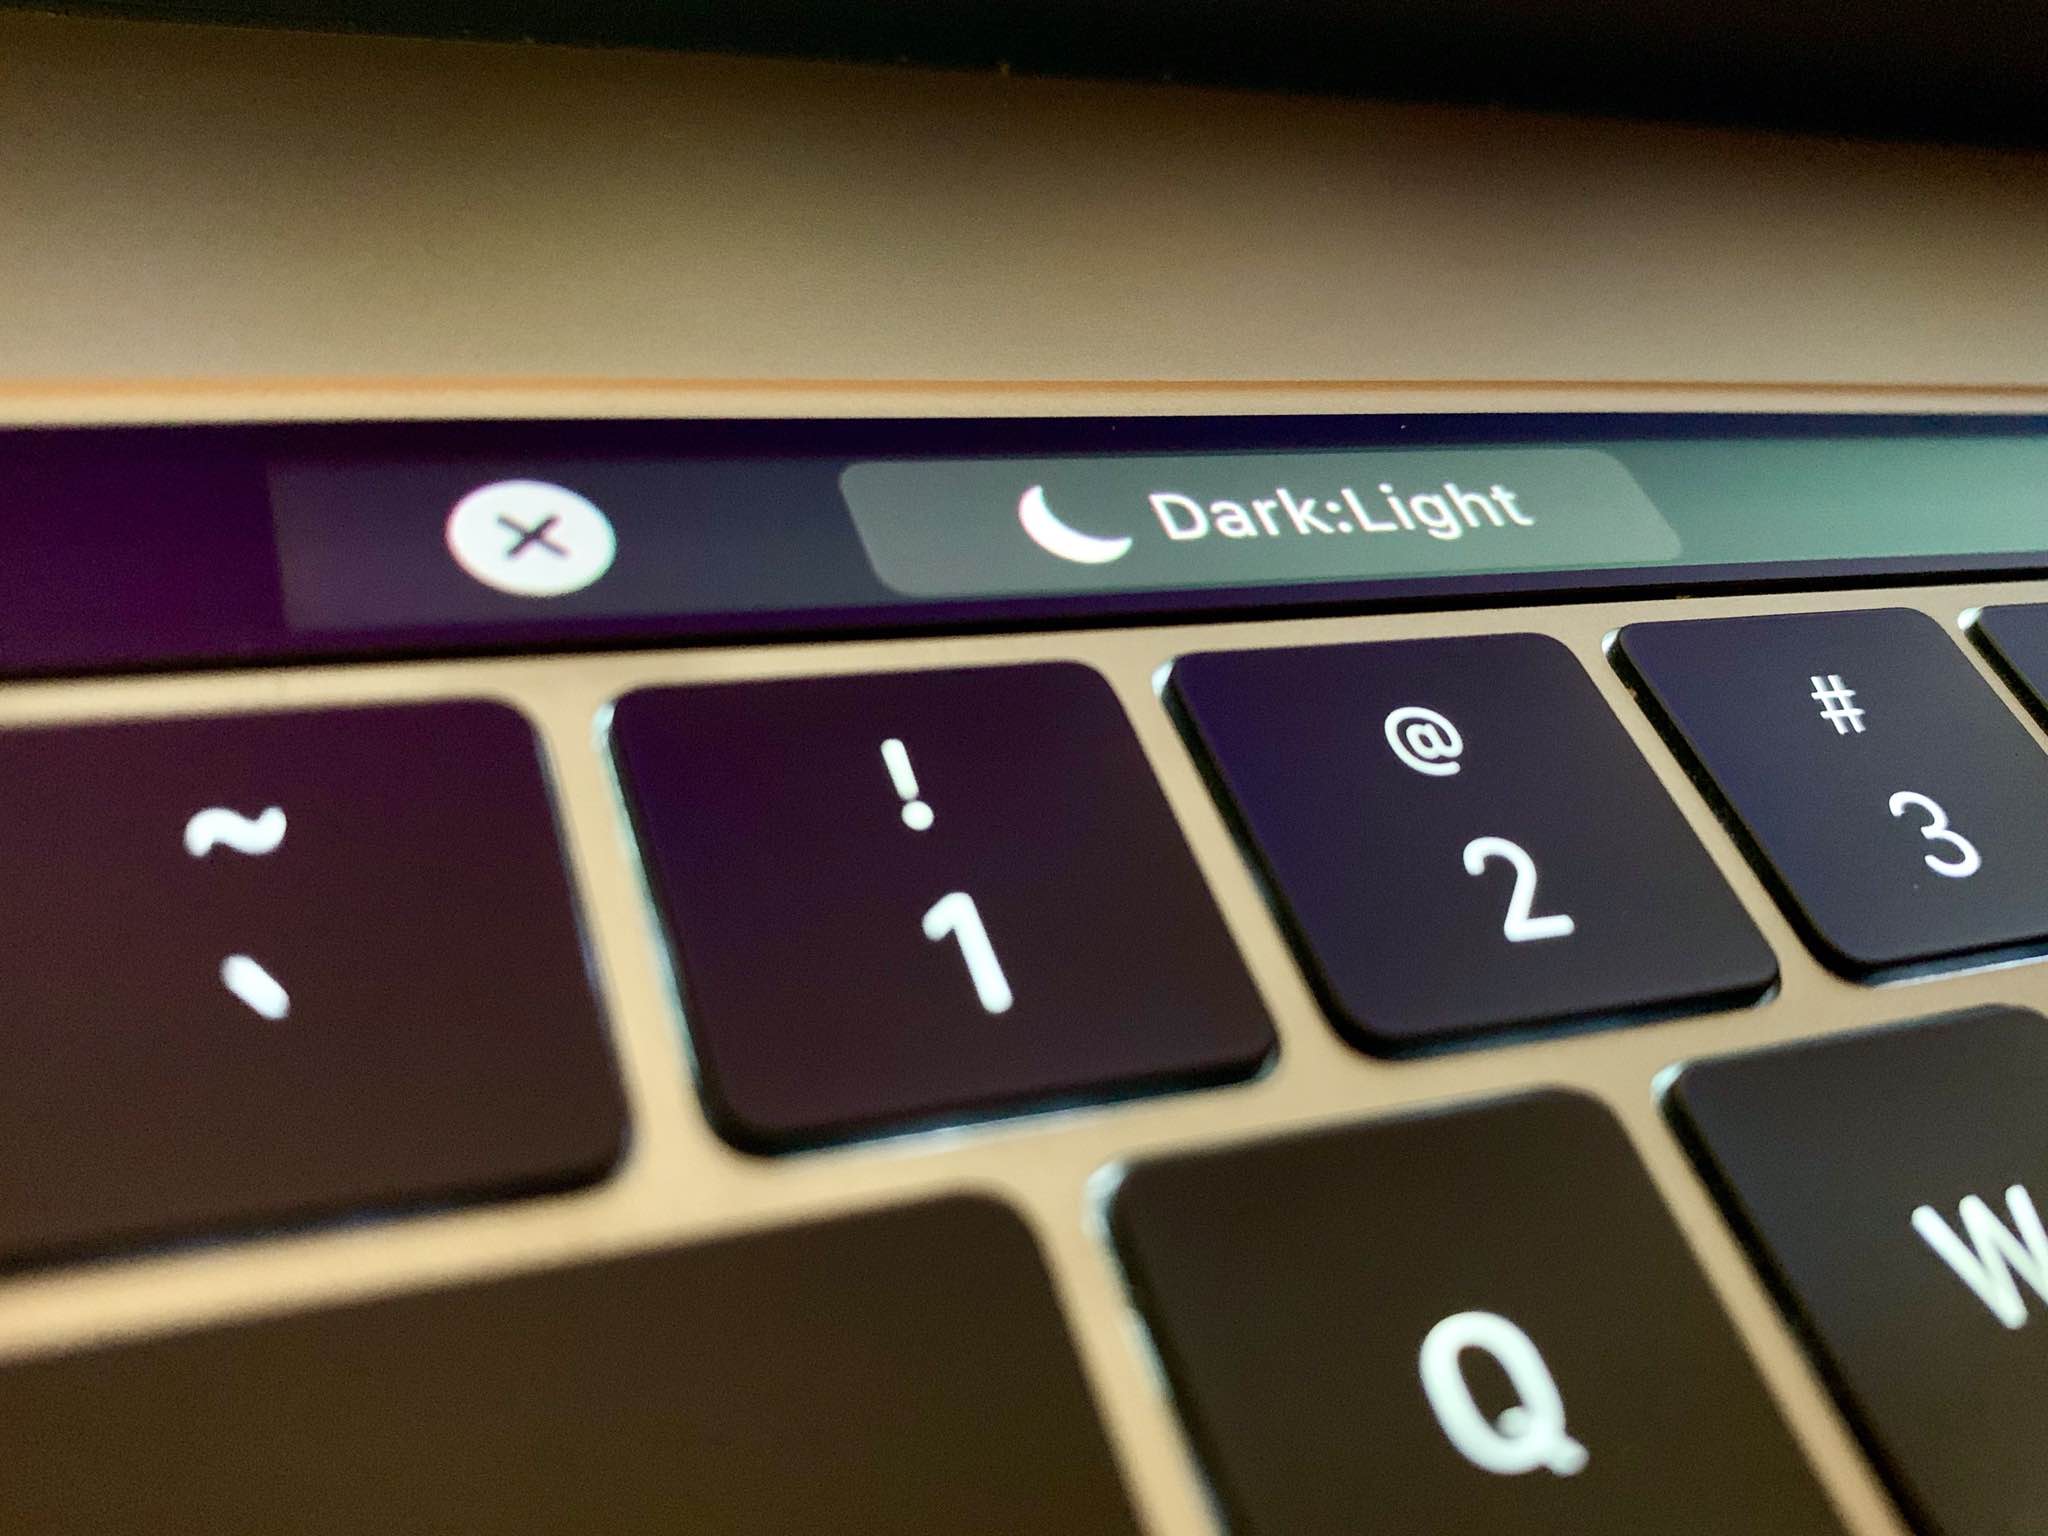
Follow this step-by-step tutorial to learn how to quickly switch between macOS’s dark and light themes by adding a dedicated toggle for Dark Mode to the Touch Bar of your Mac.
As the name suggests, the Dark Mode mode feature uses a system-wide dark color palette for the user interface. Some people say Dark Mode is easier on their eyes while others claim it helps them focus on their work. Your mileage may vary —I prefer taking advantage of Dark Mode at night because everything but my content is deemphasized, which makes sense.
Dark Mode is available in macOS Mojave 10.14 or later.
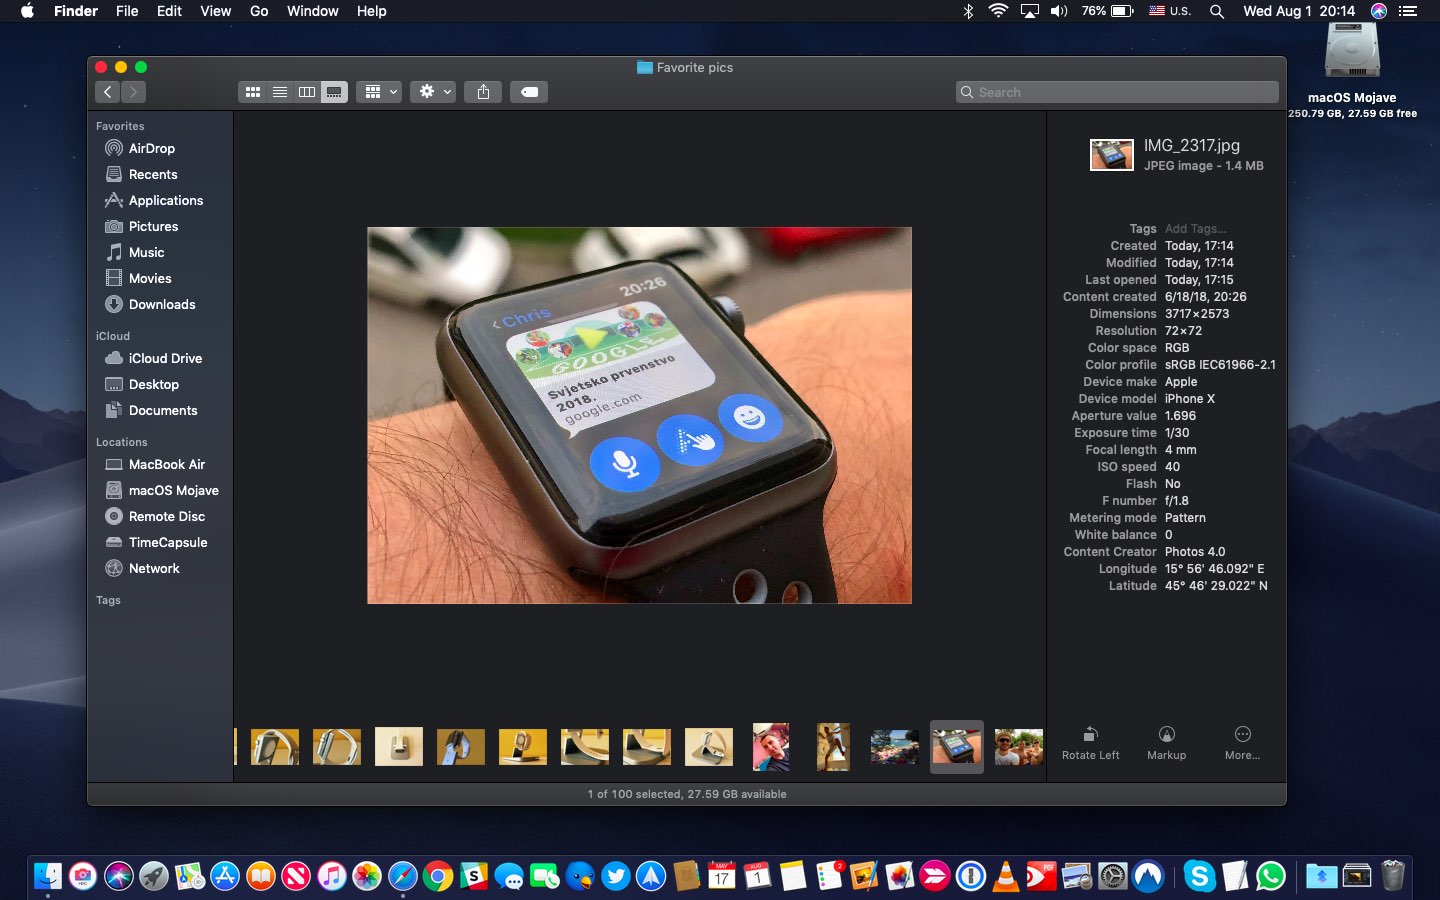
Dark Mode can be used not only with the Apple apps that came with your Mac, but also in the third-party apps that have adopted Apple’s official Dark Mode APIs.
TUTORIAL: How to user Dark Mode on your Mac
You can toggle a darkened look for the macOS user interface manually or set your Mac to
automatically use the light appearance during the day and the dark appearance at night in System Preferences → General, then select one of the Appearance options at the top:
- Light: Use the light appearance.
- Dark: Use the dark appearance.
- Auto: Automatically switch between light/dark mode depending on the time of day.
Keep in mind that the Auto option is available in macOS Catalina 10.15 or later.
TUTORIAL: 20 cool Touch Bar tips and tricks
As switching between dark and light modes is a multi-step affair, yo ay be wondering how great it would be if you could make the process quicker by adding a dedicated Dark Mode toggle to your Mac’s Touch Bar? We recently explained how to run custom Automator workflows as Quick Actions right from the Touch Bar. Now we’re going to take advantage of that knowledge, and some short AppleScript code, to do just that.
Follow along with us to learn how.
How to toggle Dark Mode with the Touch Bar
Basically, we’re going to use the macOS automation app Automator to create Quick Action workflows which can in turn be made available in places like Finder windows, the Services menu or the Touch Bar on a Mac that has a Touch Bar. After that, we’ll add our Dark Mode toggle quick action to the Touch Bar through System Preferences.
TUTORIAL: How to show either function F1-F12 keys or media controls in the Touch Bar
The Touch Bar is available on the MacBook Pro models from 2016 or later, excluding 2016’s and 2017’s 13-inch MacBook Pro models that are outfitted with two Thunderbolt 3 ports.
1) Open the Automator app from your Applications folder.
2) Click the File menu and choose New, or press Command – N on the keyboard.
3) Select Quick Action as the document type, then click Choose.
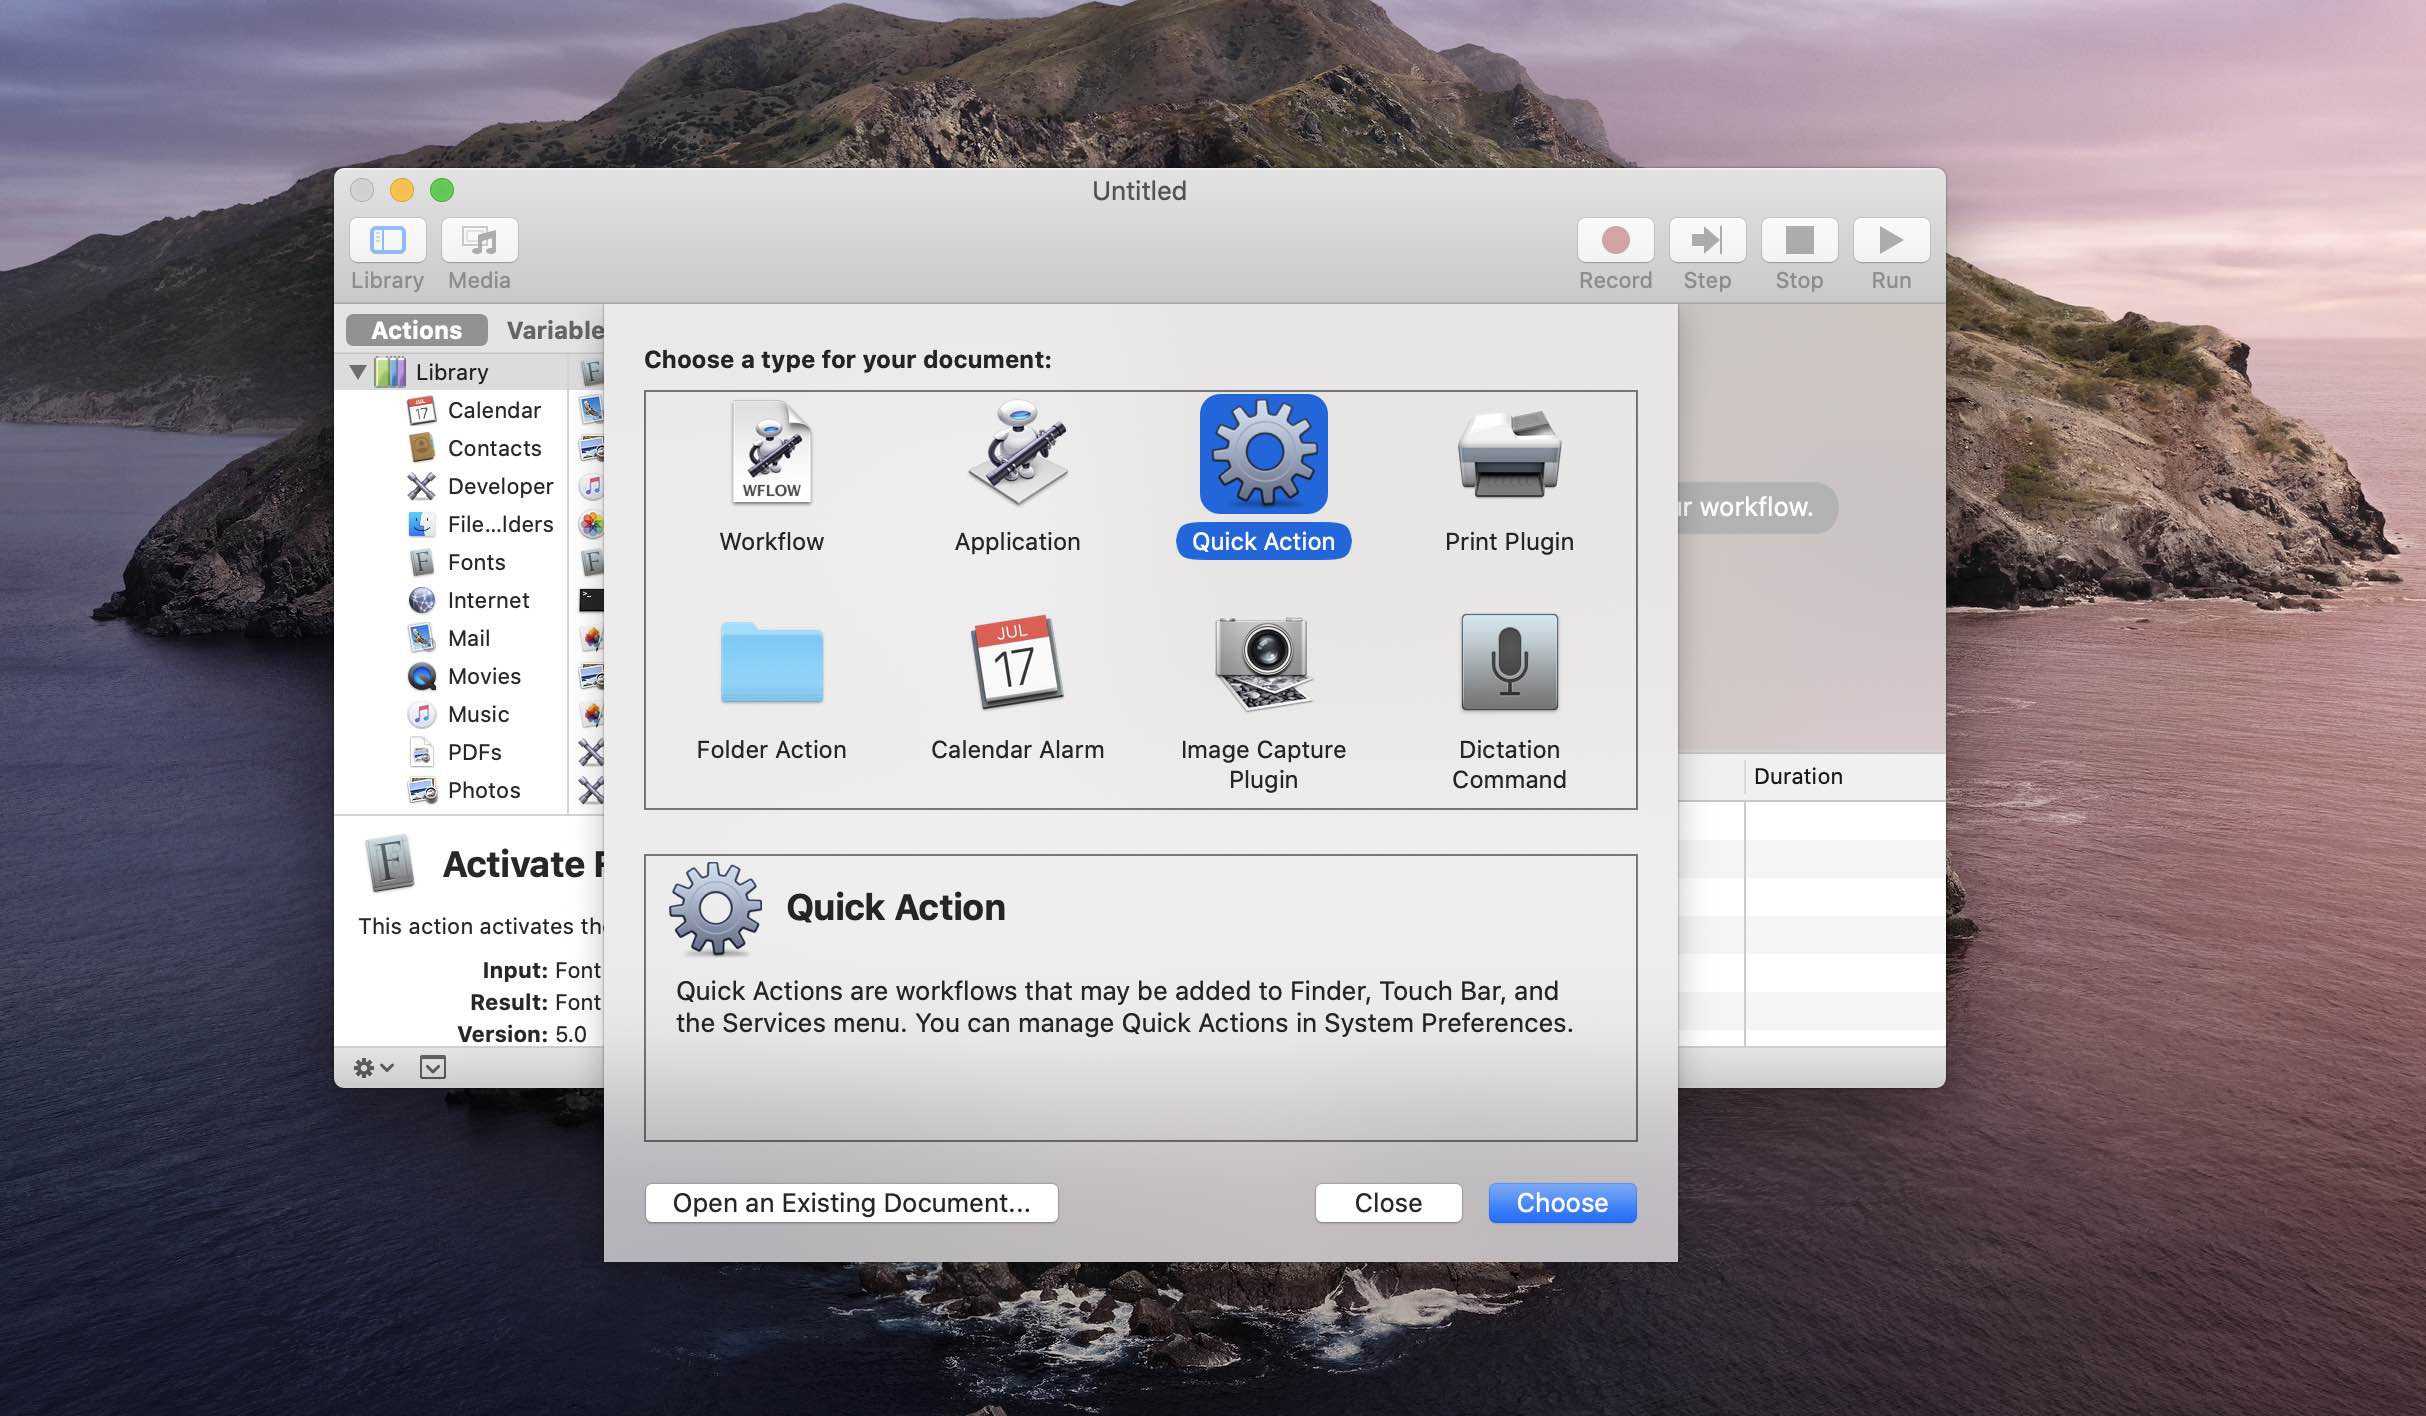
4) Now adjust your workflow settings near the top-right corner:
- Choose “No input” from the popup menu next to “Workflow receives current”.
- Set a custom glyph for the workflow next to “Image”.
- Choose a custom color for your workflow next to “Color”.
With these options set, you’re ready to proceed to the next step.
5) Drag the Run AppleScript action from the lefthand column and drop it on the right side of the window to add some custom AppleScript code to our workflow. You can use the search field to find the Run AppleScript action faster.
6) Copy and paste this code to the script:
on run {input, parameters}
tell application "System Events"
tell appearance preferences
set dark mode to not dark mode
end tell
end tell
return input
end run
7) Click the hammer icon above the AppleScript code to confirm that there are no errors.
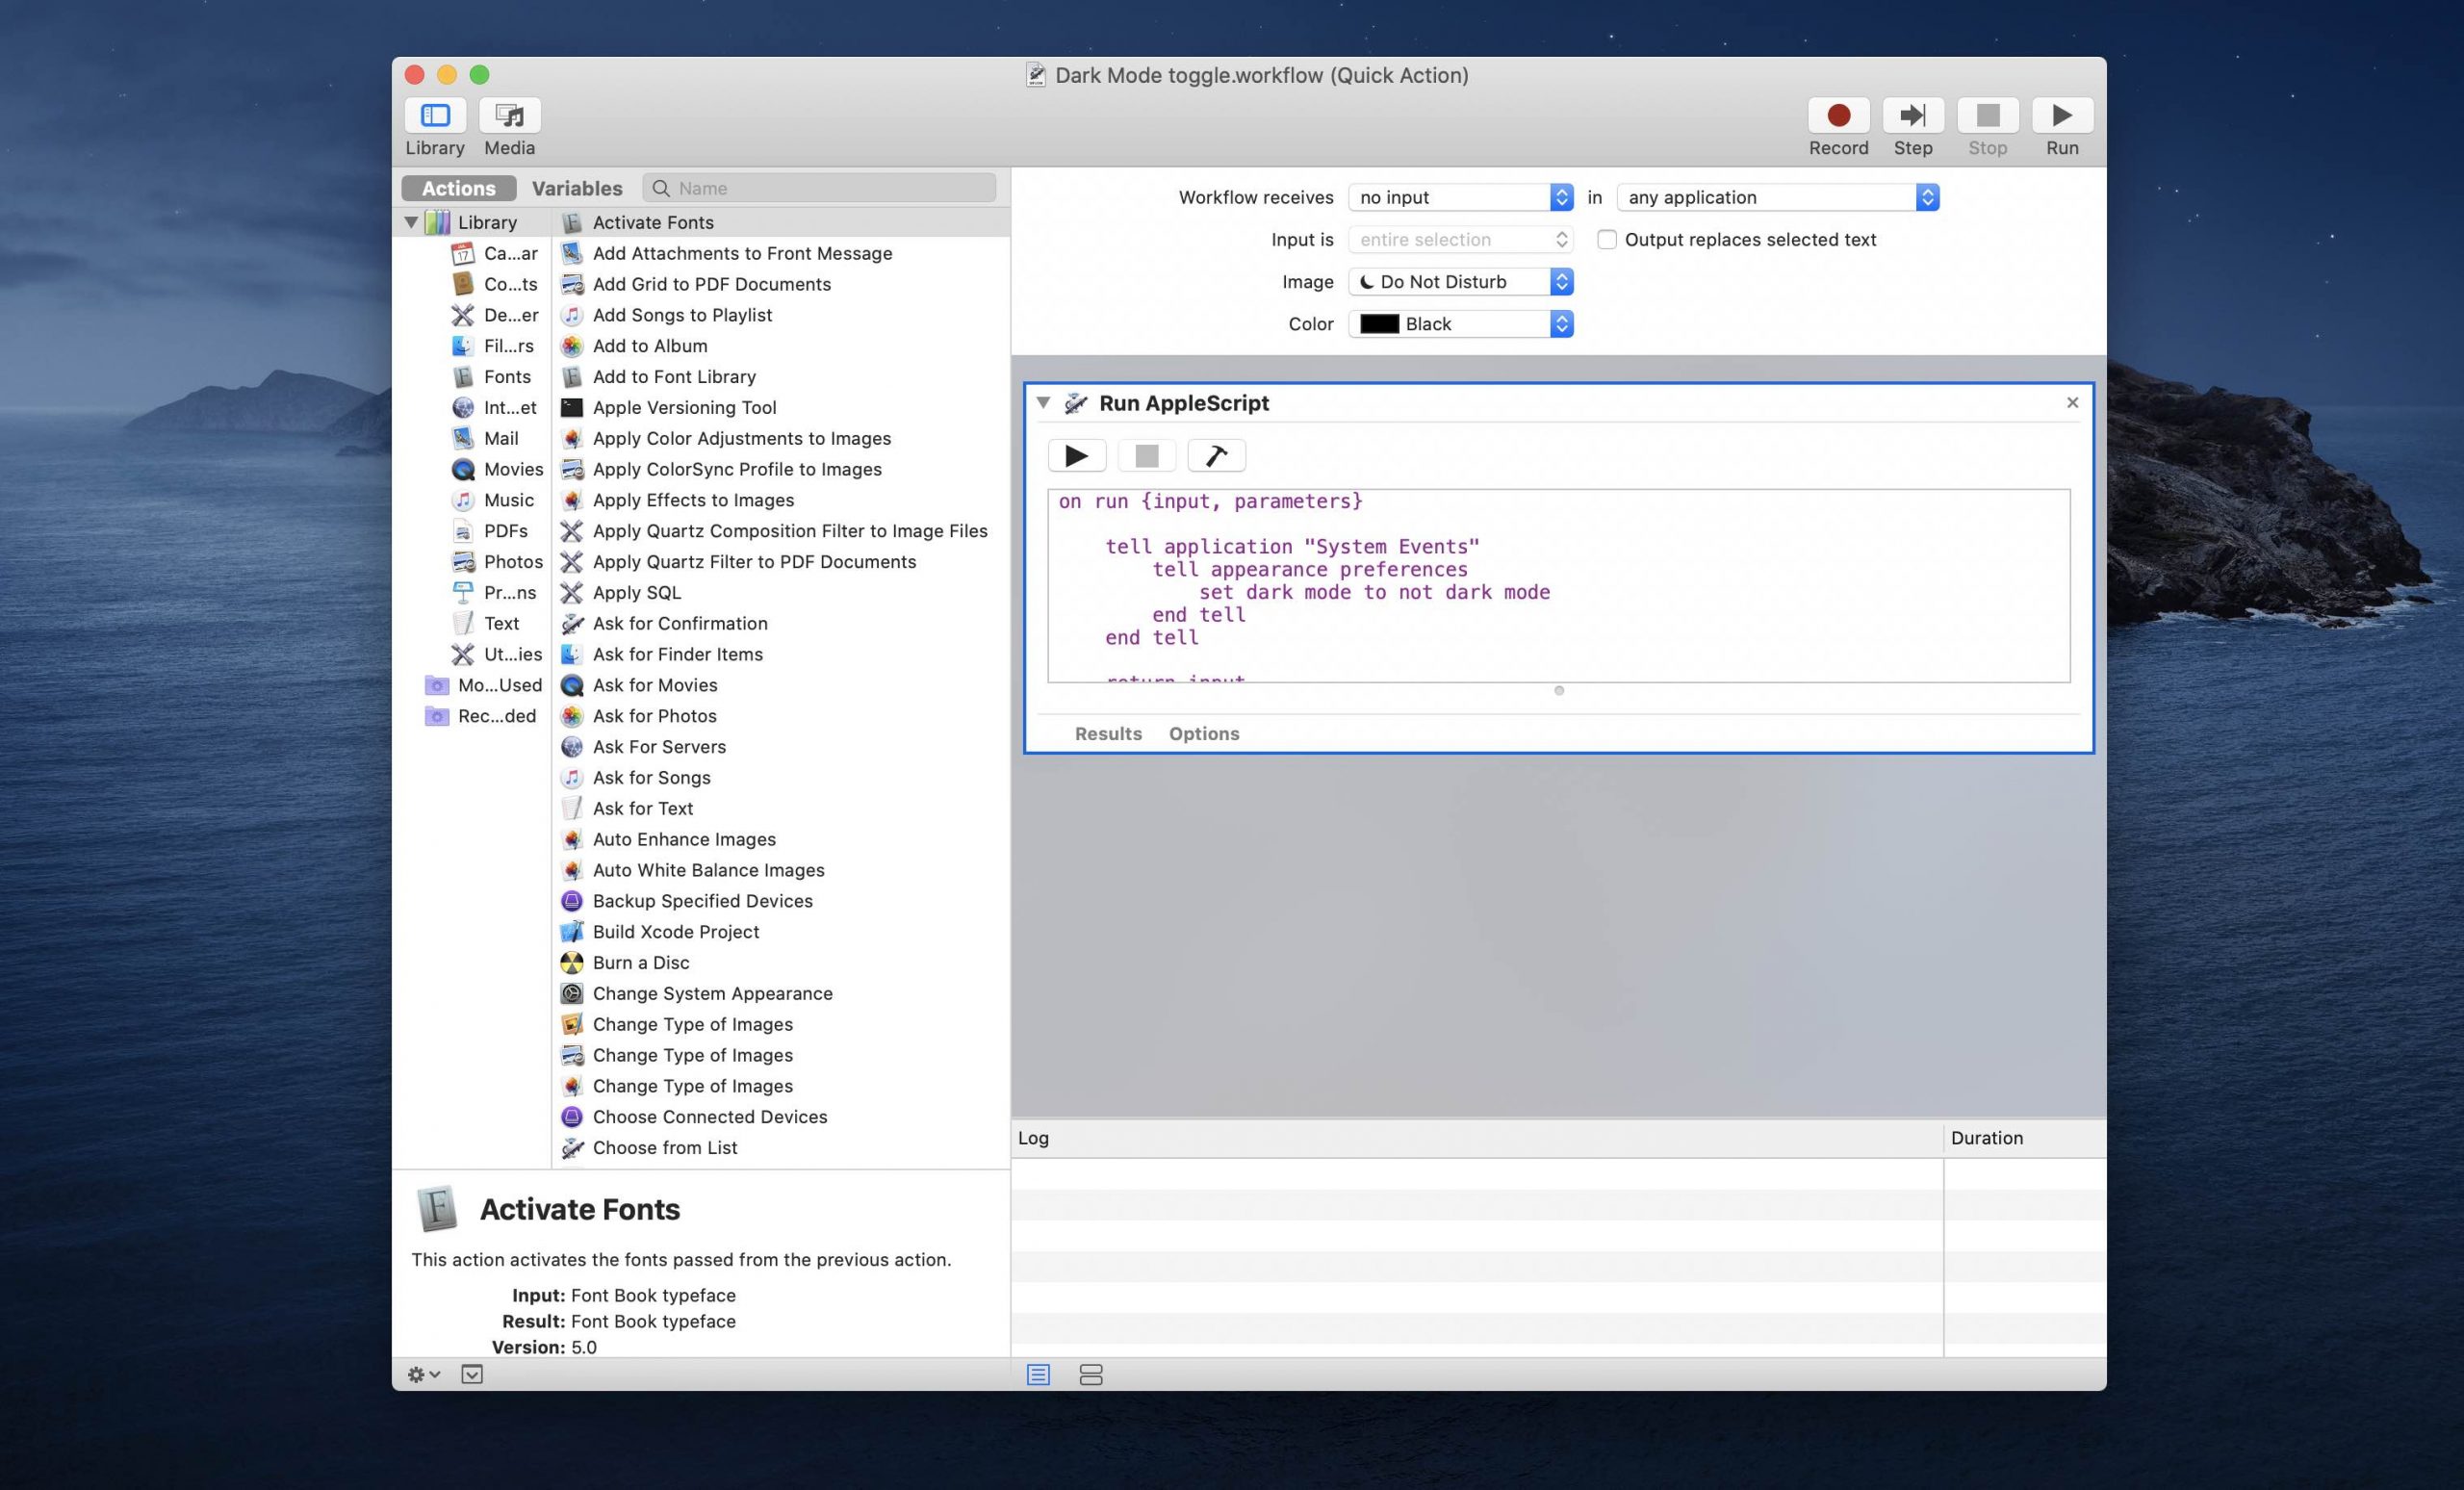
8) Click the File menu and choose the option Save, or press Command – S on the keyboard, to save your custom workflow. Be sure to give it a memorable title, such as “Dark:Light”.
Now add the custom script to the Touch Bar, as outlined further below.
9) Click the Apple menu and choose System Preferences.
10) Click the Extensions icon in the System Preferences window.
11) Click the entry Touch Bar found at the bottom of the lefthand sidebar.
If you don’t see the option, your Mac doesn’t have a Touch Bar or the Touch Bar is currently unavailable because the lid is closed (happens when using the Mac in clamshell mode).
12) You will be presented with a list of your previously saved Quick Actions in the righthand column. Click the box next to the saved Automator workflow for toggling Dark Mode on or off in order to make that quick action available via your Mac’s Touch Bar.
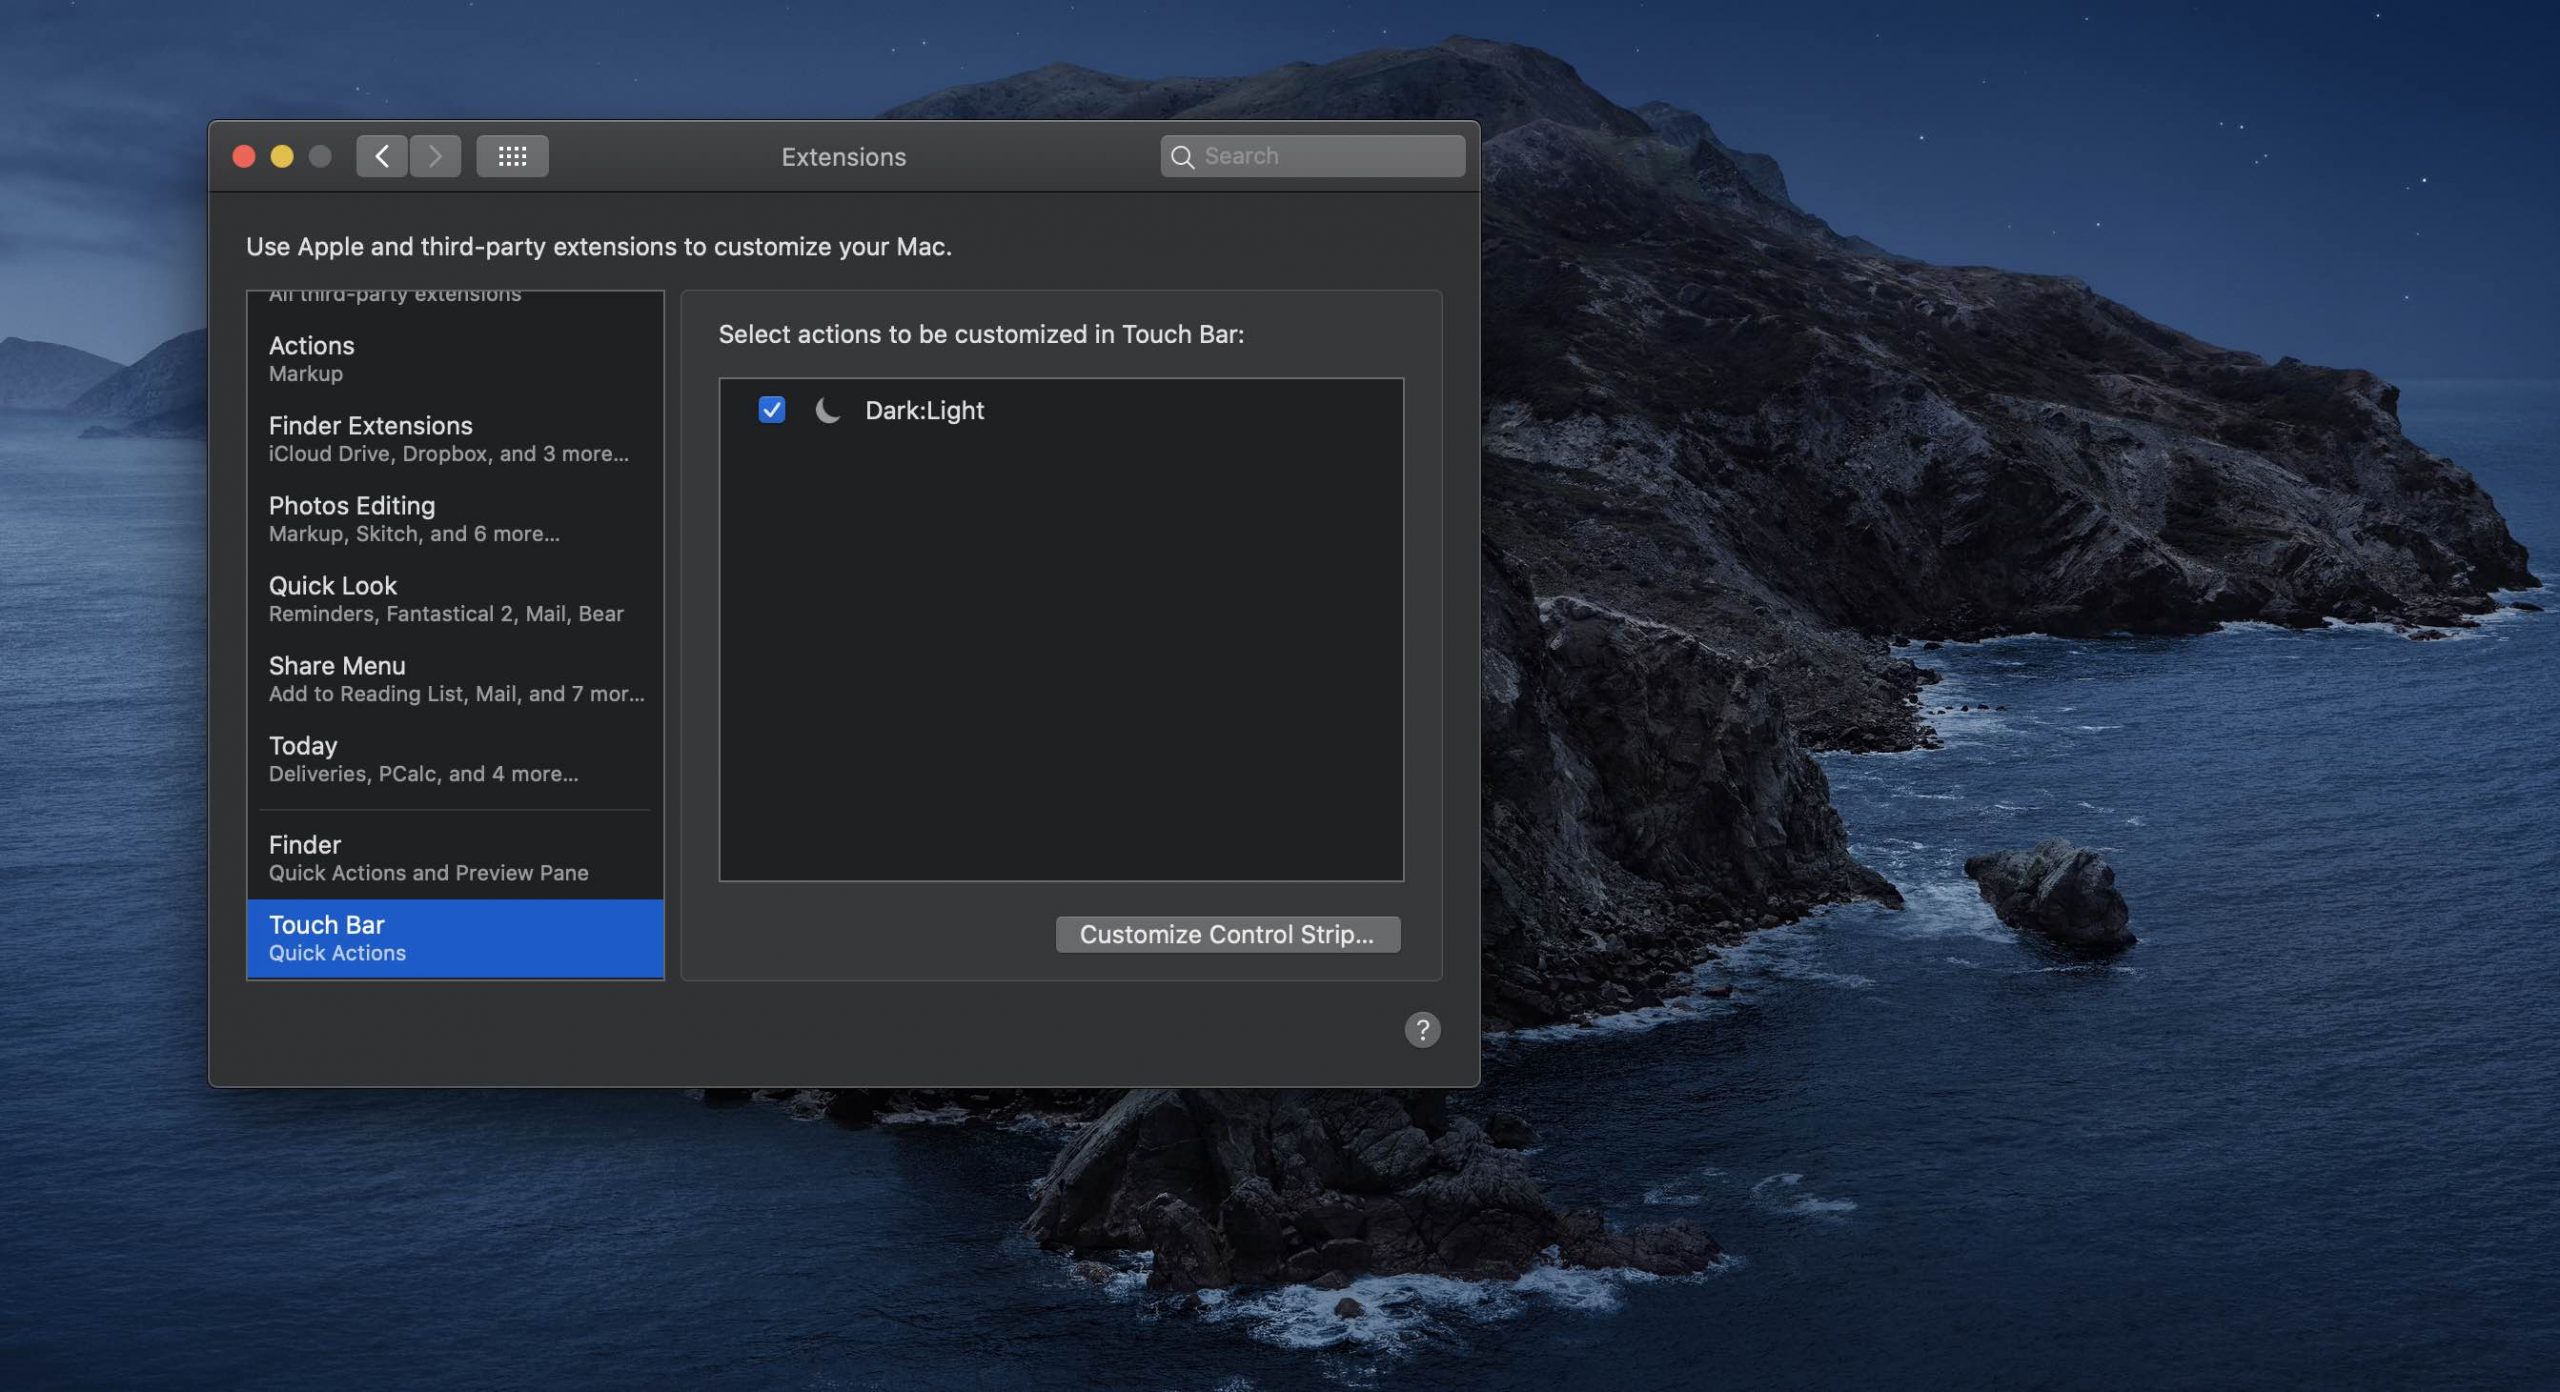
13) Time to customize the Touch Bar by adding a special button that provides quick access to your saved Automator workflows from the Control Strip (for those not in the know, the Control Strip is a special section located on the right side of the Touch Bar that displays media controls). Begin by choosing the option System Preferences from the Apple menu.
TUTORIAL: How to fix a frozen Touch Bar without restarting your Mac
14) Click the Keyboard icon in the System Preferences window.
15) Now select the Keyboard tab.
16) Click the button Customize Control Strip.
17) Drag the icon that looks like a signpost to the bottom of the screen into the Touch Bar, then click Done to save your new Touch Bar layout.

18) With the Touch Bar modified to display the Quick Actions button in the Control Strip, you can now toggle Dark Mode with just two taps. First, tap the Quick Actions icon in the Control Strip section, then choose your custom Automator workflow for toggling Dark Mode.
I originally learned about this tip from Charlie Sorrel over at Cult of Mac.
Need help? Ask iDB!
If you like this tutorial, pass it along to your friends and leave a comment below.
Got stuck? Not sure how to do certain things on your Apple device? Let us know via [email protected] and a future tutorial might provide a solution.
Submit your own how-to suggestions via [email protected].
Source link: https://www.idownloadblog.com/2020/01/08/dark-mode-touch-bar/


Leave a Reply