New to Mac? How to set up and manage multiple signatures in Mail
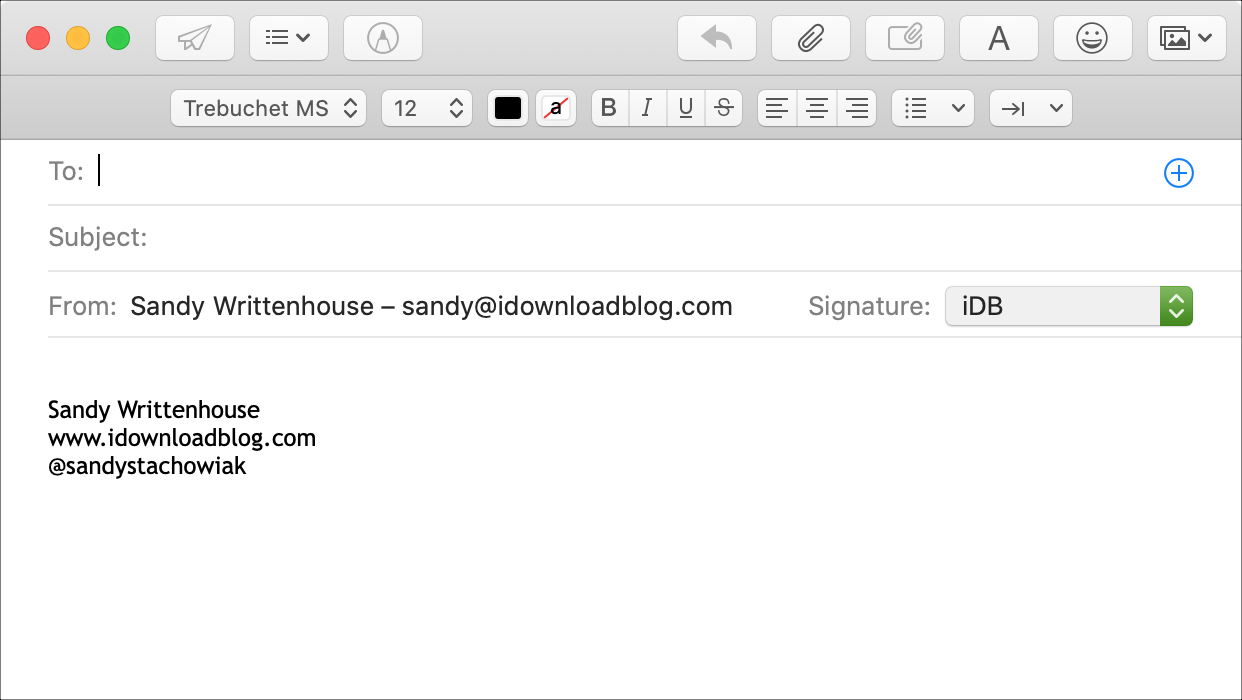
These days it’s common for people to have more than one email address. You may have one for work, one for home, one for newsletter signups, and one for something similar. So when you want to compose an email from a specific account or reply to one, you can save yourself some time using signatures. In the Mail app on your Mac, you can create multiple email signatures so that you have one for every account. And you can have the correct signature automatically apply to the account you’re using at the time.
If you’re new to Mac, this tutorial shows you how to set up and manage multiple signatures in the Mail app.
Create your Mail signatures
Open the Mail app on your Mac and then follow these steps to set up email signatures.
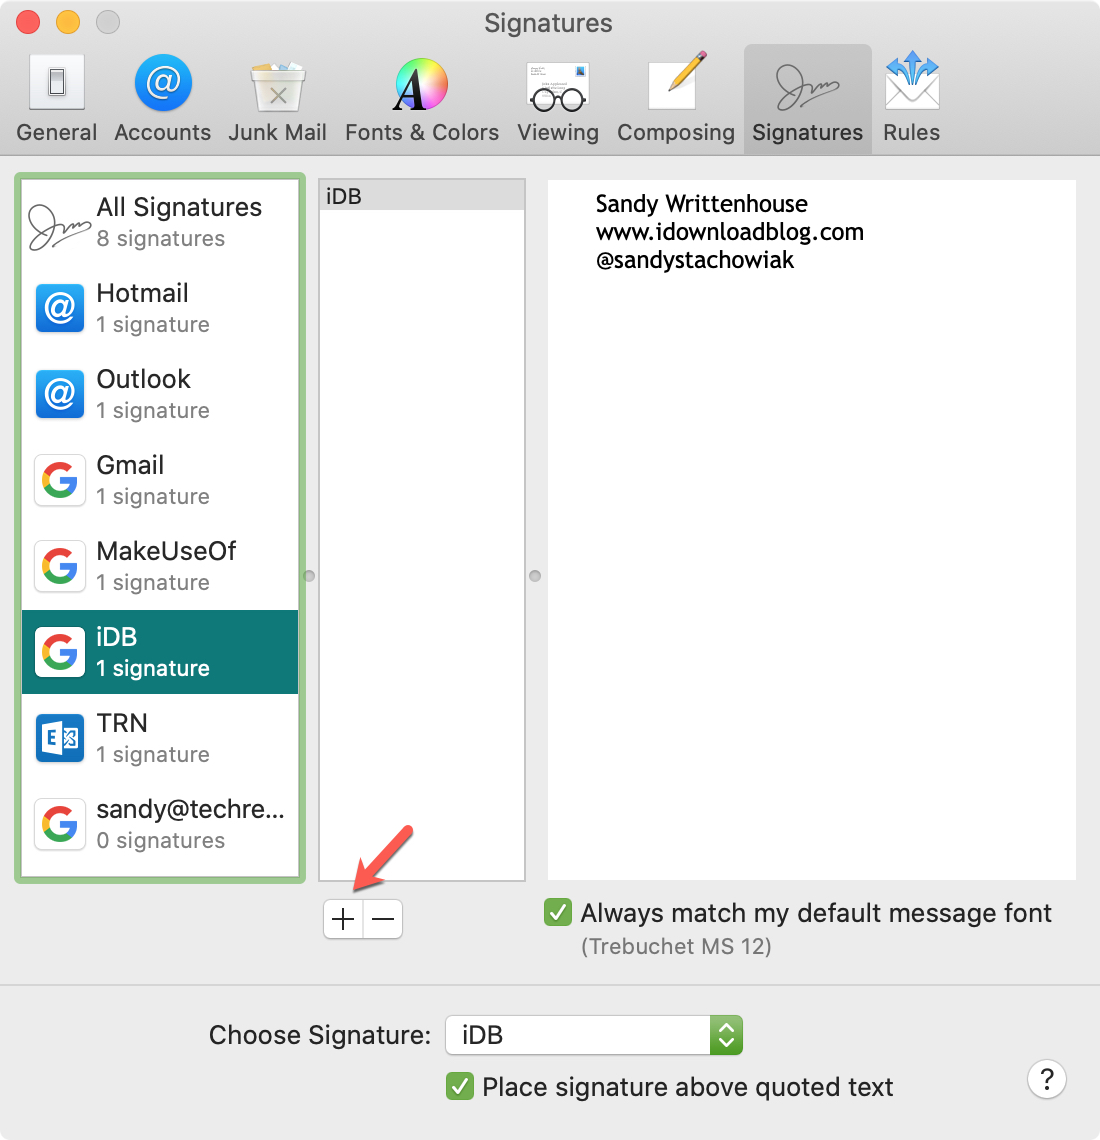
1) Click Mail > Preferences from the menu bar.
2) Select the Signatures tab.
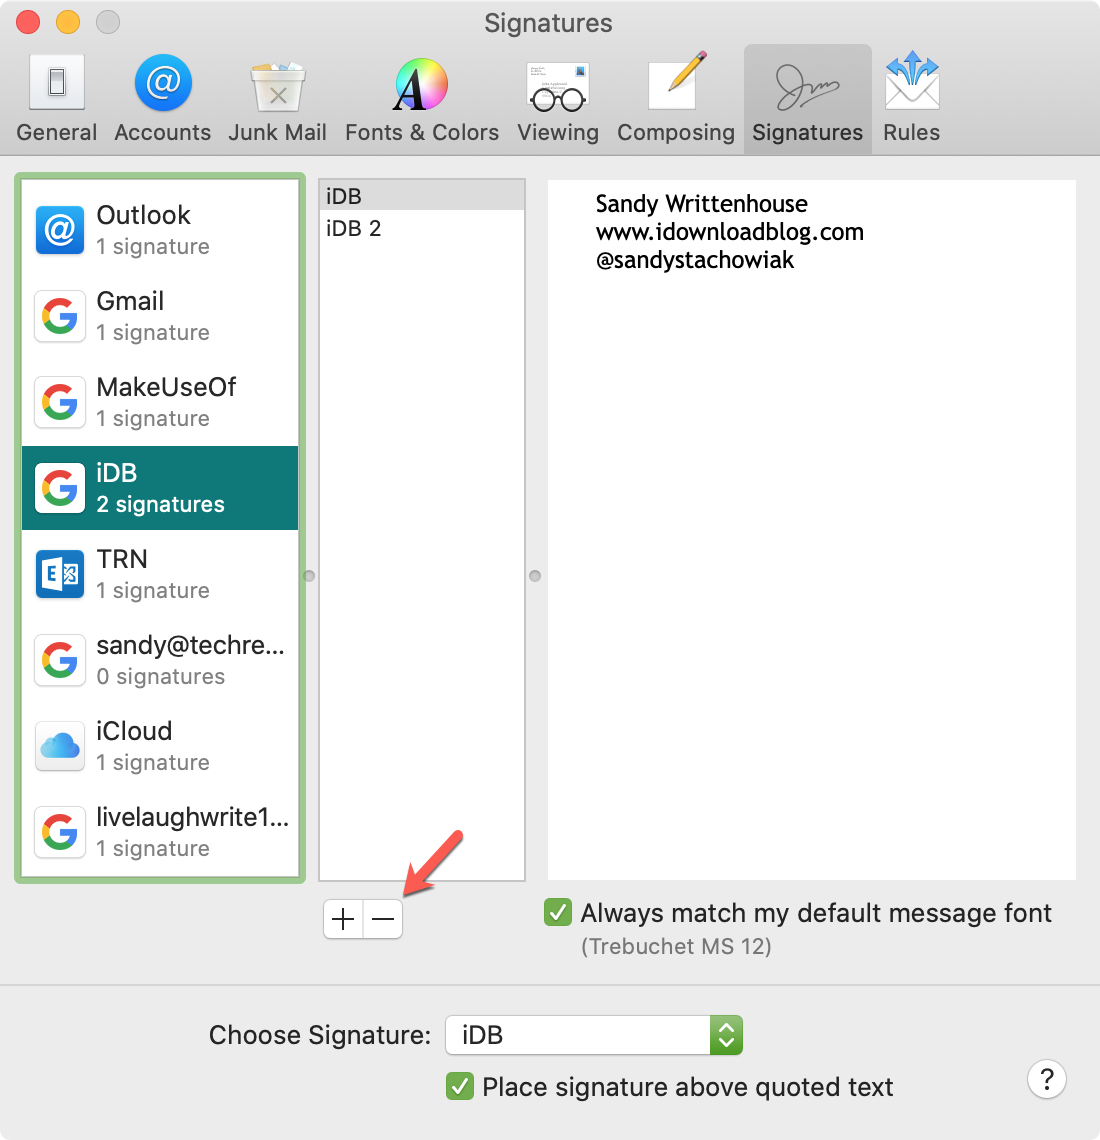
3) Choose an email account from the left and click the plus sign below the center box.
4) In that center box, you can give your signature a name to remember it by.
5) In the box on the right, enter the signature you want to use.
6) Optionally, you can check the box under the signature you create to always use the same default font as the email. You can also check the box to have your signature placed above quoted text in the message.
Apply a signature automatically
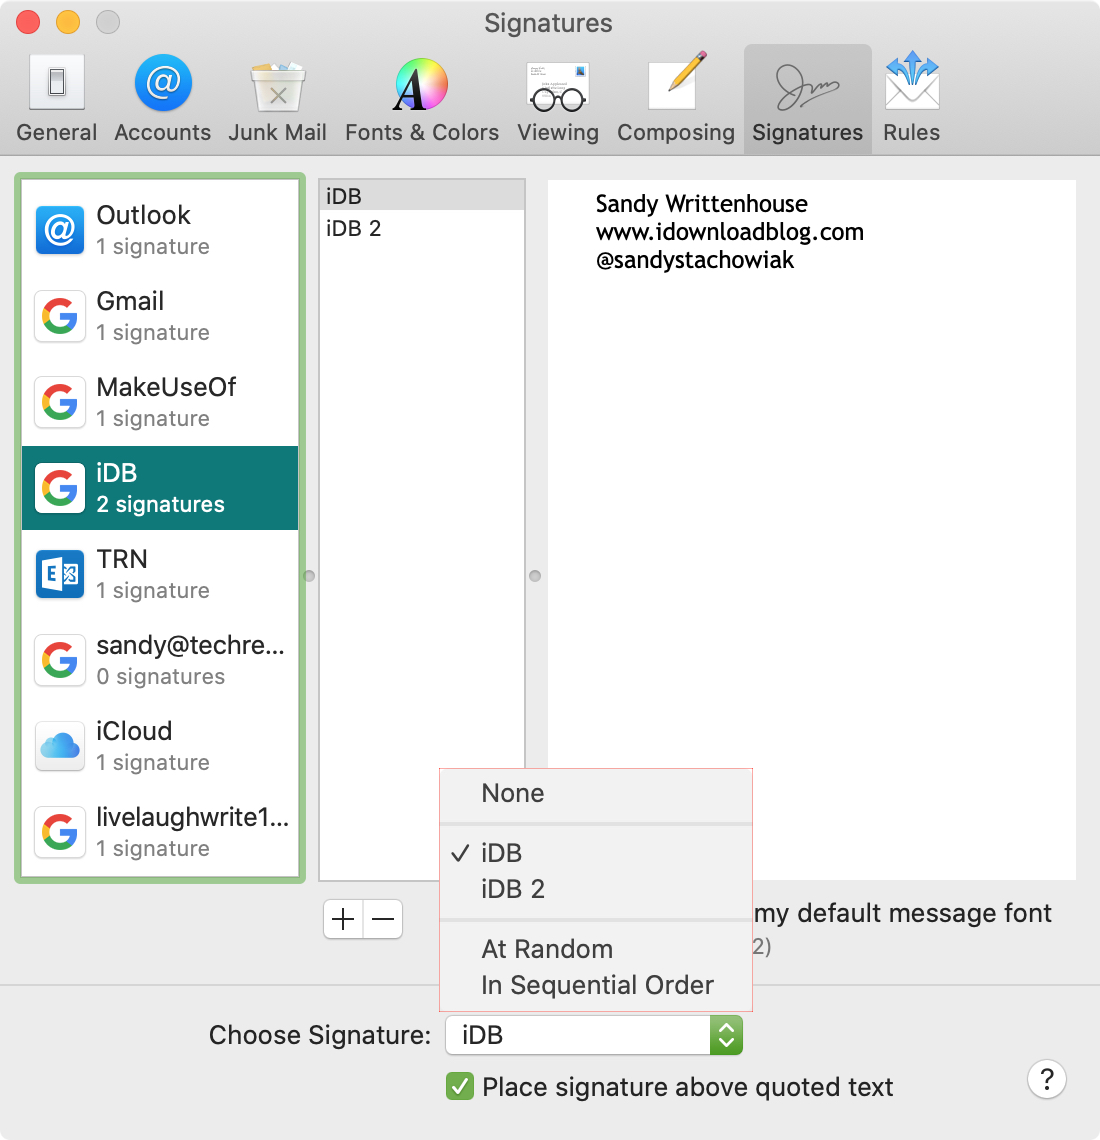
The Choose Signature drop-down box at the bottom should immediately choose that signature you just created. But if it doesn’t or if you create more than one for that account, pick the one you want to use by default.
Then when you compose, reply, or forward an email using that account, the signature you choose will pop into the message automatically.
Apply a signature manually
If you want to pick the signature you use instead of applying one automatically, this is easy to do.
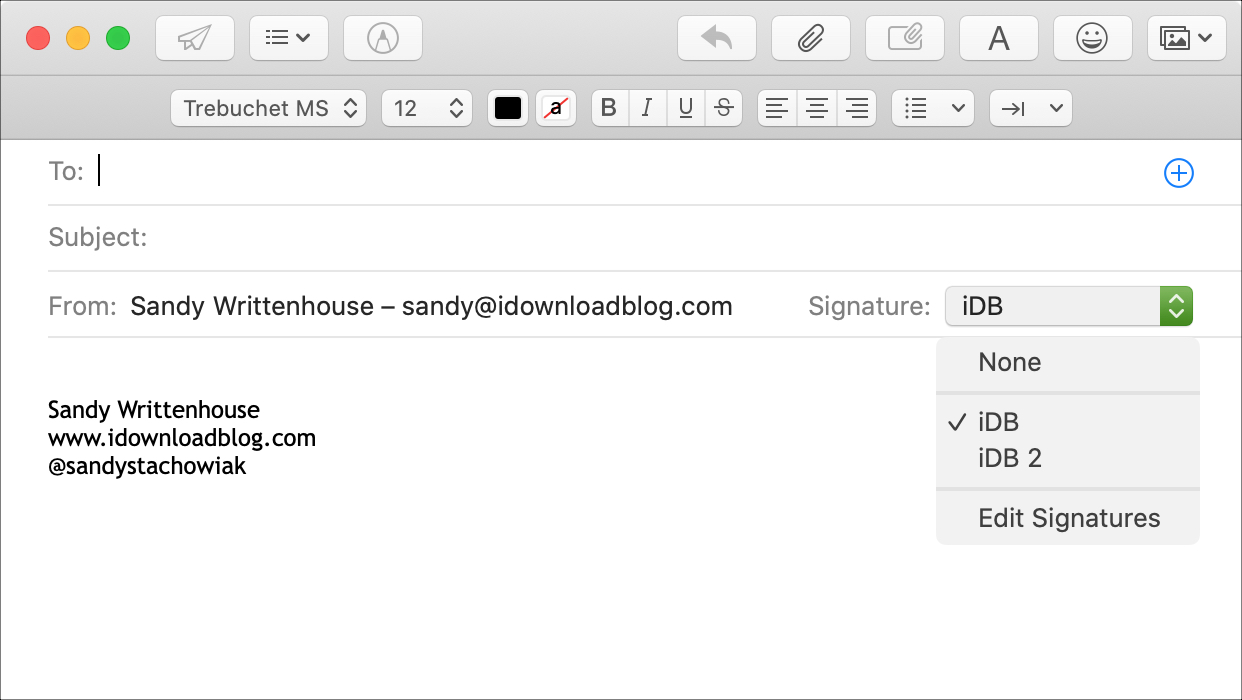
You should see a Signature drop-down box in the From field (to the right of your email address) of the email window. You can then pick the signature you want from those you created for that account.
Remove a signature from an email
If you want to take your signature out of the email you’re sending, you can either click the Signature drop-down box and select None or simply remove the text from your email.
Manage your Mail signatures
Once you start creating signatures in Mail, you’ll see an All Signatures option at the top of your account list on the left. Since this shows all of the signatures you create, it gives you a simple way to make quick changes rather than clicking each individual account.

For instance, if you have a name change, you can click the All Signatures option and then select each signature to make a change. You don’t have to worry about saving your changes, this happens automatically.
You can also reorder your signatures in this area. This is helpful if you choose to use them In Sequential Order in the Choose Signature drop-down box mentioned earlier. To move a signature in the list, just click, drag, and drop it where you want it.
Delete a signature
If you want to remove a signature that you create, click the account on the left, select the signature in the center, and then click the minus sign button below that box.
Wrapping it up
Multiple email signatures in the Mail app on your Mac is a time-saving feature. You can use your name, website, email address, phone number, or whatever you like, that you always include in your closing.
Are you going to take some time and set up Mail signatures on your new Mac? Let us know in the comments below!
For more, check out how to add an image to your signature on Mac or how to set up multiple signatures on your iPhone or iPad.
Source link: https://www.idownloadblog.com/2019/12/24/multiple-signatures-mail-mac/


Leave a Reply