How to upgrade the SSD in a 15-inch Retina MacBook Pro

Running out of space on your Retina MacBook Pro? Depending on the model, it’s possible to upgrade your internal storage with a larger SSD. This tutorial will walk you through the upgrade process.
In 2012 Apple made a fundamental shift in the MacBook Pro line, introducing for the first time the Retina MacBook Pro series. Both 15 and 13-inch models sported dramatically higher resolution displays and a slimmer design that eschewed both a Superdrive and a spinning hard drives, instead providing a Solid State Drive (SSD) for internal storage.
Over time data sets multiply, applications bloat, and the goalposts change. If you’re a do it yourselfer and you have the time and patience, it’s possible to upgrade the SSD on these models, provided you have the right tools, the right space to work, and whatever amount of time you need.
Which 15-inch Retina MacBook Pro can you upgrade
Why upgrade?
What you’ll need
Back up your MacBook Pro
Install the new MacBook Pro SSD
Set up your new MacBook Pro SSD
Troubleshooting
Which 15-inch Retina MacBook Pros are upgradable?
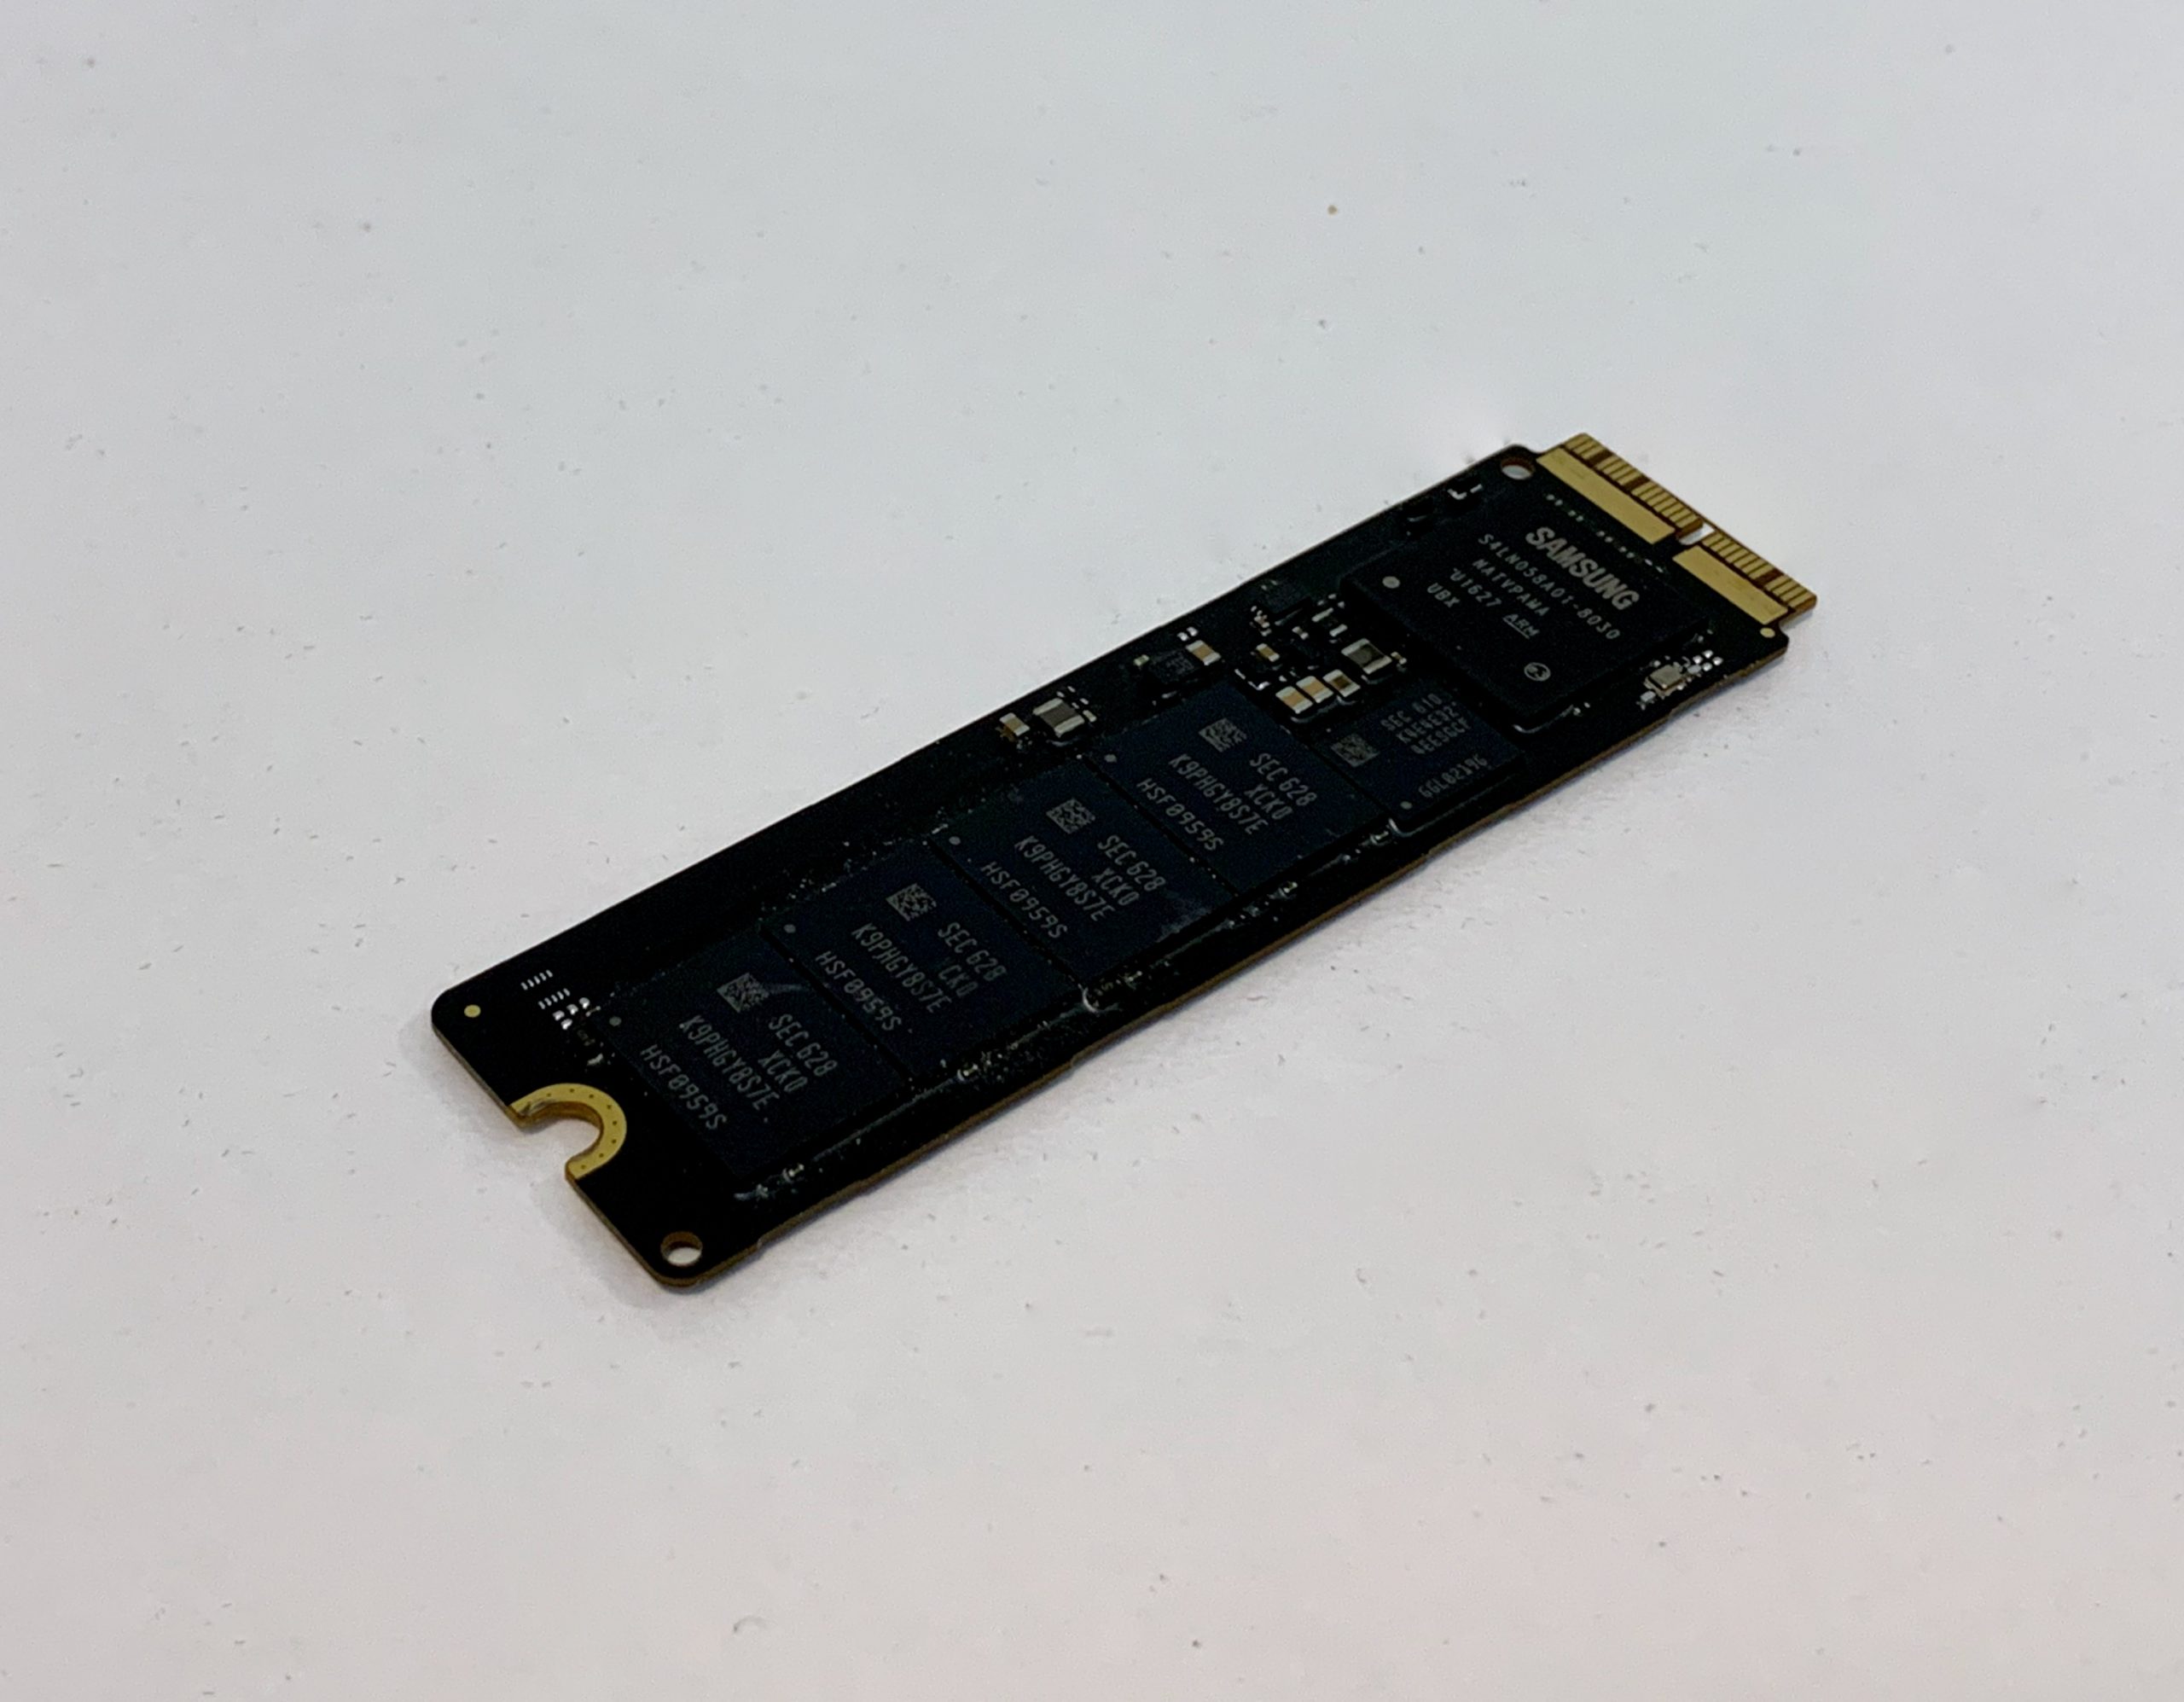
Older MacBook Pros can be disassembled and Serial ATA (SATA)-based SSDs designed to replace laptop hard drives are a dime a dozen these days. But the Retina MacBook Pro series is different, because Apple opted for a series of mSATA-based blade-style SSDs, but ones that use Apple’s own connection.
Our specific donor model for this is a Mid 2015 Retina MacBook Pro (The model ID is MacBookPro11,5). The same basic procedure applies to many MacBook Pro models. Those include:
- MacBook Pro (Retina, 15-inch, Mid 2012)
- MacBook Pro (Retina, 15-inch, Early 2013)
- MacBook Pro (Retina, 15-inch, Late 2013)
- MacBook Pro (Retina, 15-inch, Mid 2014)
- MacBook Pro (Retina, 15-inch, Mid 2015)
These instructions are not applicable for MacBook Pros not listed here.
Why Upgrade?
Of all the Mac laptops I’ve owned over the years, the one that approached my platonic ideal was the mid-2015 Retina MacBook Pro. It’s been my faithful daily driver for years, still performing well and running modern software.
The only problem is that my software needs have changed. I’m running much bigger app installations than I used to. I’m using an array of virtual machines whose host apps have their own prodigious storage needs.
I thought I was planning ahead when I got this computer to order it with 512GB of spac.e But I’ve simply outgrown it, and trying to pare it down from here is more trouble than it’s worth.
Sound familiar?
If you’re like me, you’re interested in maximizing your hardware investment as much as possible. I also don’t like to discard things that are still useful if I can make them work better.
To replace it with a brand new 16-inch MacBook Pro means spending at least $2,399 and it’ll be even pricier once I customize it with more storage space. Upgrading the existing storage costs only a fraction of that, and keeps the system going for a while longer.
For me, it’s better value to upgrade what I have rather than to start over with a new machine.
What you’ll need
Apple hasn’t made it easy to get into the MacBook Pro – you’ll need a pentalobe (five point Torx) screwdriver in order to get inside, thanks to the security screws they’ve put in place. Many SSD upgrade kits for Retina MacBook Pros include tools. If yours did not or if you need them, inexpensive kits are available on Amazon.
Having said that, once you’re past the weird screws this is a very straightforward installation.
Which SSD module you’ll need depends on which Mac you have. Mid 2012 and Early 2013 Retina MacBook Pros use a SATA-based SSD. The Late 2013, mid 2014 and mid 2015 models use a PCIe 2.0-based SSD instead. They are not interchangeable, so make sure to order the right part for your computer.
You can find compatible SSD upgrade kits from various Internet vendors. Shop based on your budget and your needs. The 2 TB upgrade kit we used for this upgrade came from MCE Technologies. It quadruples the available storage space for this computer to 2 TB.
Back up your MacBook Pro
Before you attempt to do anything to your MacBook Pro, make sure you have a recent backup. Time Machine is the path of least resistance for most of us since it’s built into the Mac.
TUTORIAL: How to set up Time Machine on macOS X
Install the MacBook Pro SSD
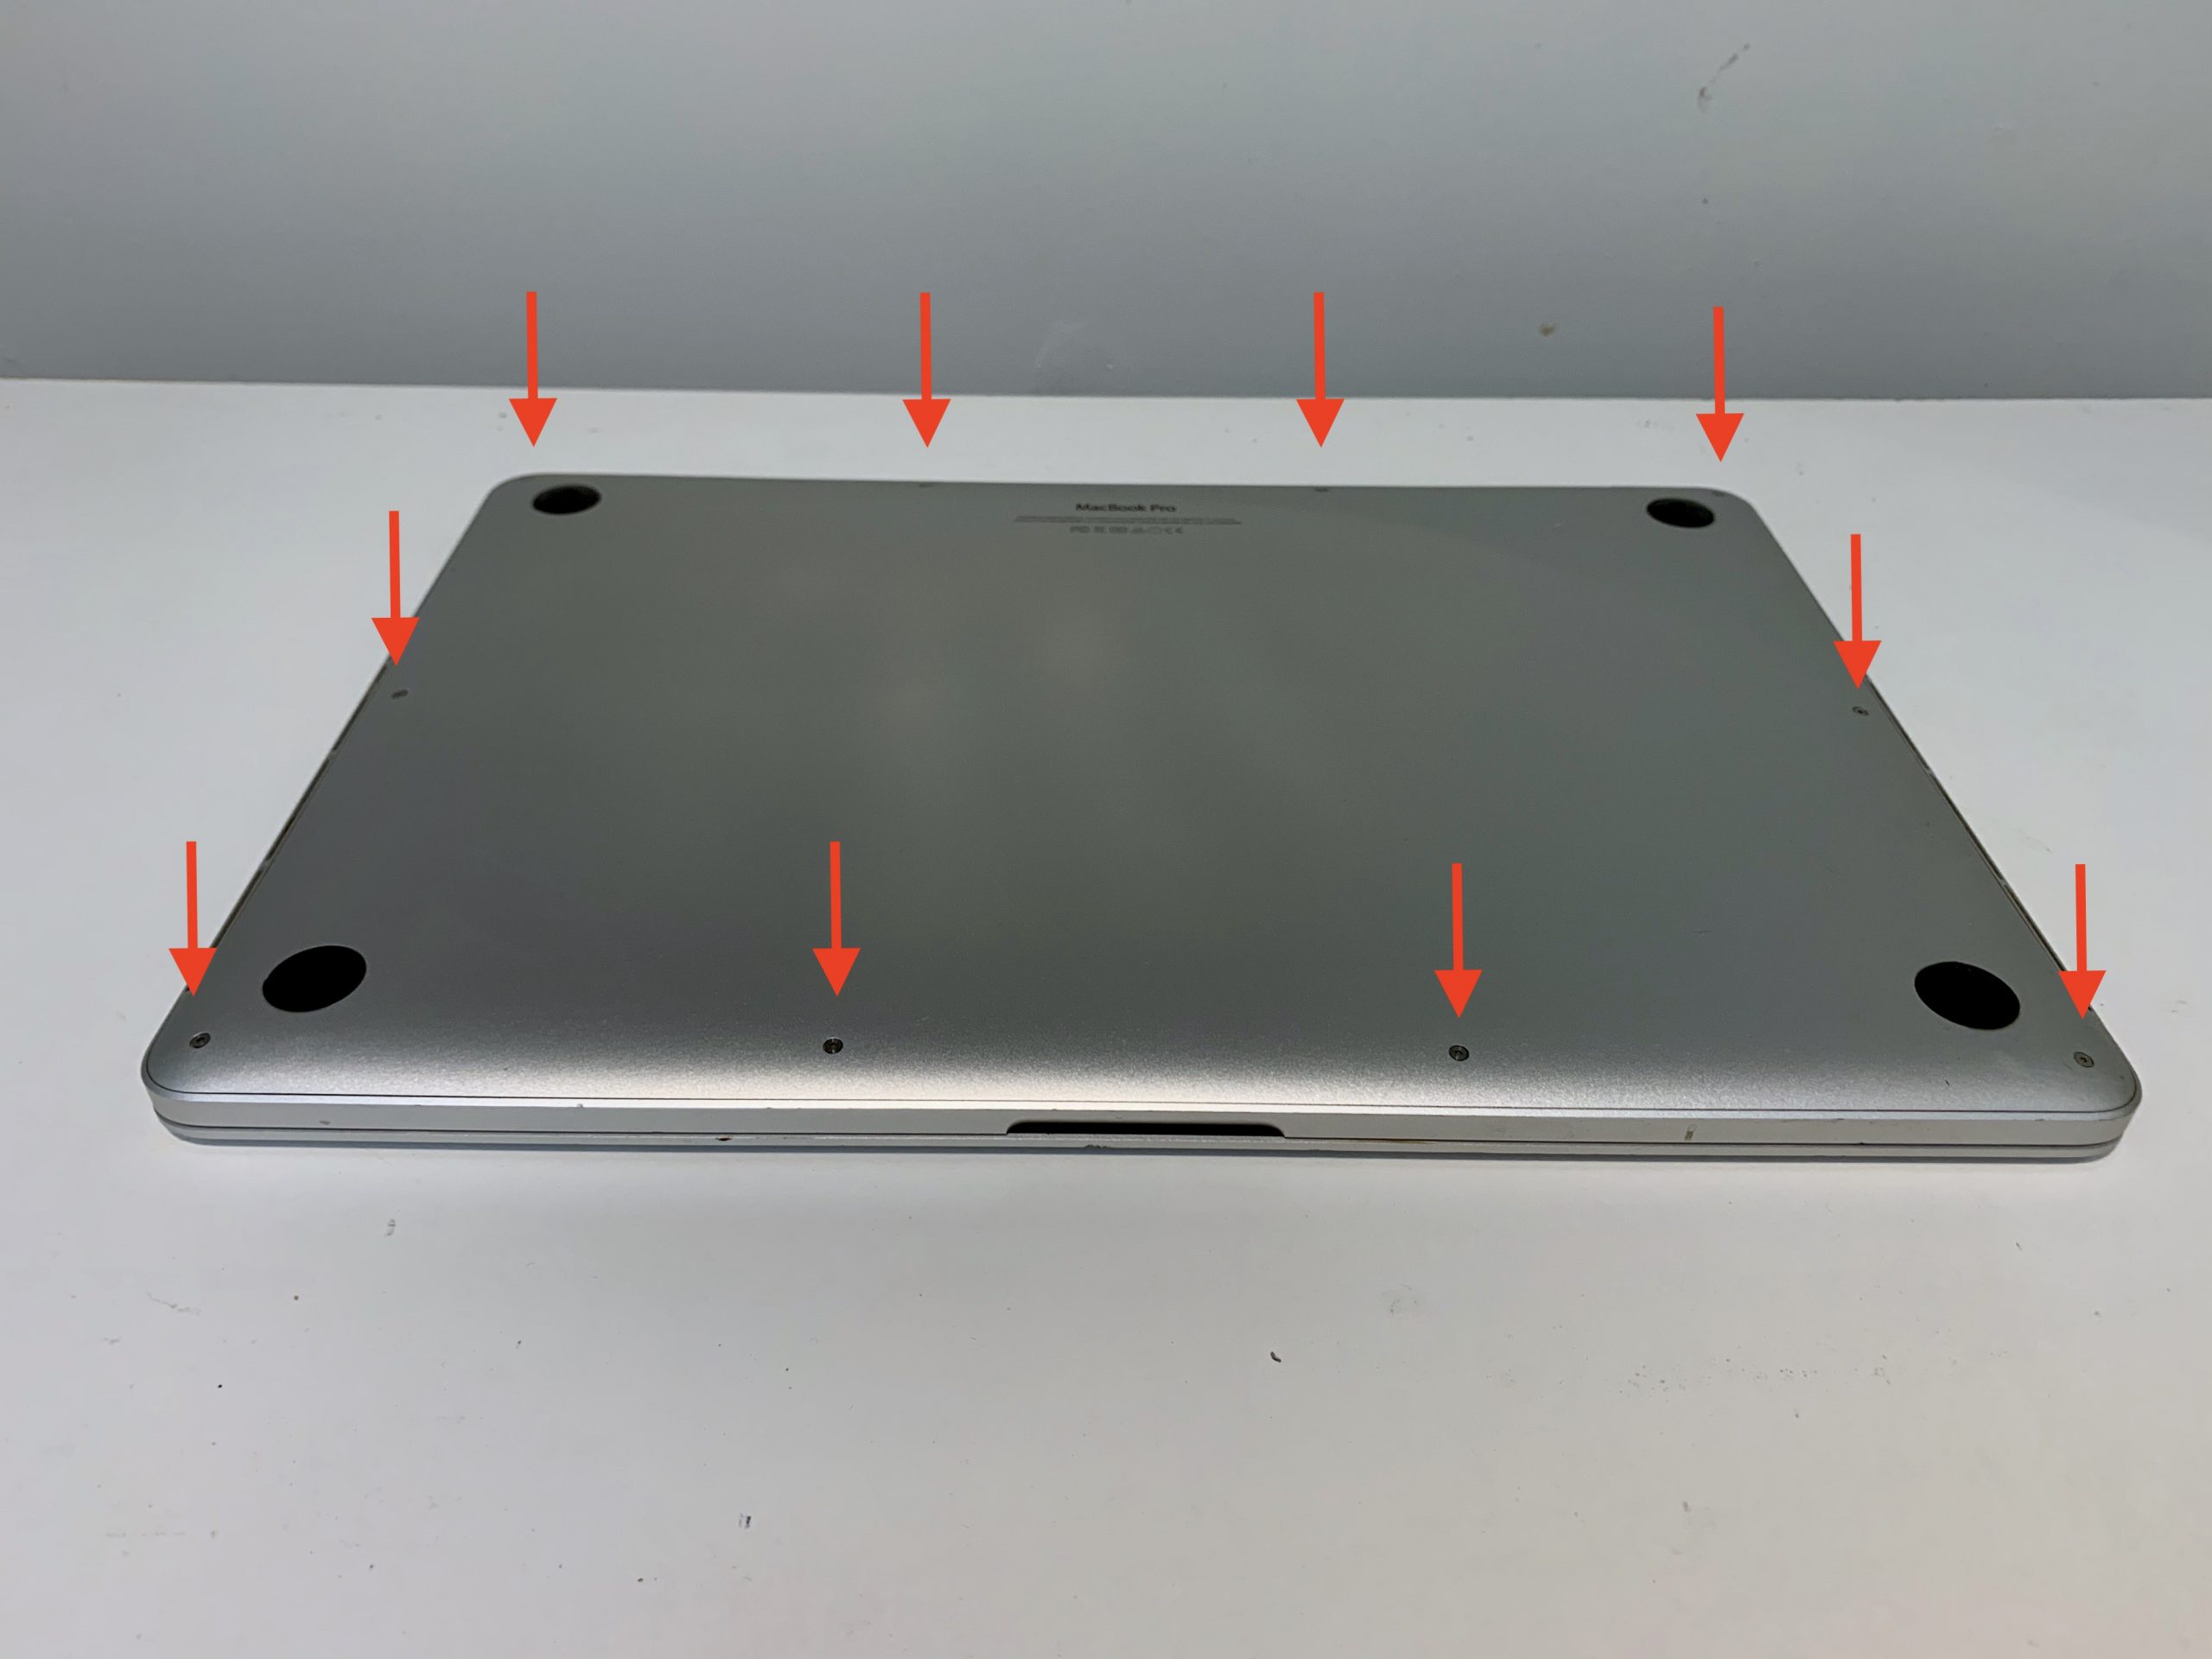
Shut down the MacBook Pro. Disconnect the power supply and any devices connected to it. On a clean, flat, well-lit surface, flip the MacBook Pro so its bottom case is facing you.
1) Remove the ten pentalobe screws on the bottom case. Be careful to note which screws correspond to which holes, because some are longer than others. Remove the bottom case and set it aside.

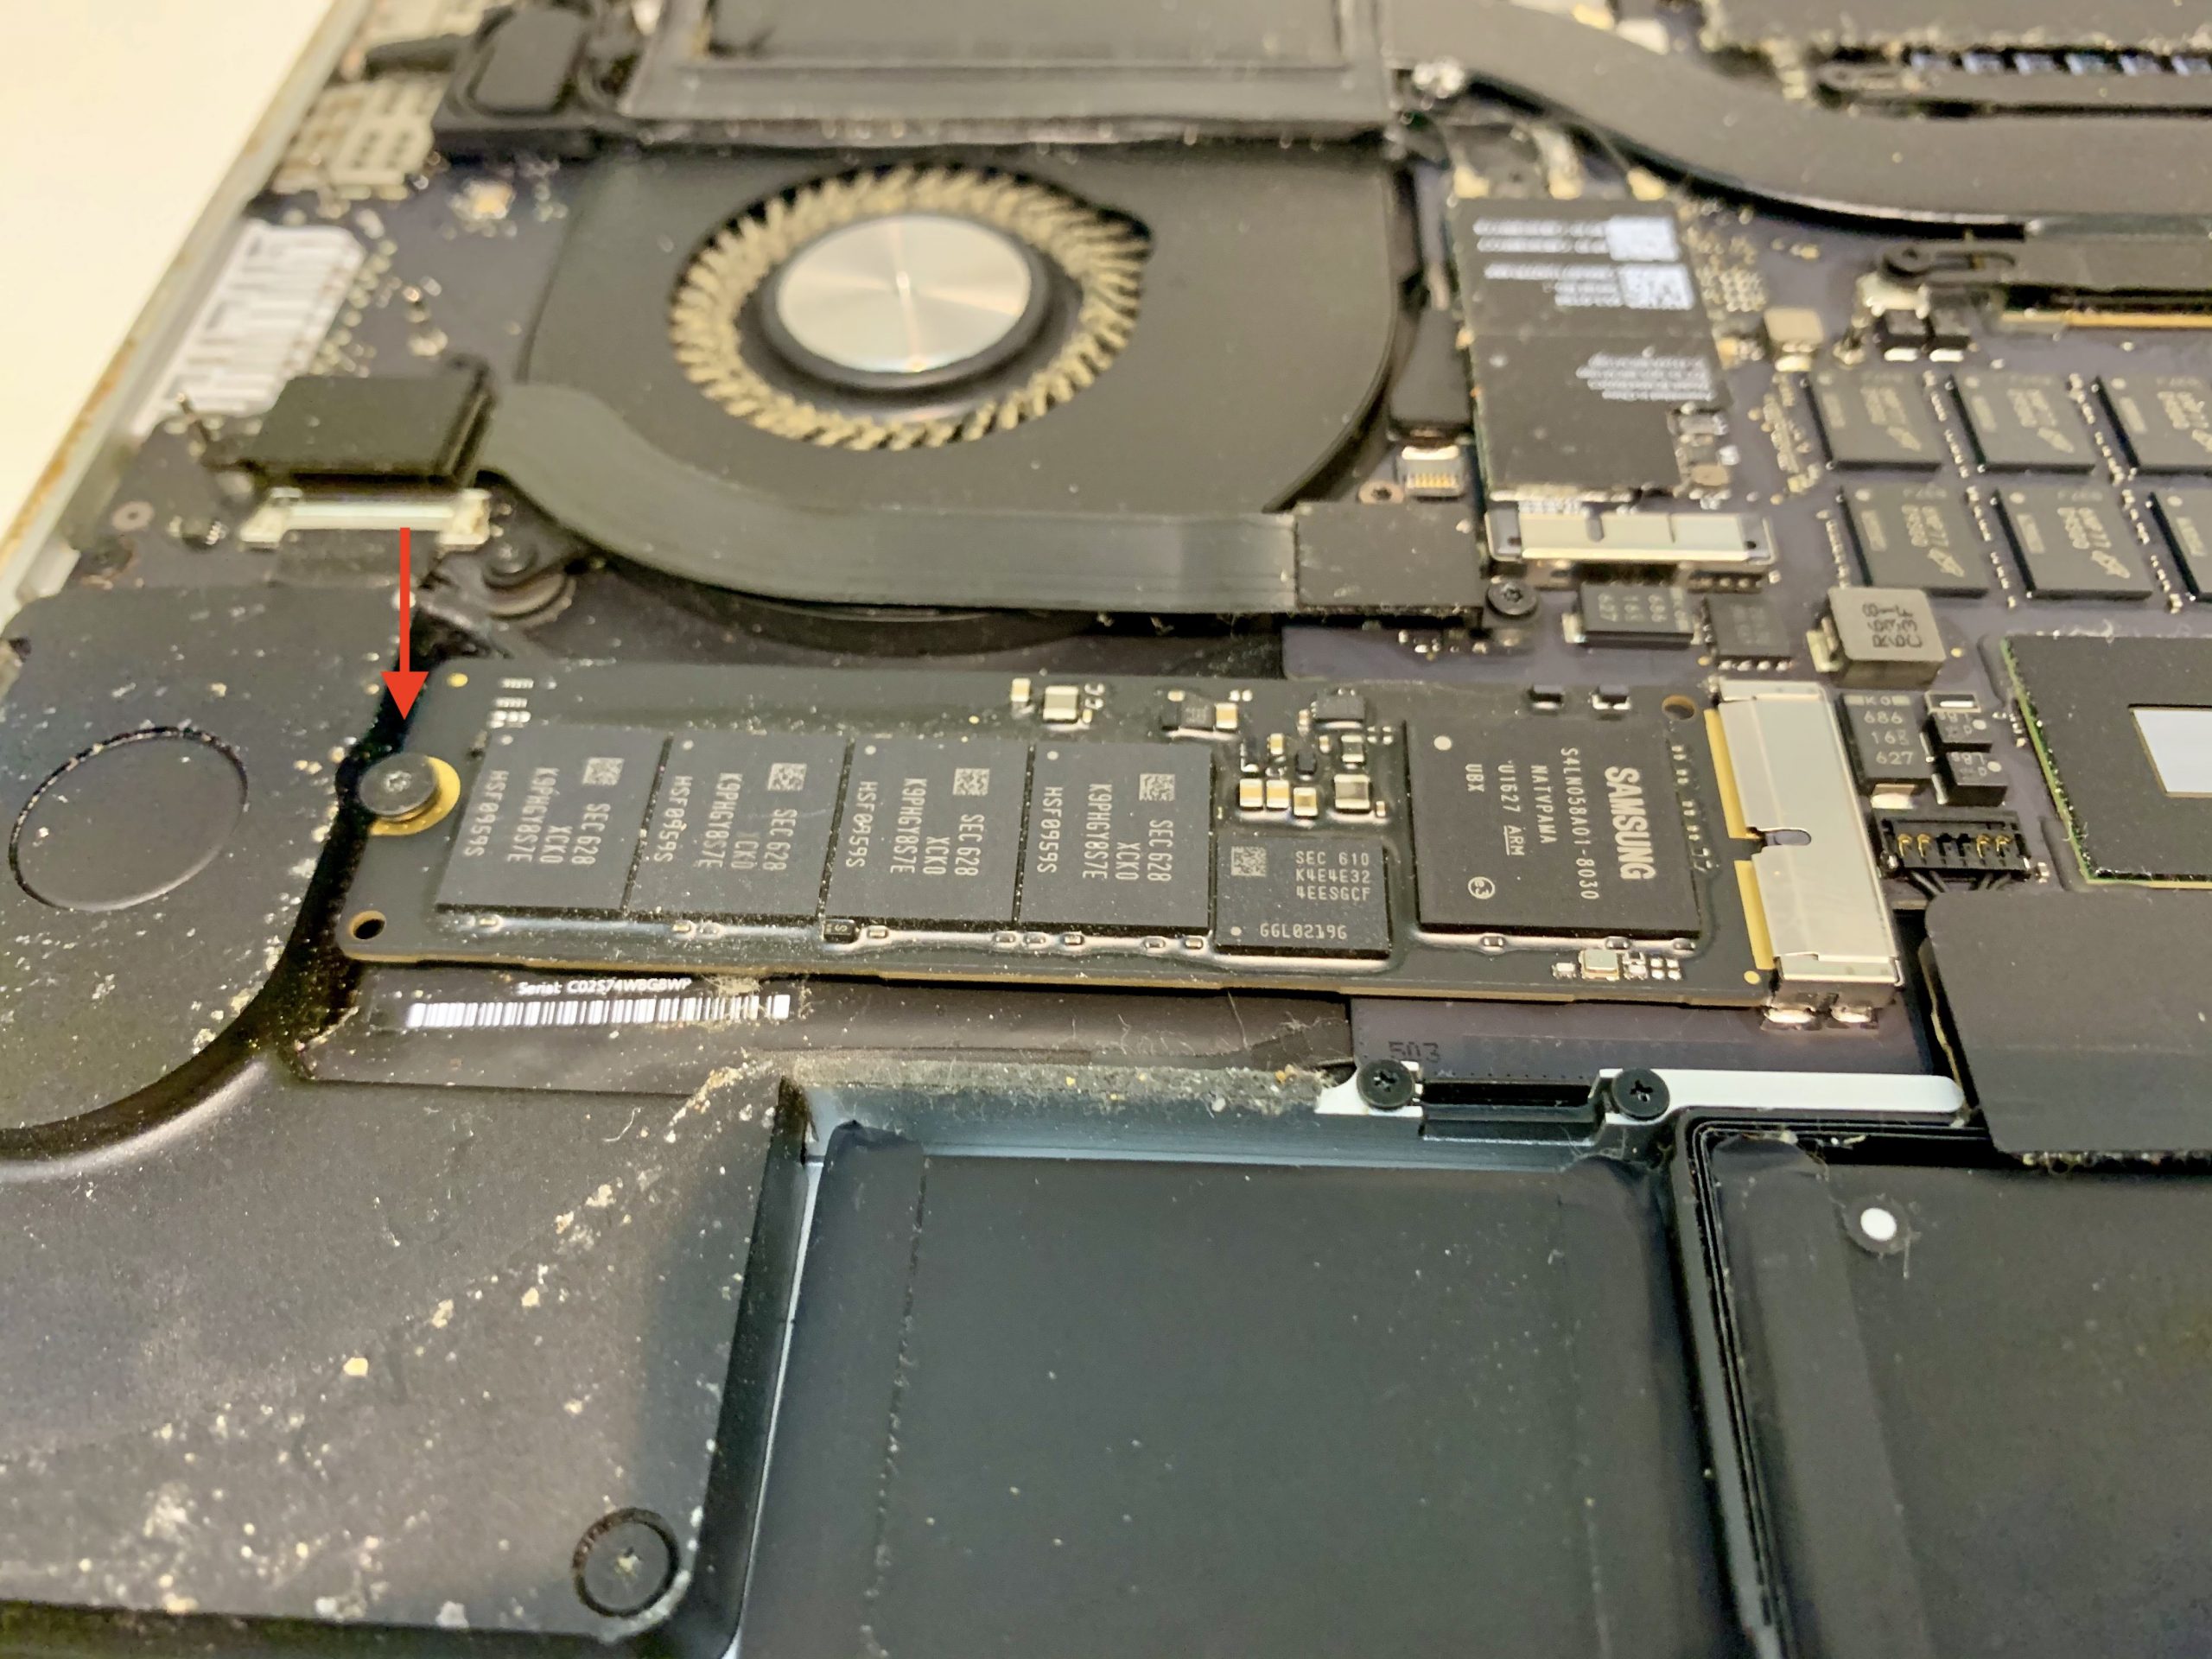
2) Locate the SSD located on the left-hand side of the MacBook Pro’s Main Logic Board. It is held in using a single T5 Torx screw. Remove the screw then remove the SSD by lifting the side where the screw was removed and sliding it to the left to free it from the main logic board connection.

The years of service in a retail environment were obvious from the accumulated debris inside. We cleaned it as best we could.
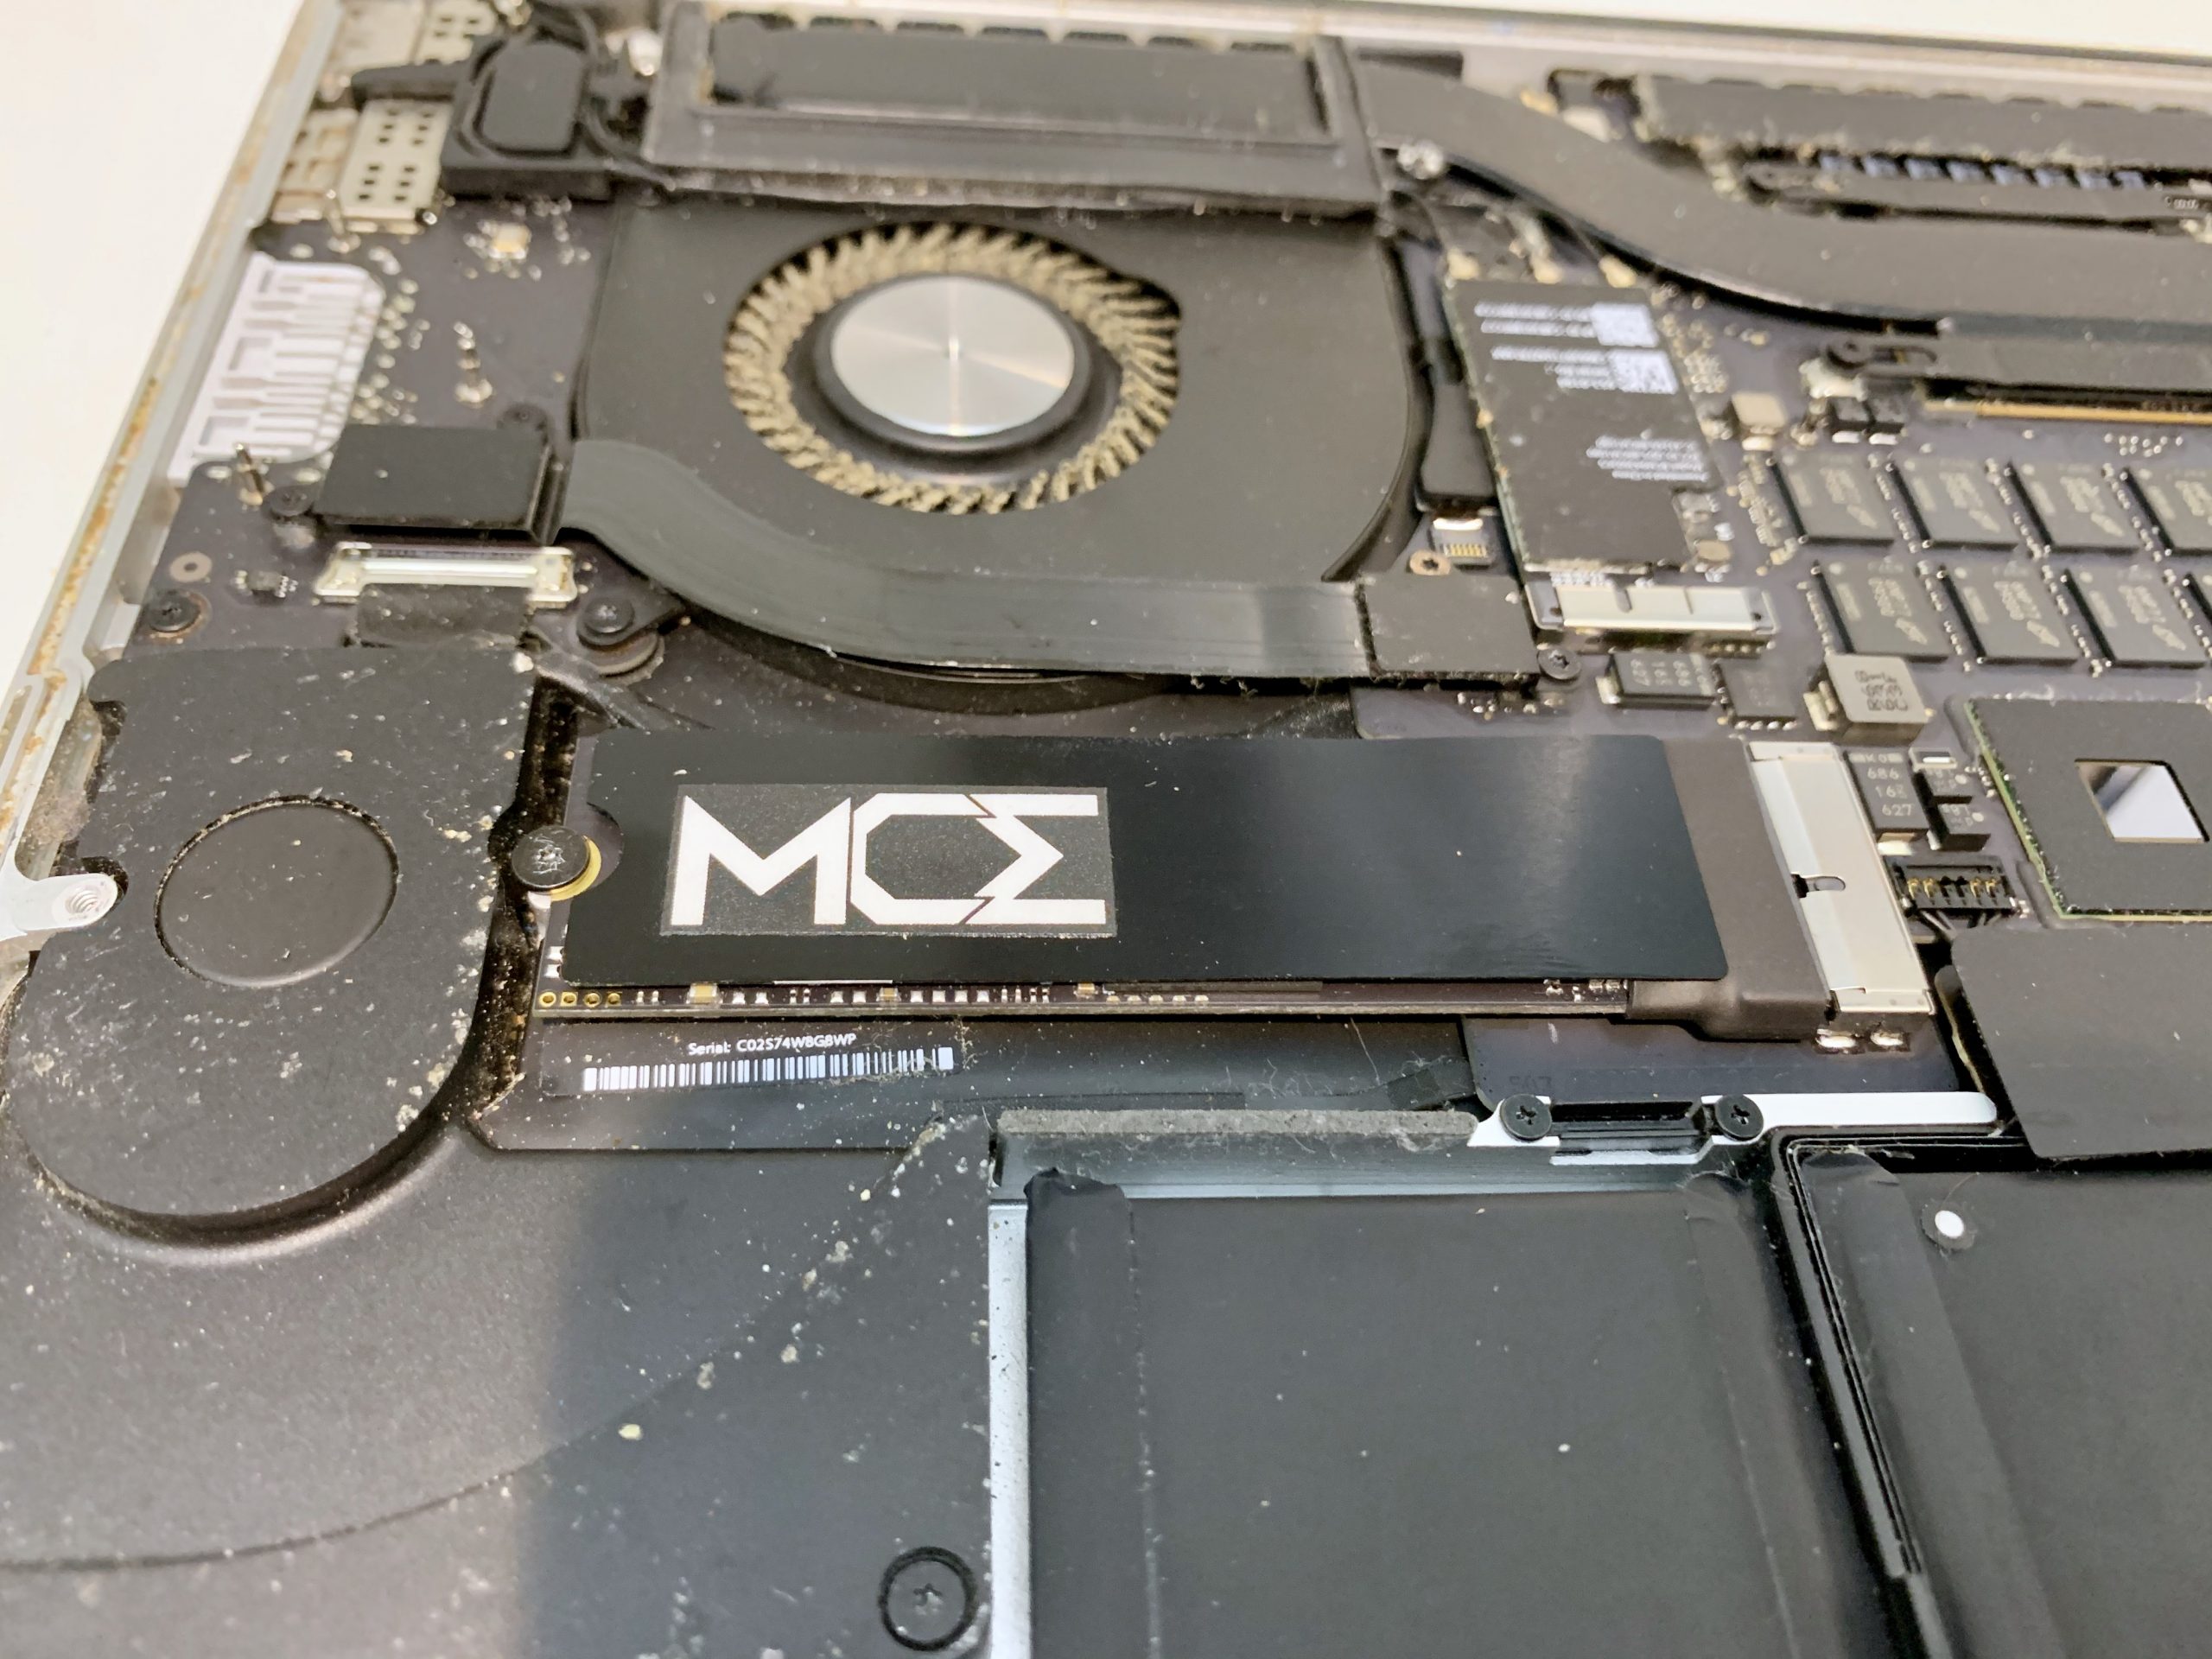
3) Replace the SSD with the new SSD. Be careful to insert the SSD completely into the socket on the Main Logic Board – you may feel some initial resistance. Do not force it in, but make sure it is in completely. Reattach the T5 Torx screw to hold the SSD in place.

4) Reattach the bottom case.
TIP: If your MacBook is a lot noiser and runs hotter than it used to be, this is an opportunity for you to fix that problem. Over time the MacBook Pro can accumulate plenty of dirt, dust and debris internally. This debris blocks internal airflow. That makes the Mac run hotter, so the fans run harder to keep things cool.
With the bottom case removed, now is a good time to clean the MacBook Pro of any debris or dust that is clogging its vents. Your Mac will run cooler and will be quieter.
Use a can of compressed air only. Refrain from physically touching any of the components. Do not use a powered vacuum or any sort of microfiber cloth, and do not use solvents or any sort of liquid cleaner.
Cleaning the interior of this MacBook Pro proved to be quite a challenge, as you can tell from the images. Years of use in a retail environment caused a lot of debris to build up inside, and some if appeared actually dried on to the internal components. We did what we could to clean it up and make sure the air channels inside were unobstructed, and it’s running cooler and quieter than it did before with less frequent fan blasts.
Set up your new MacBook Pro SSD
If your kit included a USB sled, install the original MacBook Pro SSD you’ve just removed. When you start up your MacBook Pro, hold down the Option key and select your Mac’s original hard drive icon to boot. You can then format and partition the new SSD if necessary, and transfer your data back to it.
Some SSDs arrive preconfigured with macOS software. Others will be blank. If you need to set up yours from scratch, start up your Mac and hold down the Command, Option and R keys to invoke Internet Recovery. Your Mac will attempt to connect to a Wi-Fi network and then will download the software it needs to restore the drive and install new operating system software from the Internet.
Restore from your original drive once Internet Recovery is complete.
Having trouble?
You install the new SSD and turn on your Mac, only to face a flashing question mark. What to do? Follow these steps if you need help.
Reset NVRAM
The Non-Volatile RAM (NVRAM) is a special protected area in the Mac’s memory that retains certain information like what startup disk is being used and other things that can affect the Mac’s basic operation. If your Mac fails to recognize the new SSD, reset the NVRAM before doing anything else. Here’s how
1) Shut down the Mac.
2) Connect it to its power charger.
3) Press the Power button to turn on the Mac, then immediately
4) Hold down the Command, Option, P and R keys until you hear the Mac restart again.
Should that fail to work, follow these steps:
Check connections
1) Follow the instructions above to disassemble the MacBook Pro and check your connections.
2) Make sure the new SSD is resting securely and completely in the slot on the Main Logic Board.
3) Make sure the screw is attached properly to hold it in place.
If worse comes to worst and you still can’t get the MacBook Pro to recognize the SSD, try replacing it with the original. If you’re able to boot off your original, there may be something wrong with the replacement drive. Consult the manufacturer’s support if that’s the case.
Wrapping it up
Hopefully by now you’ve upgraded your 15-inch Retina MacBook Pro with more storage, kicking the “replace it” can down the road a while longer. With some patience and elbow grease, you can double or even quadruple your internal storage for a fraction of the price of a new MacBook Pro.
Are you ready to roll up your sleeves and get to work? Have you upgraded? Do you have any questions? Let me know in the comments.
Source link: https://www.idownloadblog.com/2019/12/13/how-to-upgrade-the-ssd-in-a-15-inch-retina-macbook-pro/


Leave a Reply