How to use Screen Time on Mac
When Apple introduced the Screen Time feature with iOS 12, it was a nice addition for many. From monitoring your own device screen time to your child’s, the feature has many helpful and useful options.
With the release of macOS Catalina, Apple decided to bring that Screen Time feature to Mac. And it’s just as valuable on your computer screen as your mobile device. This tutorial walks you through how to use .
Use Screen Time on your Mac
Make sure that you have updated your computer to macOS Catalina or later. Then, enable, set up, and view Screen Time reports.
Enable
Open your System Preferences with the button in the Dock or by clicking Apple icon > System Preferences from the menu bar. Then select Screen Time.
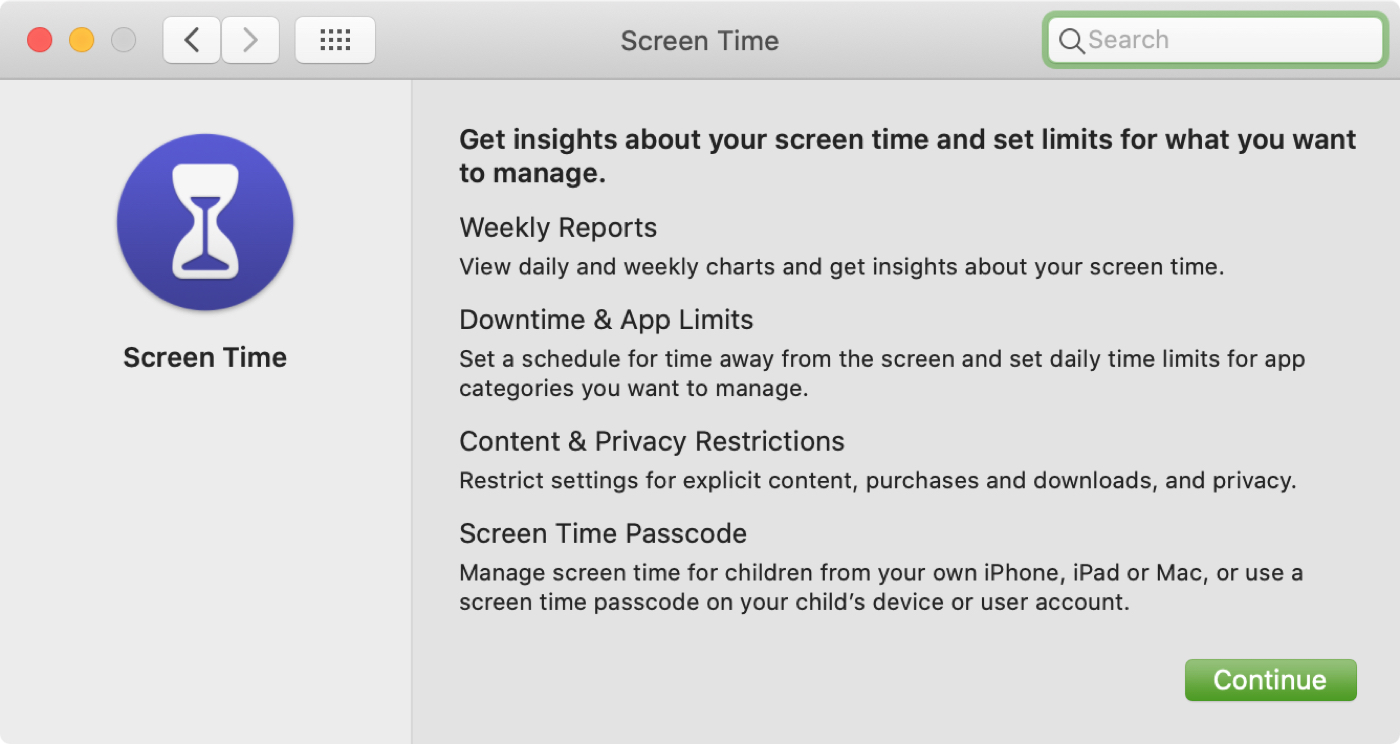
When you first open Screen Time, you’ll be greeted with a nice summary of the features you can enjoy. This includes Weekly Reports, Downtime and App Limits, Content and Privacy Restrictions, and an optional Screen Time Passcode.
Click Continue and then click the Turn On button to enable it.
Set up Screen Time
Once you turn on Screen Time, you can move through each of the sections or just those that interest you, depending on if you’re setting it up for yourself or a family member.
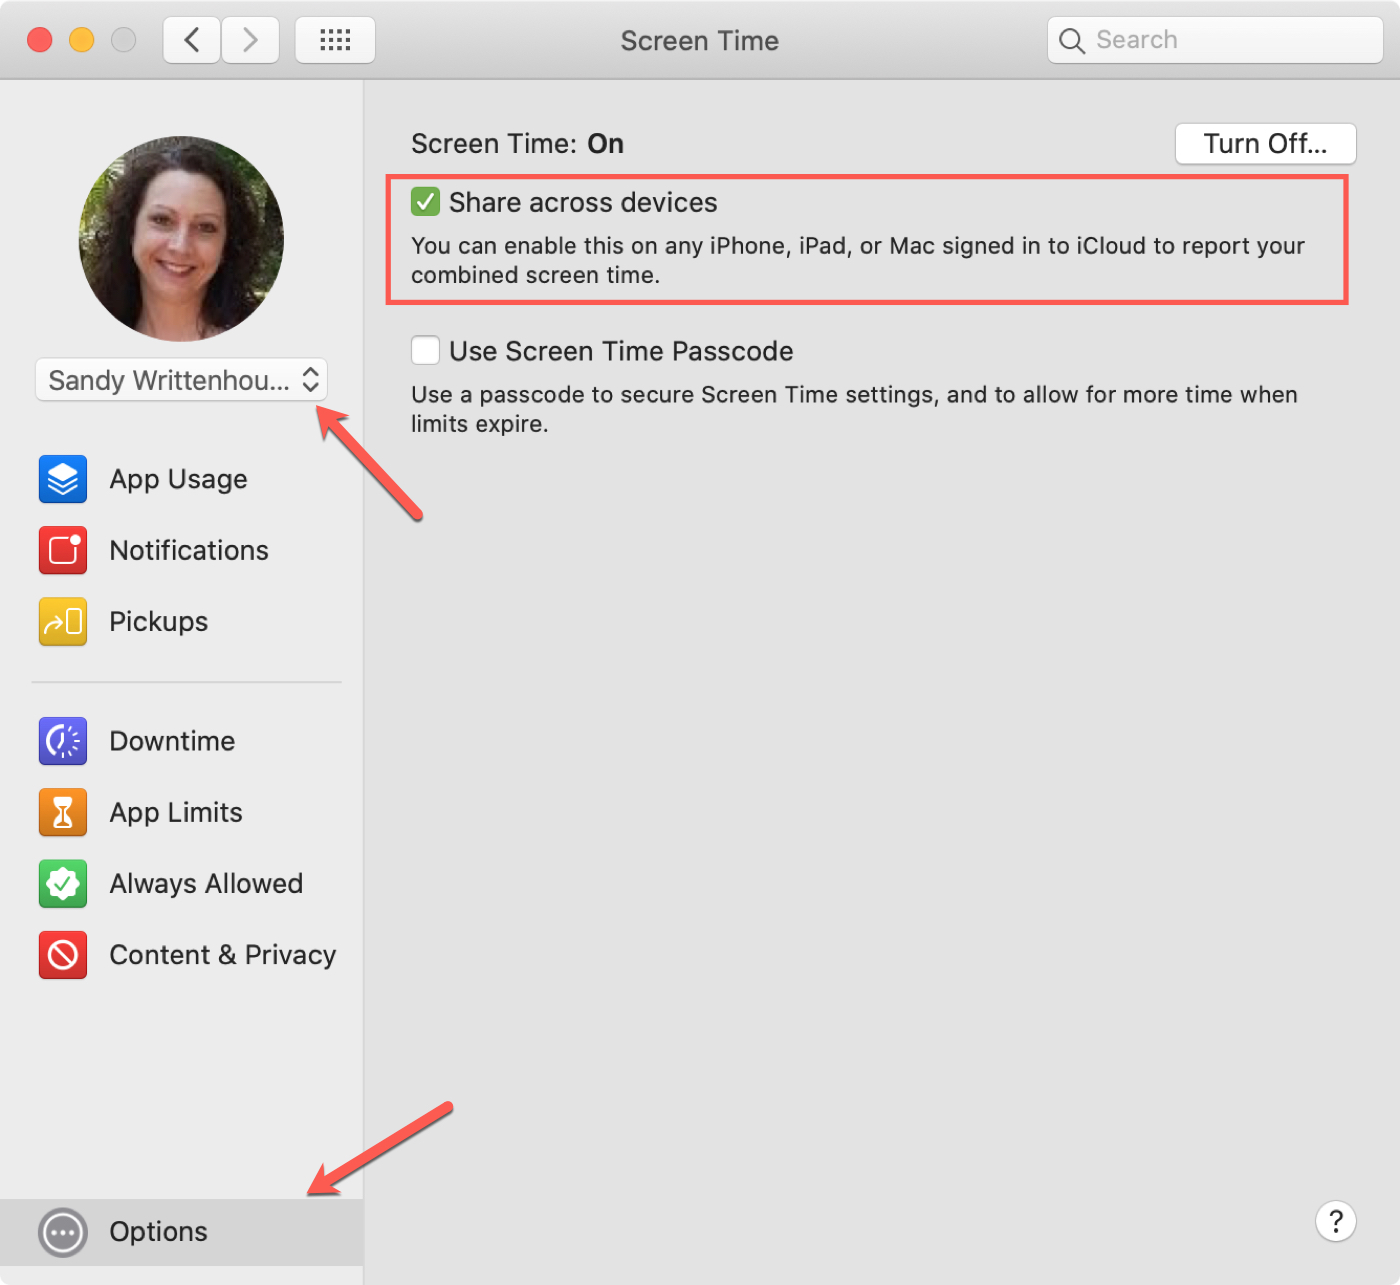
If you want to see a combined report with the Screen Time for your other devices, mark the first checkbox for Share across devices. To return to this screen and option at any time, just click Options in the Screen Time settings window. To set up Screen Time, select the user on the top left.
Downtime
Head to the Downtime selection to schedule time away from your screen. If you want to use this feature, click the Turn On button at the top. Then pick from Everyday for a certain timeframe or Custom to set up a different timeframe for each day of the week.
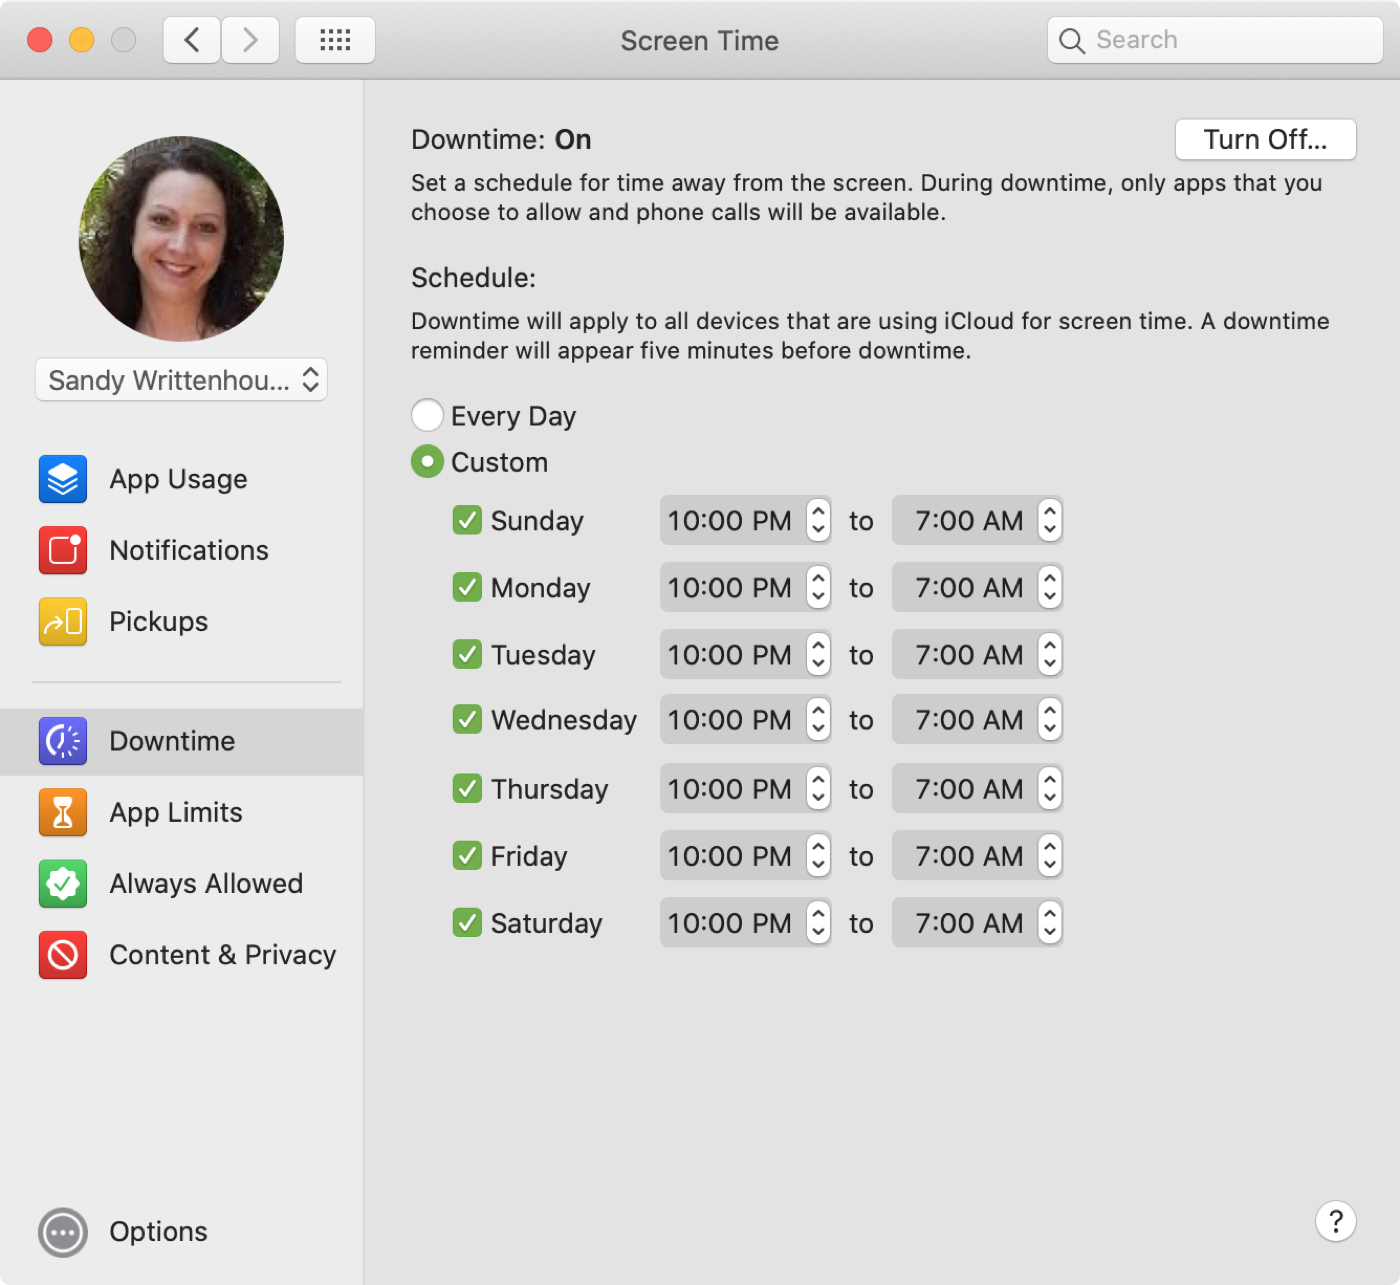
Remember that if you enable Downtime, only apps you pick along with phone calls will be available for you to use. You can set these up in the Always Allowed section we’ll discuss later.
App Limits
The next feature in the Screen Time settings is for App Limits. This lets you set time limits for categories of apps or specific apps within a category. This is helpful if you find yourself spending a little too much time on social networks, for example, or just a certain one like Facebook.
Click the plus sign button to view the categories. You can mark checkboxes next to categories to include all apps within them or expand a category and pick certain apps.
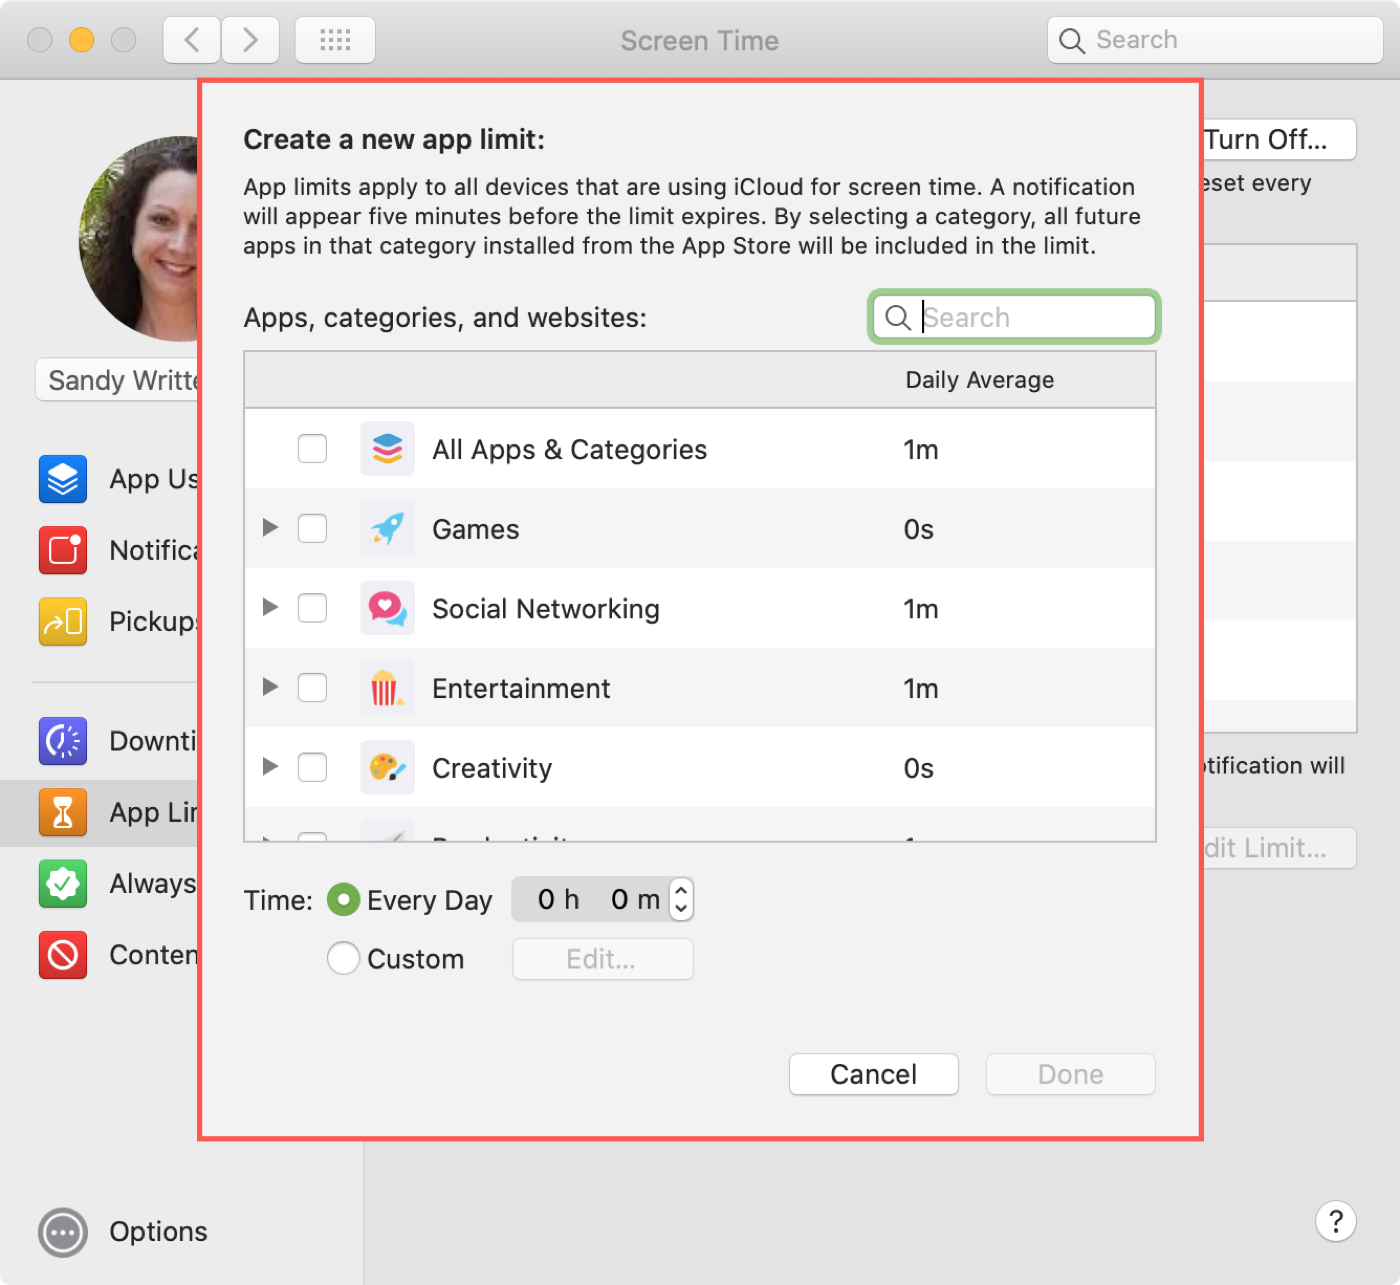
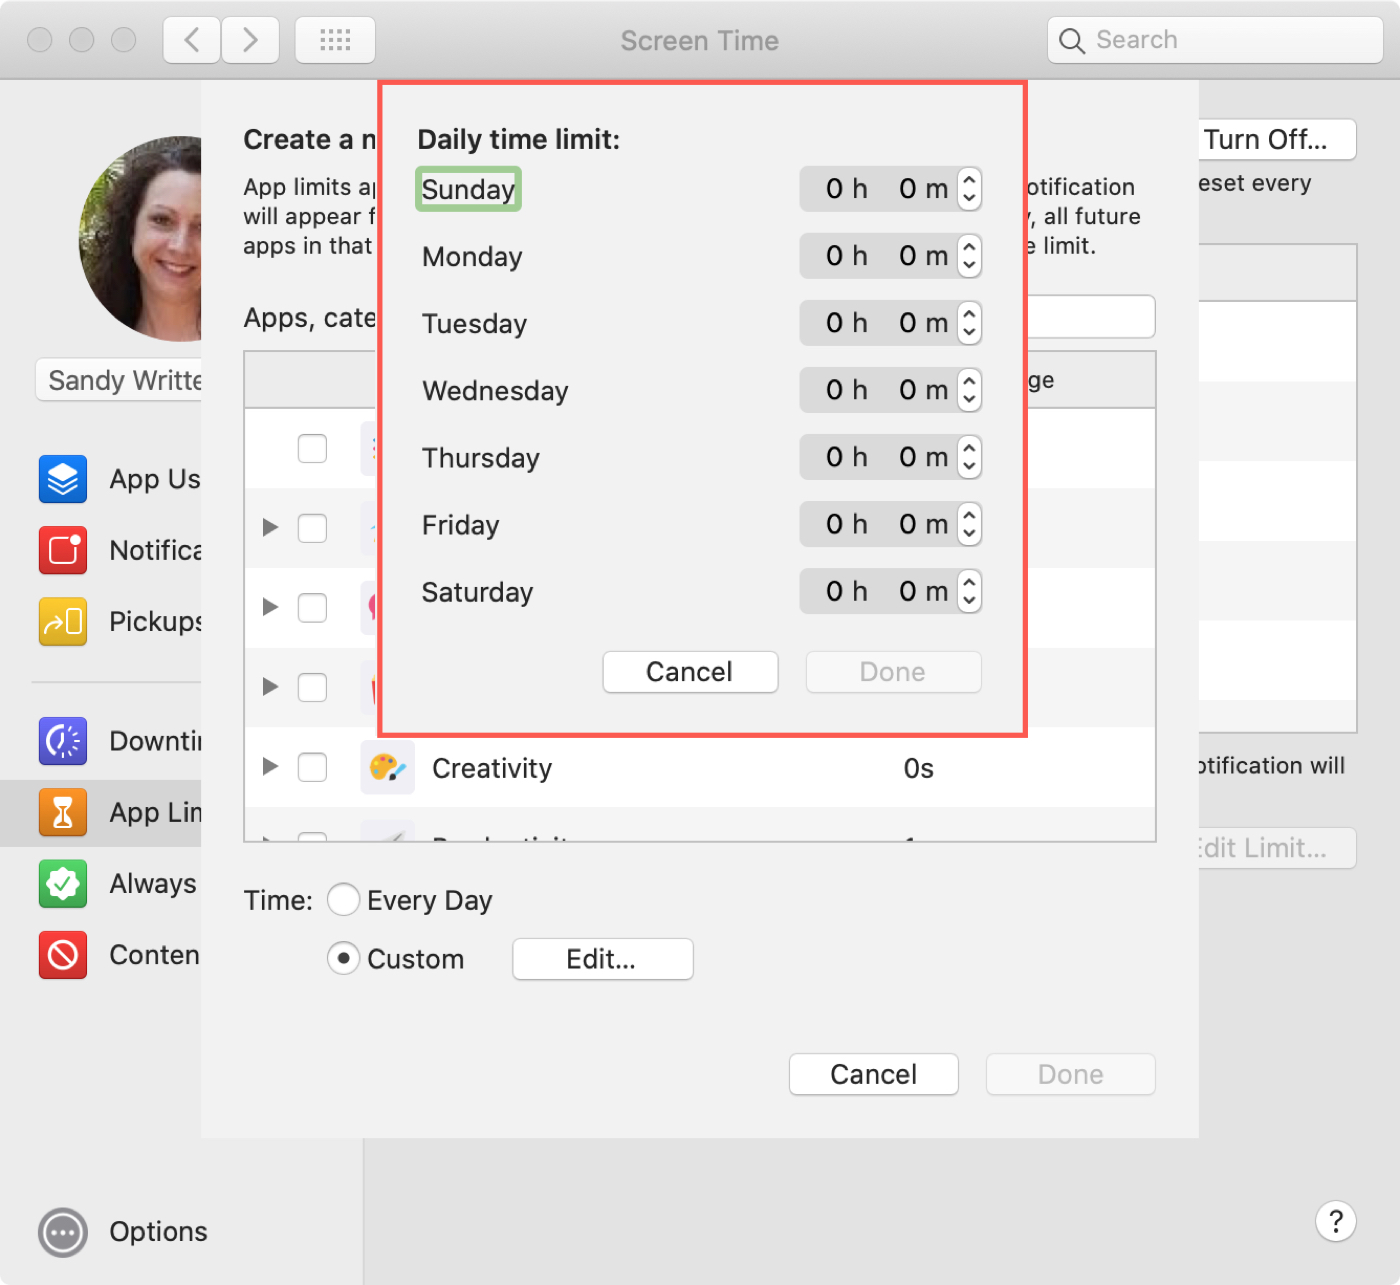
Then select the time limit for those categories and apps that you want to use. You can set up a time limit that applies to Everyday or use a Custom time limit that can change each day. This is flexible so that you can allow more time on weekends, for instance. When you finish, click Done.
Always Allowed
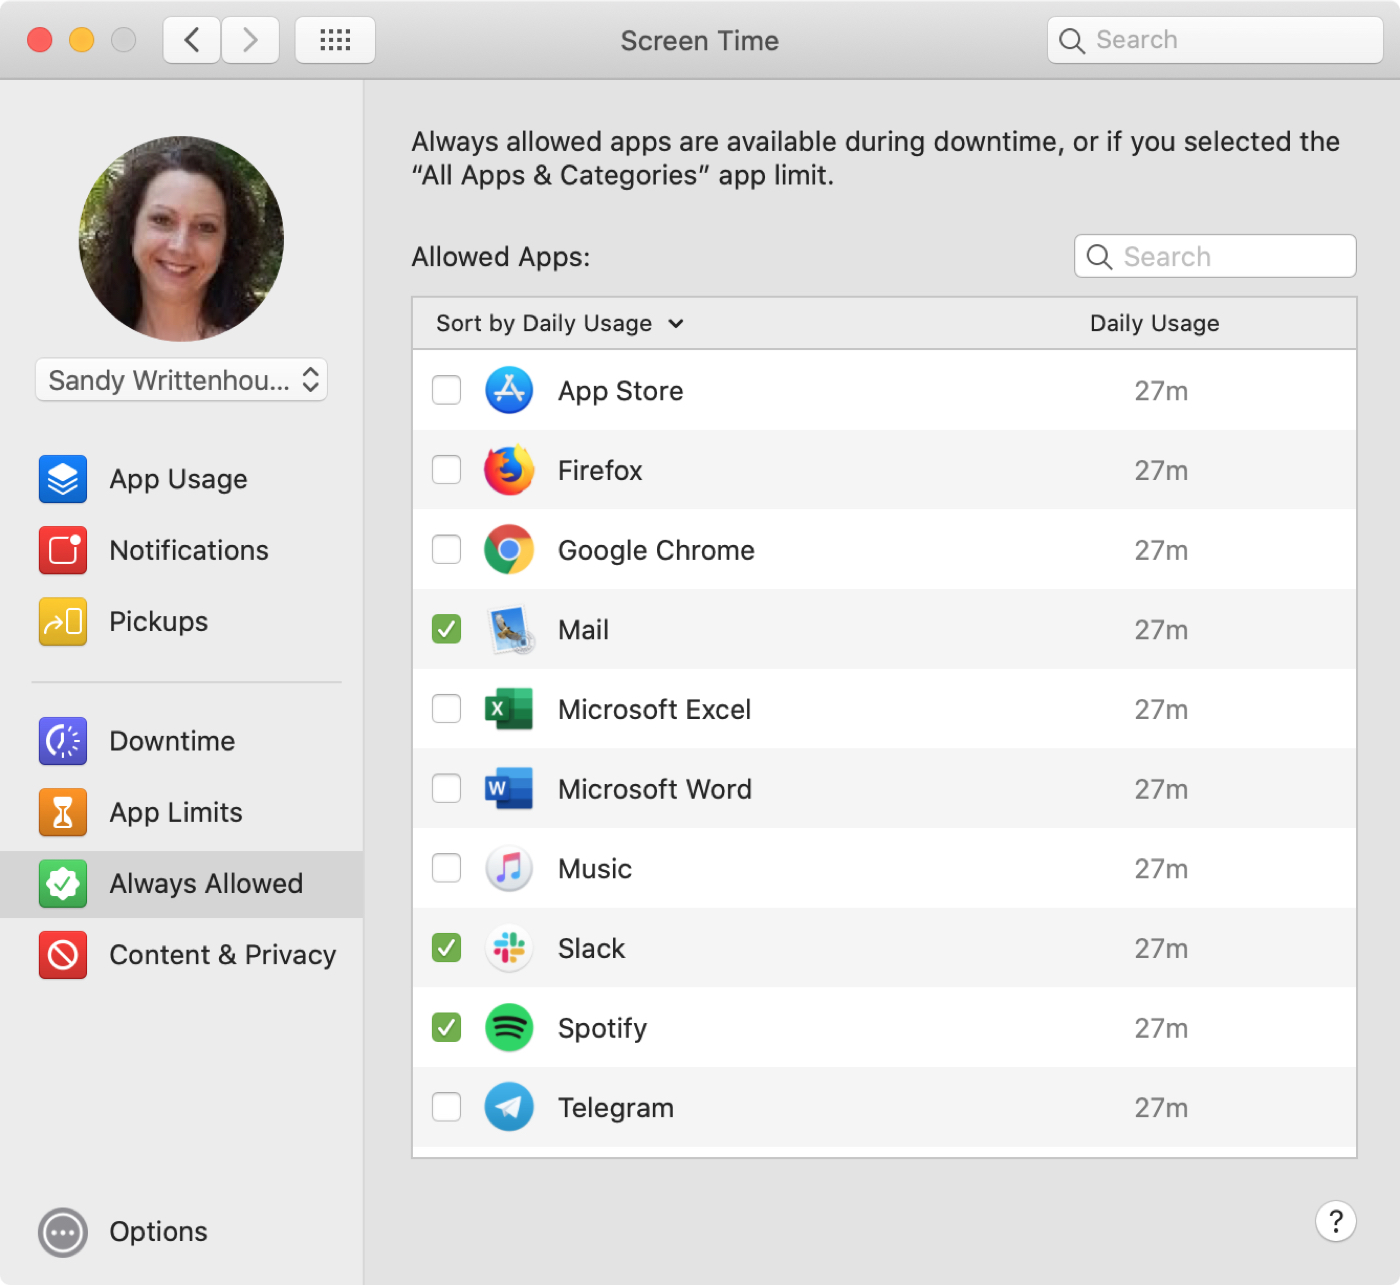
The Always Allowed section, that we mentioned above for Downtime, lets you pick those apps that you can always use. This means that if you set Apple Limits or Downtime, the apps you pick in this section will not apply to those limitations.
Content & Privacy
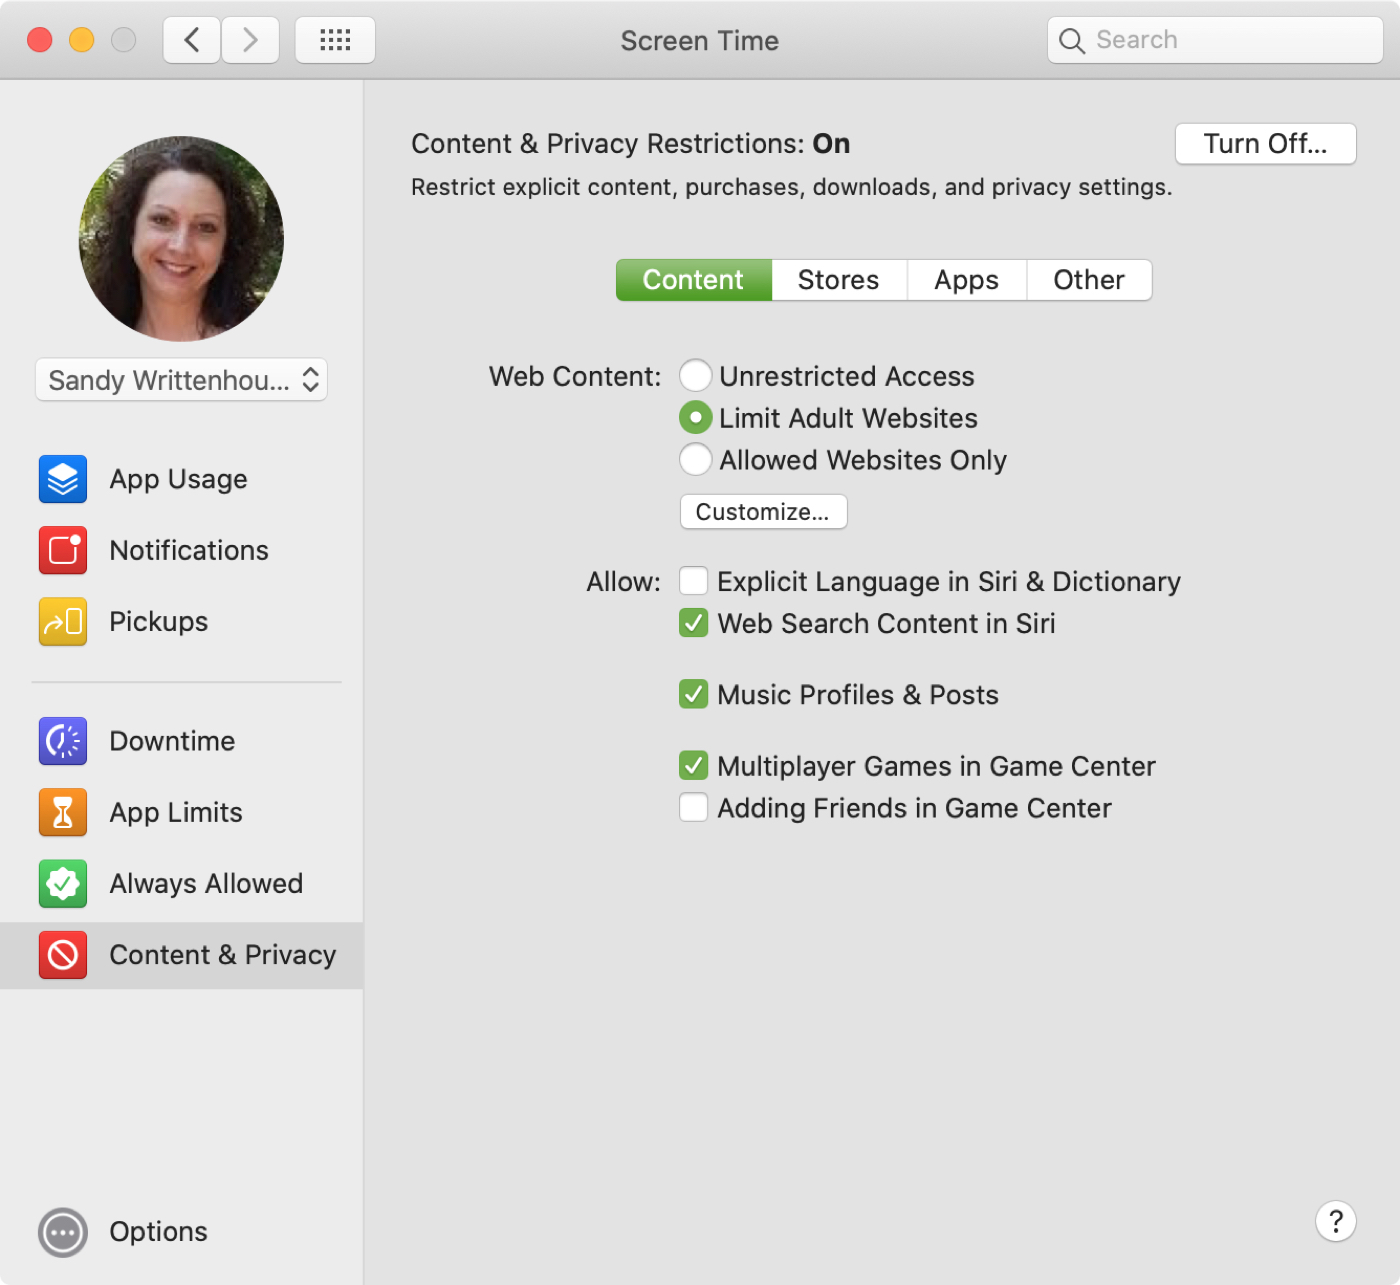
The final section you’ll want to check out for Screen Time is the Content & Privacy area. This lets you restrict content, purchases, downloads, and privacy settings if needed. If you want to set this up, click the Turn On button. Then, make your selections under Content, Stores, Apps, and Other.
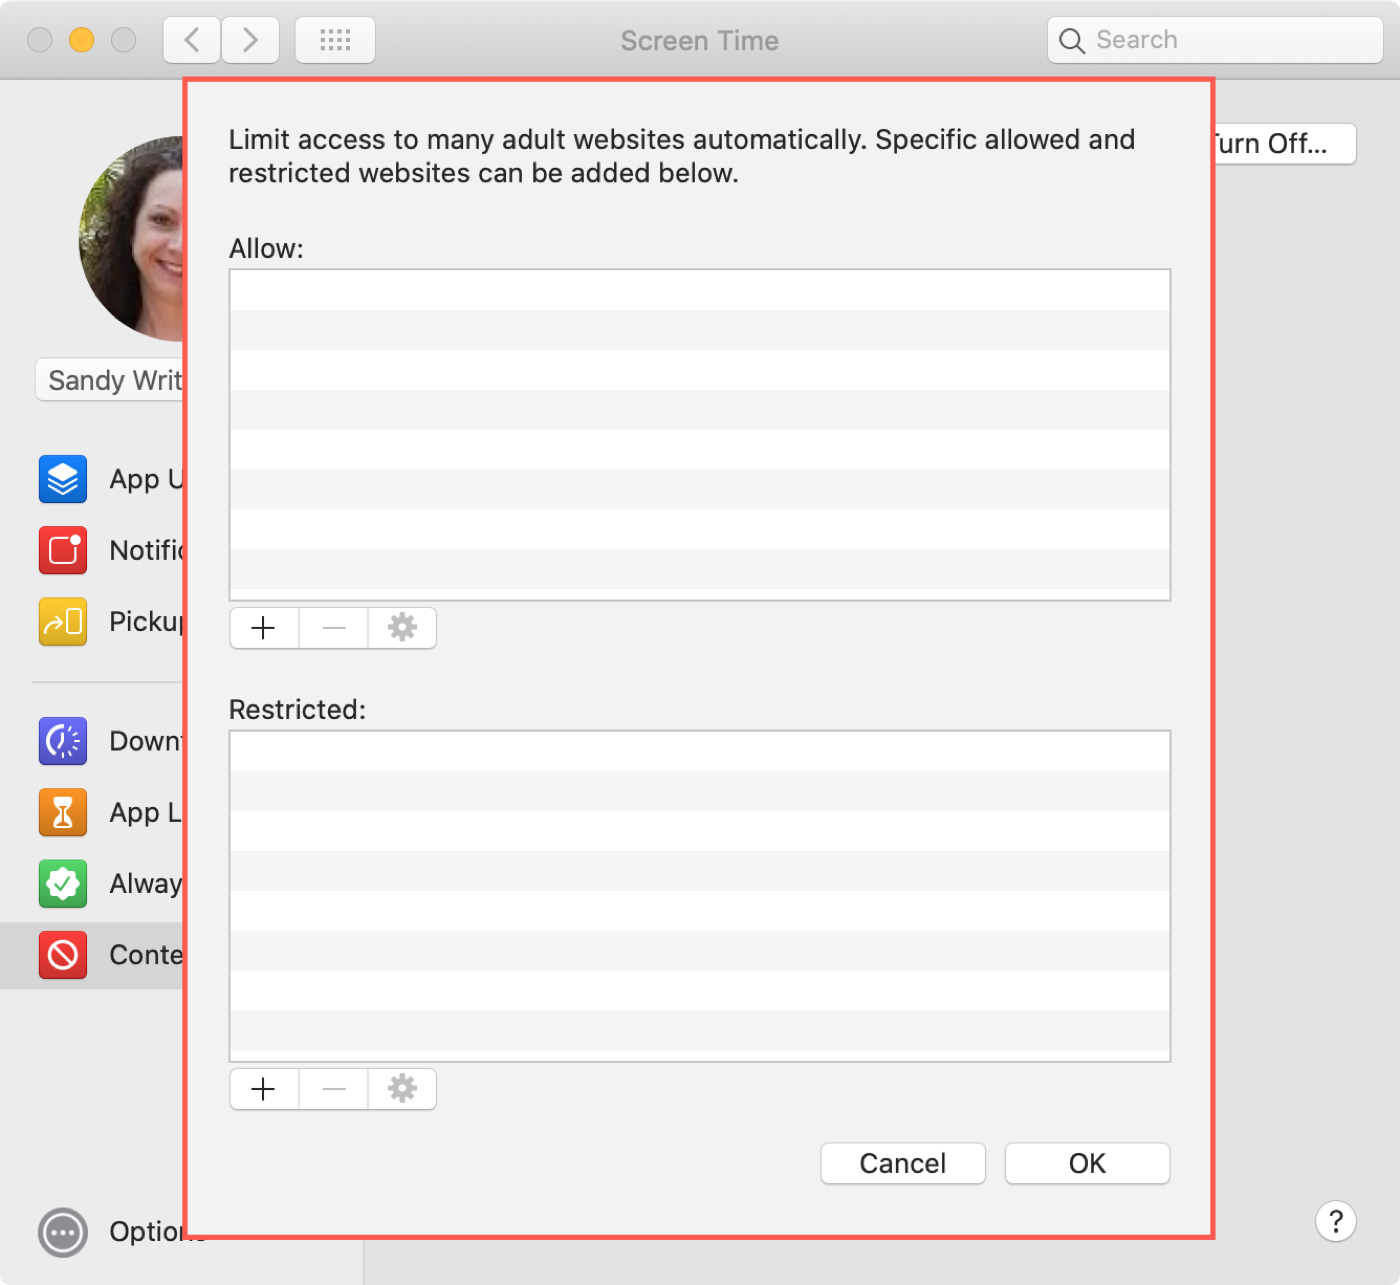
Notice on the Content tab that if you pick an option under Web Content other than Unrestricted Access, you can Customize the options. This lets you limit or only allow access to specific websites which is ideal if you’re setting this up for a child.
View Screen Time reports
Once you have all of the options enabled in Screen Time that you want to use, you’ll likely want to view the reports. You can view each of the following by time period, app, category, website, or device.
App Usage: View app usage and for app details, move your cursor over the app and click either the Hourglass or Information button.
Notifications: View how many times you receive notifications and from where.
Pickups: View how many times you wake your device and the first app you use when you do.

Wrapping it up
The Screen Time feature on Mac simply makes sense. And it is super handy for monitoring your child’s device activity, limiting yourself when you need to, and controlling inappropriate content.
Are you going to start using Screen Time on your Mac? If so, just make sure that you’ve updated to macOS Catalina or later.
Source link: https://www.idownloadblog.com/2019/10/10/how-to-use-screen-time-on-mac/


Leave a Reply