How to adjust the color in a video or image in iMovie

Not every video or image that you pull into your movie in iMovie is perfect. There may be a time when you need to brighten one up a bit. At the same time, you may want to darken the colors or give it a warmer feel.
In iMovie on Mac, you have some terrific options for working with the colors, balance, and saturation. And on iOS, you can apply filters that add a different color effect. If you’re ready, here’s how to adjust the color in your movie in iMovie.
Color options in iMovie on Mac
When you open iMovie on your Mac and select your movie for editing, you’ll see many options in the Color Correction feature.
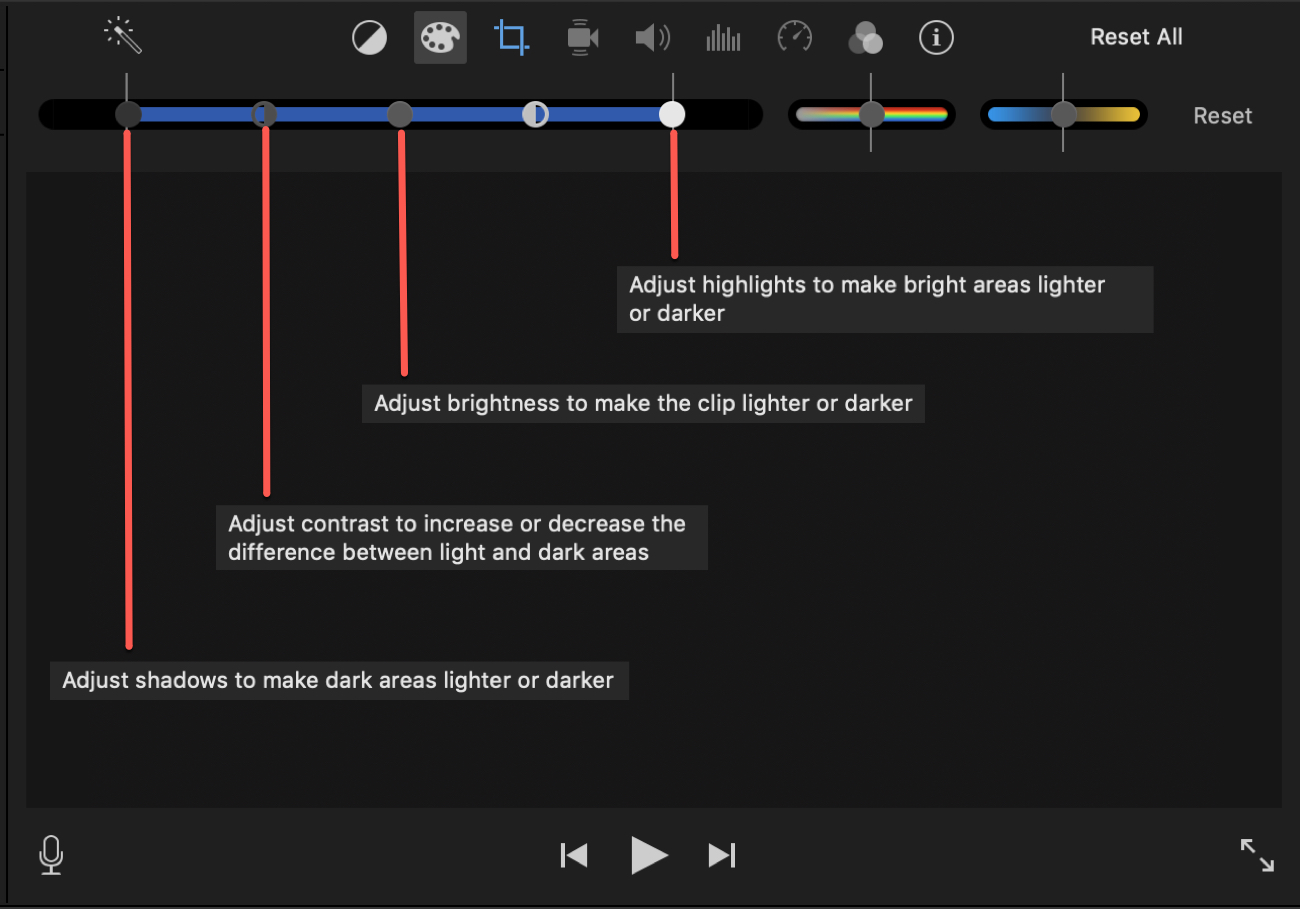
Select a clip in your Timeline that you’d like to edit and click the Color Correction button, which looks like a color palette, above the Viewer.
On the left, you’ll see a blue slider. Each button in that slider represents something a little different. Starting on the far left, you can adjust the shadows, contrast, brightness, more contrast, and finally highlights.

As you slide the various buttons, you’ll see the others move with it to help you with your color corrections.
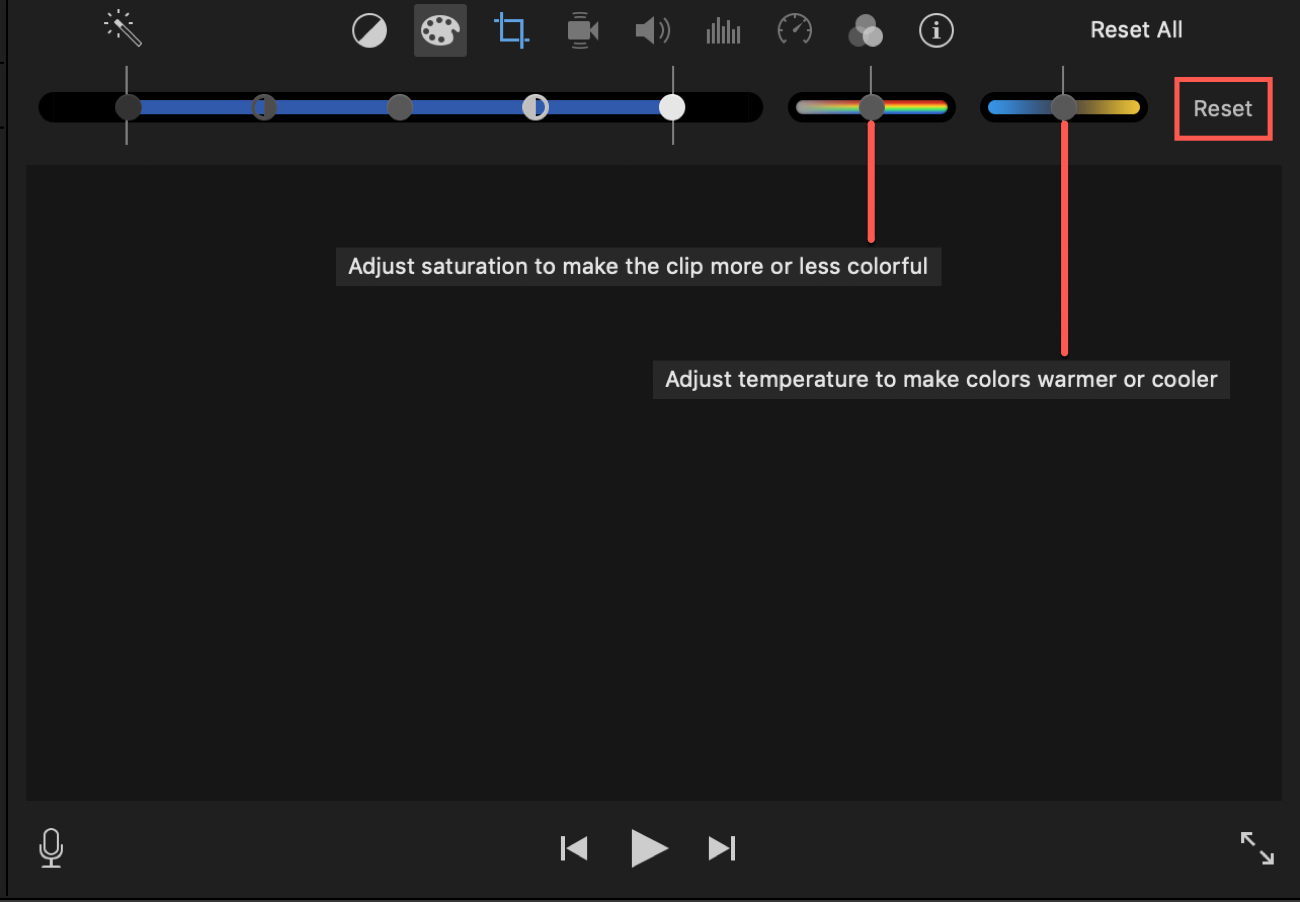
To the right of the blue slider, you’ll see two more. The first is for saturation so that you can make your video or image more or less colorful. The second is for temperature so that you can give it a warmer or cooler feel.

If you make an adjustment that you don’t like, you can click Edit > Undo from the menu bar. And if you make several and want the video or image back to its original state, you can click Reset in the Viewer.
Along with making corrections to the colors, you can create some pretty cool effects for your movie with the Color Correction feature in iMovie on Mac.
Filter effects in iMovie on Mac
In addition to adjusting specific color correction options, you can apply filters. This lets you quickly change the look of your image or video.
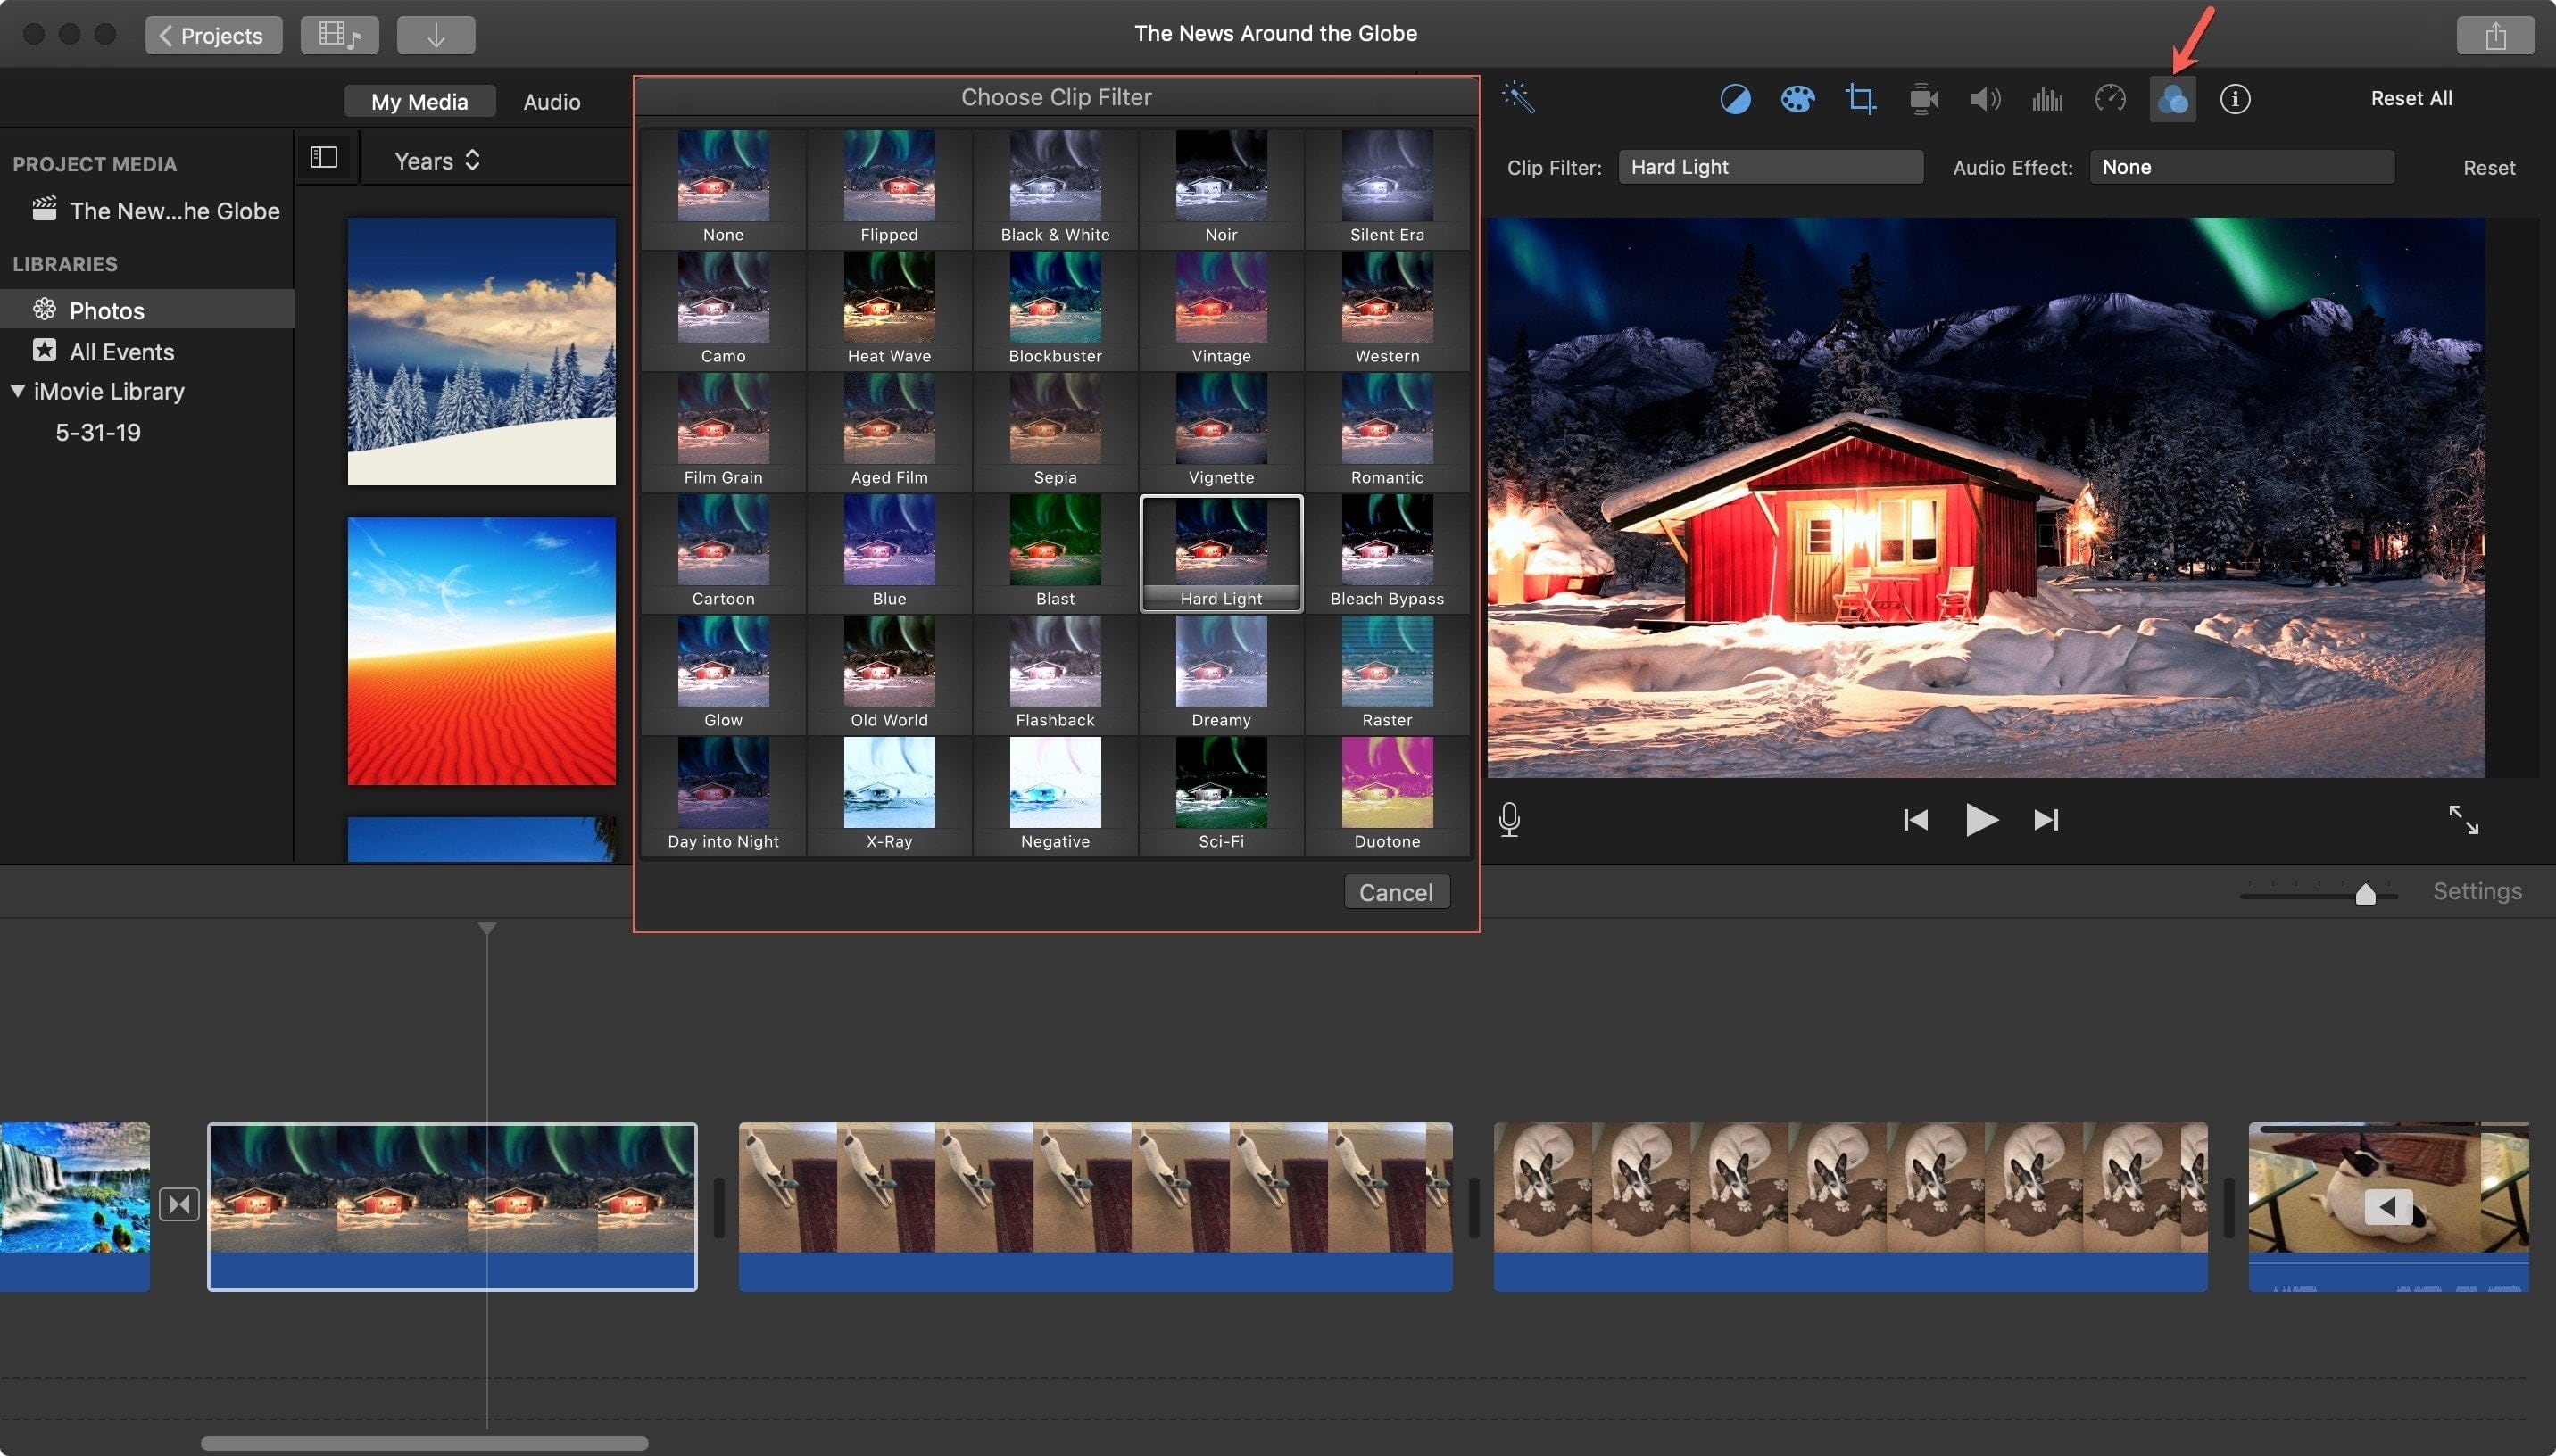
Select a clip in your Timeline and click the Clips Filter and Audio Effects button, which looks like three circles, above the Viewer. Then, click None in the Clip Filter box.
A pop-up window will display with tons of clip filters like black and white, sepia, aged film, vignette, and many more. Put your cursor over one to get a glimpse at how your clip with look. If you find one you like, just click to apply it.

Filter effects in iMovie on iOS
You don’t currently have the detailed color correction options in iMovie on iOS like you do on Mac. But you can still add clip filters to create a different look.
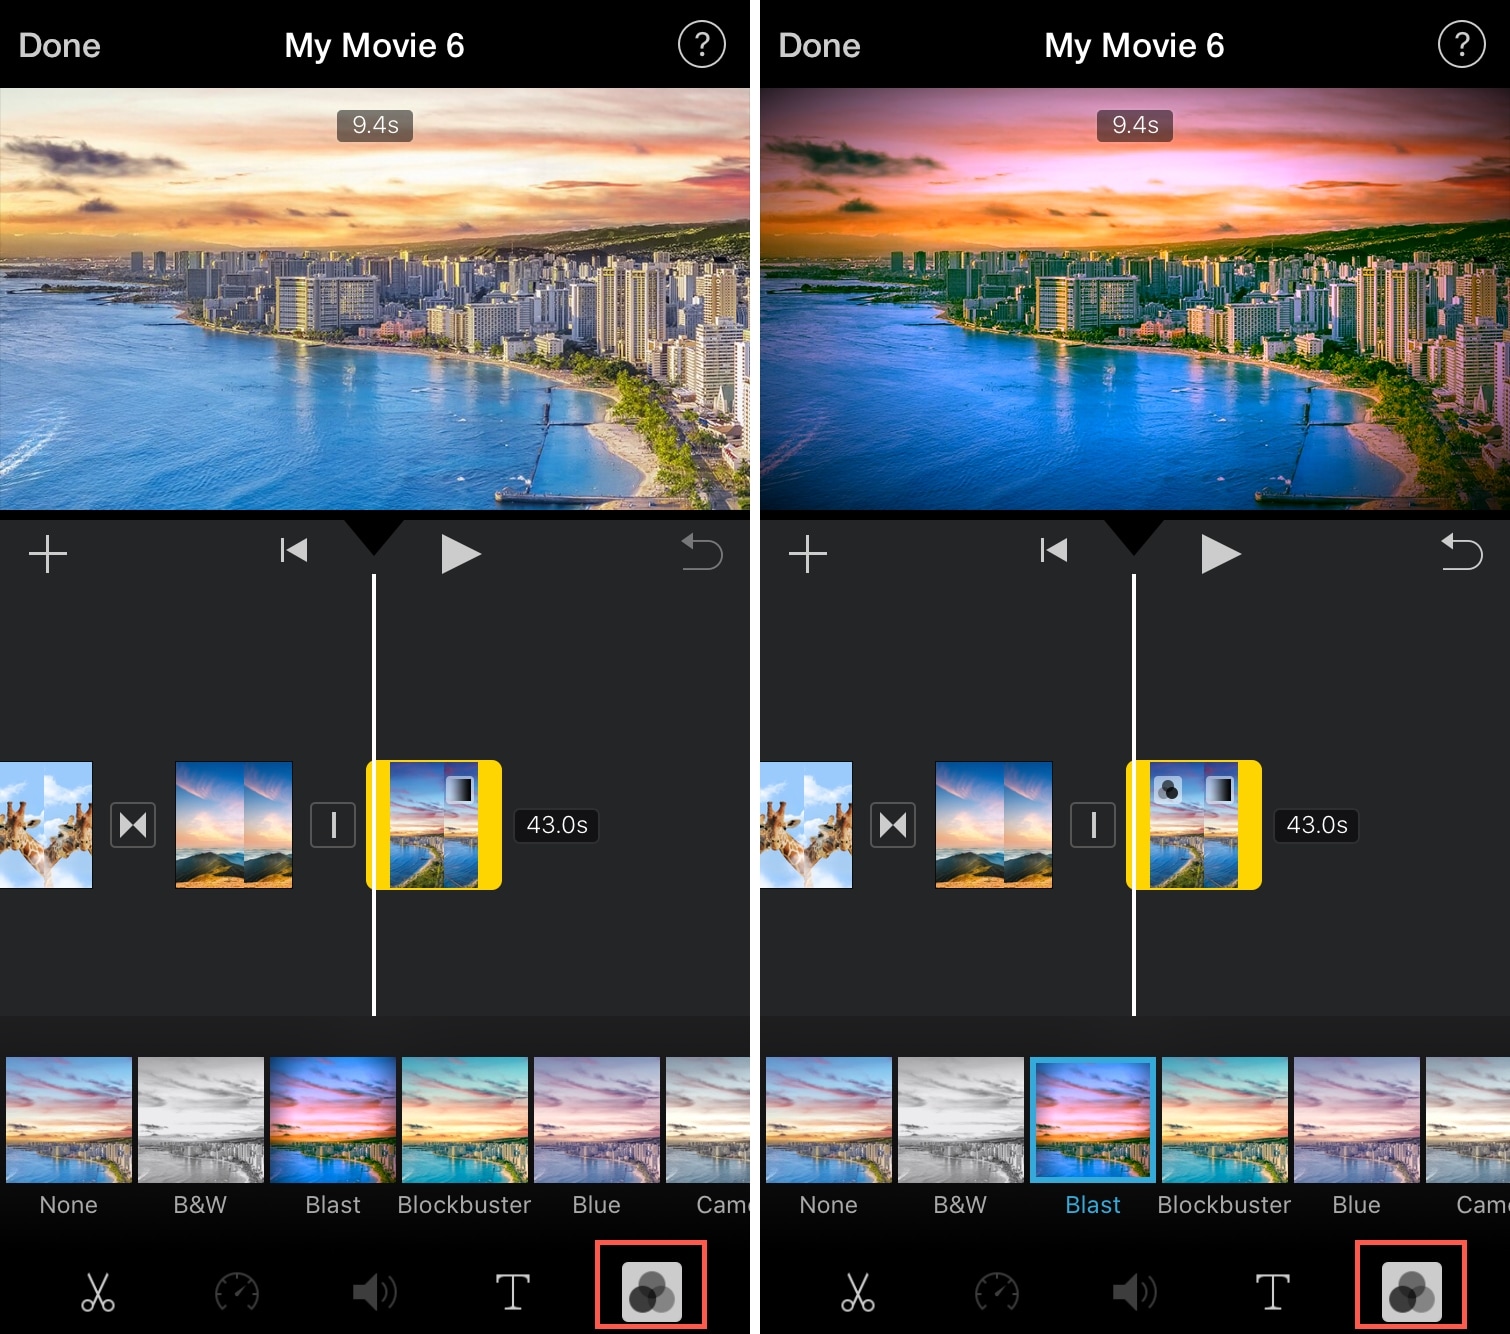
Open your movie for editing in iMovie and select a clip in the Timeline. Tap the Filter button at the bottom that looks like three circles. You can pick a filter like black and white, blue, vintage, or western. Just tap the one you want to apply it.

If you decide to remove the clip filter, tap the Filter button and slide all the way to the left of the filter options. Tap None.
Wrapping it up
Whether you want to make color corrections on your Mac or apply clip filters on your iPhone or iPad, iMovie makes it easy.
Do you use color changes like these to apply nifty effects to your movies in iMovie? If so, and you have some tips, feel free to share them in the comments below!
Source link: https://www.idownloadblog.com/2019/10/10/adjust-color-video-image-imovie/


Leave a Reply