How to apply for Apple Card
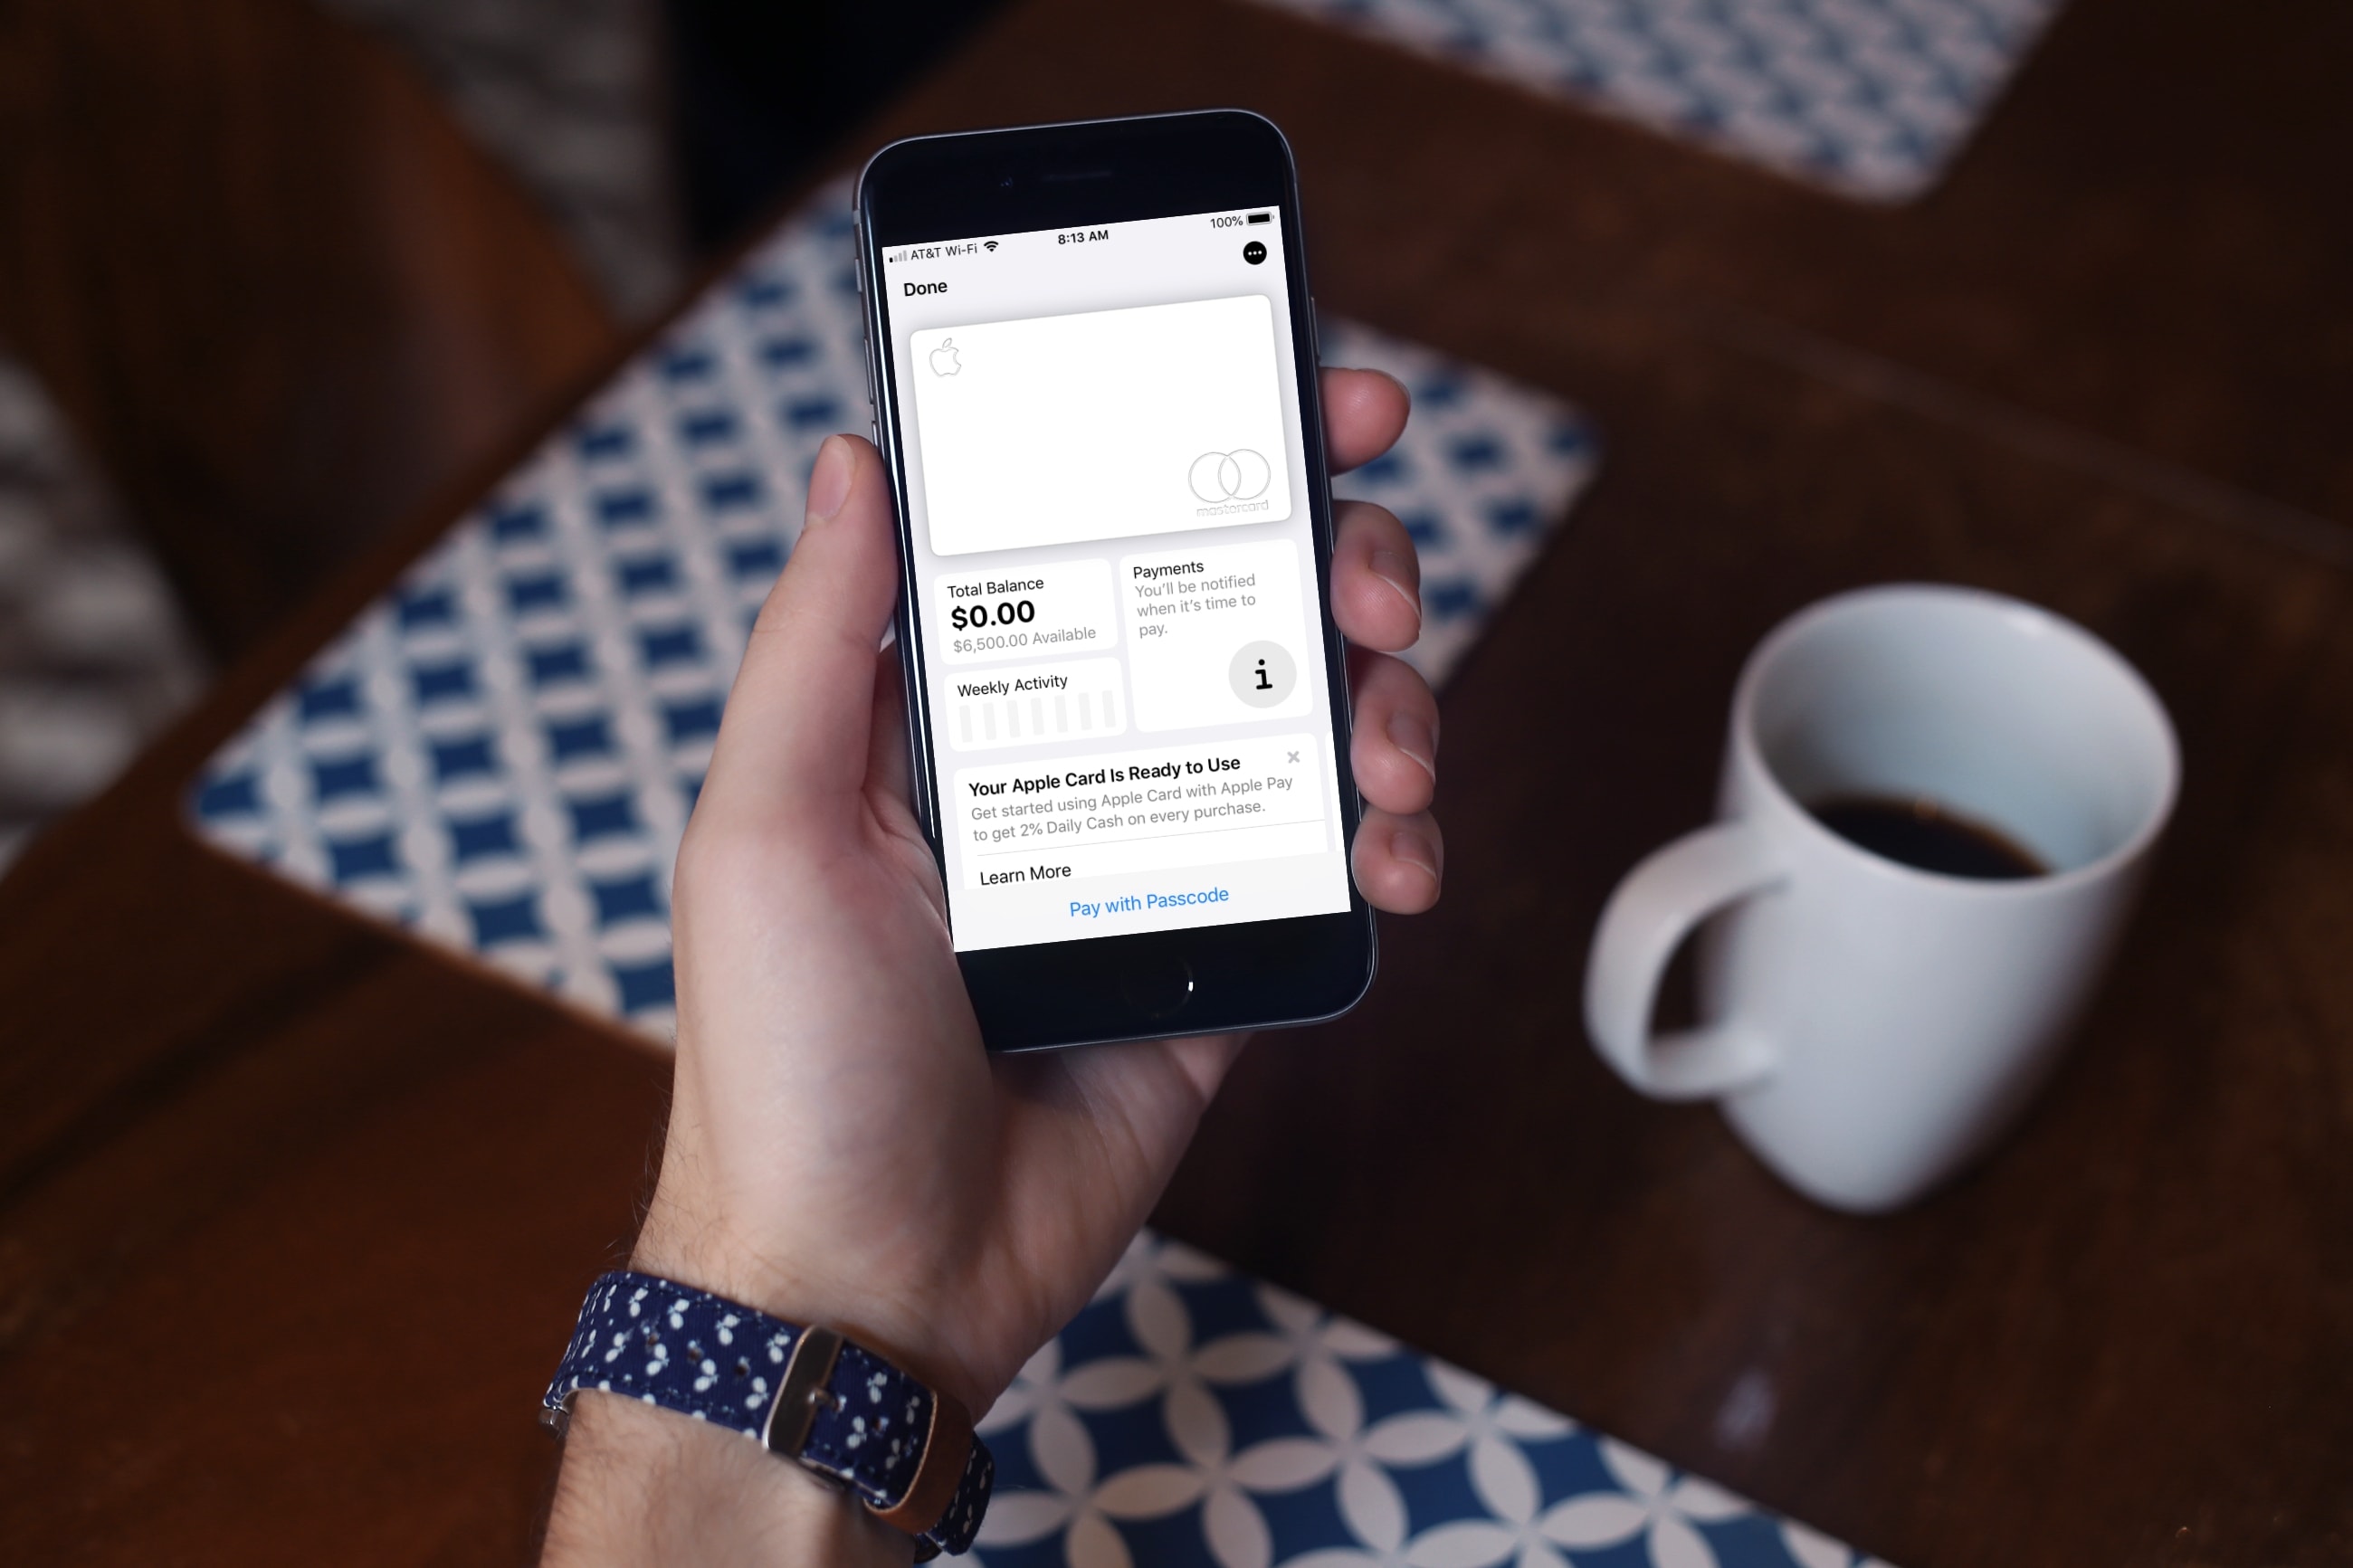
Earlier this year, Apple announced the launch of their first credit card. Appropriately named, the Apple Card works like a regular credit card, offers Daily Cash, and sits nicely in your Wallet app for Apple Pay in addition to offering a physical card.
Pro tip: You can sign up to be notified when the card is available, and select users will receive an email invitation to apply early. To do so, visit the Apple Card page on Apple’s website, click the Notify Me link in the upper right, and enter your email address. A few of us at iDB have confirmed that entering your email address to get notified is a good way to receive an invite early. After entering your email address, you should receive an invite within a few days.
So whether you fall into this group or are one who’ll wait a bit longer, here’s how to apply for the Apple Card when you’re ready.
Apple Card requirements
As with most any credit card these days, you must meet certain requirements for approval. Here’s a rundown to see if you’re eligible. You must:
- Be 18 years or older.
- Be a U.S. citizen or lawful U.S. resident with a physical address, not a P.O. Box.
- Own a compatible iPhone with iOS 12.4 or later.
- Use two-factor authentication.
- Sign into iCloud with your Apple ID.
- Be willing to verify your identity with a driver’s license or state-issued ID.
If you are eligible and ready to apply, here are the steps and it takes just a few minutes.
1) Open the Wallet app on your iPhone and tap the plus sign on the top right.
2) Tap Continue and then under Card Type, select Apple Card.
3) Tap to read the Rates and Terms and then tap Continue when you finish.
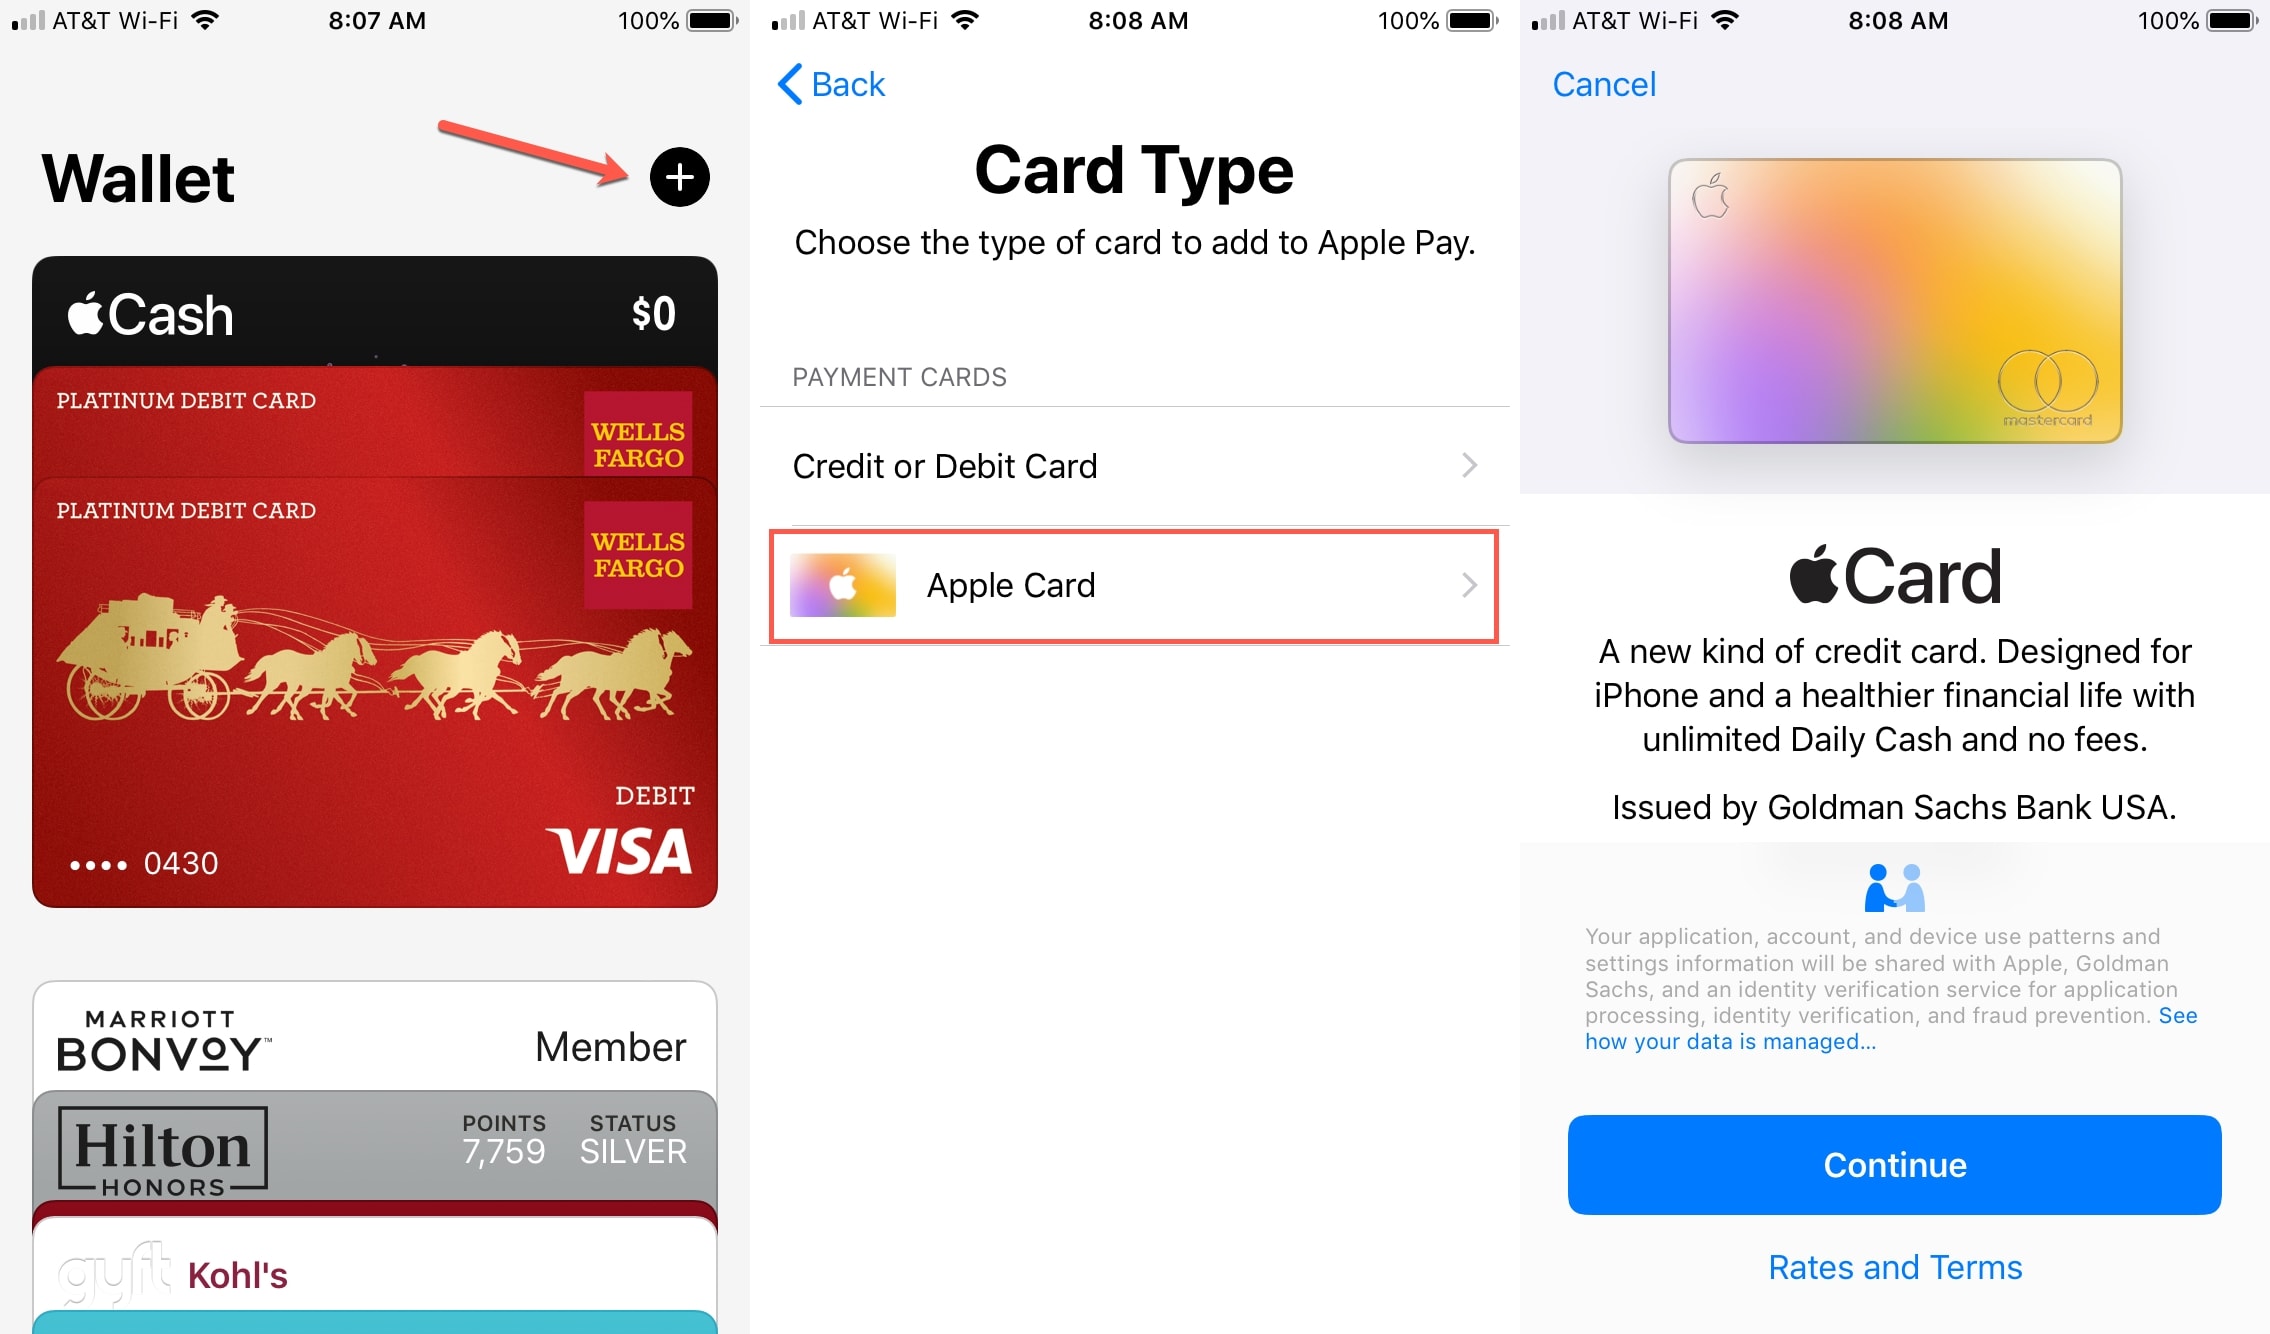
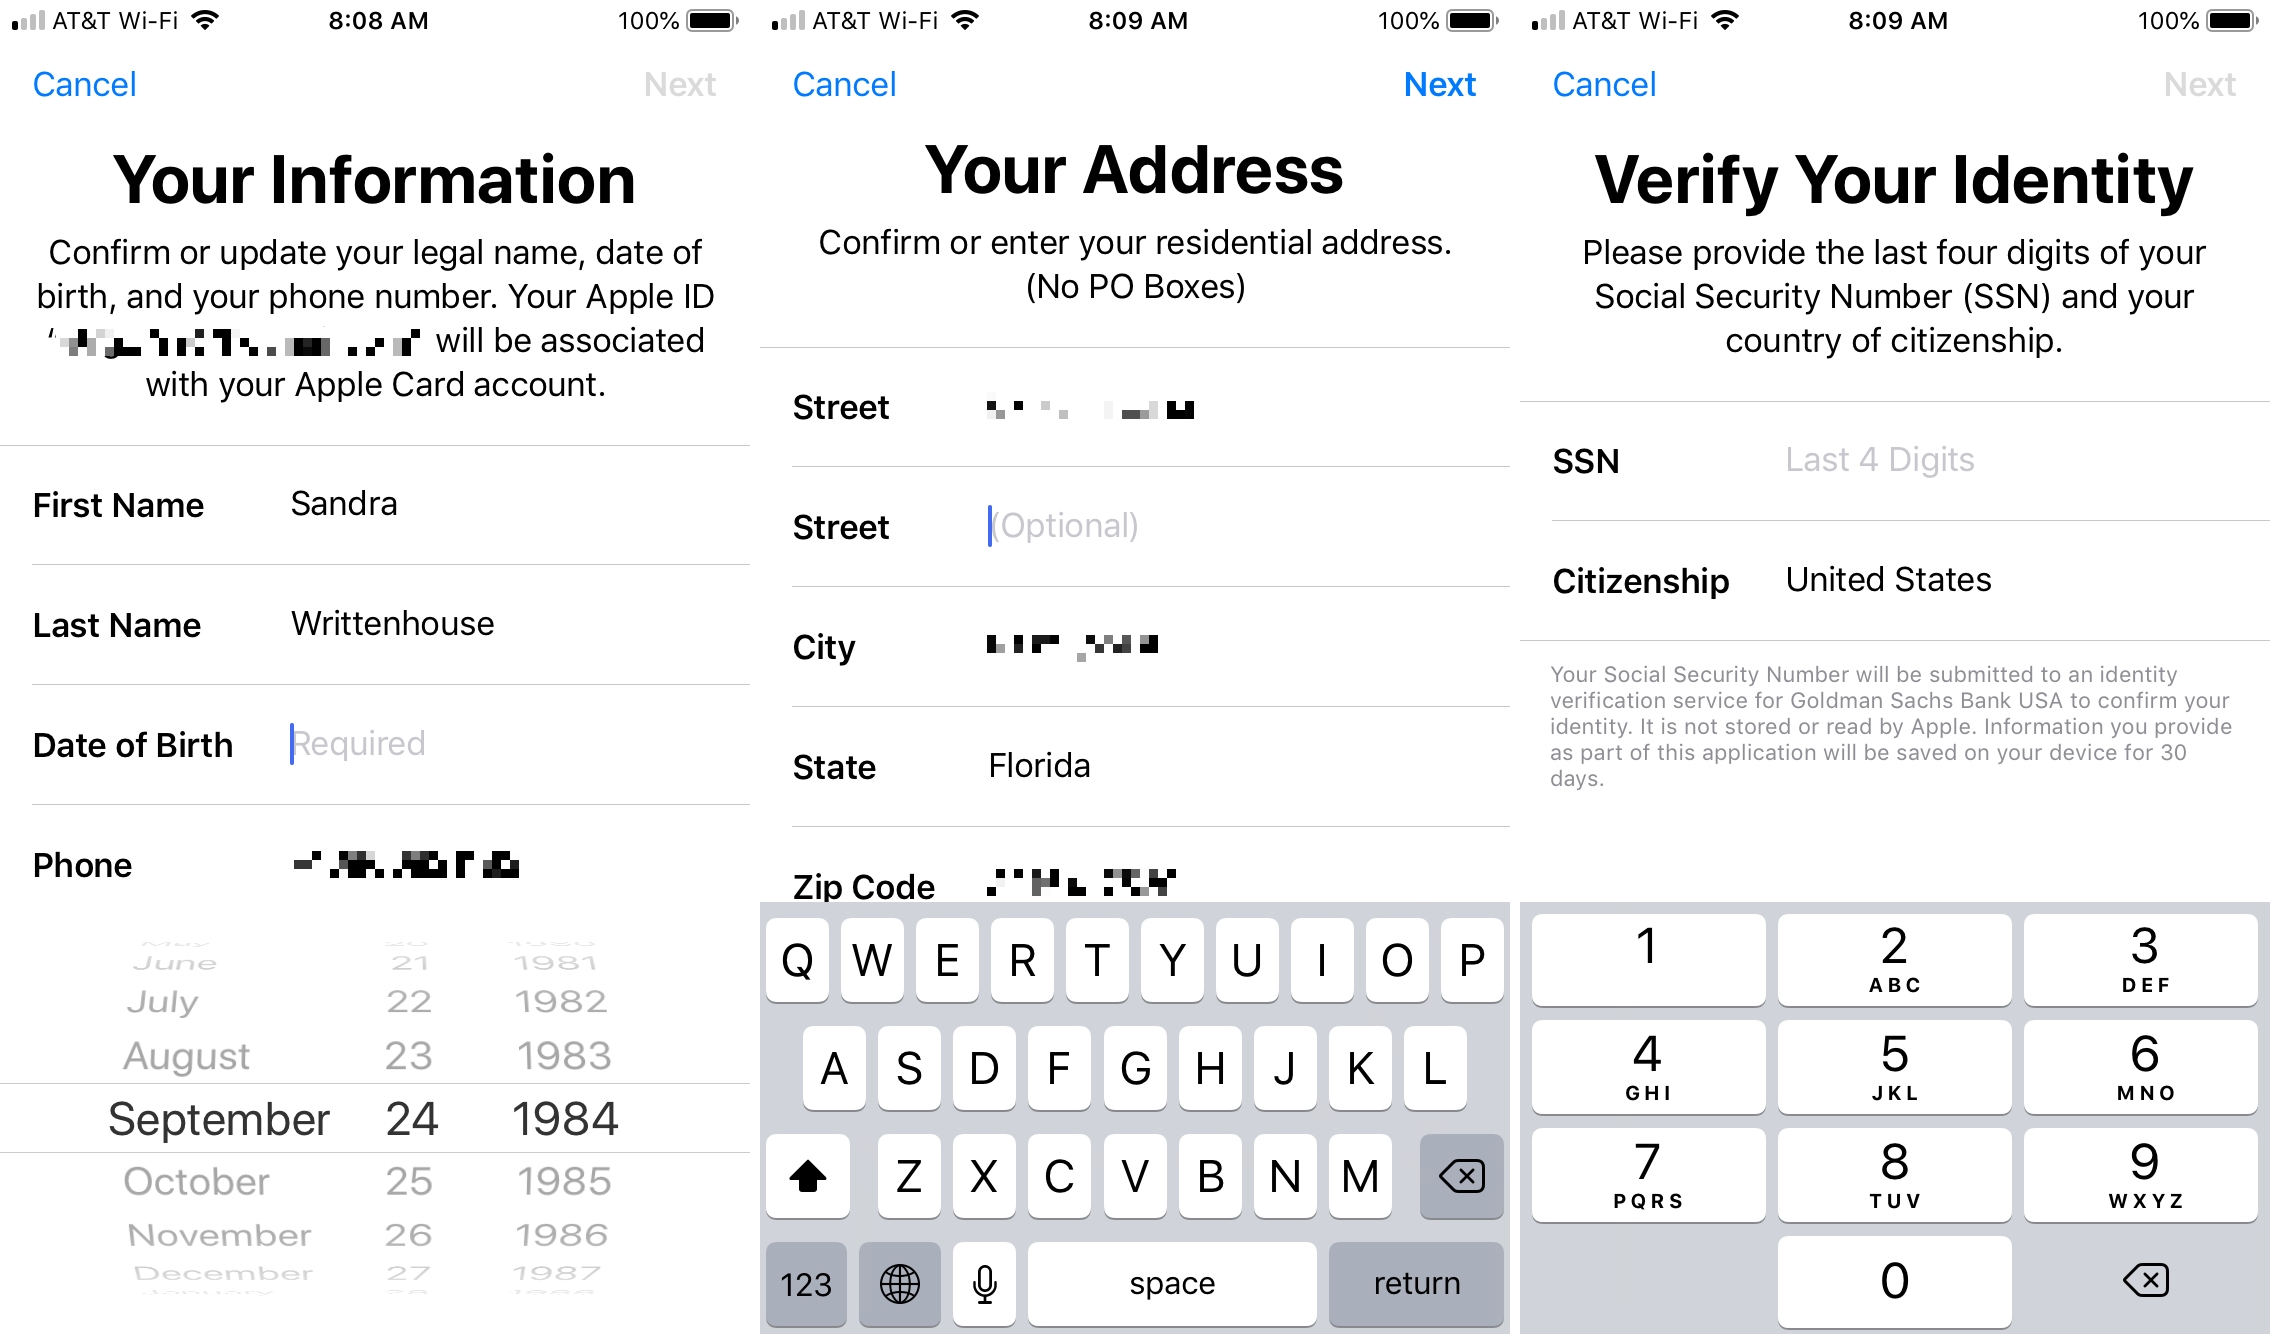
4) Verify and complete your basic information; name, birthdate, and phone number, and tap Next.
5) Verify and complete your residential address and tap Next.
6) Verify your country of residence, enter the last four digits of your social security number, and tap Next.
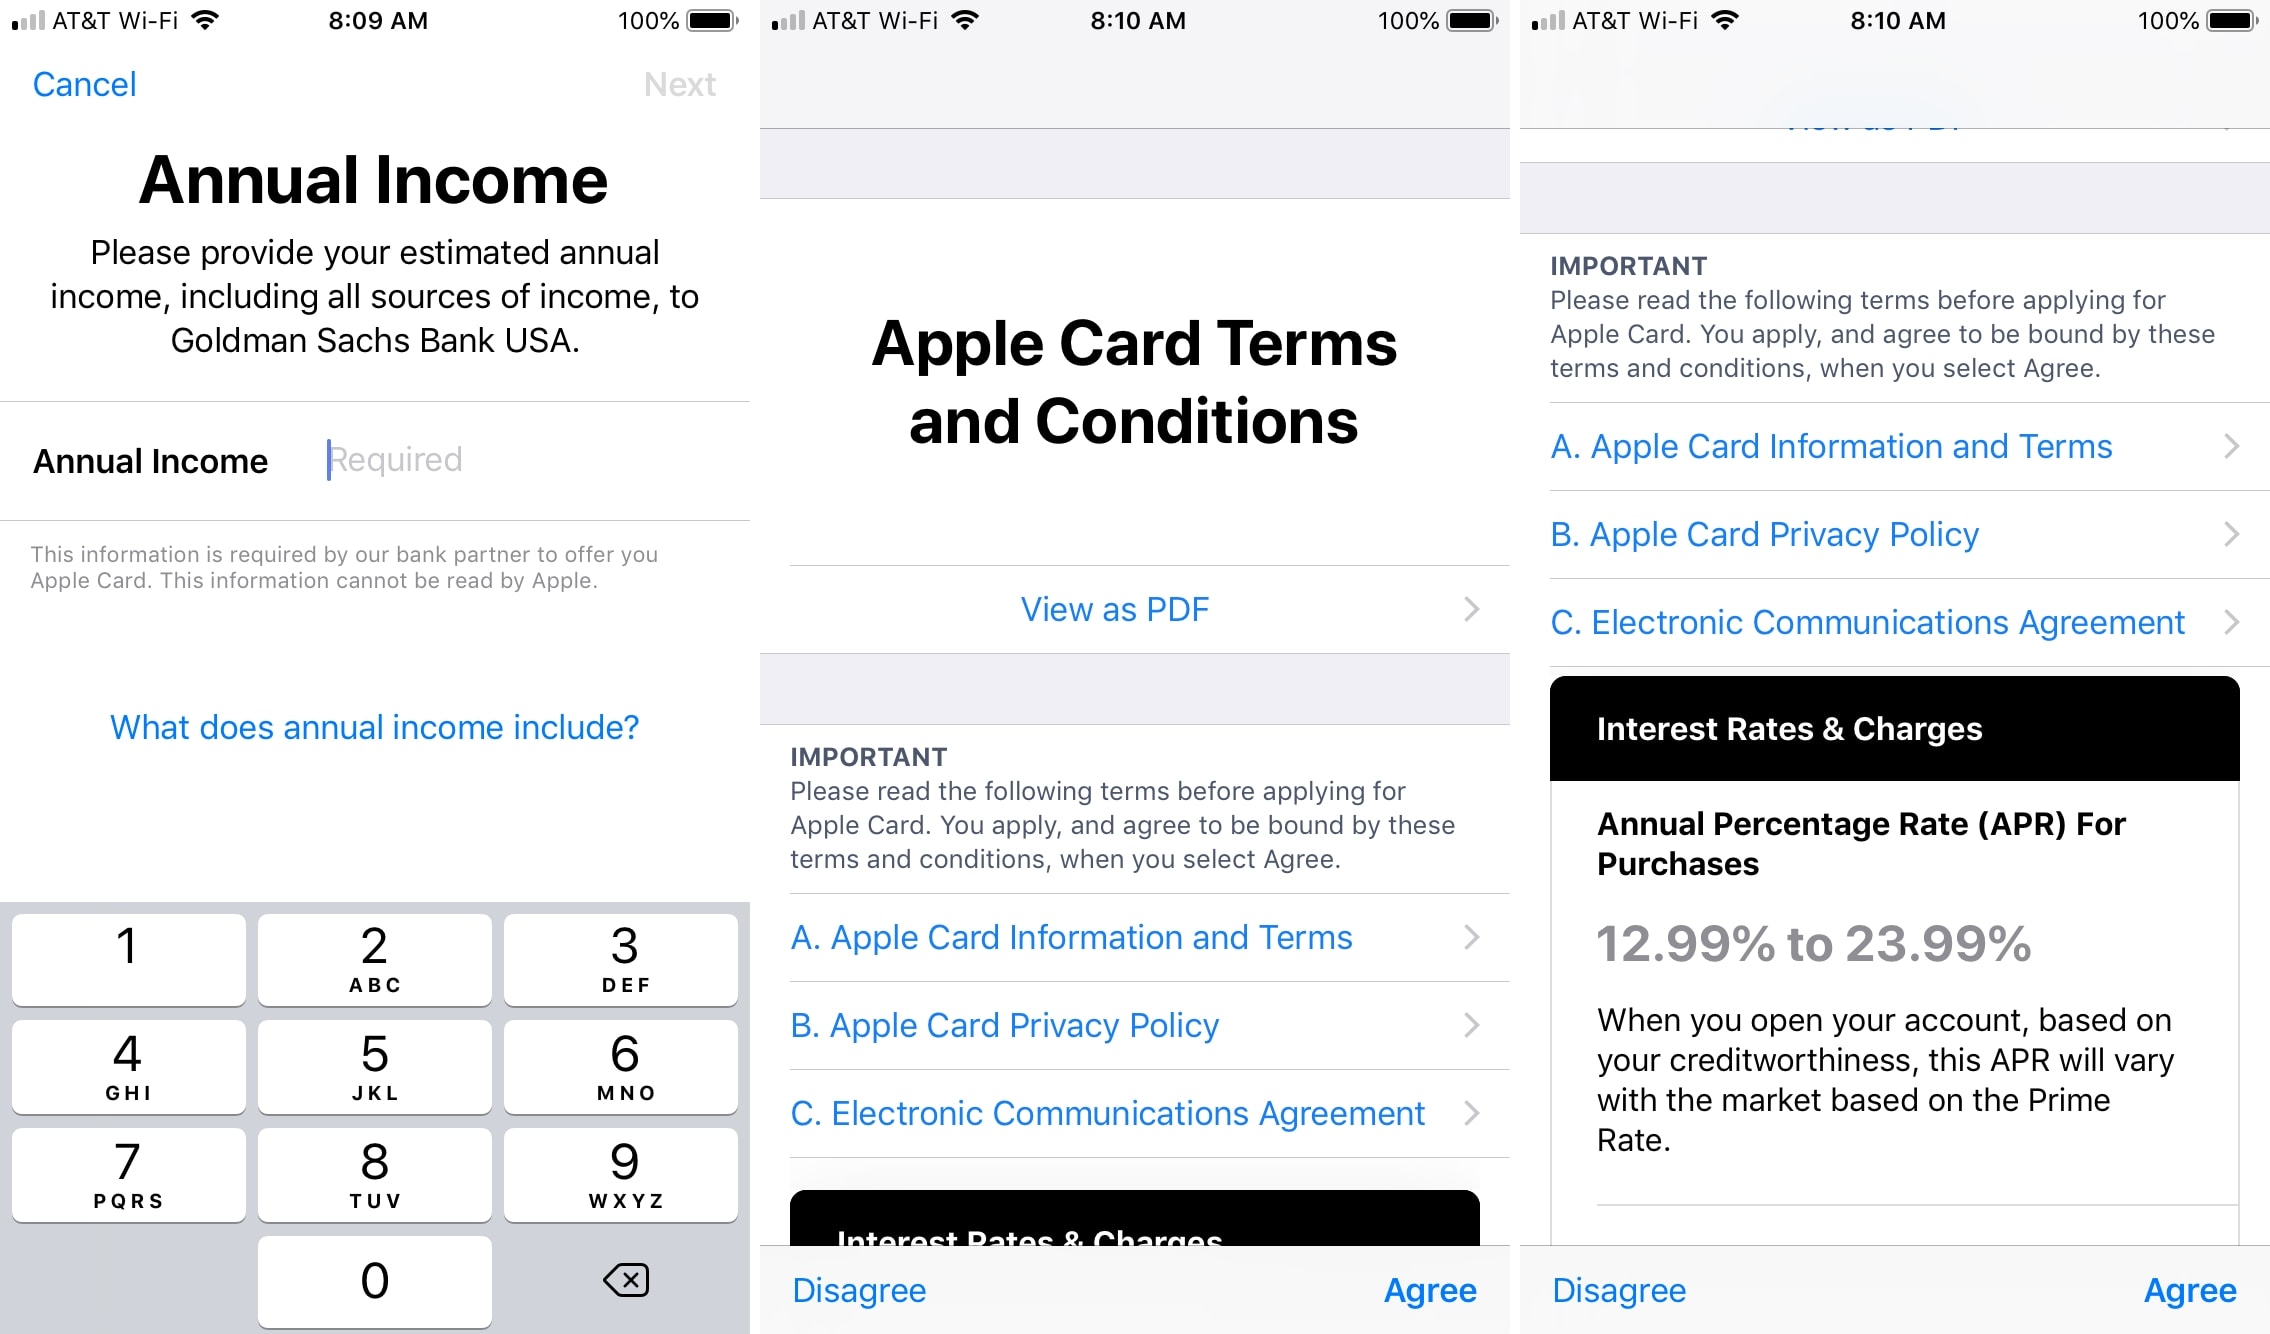
7) Enter your annual household income and tap Next. You can tap the What does annual household income include? link for more information if needed.
8) Read the Apple Card Terms and Conditions and tap Agree.
9) If prompted to verify your identity, grab your driver’s license or state-issued photo ID and tap Continue. Position your screen over the front of your card, tap Continue, let it capture the back of your card, and tap Continue again.
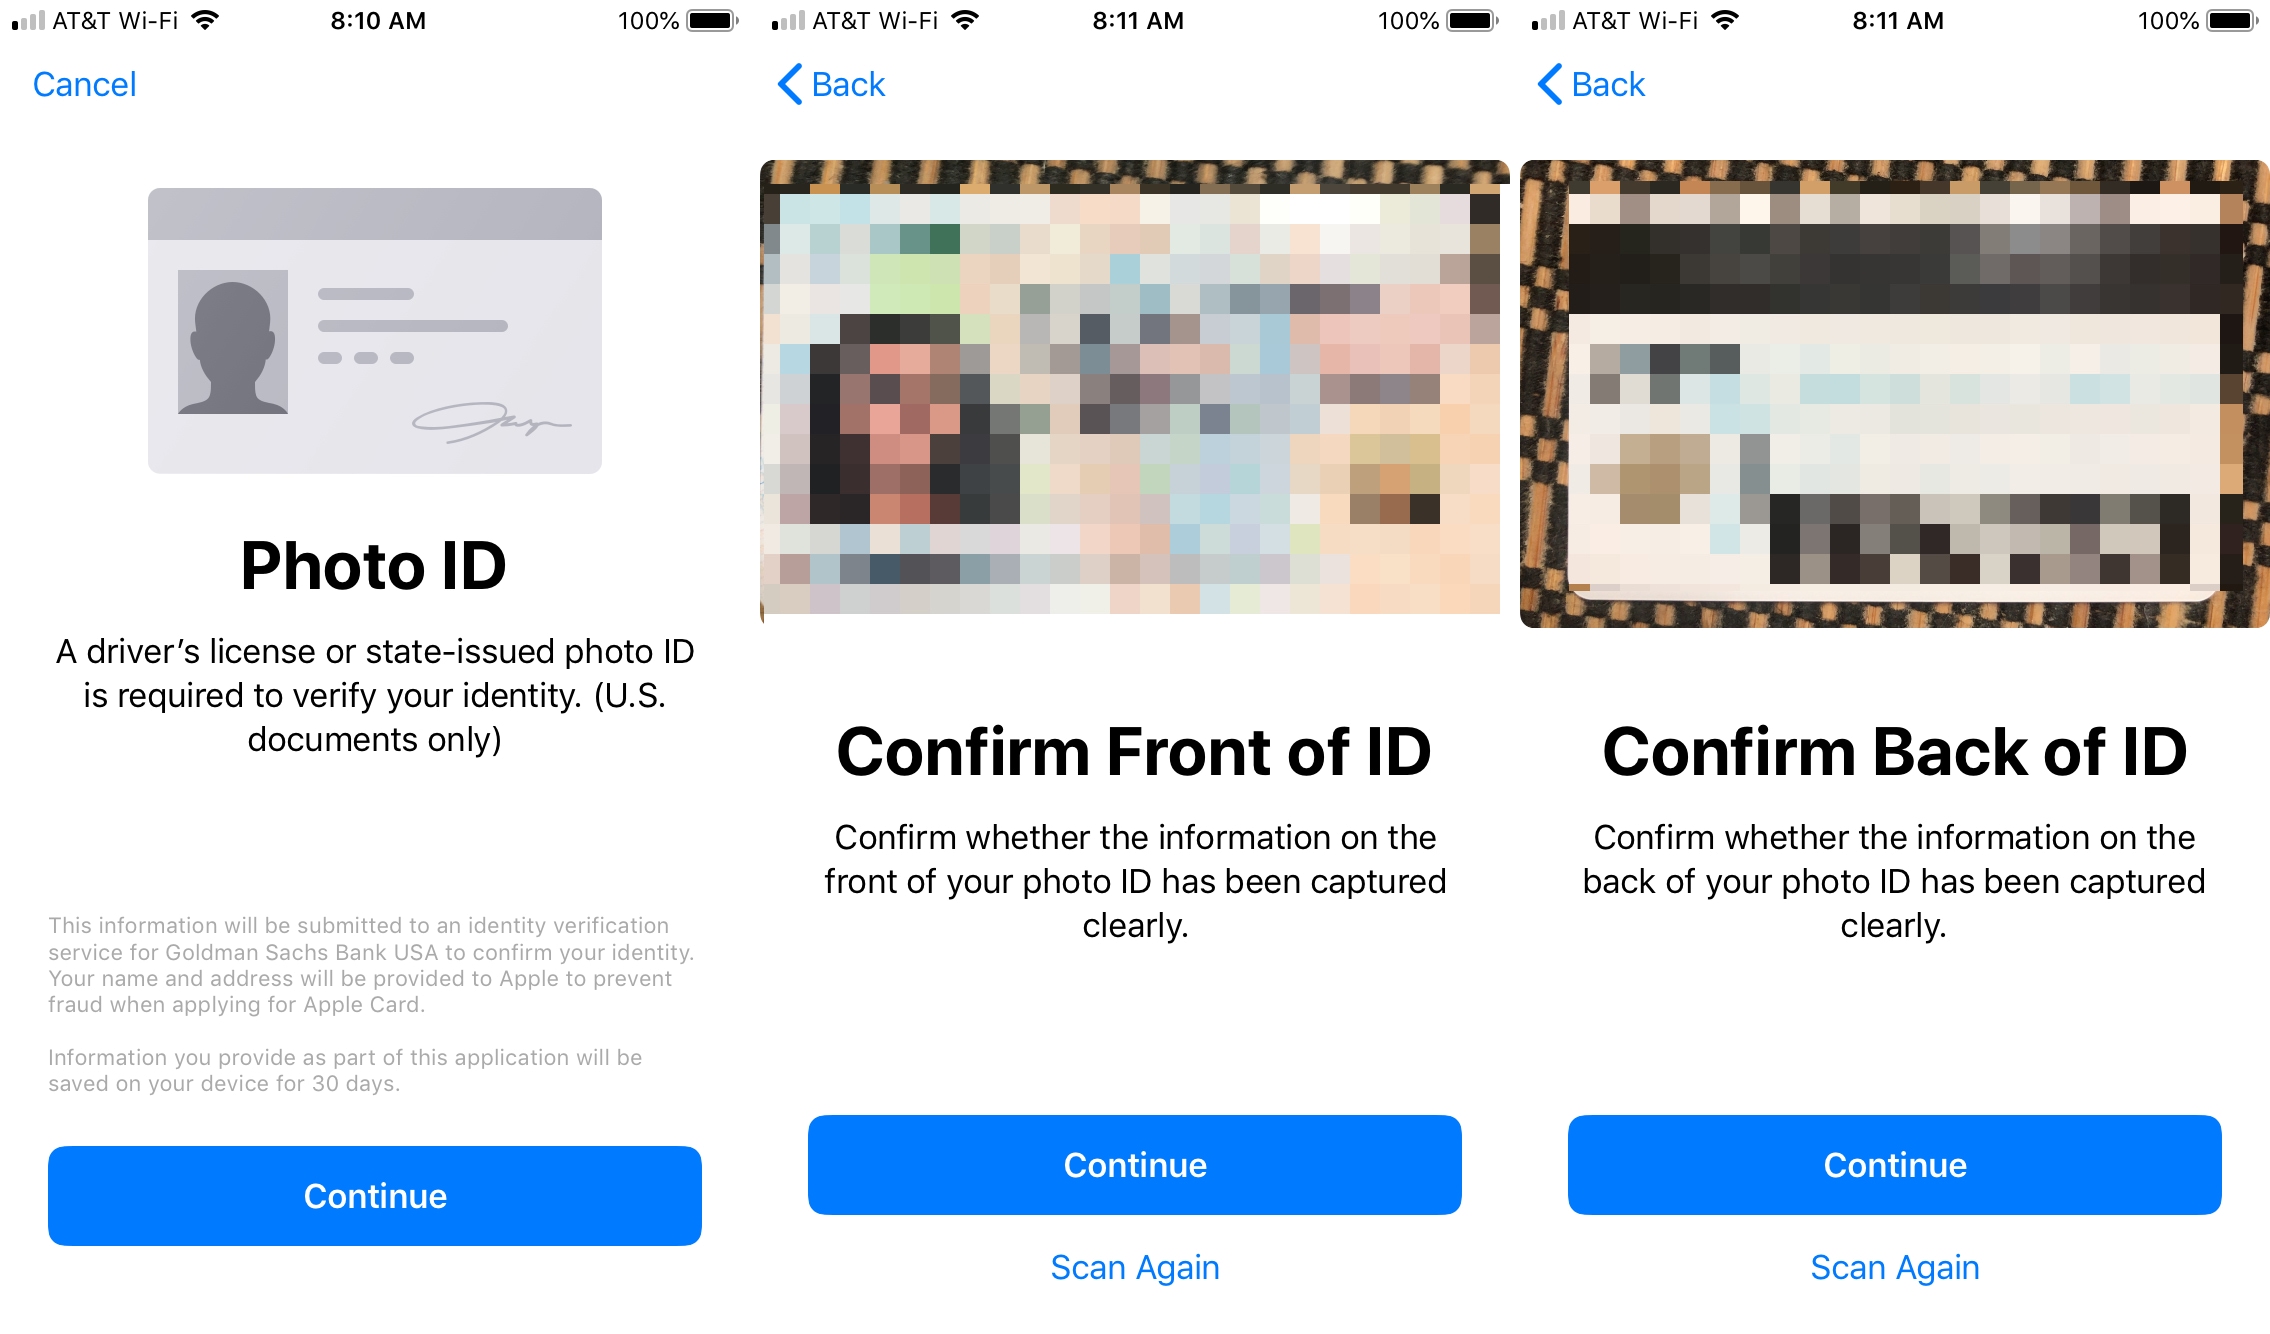
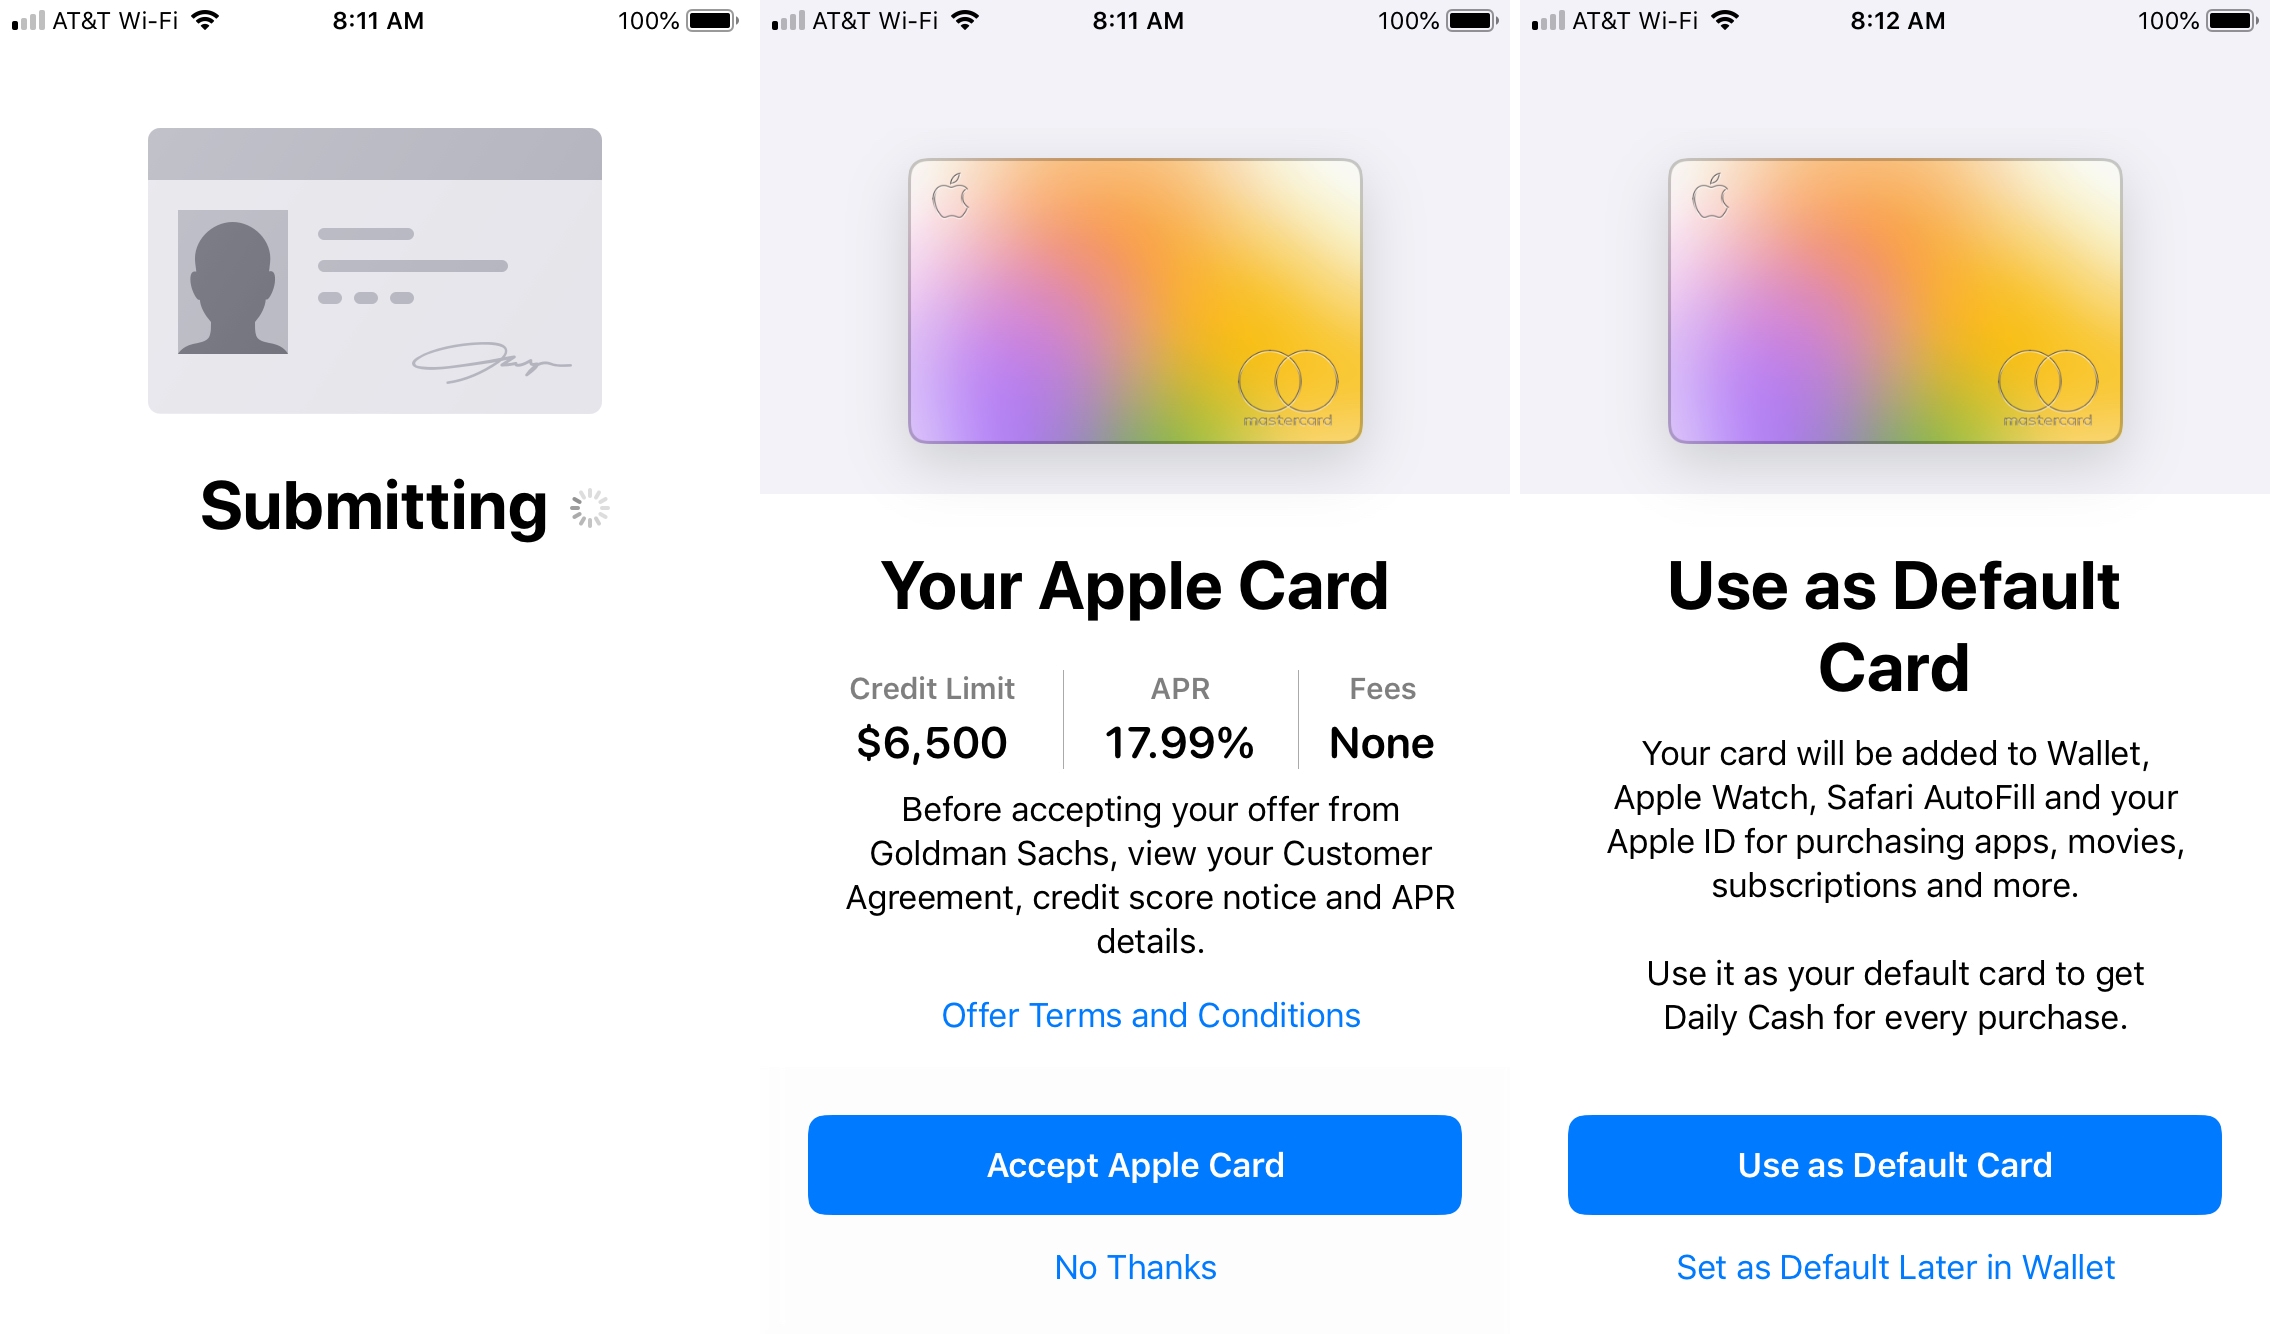
10) After a moment, you will receive a view of the Apple Card with your credit limit and APR. If you agree to these and want the card, tap Accept Apple Card.
11) You can choose to make that card your default for Apple Pay or set that up later. Make your choice and then when you see the Card Added screen, tap Continue.
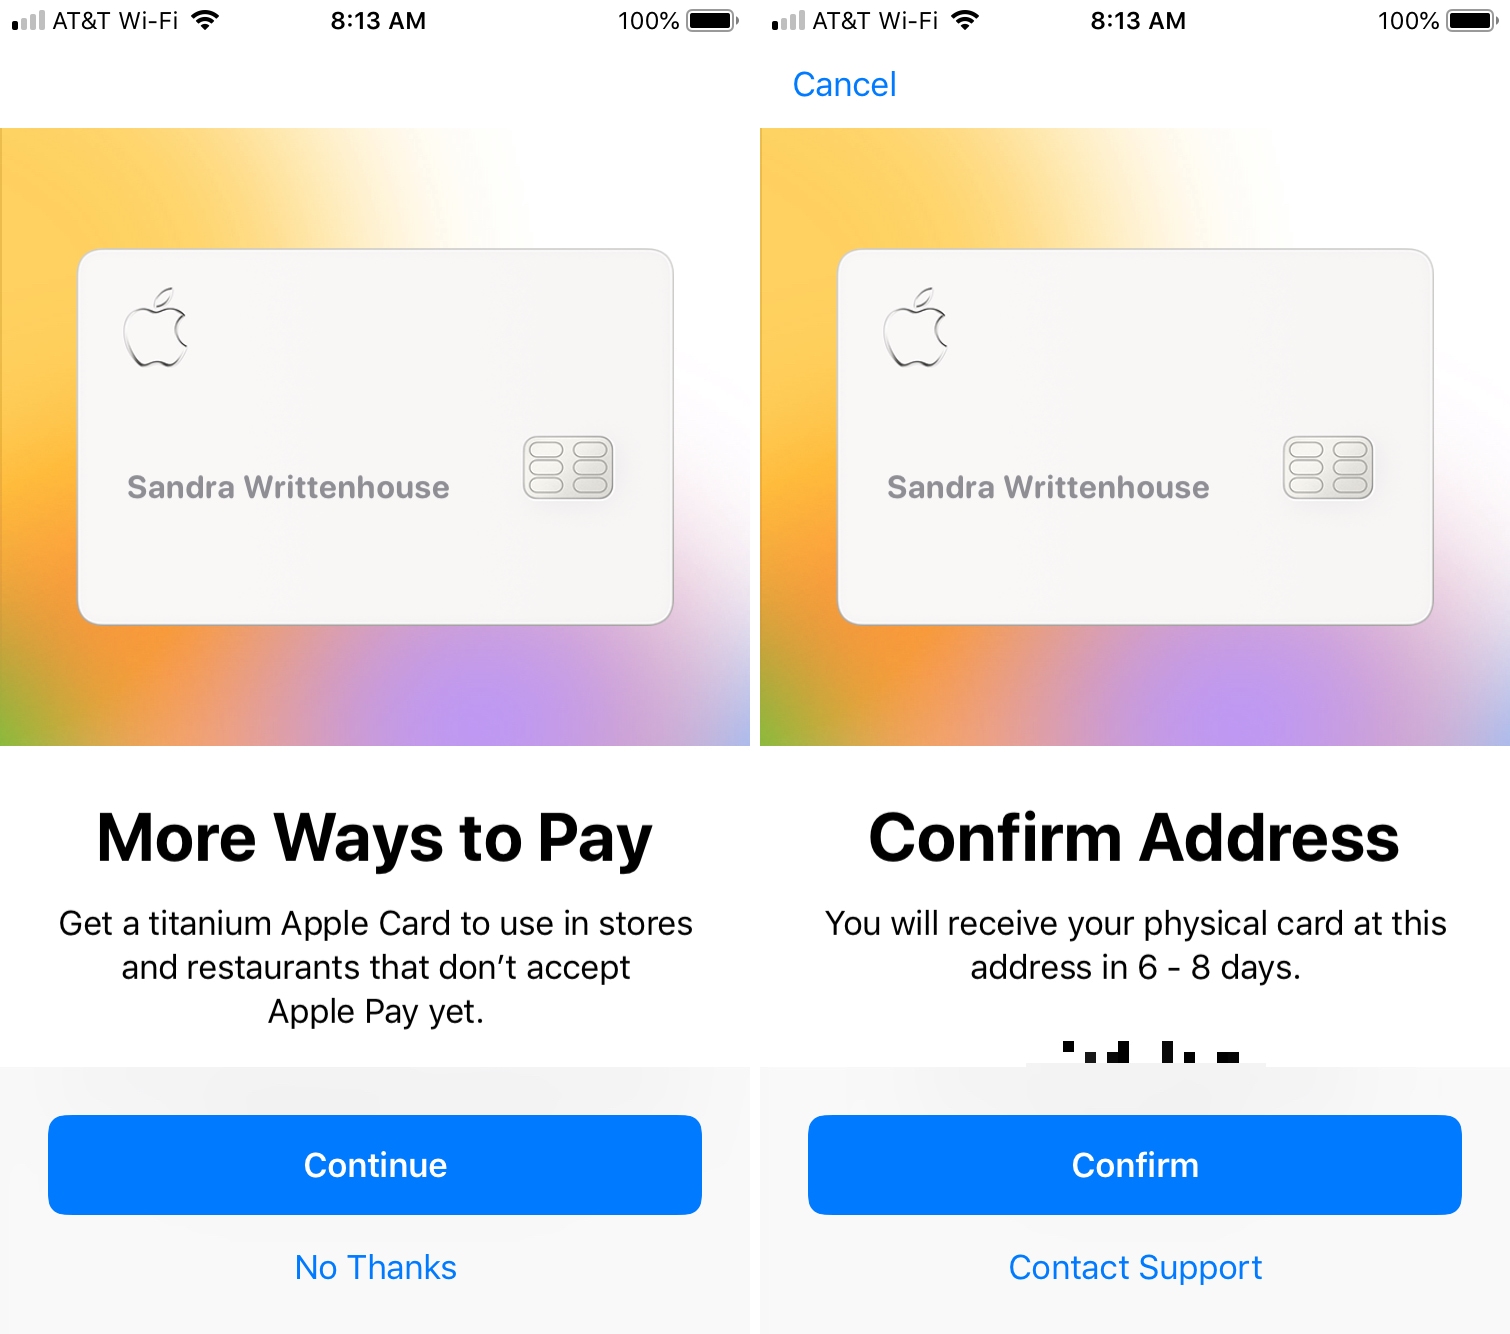
12) You will then see an option to receive a physical card that you can use in stores and restaurants. Tap Continue if you’d like the physical card or No Thanks. If you decide to get the physical card, you’ll be prompted to verify your mailing address and tap Confirm.
And there you go; you are the proud owner of an Apple Card! Spend wisely!
Wrapping it up
While there are several steps involved in the process to apply for the Apple Card, it really does only take a few minutes. Are you planning to apply? Let us know if so or if not in the comments below if you’d like to share!
And be sure to check back with iDB for upcoming articles on the Apple Card we have planned!
Source link: https://www.idownloadblog.com/2019/08/13/how-to-apply-apple-card/


Leave a Reply