How to add, delete, hide and move columns and rows in Numbers on Mac
The columns and rows in Numbers are what keep your data organized nice and neat. But there may come a time when a column or row isn’t working out as well as you’d like. Maybe you no longer need a data set in a row or perhaps you want a column moved from the right side to the left. Maybe you just need to add several columns or rows to prepare for incoming data or want to hide specific data sets.
To help you work with your spreadsheets, here’s how to add, delete, hide, and move columns and rows in Numbers on Mac.
Adding columns or rows in Numbers
Adding multiple columns or rows
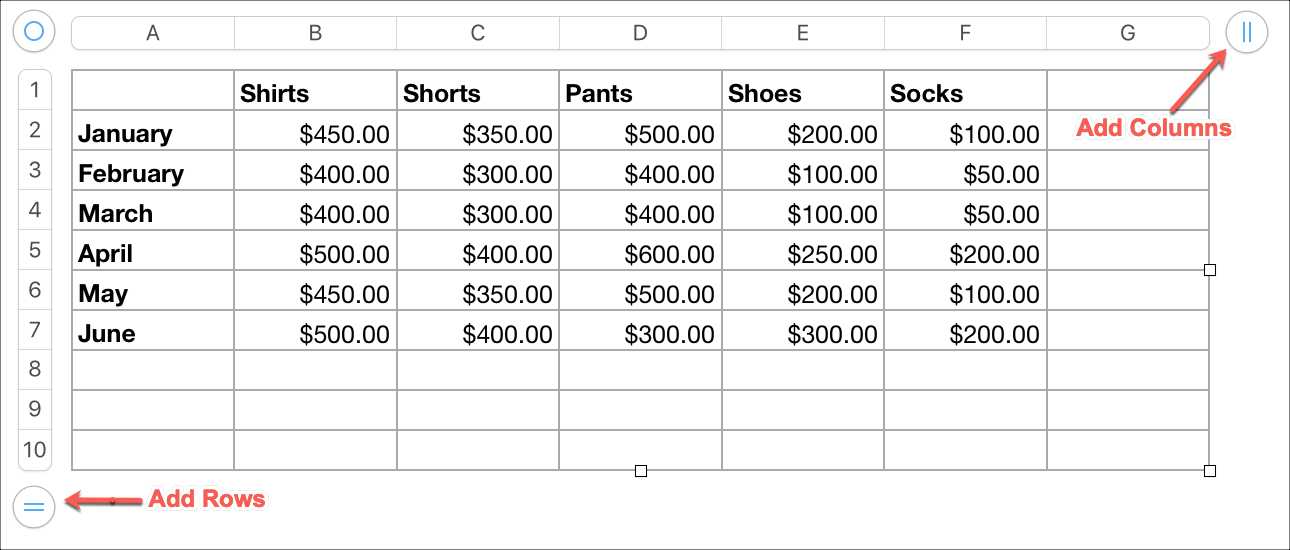
You may want to prepare for additional data and need more columns or rows in your spreadsheet. You can add multiple columns and rows by doing the following.
1) Click and hold the two-line circled symbol at the top right for columns or bottom left for rows.
2) For adding multiple columns, continue to hold the circle as you drag to the right. For adding multiple rows, continue to hold the circle as you drag down. Release when you have the number of columns or rows you need.
Adding columns and rows at the same time
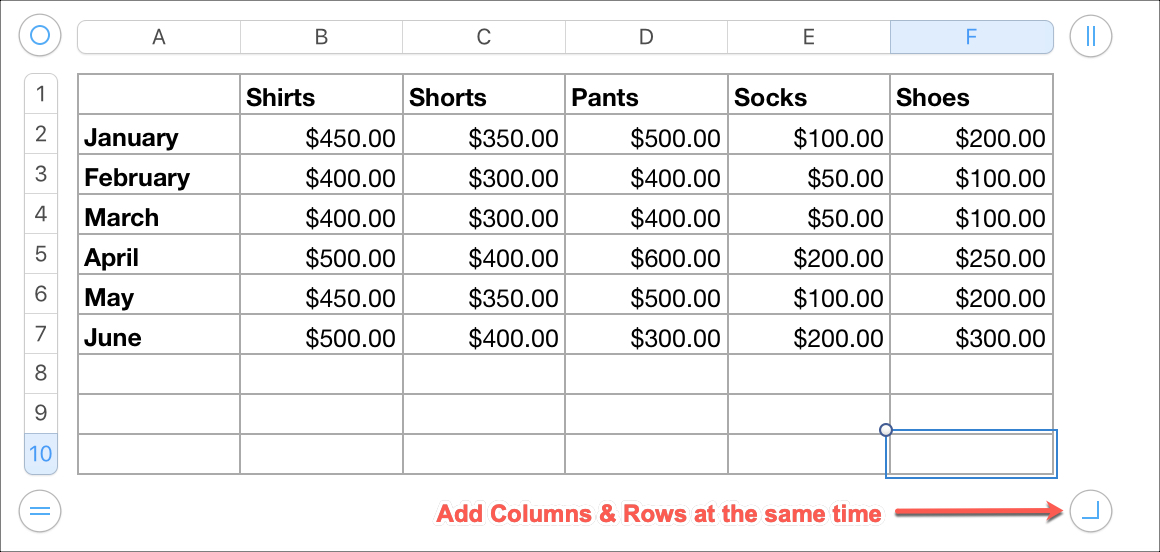
Maybe you need to expand your spreadsheet with both columns and rows. Click the small circular symbol on the bottom right of your spreadsheet. Hold and drag outward to add the number of columns and rows you need and release when you finish.
Adding single columns or rows
If you only need to add one column or row, you can use the steps above releasing when just one is added.
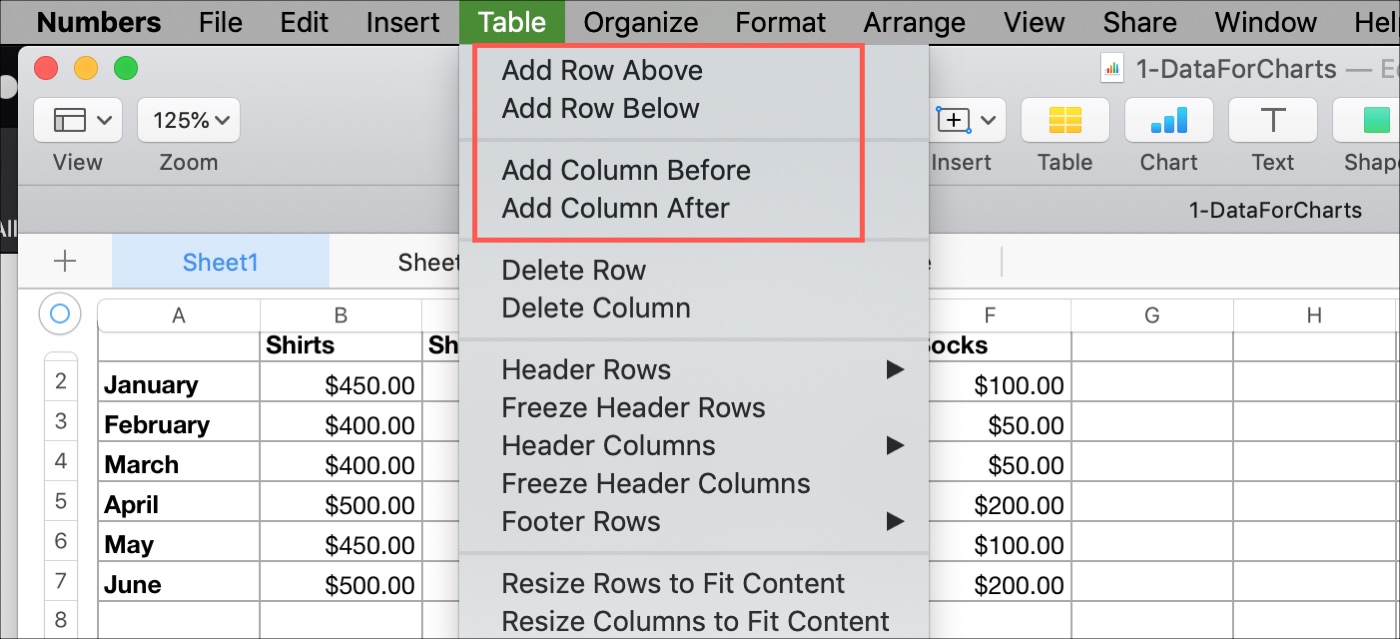
Or, you can use one of these methods to add a column (before or after) or row (above or below).
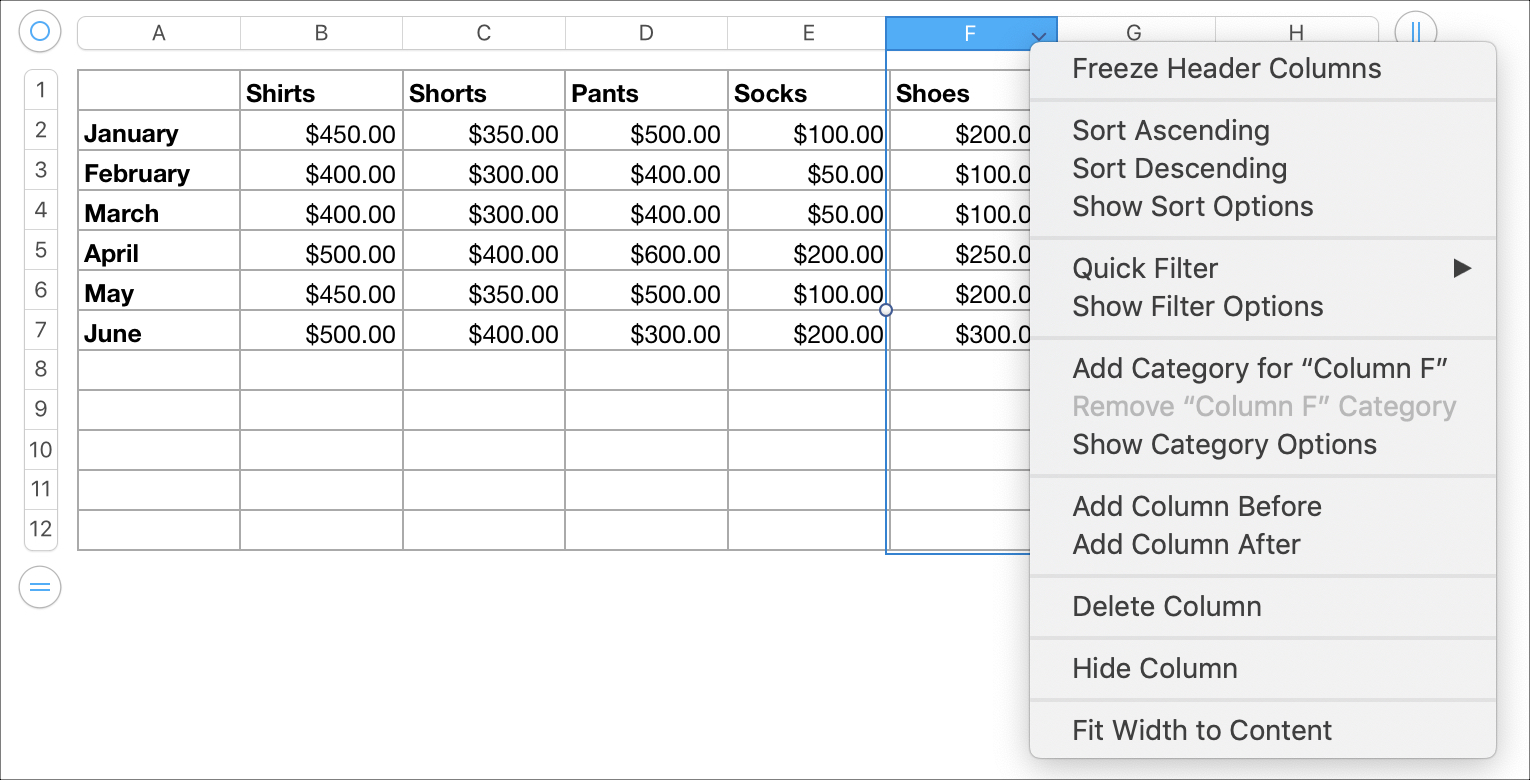
- Click the arrow button for the column or row header and select Add Column or Add Row.
- Select the column or row and then click Table > Add Column or Add Row from the menu.
- Select the column or row and either right-click or hold control and click. Then pick Add Column or Add Row.
Deleting columns or rows in Numbers
If you need to remove columns or rows from your spreadsheet, do the following.
Deleting empty multiple columns or rows
To remove several empty columns or rows at one time, you can do this similar to adding them with the symbols shown in the screenshots above.
1) Click and hold the two-line circled symbol at the top right for columns or bottom left for rows.
2) For deleting multiple empty columns, continue to hold the circle as you drag to the left. For deleting empty multiple rows, continue to hold the circle as you drag up. Release when you have removed the number of columns or rows you need.
Deleting empty columns and rows at the same time
Maybe you need to remove both empty columns and rows. Click the small circular symbol on the bottom right of your spreadsheet. Hold and drag inward to delete the number of columns and rows you need and release when you finish.
Deleting single columns or rows
If you only need to delete a single column or row without data, you can use the steps above releasing when just one is removed.
Alternatively, or if the column or row contains data, use one of these methods to delete it.
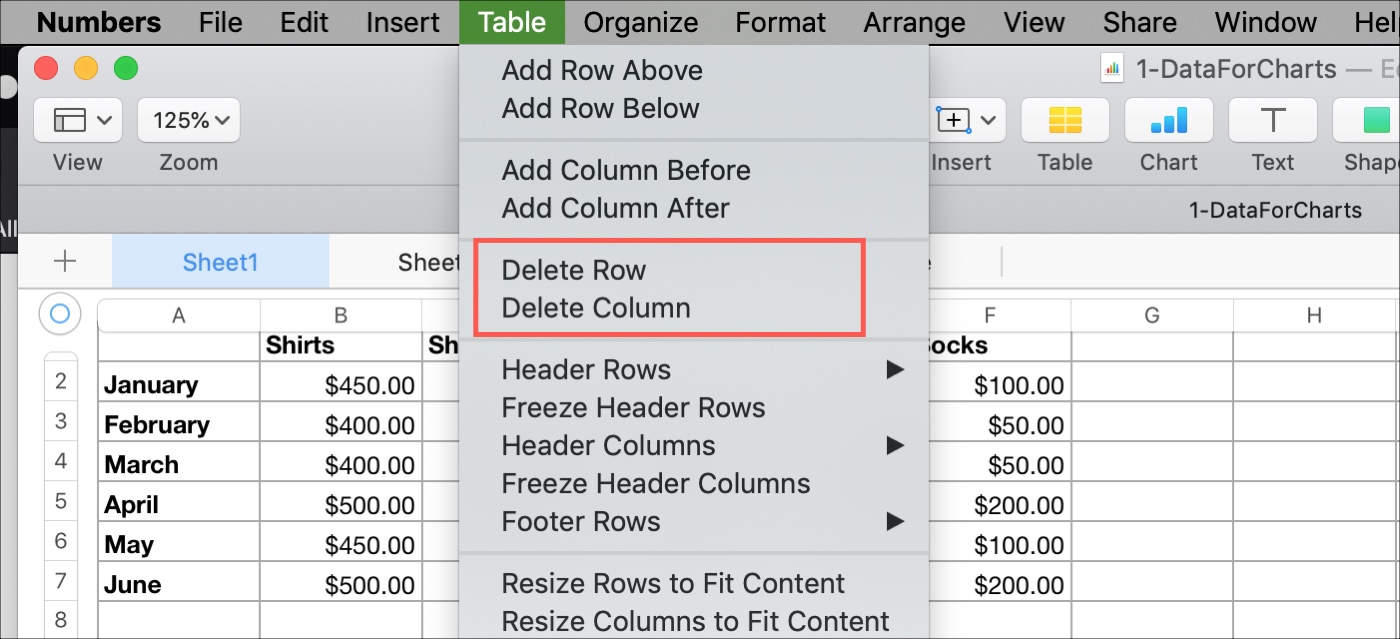
- Click the arrow button for the column or row header and select Delete Column or Delete Row.
- Select the column or row and then click Table > Delete Column or Delete Row from the menu.
- Select the column or row and either right-click or hold control and click. Then pick Delete Column or Delete Row.
Hiding columns or rows in Numbers
You can quickly hide single or multiple columns or rows in Numbers in a few different ways.
- Click the arrow button for the column or row header and select Hide Column or Hide Row.
- Select the column or row and then click Table > Hide Column or Hide Row from the menu.
- Select the column or row and either right-click or hold control and click. Then pick Hide Column or Hide Row.
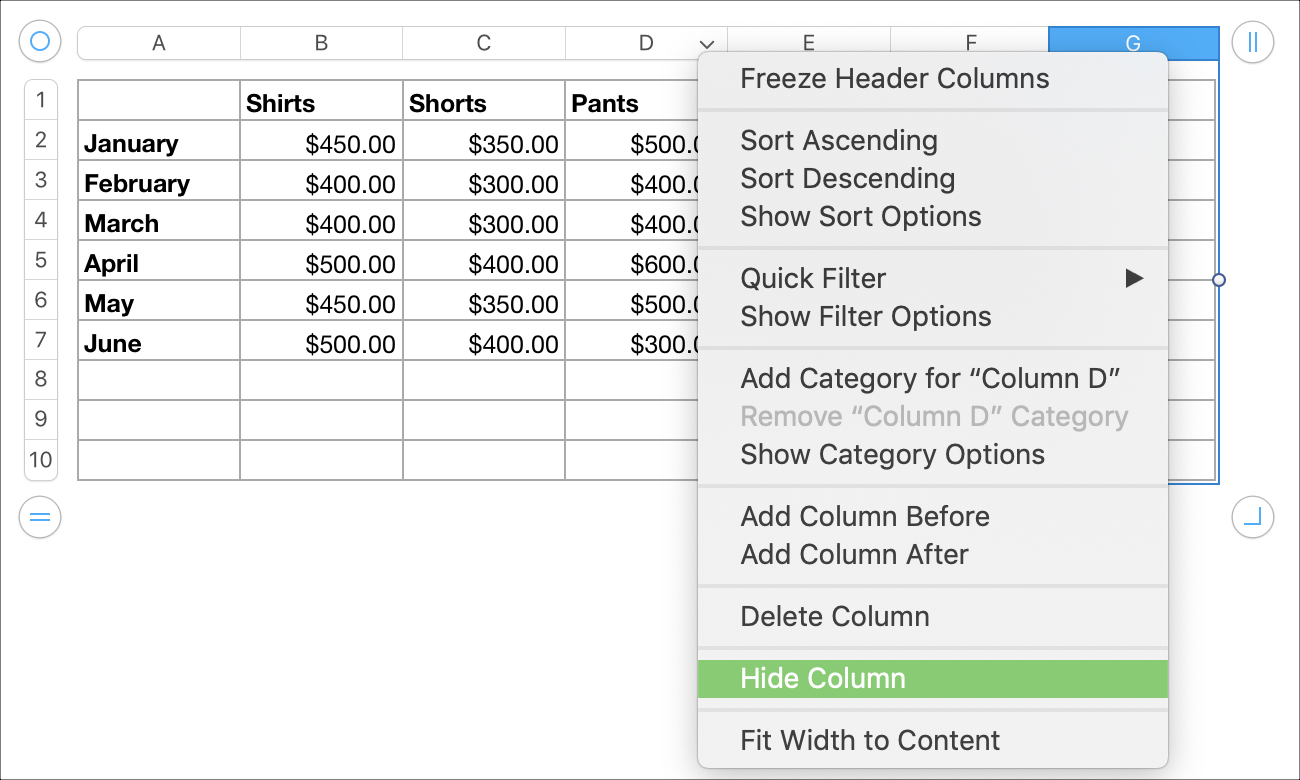
You can use the same methods for multiple columns or rows by just selecting the ones you want to hide and doing one of the above.
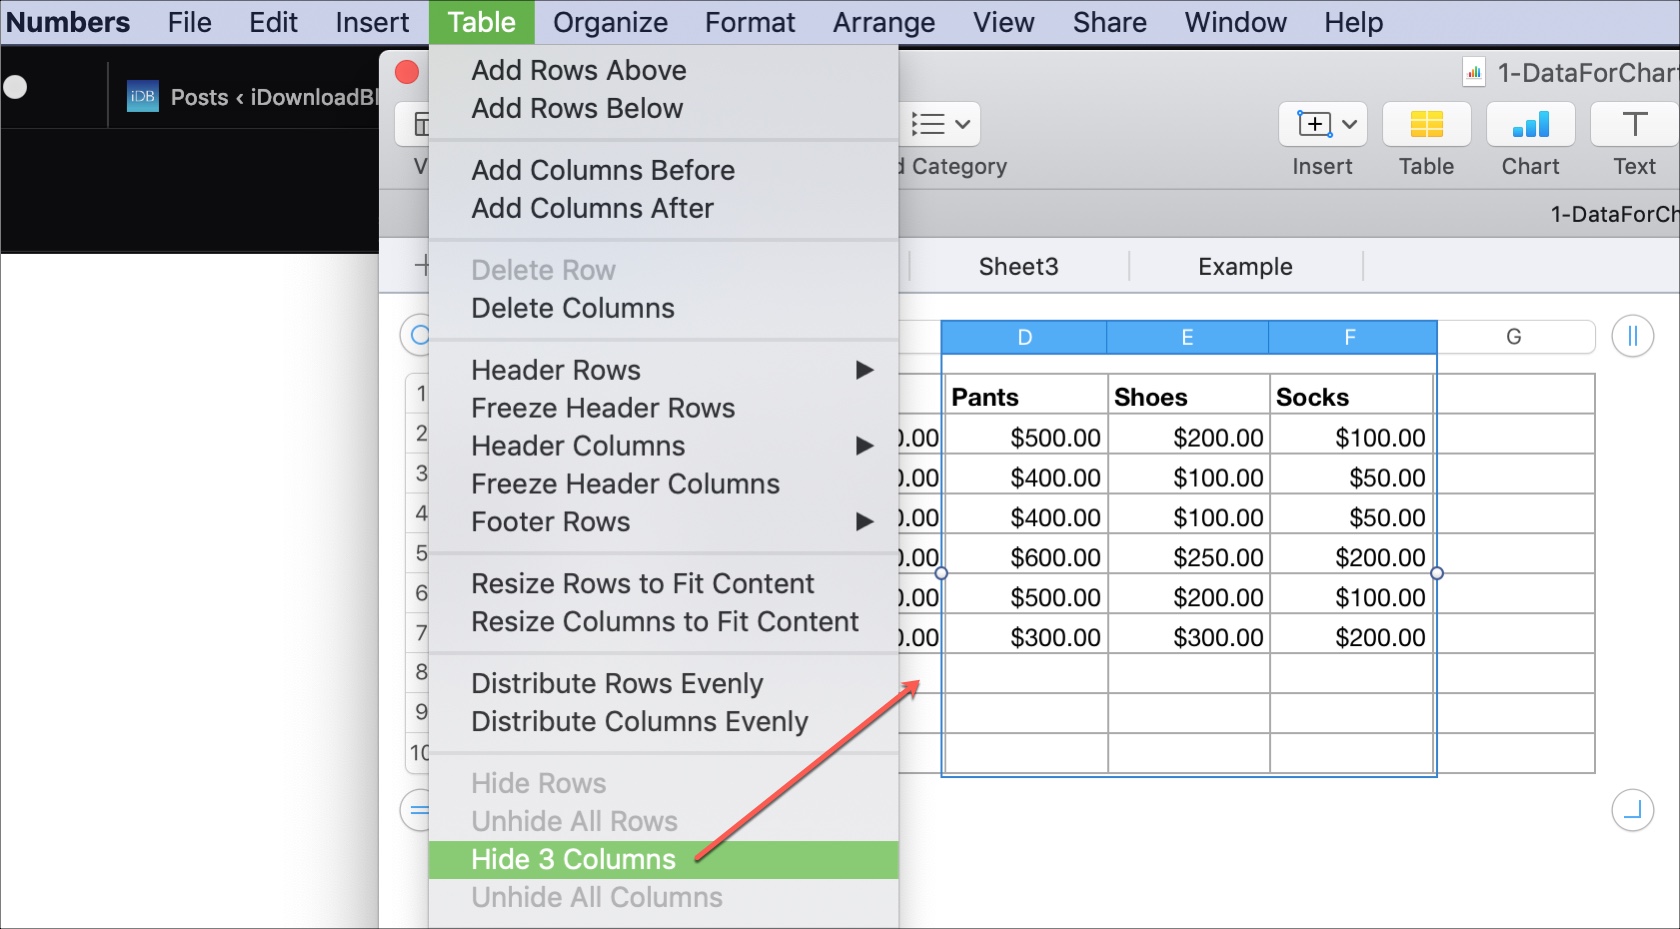
To unhide the columns and rows later, follow one of the methods above and choose Unhide.
Moving columns or rows in Numbers
If you need to move a column or row to another spot in the spreadsheet, this is also simple.
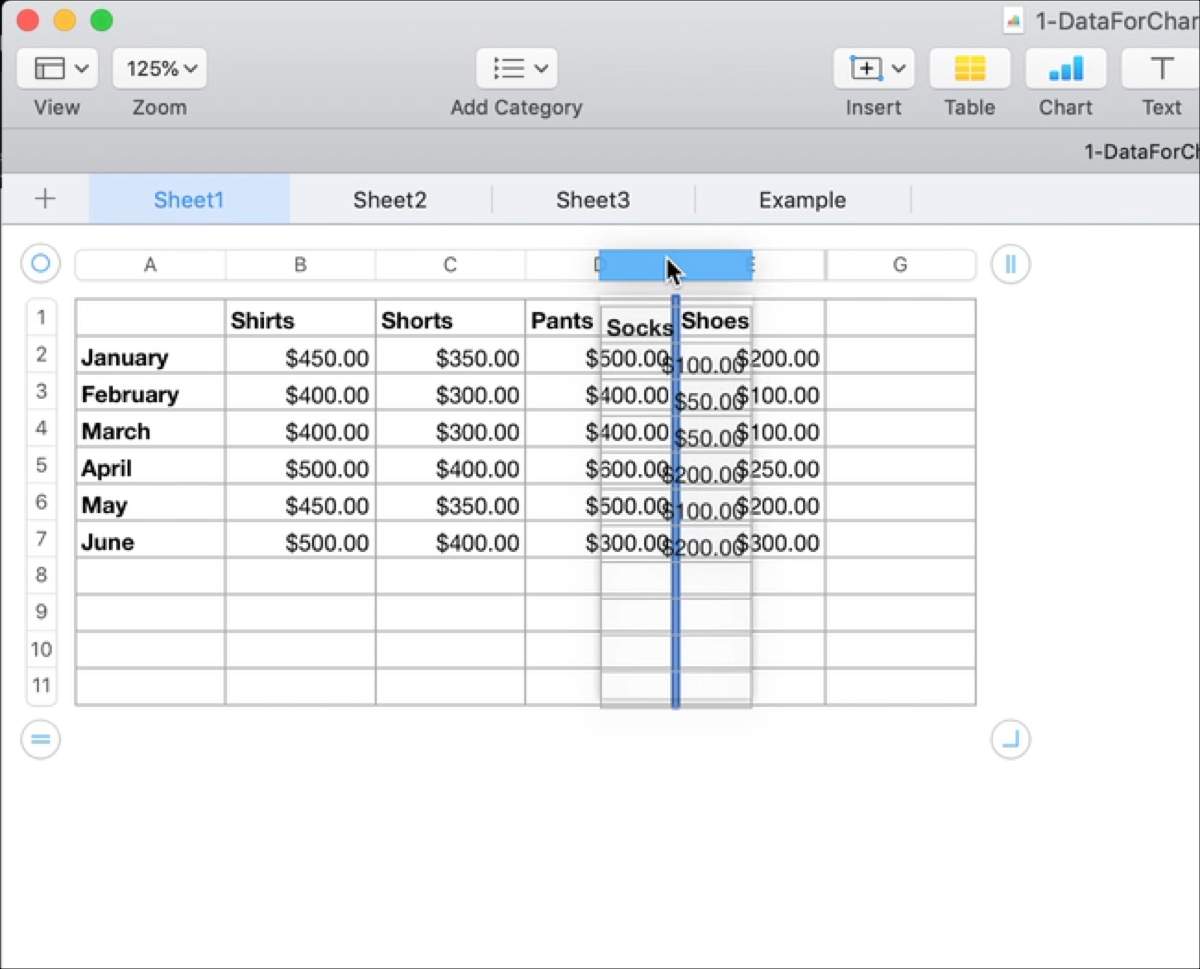
1) Click and hold the column or row.
2) Drag it to its new location in the spreadsheet.
3) When you see the dark line displaying where the column or row can go, release to drop it there.
Wrapping it up
As you can see, there are multiple ways to add, delete, and hide rows in Numbers on Mac. Plus, moving them is easy too. Do you have the need to manipulate the columns and rows in your Numbers spreadsheets often?
For other Numbers how-tos, check out how to freeze columns and rows or transpose columns and rows.
Source link: https://www.idownloadblog.com/2019/03/15/manage-columns-and-rows-in-numbers-mac/


Leave a Reply