How to create and use Spark email templates on Mac and iPhone
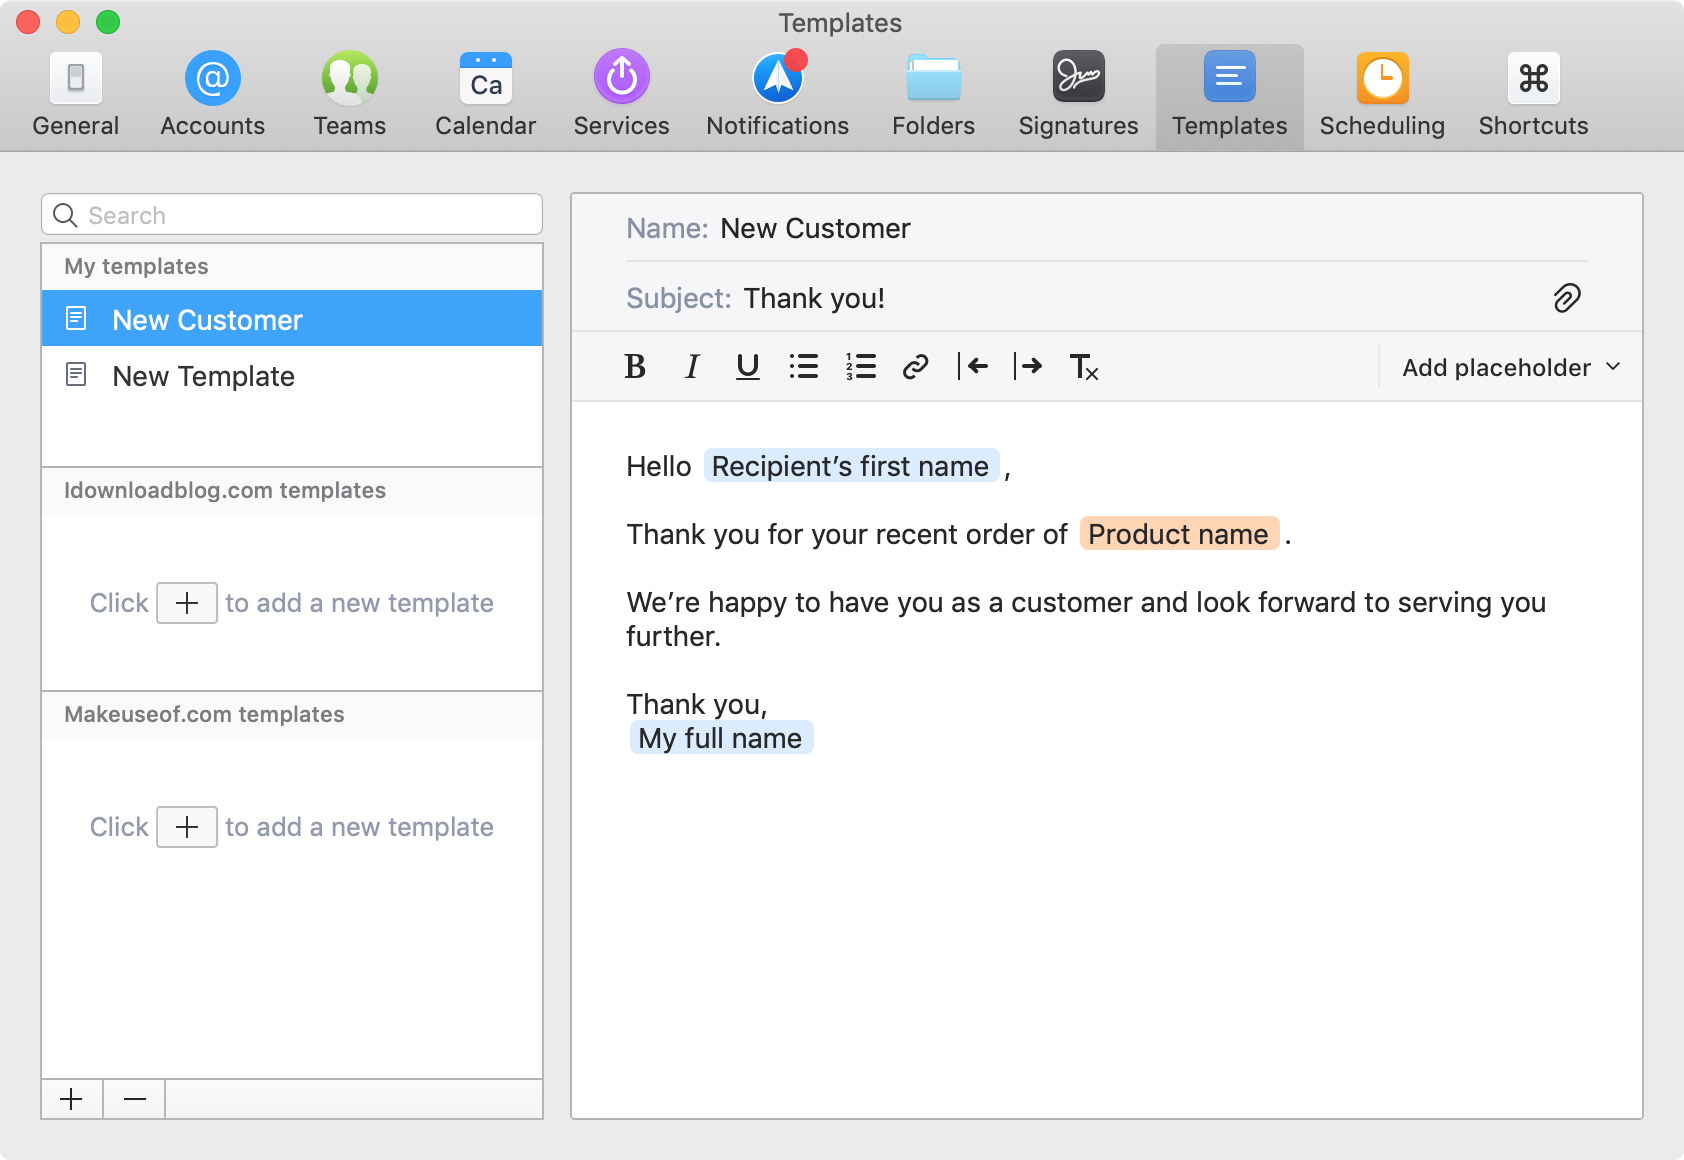
The Spark email app by Readdle has a lot of great features that users find helpful on both iOS and Mac. And, the company recently added one more to the list; email templates. This terrific addition to the app makes composing emails that you create on regular basis much simpler.
This tutorial shows you what’s available and how to use Spark email templates.
Spark email template basics
Before getting into how to create and use templates, here are some basics to keep in mind.
- The email template feature does not provide built-in options for you to select from, but rather gives you the ability to create your own templates that you can reuse.
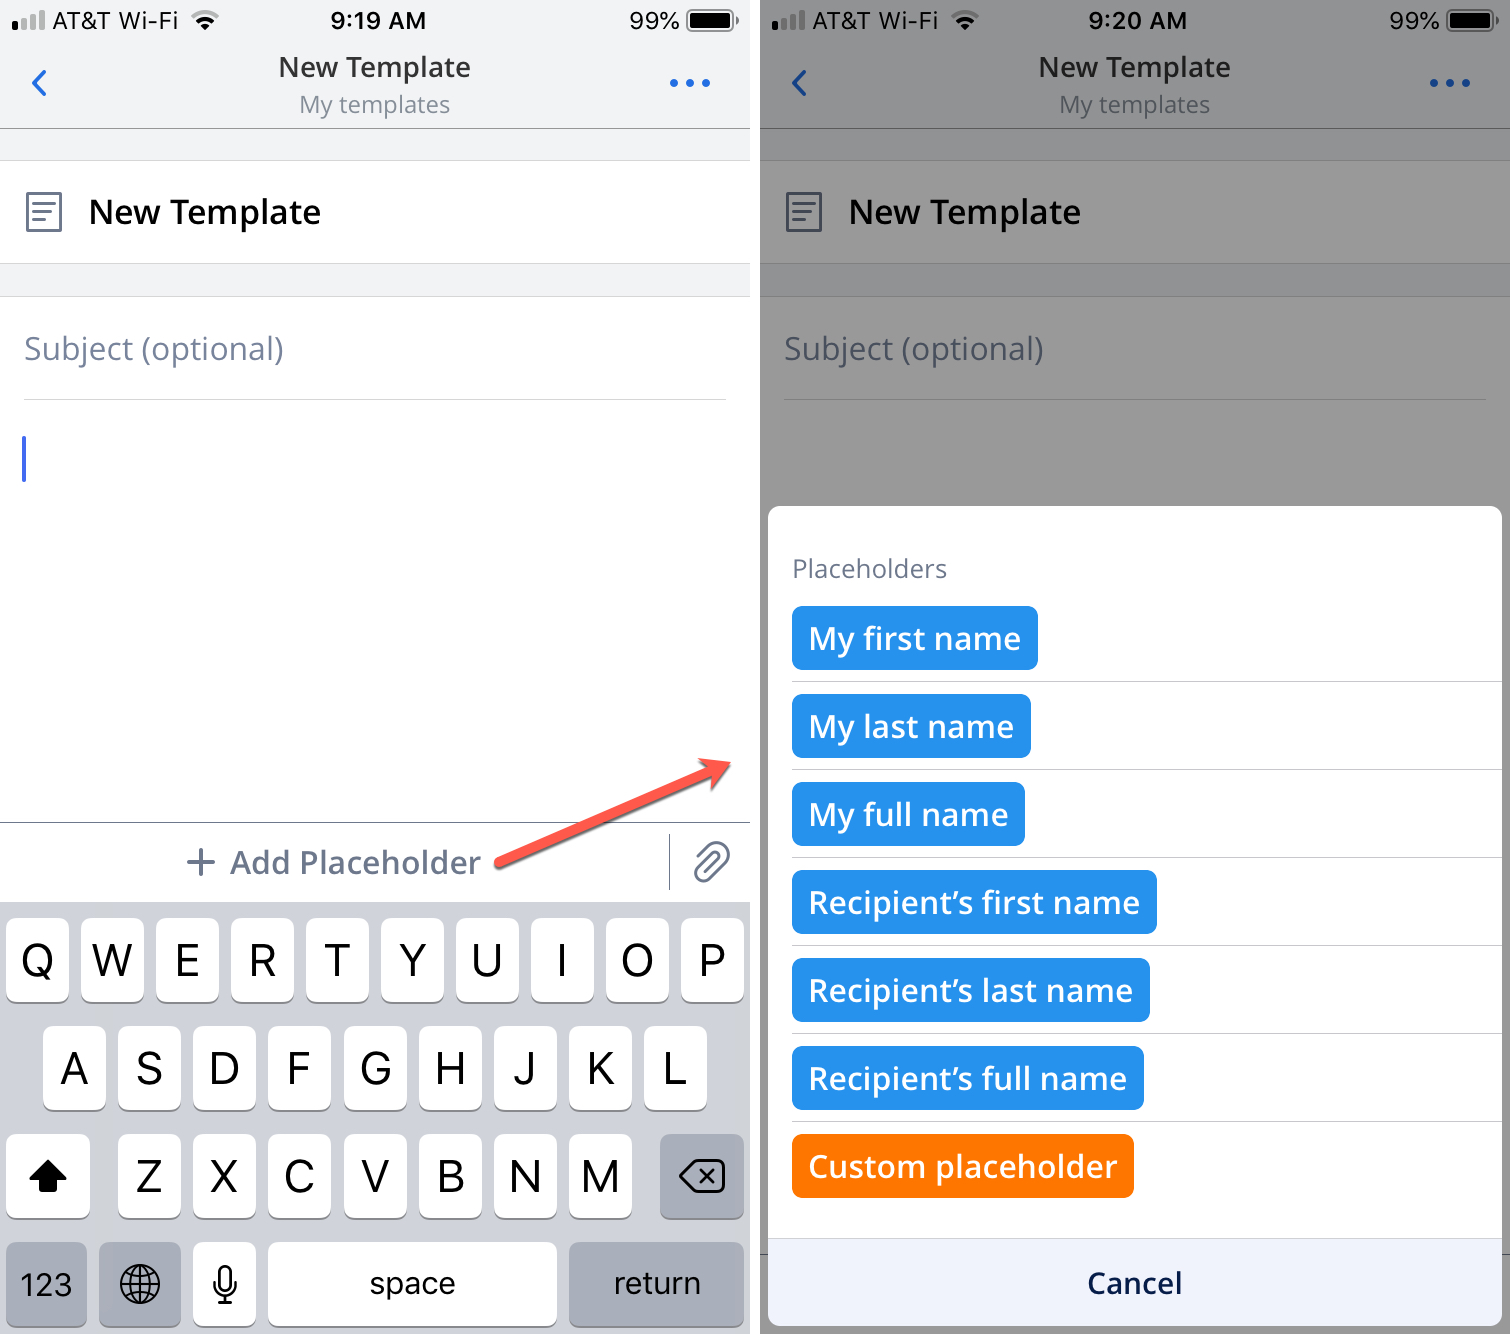
- The blue placeholders you’ll use are presets that Spark will populate for you. These include the recipient’s first, last, and full name as well as your first, last, and full name.
- The orange placeholders are custom placeholders for you to populate before you send the email. You can name them what you want so that you know what information goes inside. Think of them as reminders for what you need to add to the message.
- You can create separate templates for each email account that you use for Spark.
- You can format email templates just like regular email messages with fonts, lists, indents, and attachments.
Creating a Spark email template on Mac
Now that you have the basics, let’s create a template! When you open Spark, you can access the templates two different ways.
- Click Spark from the menu bar, select Preferences, choose the Templates.
- Click the Compose button to create an email, select the Templates button at the bottom, and choose Manage.
Both actions will take you to the same Templates window. Once there, you can choose New Template under My Templates. Or, you can click the plus sign in a specific account to create the template there.
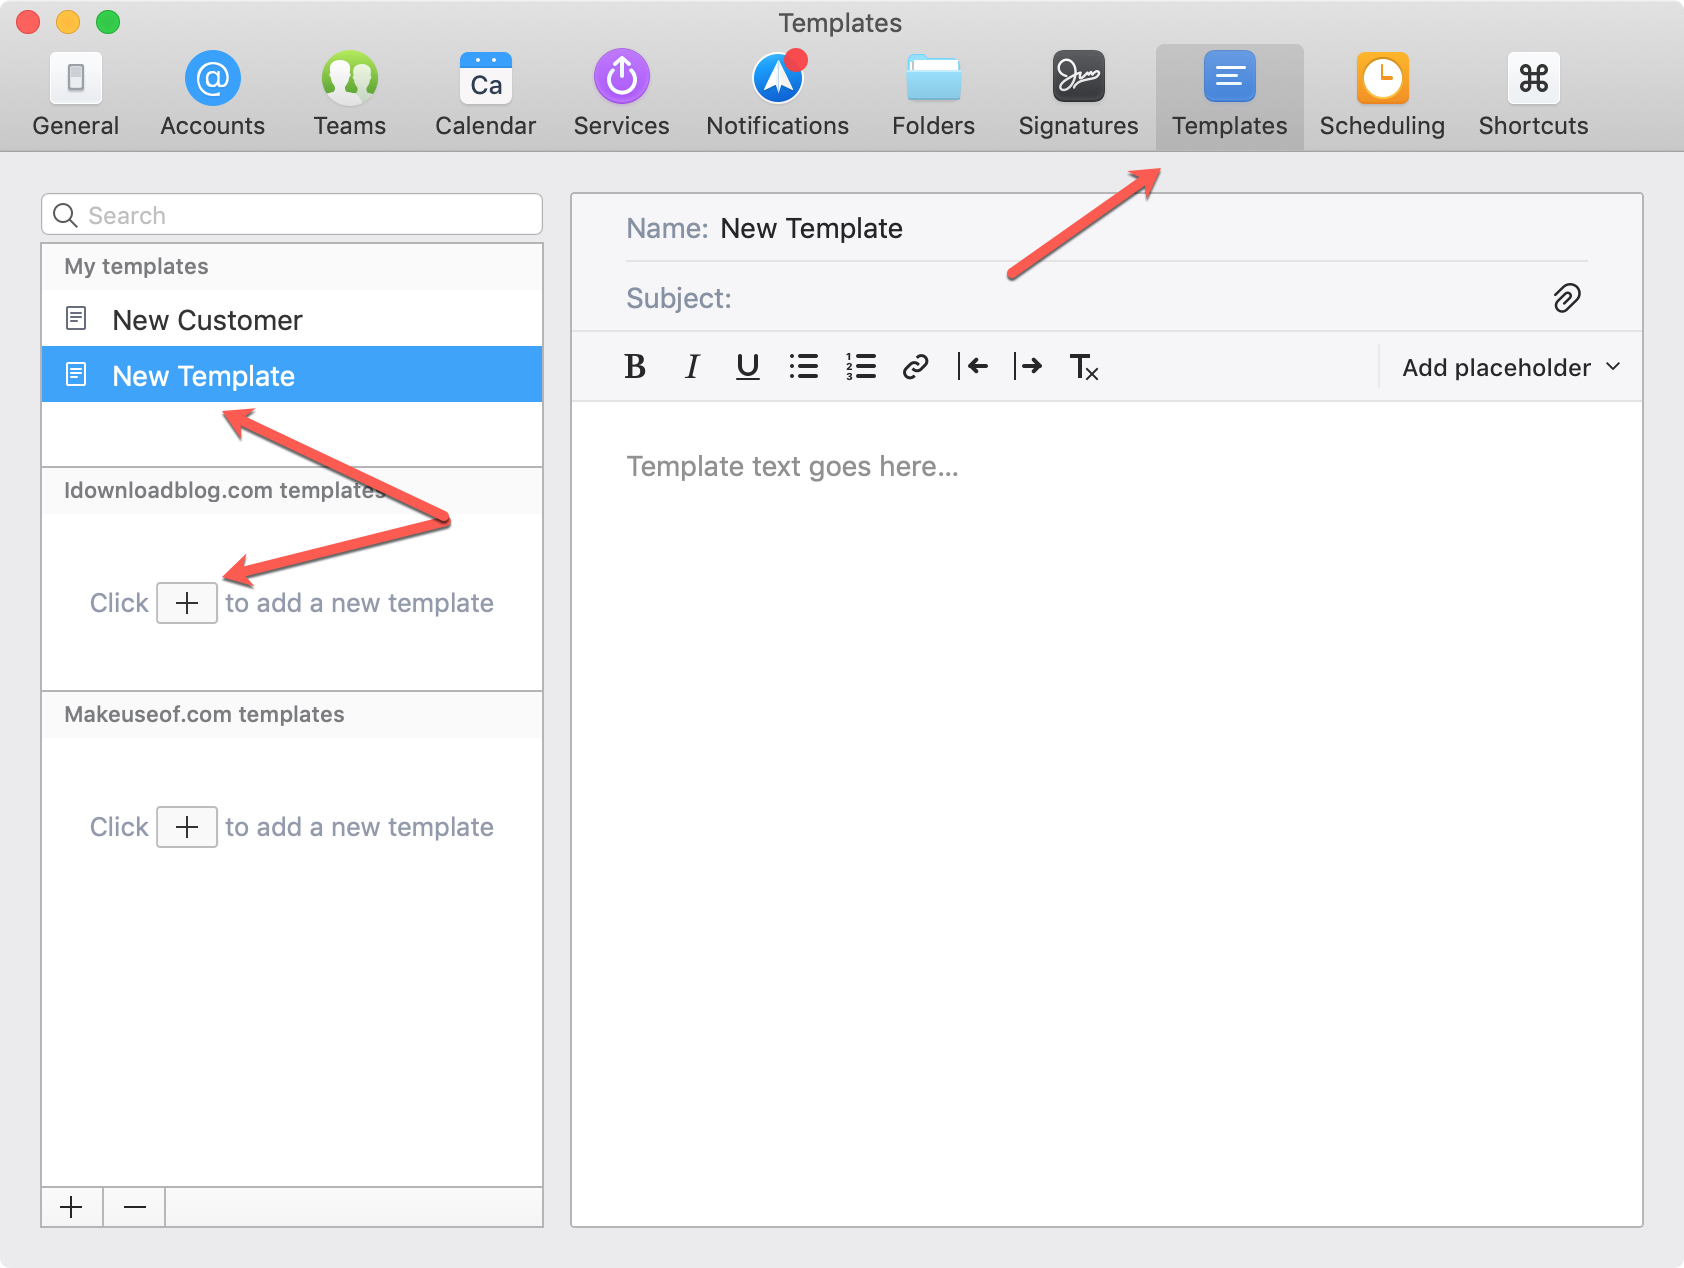
Then, follow these steps.
1) Give your template a Name and Subject at the top.
2) Type in your email message.
3) Select the Add Placeholder button and pop in the placeholders where you need them.
Here’s an example:
Hello [Recipient’s first name],
Thank you for your recent order of [Product name].
We’re happy to have you as a customer and look forward to serving you further.
Thank you,
[My full name]
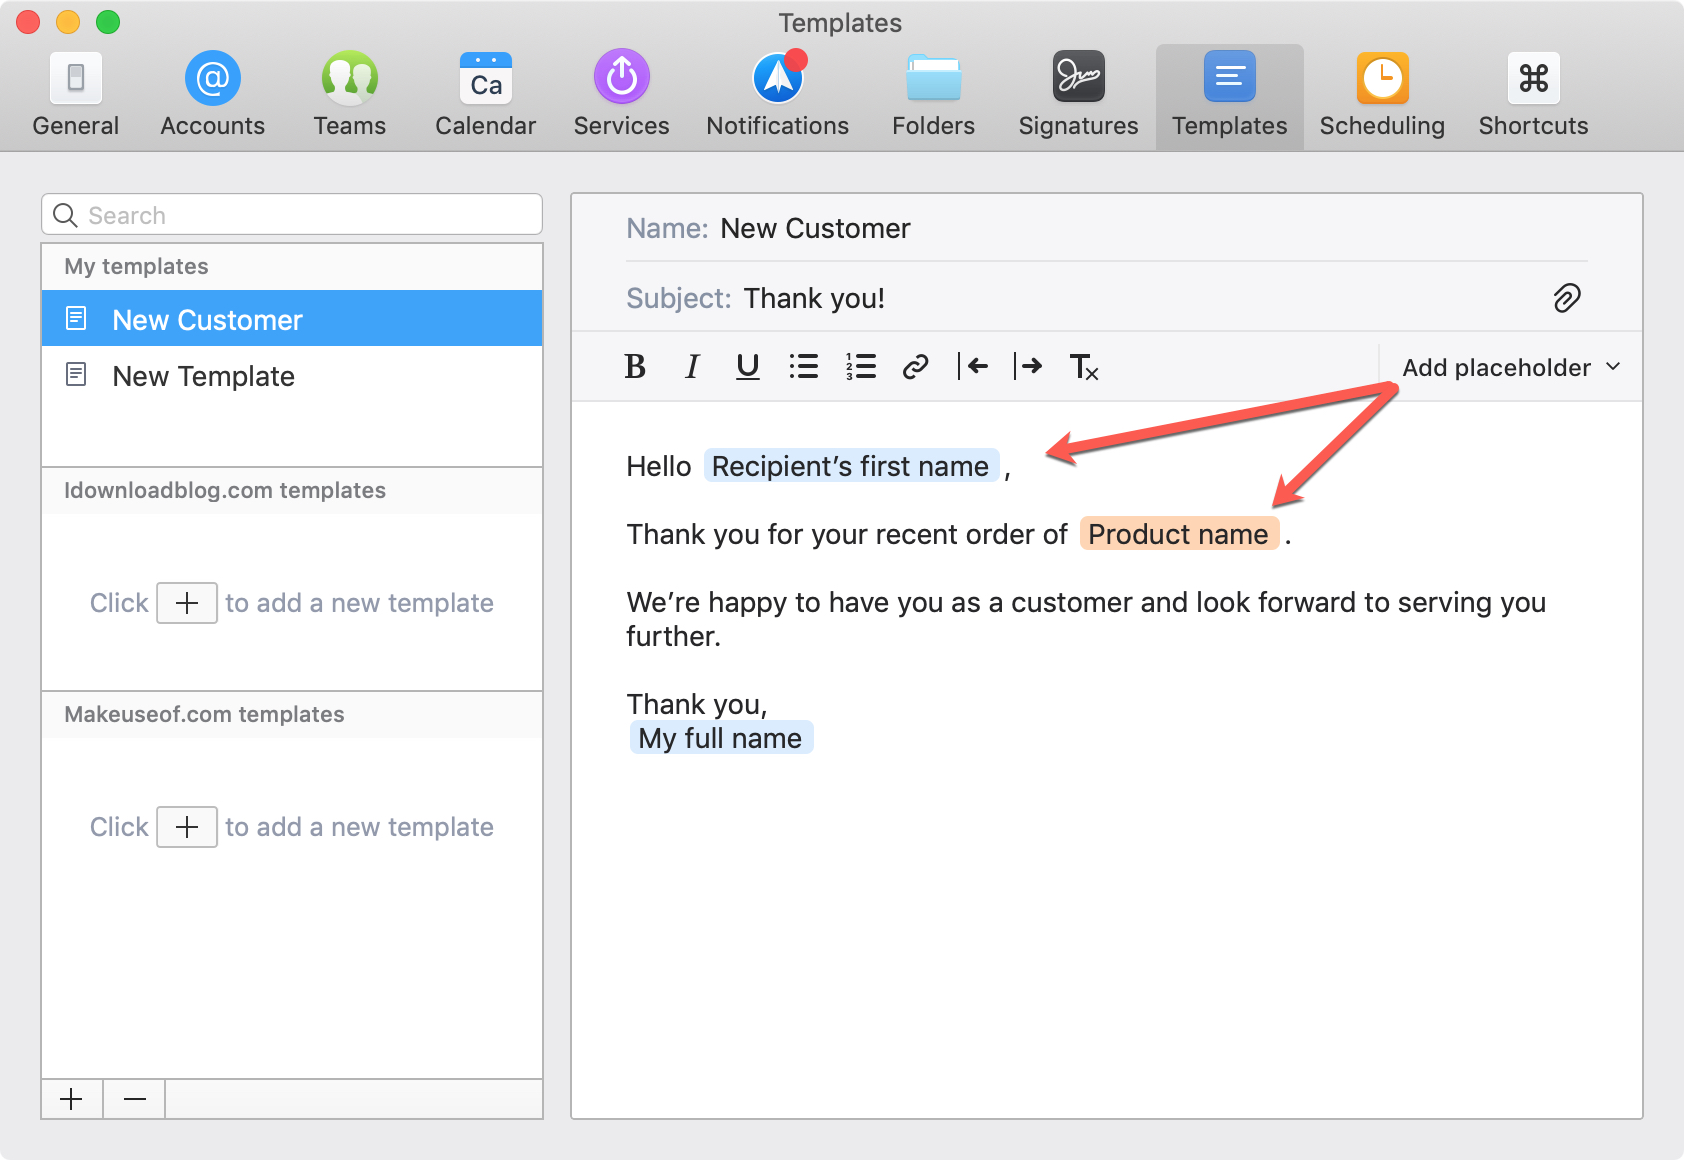
As you can see, the blue placeholders were chosen from the list of preset options. The orange placeholder is a custom placeholder that I labeled “Product name”.
When you finish, the template is automatically saved.
Using a Spark email template on Mac
Now when you’re ready to use the template you create, simply do the following.
1) Compose, reply to, or forward an email. If you are composing a new email, be sure to enter the recipient before applying the template otherwise the blue preset placeholders for the recipient will not populate.
2) At the bottom right of the email window, click the Templates button.
3) Select the name of the template you want to use.
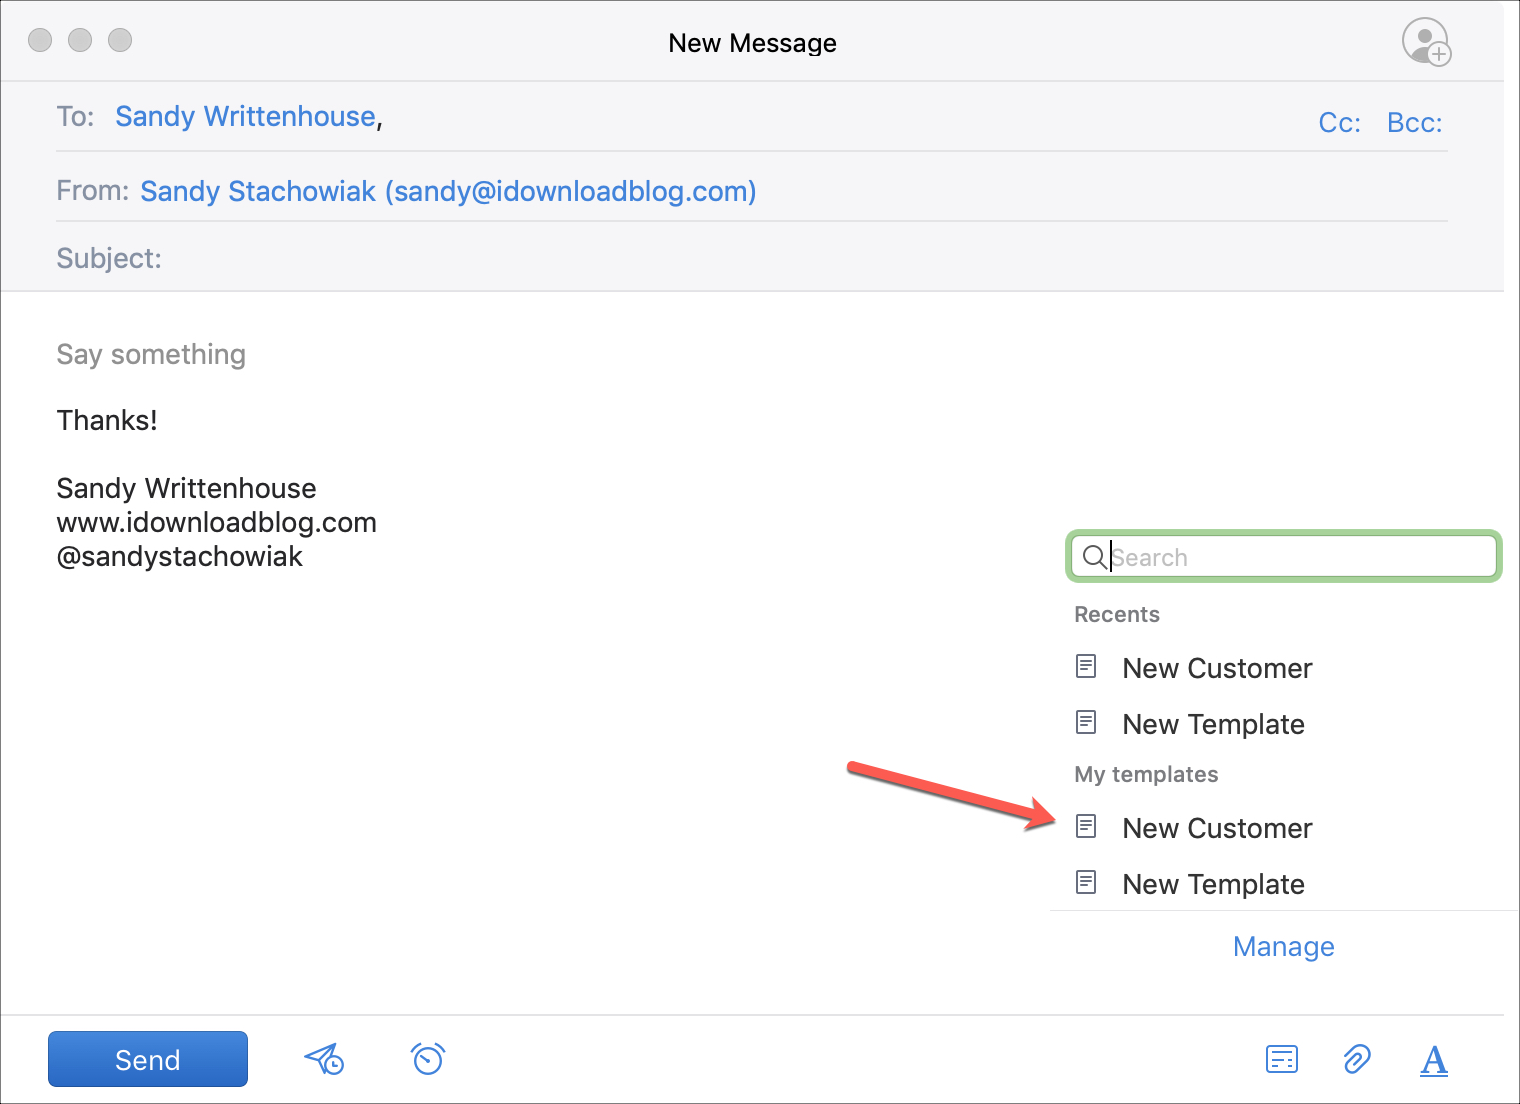
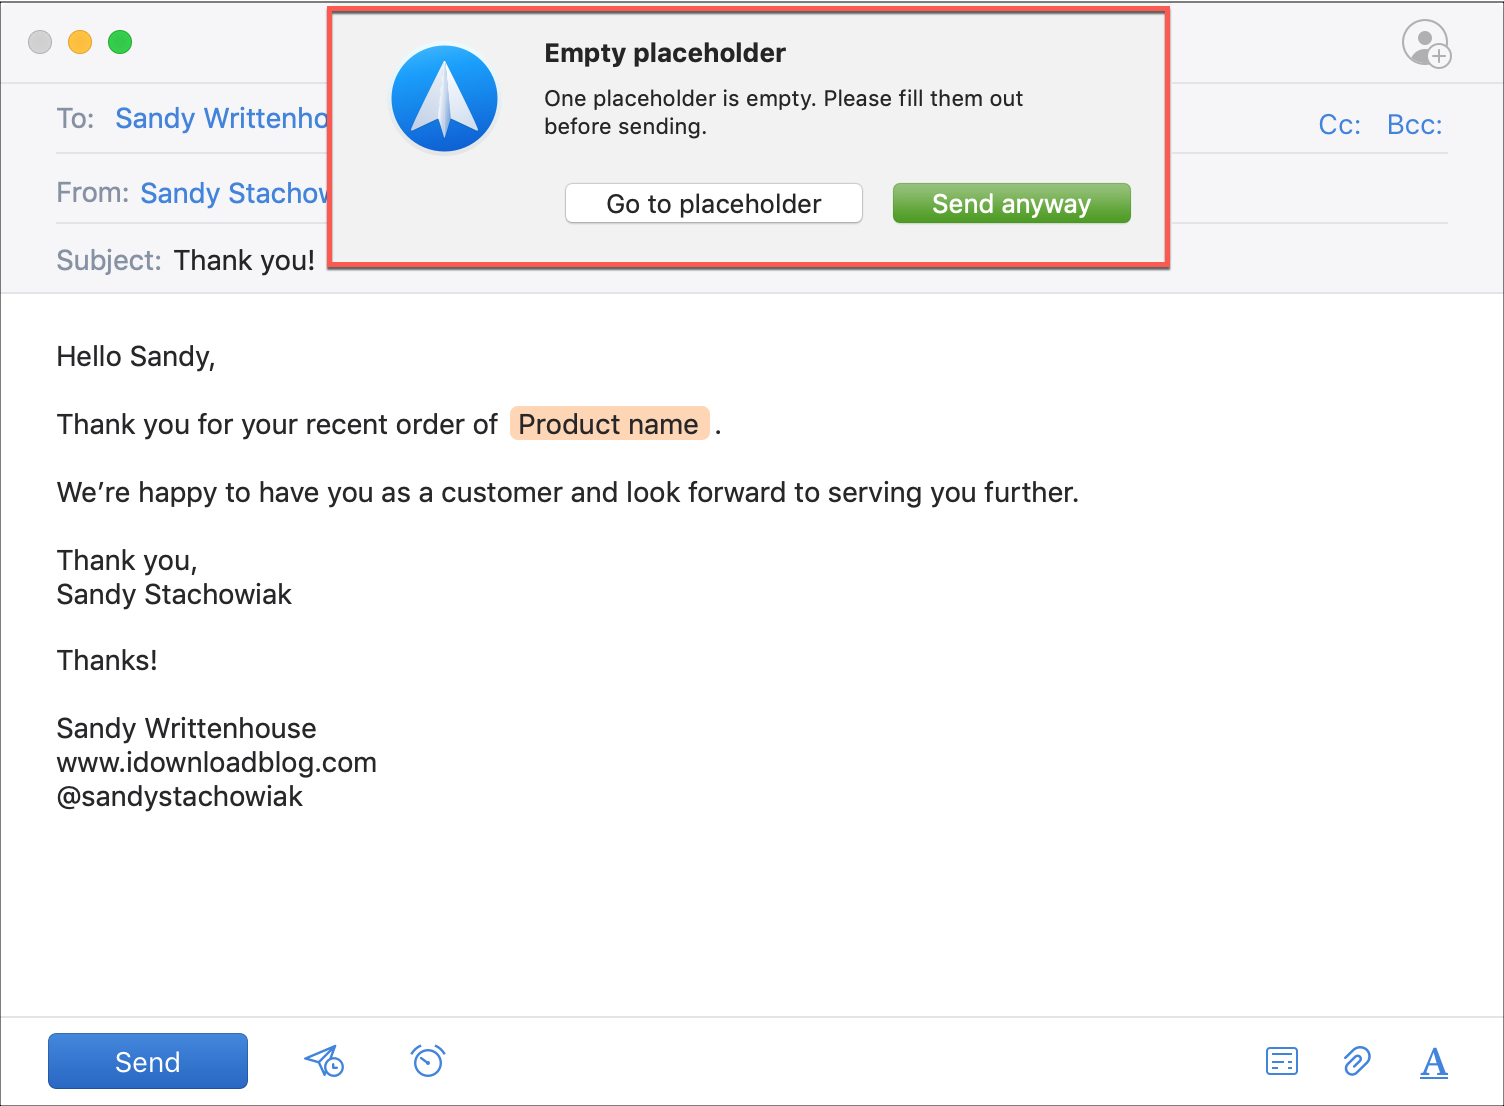
Once you click to use the template, it will pop into your email and the blue placeholders will automatically populate. You will also see a very brief message letting you know the template was applied and you can click Undo to remove it.
Next, just enter the information for any of the orange placeholders that you use. If you forget to do this, Spark will remind you before the email can be sent.
Spark email templates on iPhone
If you use Spark on your iPhone in addition to Mac, you can access your templates on your device as well create and use new ones.
Creating a new template
Open Spark on your iPhone and follow these steps to create a new template.
1) Open the menu on the left, scroll down to and tap Settings.
2) Tap Templates.
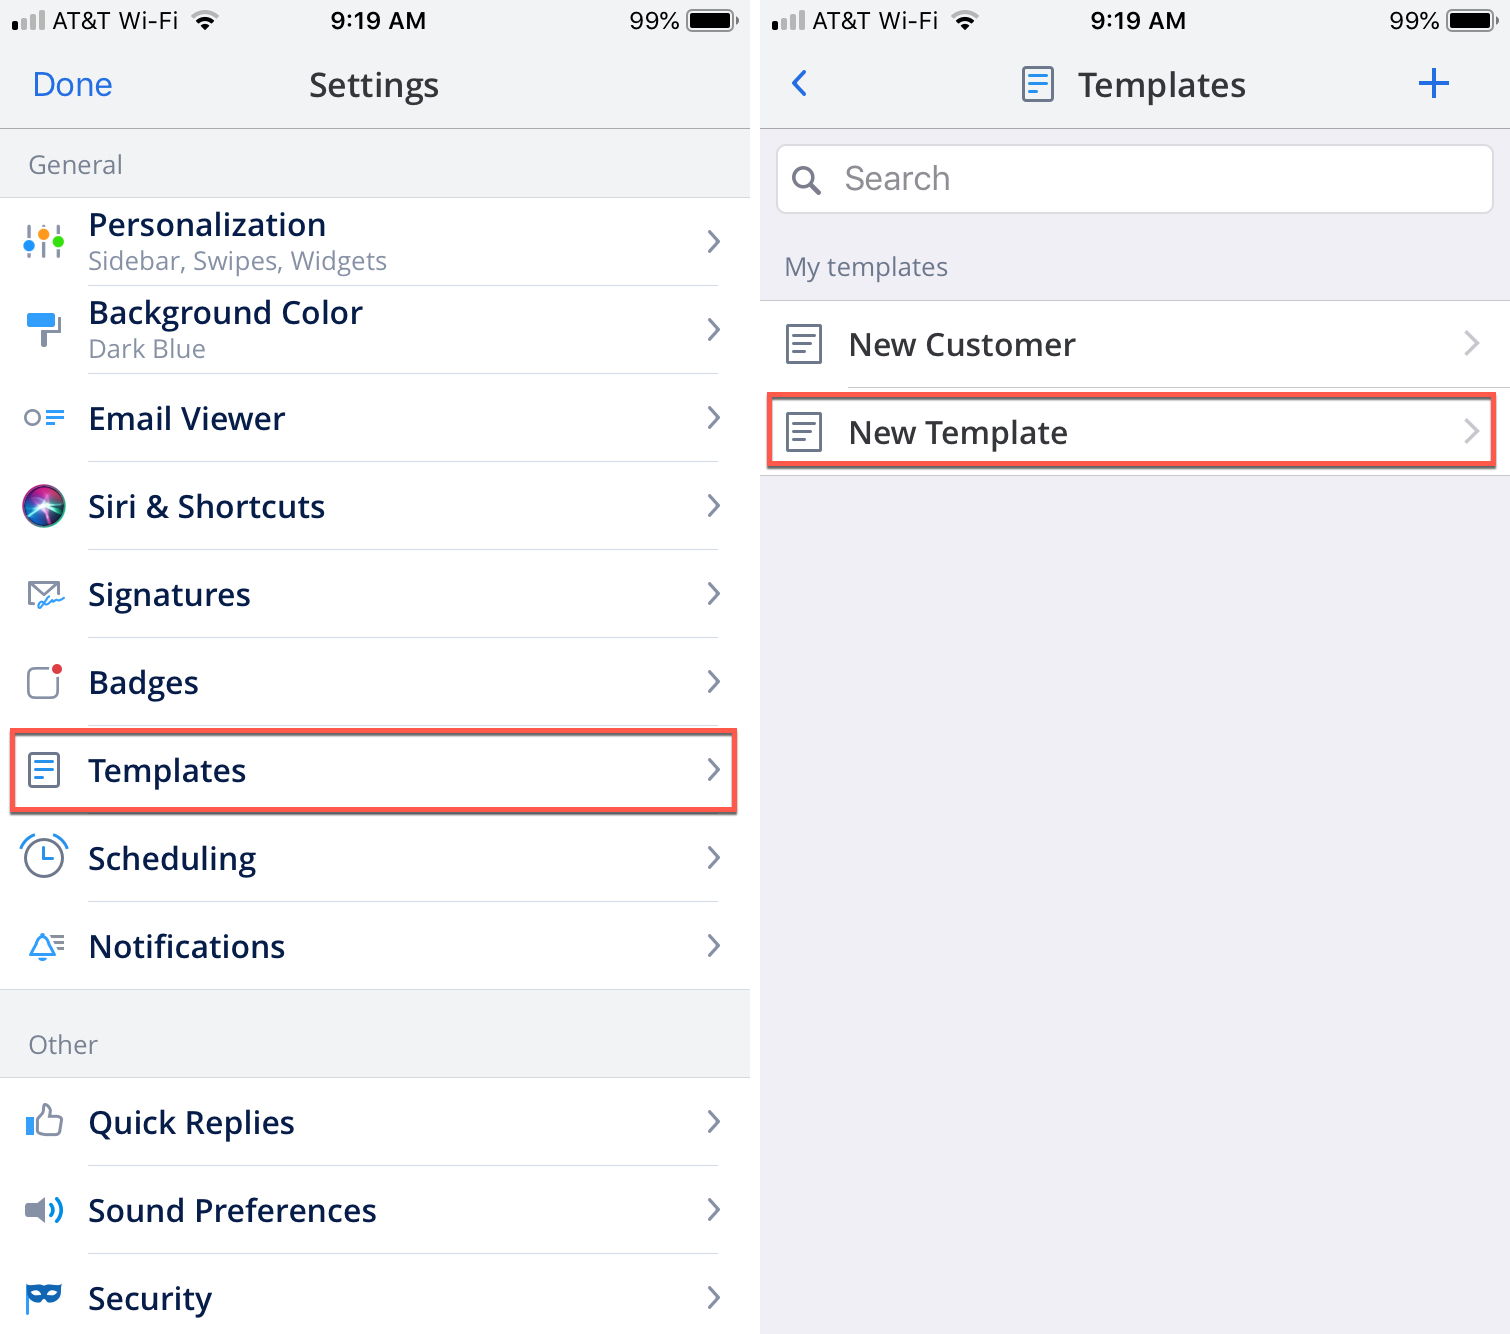
3) Choose New Template.
Just like on Mac, you can give your template a Name and Subject, type your text, and add placeholders.
Using a template
Applying a template to an email is simple, just do the following.
1) Compose, reply to, or forward an email. If you are composing a new email, be sure to enter the recipient before applying the template otherwise the blue preset placeholders for the recipient will not populate.
2) On the bottom left of the email window, click the Templates button.
3) Select the name of the template you want to use.
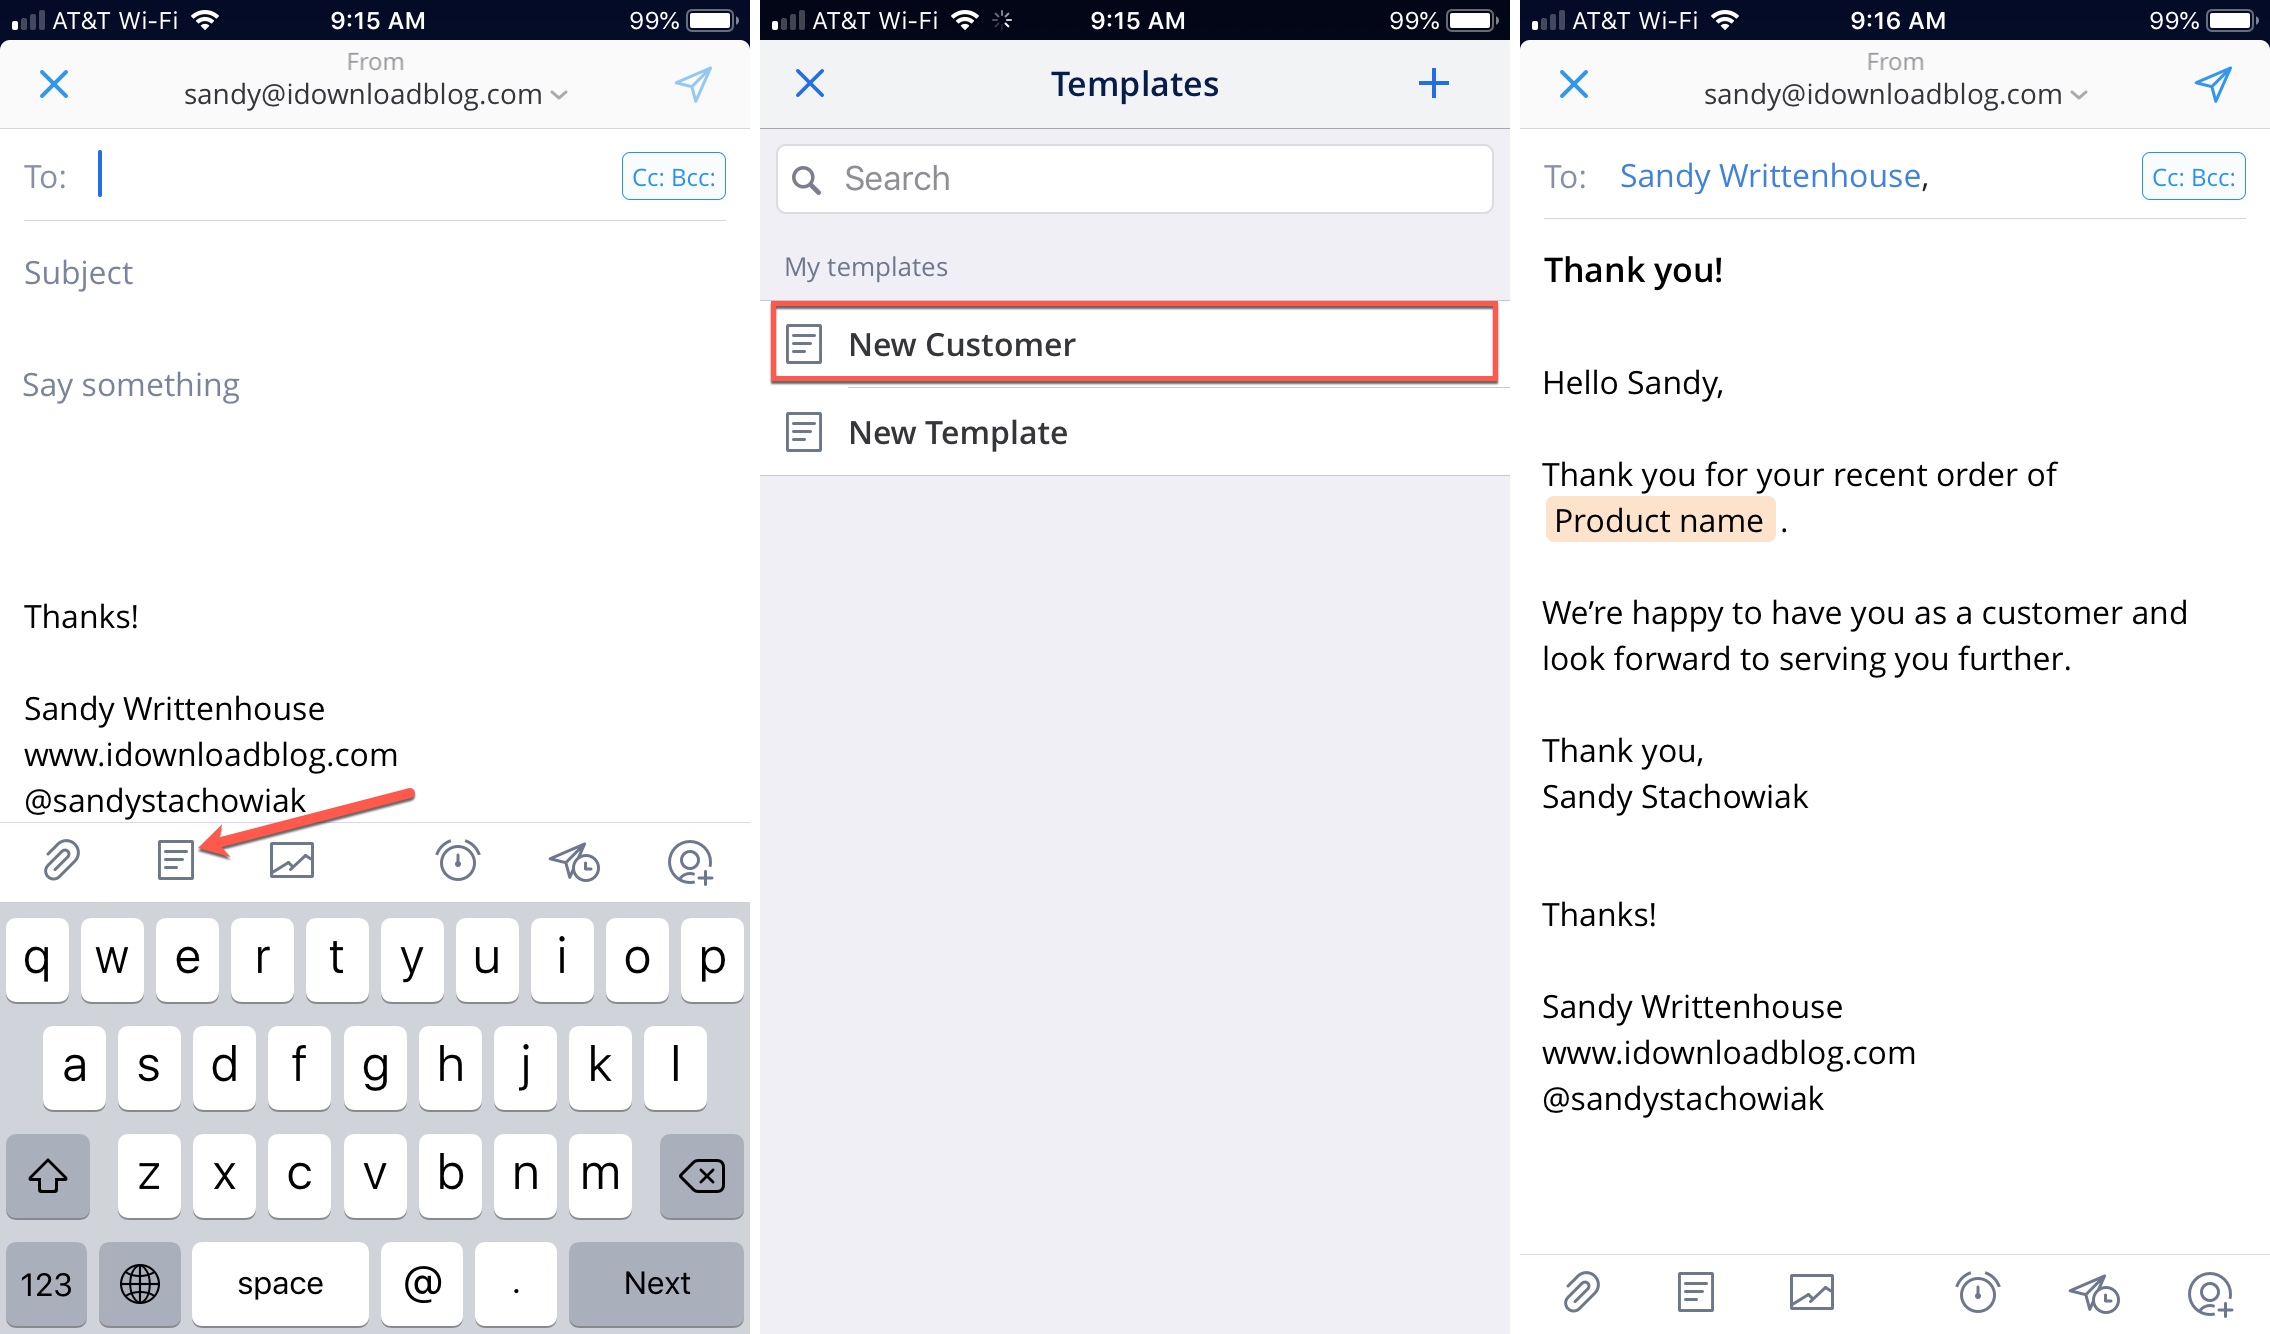
Again, like on Mac, you will see your blue placeholders populate with the information and you’ll need to enter the details into the orange placeholders.
Wrapping it up
The ability to create email templates in Spark really is a nice new feature. Having different templates for various emails you send regularly is a total time-saver. Are you going to use this handy new Spark feature? If you do, let us know what you think of it!
You might also check out how to set up multiple signatures in Spark and configure your Spark Smart Inbox.
Source link: https://www.idownloadblog.com/2018/11/14/spark-email-templates-mac-iphone/


Leave a Reply