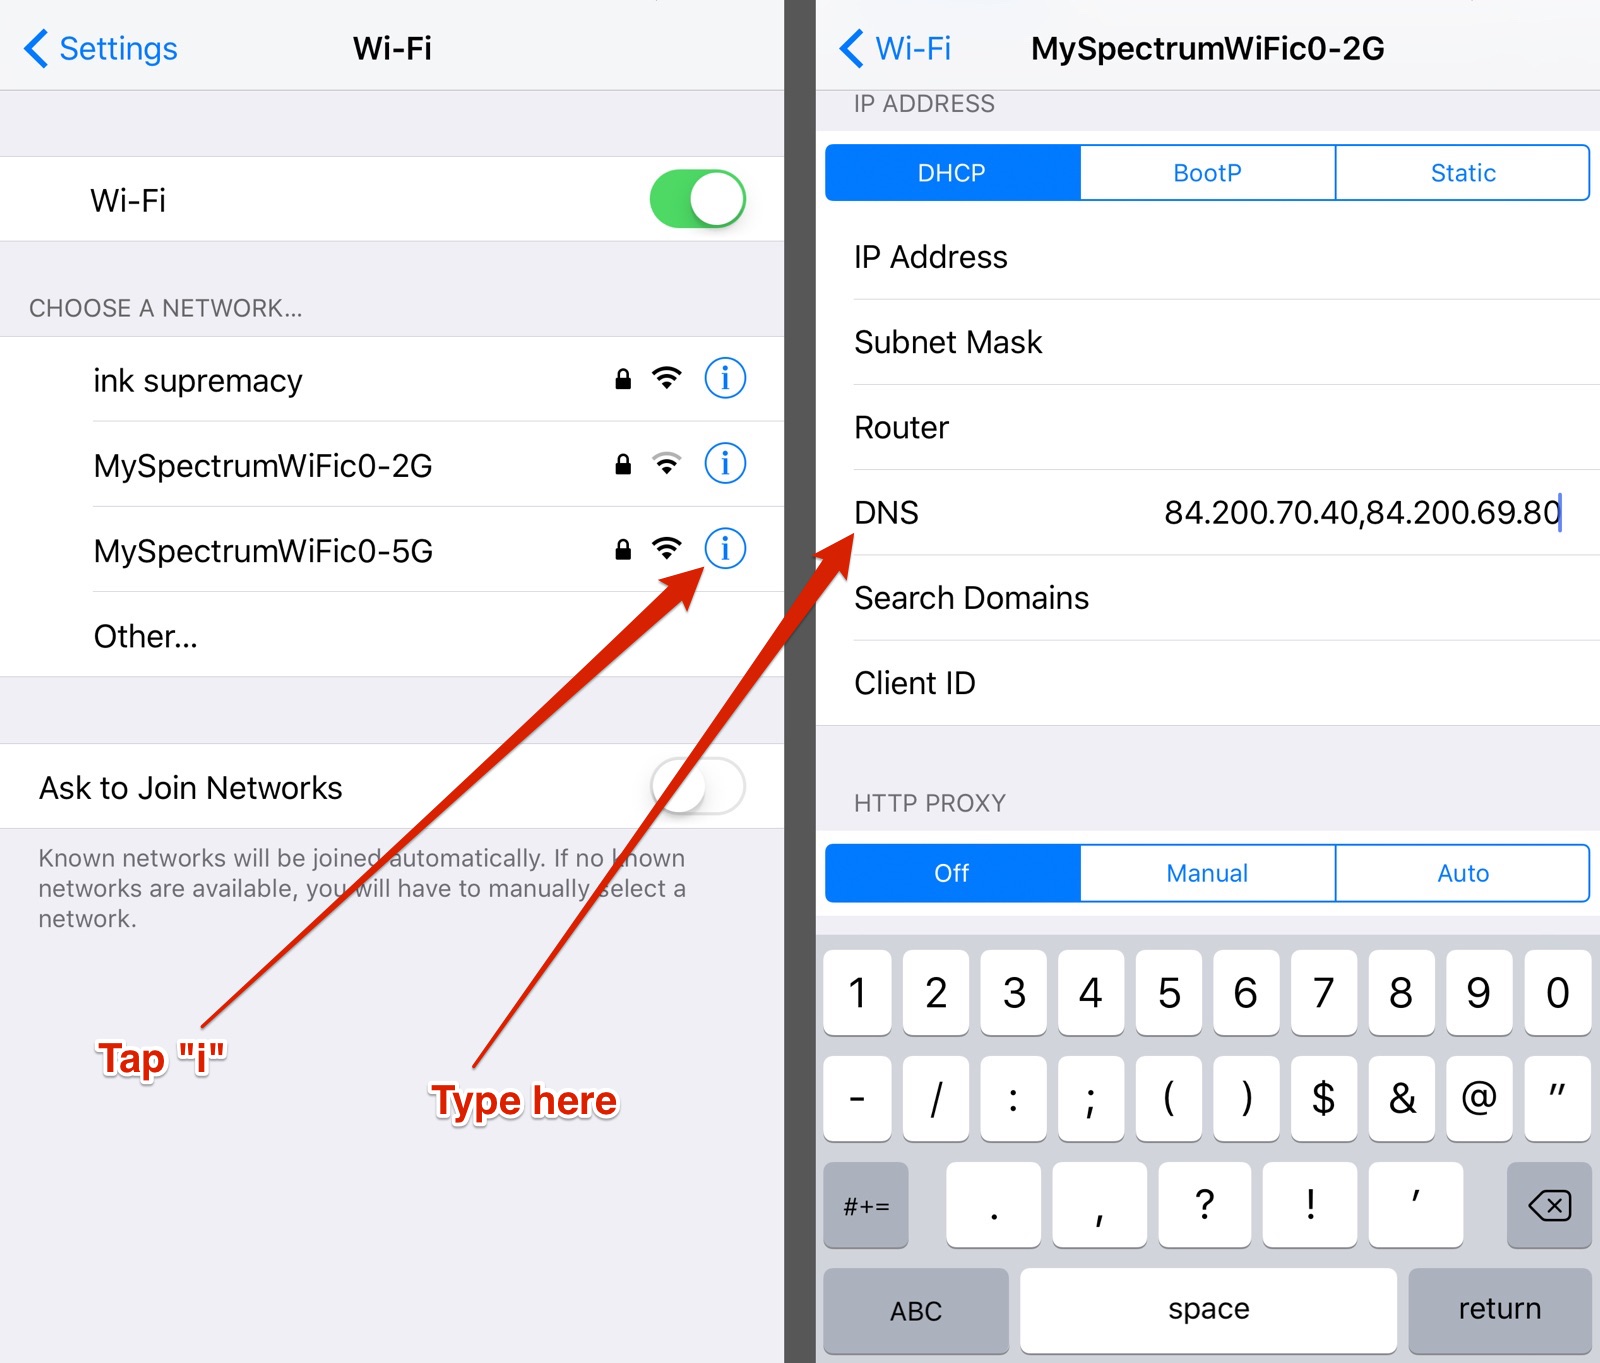
Tip: Easily Change Your iOS DNS Settings

By default, your device automatically uses the DNS settings provided by your ISP. But you don’t have to use those settings, especially if you want something geared towards privacy. You may have known that it’s possible to change your DNS on a Mac, but did you know you can also change your iOS DNS?
First, a quick primer. DNS, or Domain Name System, is a type of system used to name any device or service connected to the internet. Most importantly, it translates numerical IP addresses to more human-friendly names, like macobserver.com.
Browser requests are sent to a DNS server controlled by a third party, usually your ISP. But it’s possible for your ISP to know which websites you visit, but also censor websites it doesn’t like. Thankfully, there are DNS services that are committed to privacy, and defeating censorship.
That’s it.
There are a variety of DNS services to choose from, and plenty of free ones. Here are several services you can use.
Google Public DNS
Primary Server: 8.8.8.8
Secondary Server: 8.8.4.4
OpenDNS
Primary Server: 208.67.220.220
Secondary Server: 208.67.222.222
DNS Watch
Primary Server: 84.200.70.40
Secondary Server: 84.200.69.80
I’ve used all of the above DNS services, and they are all free to use. It doesn’t matter a whole lot which one you choose. Some services market themselves as “fast DNS,” but I’ve never noticed speed differences between services.
For my preference, I’ve been sticking to DNS Watch. They promise to protect your privacy by not logging your DNS queries or hijacking your browsing.
Source link: https://www.macobserver.com/tips/how-to/tip-easily-change-ios-dns-settings/


Leave a Reply