

How to schedule an email in the Mac Mail app with Automator
While it seems like a simple request, many of us are still waiting for a “send later” feature in the Mail app. Having the ability to compose your email and schedule a time for it to be sent is wonderful for both business emails and personal ones.
For work, you might be diligent about managing your time and work on emails at a specific time each day. So writing them up and scheduling a time to send them is not just convenient, but essential. For personal emails, you might create messages for birthdays, anniversaries, or other occasions ahead of time. Being able to schedule those keeps you from forgetting to send them when the time comes.
Until Apple adds a feature to Mail that lets us send emails later, you have a few options. The one we’ll show you here is how to use Automator on Mac to schedule Mail.
Set up email with Automator
Open Automator on your Mac from the Applications folder in your Dock or Go > Applications from your Finder menu.
1) Select New Document and then pick Application for the type.
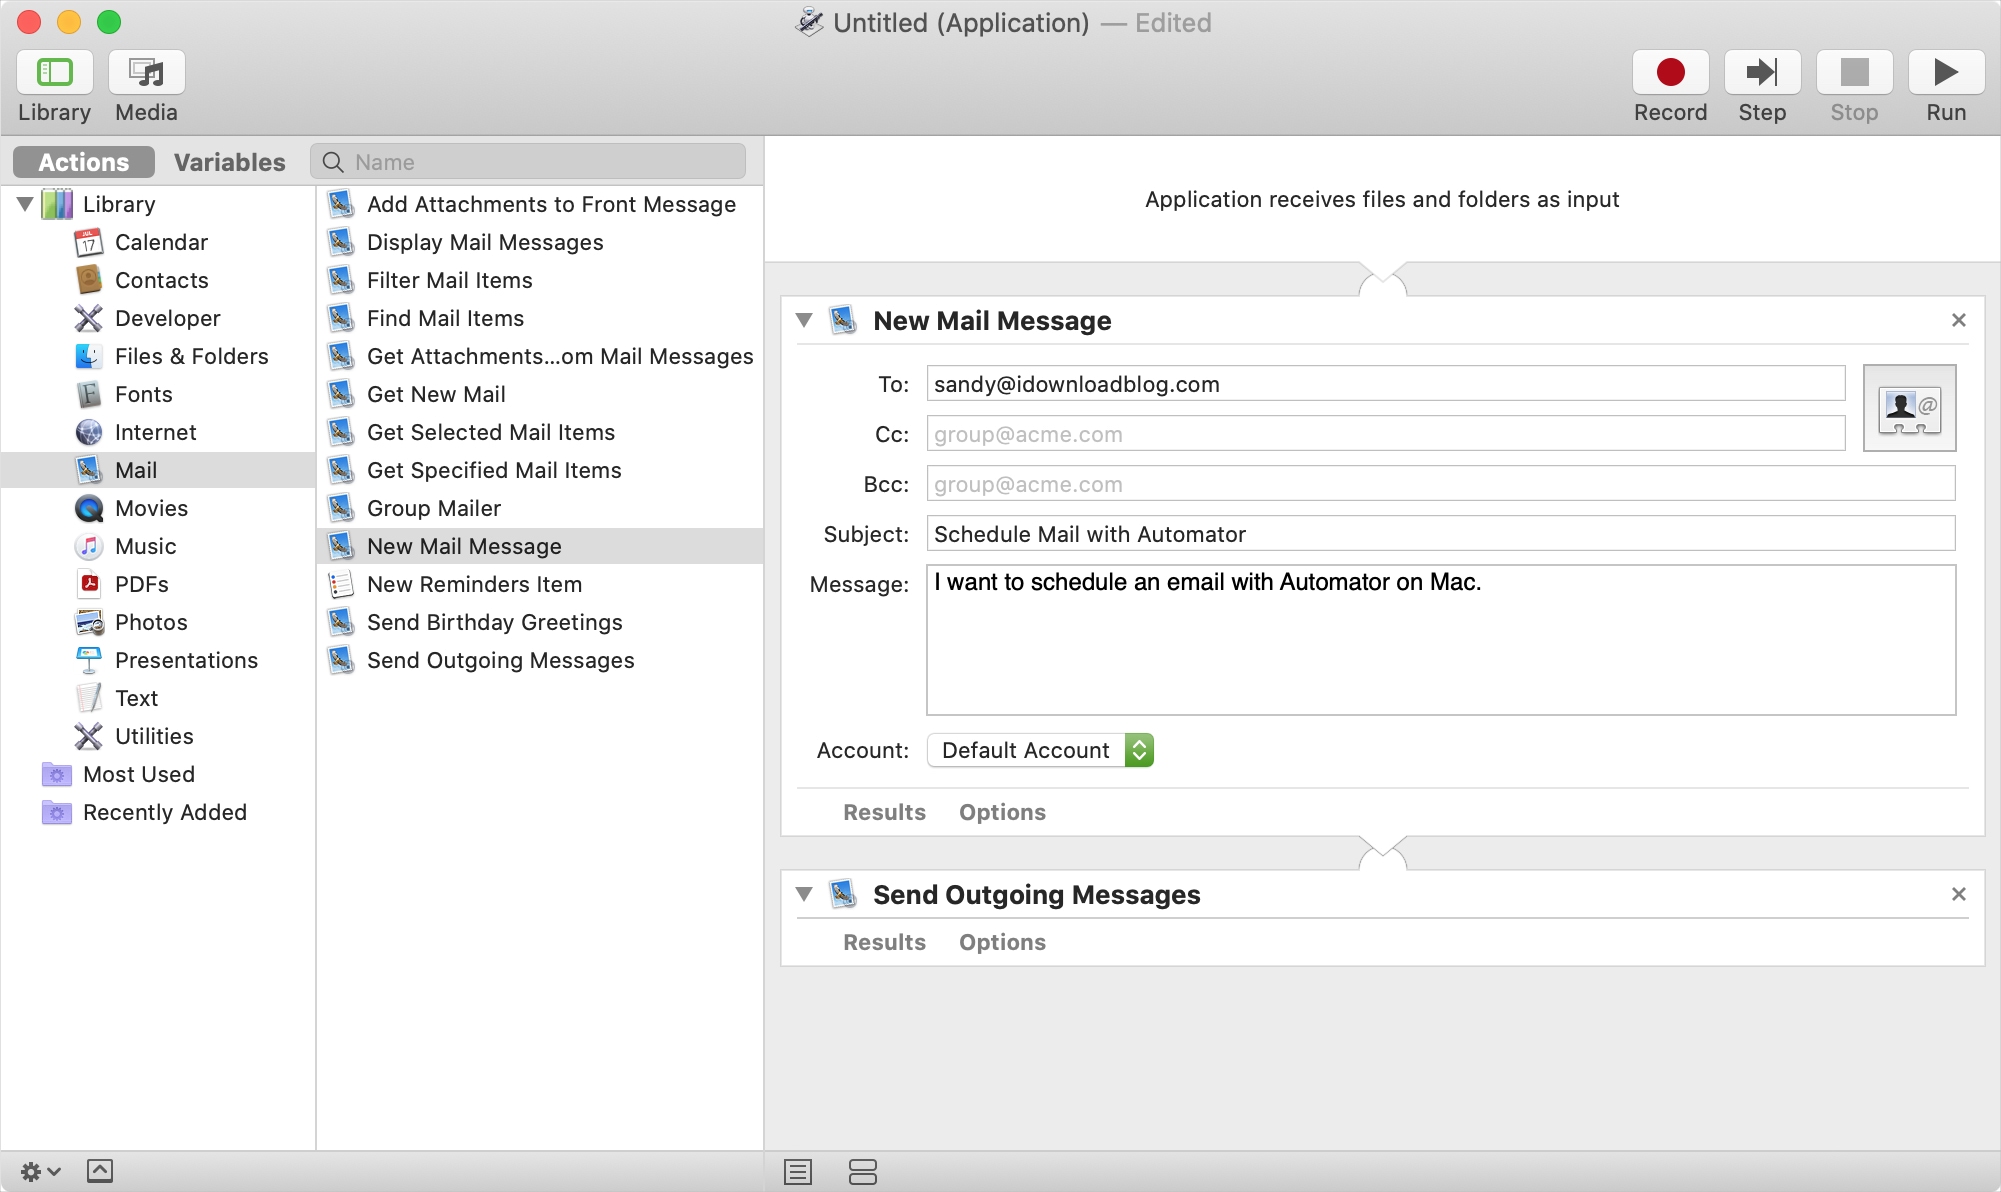
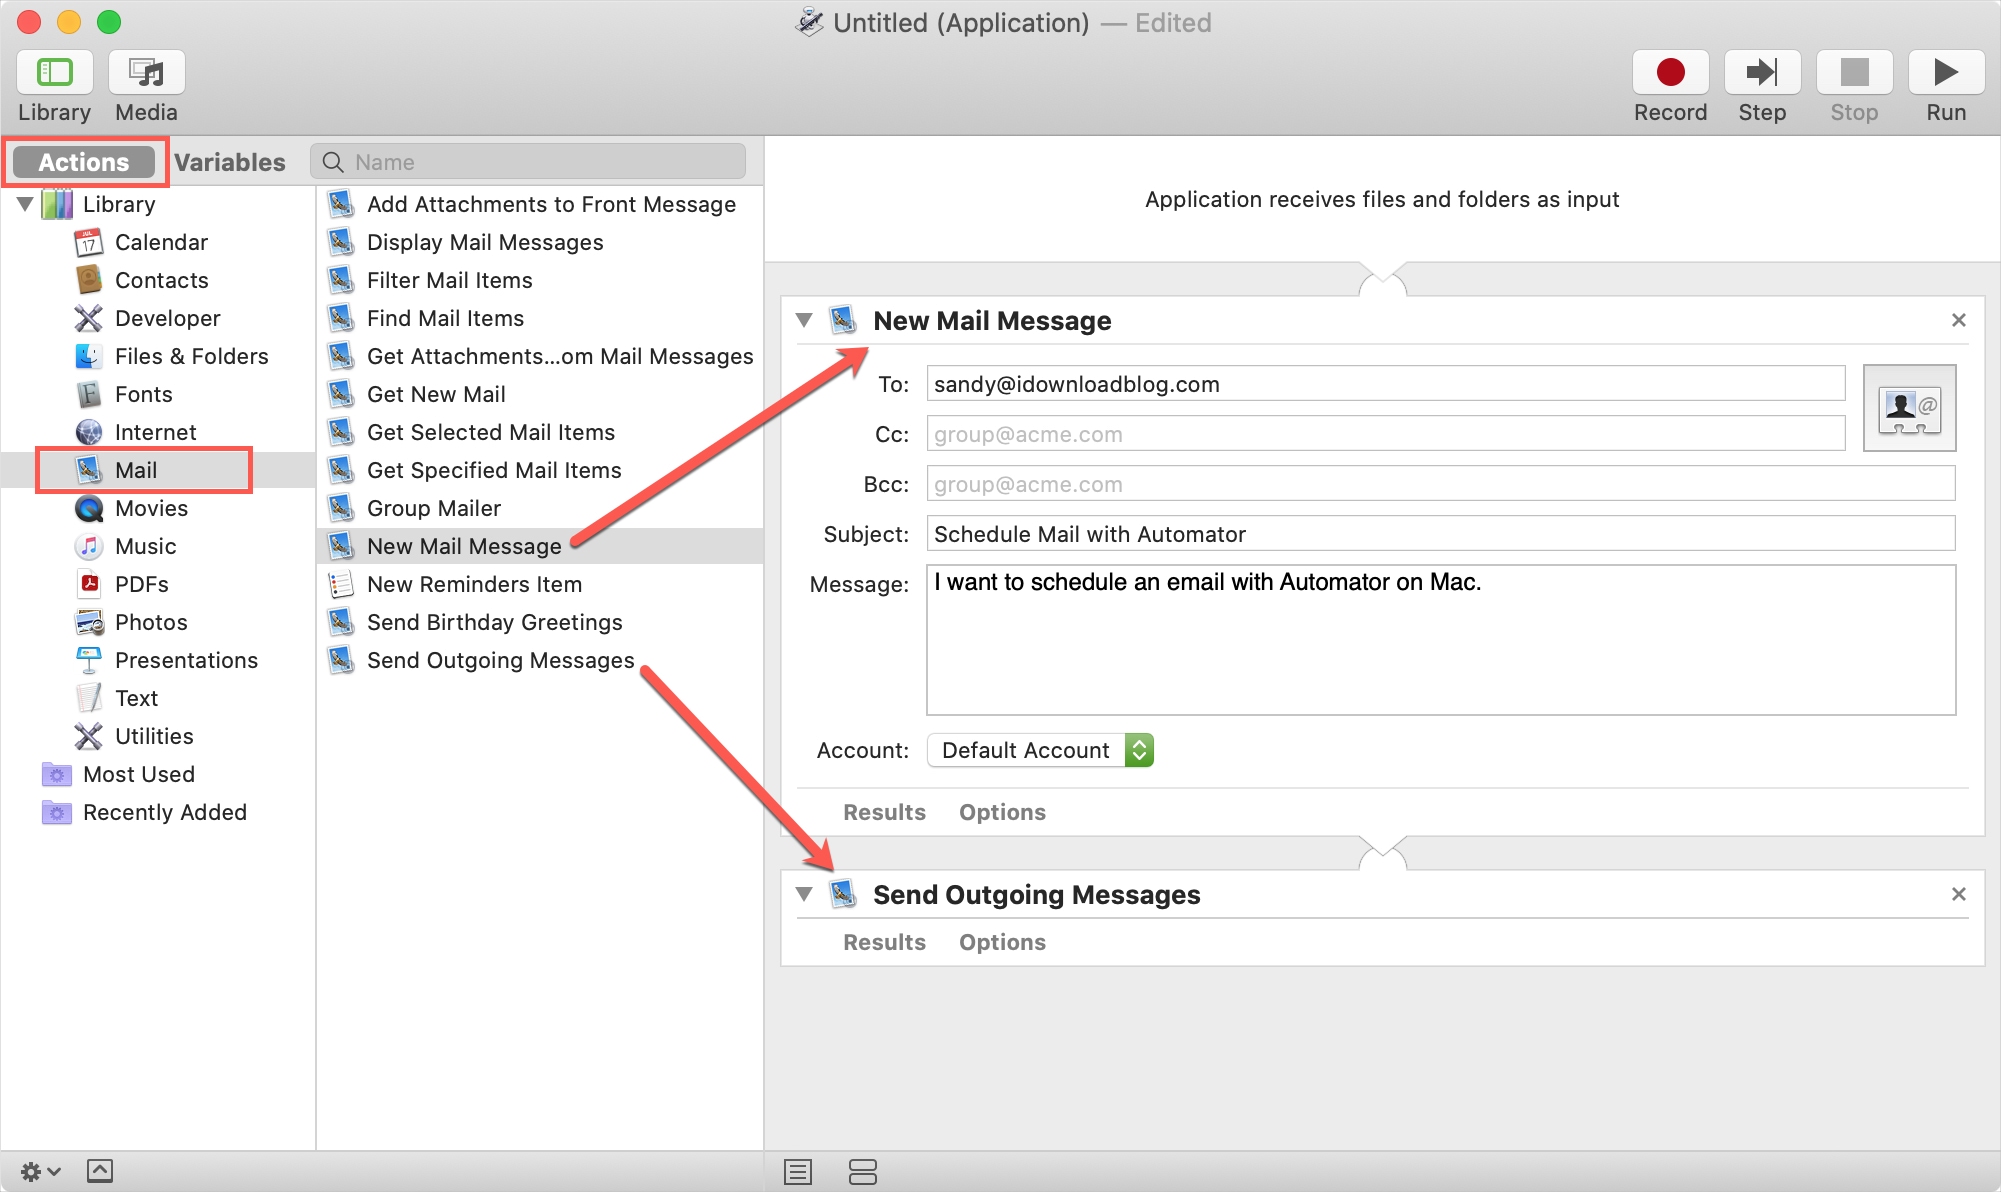
2) In the far left-hand sidebar, make sure Actions is selected and under Library, and pick Mail.
3) To the right, choose New Mail Message and drag it to the workflow space.
4) Compose your message in that New Mail Message box, include all pieces (To, Subject, etc.) and select an Account if necessary.
Follow the same steps to add more messages that you’d like to schedule for the same time.
5) Choose Send Outgoing Messages from the list and drag it to the workflow window below the New Mail Message box (or after the last Message box if you have more than one).
6) Click File > Save, give your Application a name (like Schedule Mail), and hit Save. By default, Automator will save the Application to Automator > iCloud, but you can select a different spot if you like. Just remember where you save it for the next steps.
What you did with the steps above was create an Automator Application that will send the email you composed when it’s triggered. Now it’s time to set up the trigger on a date and at a time you choose in your Calendar.
Related: How to speed up tasks with Automator and Calendar Alarms on Mac
Schedule the email with Calendar
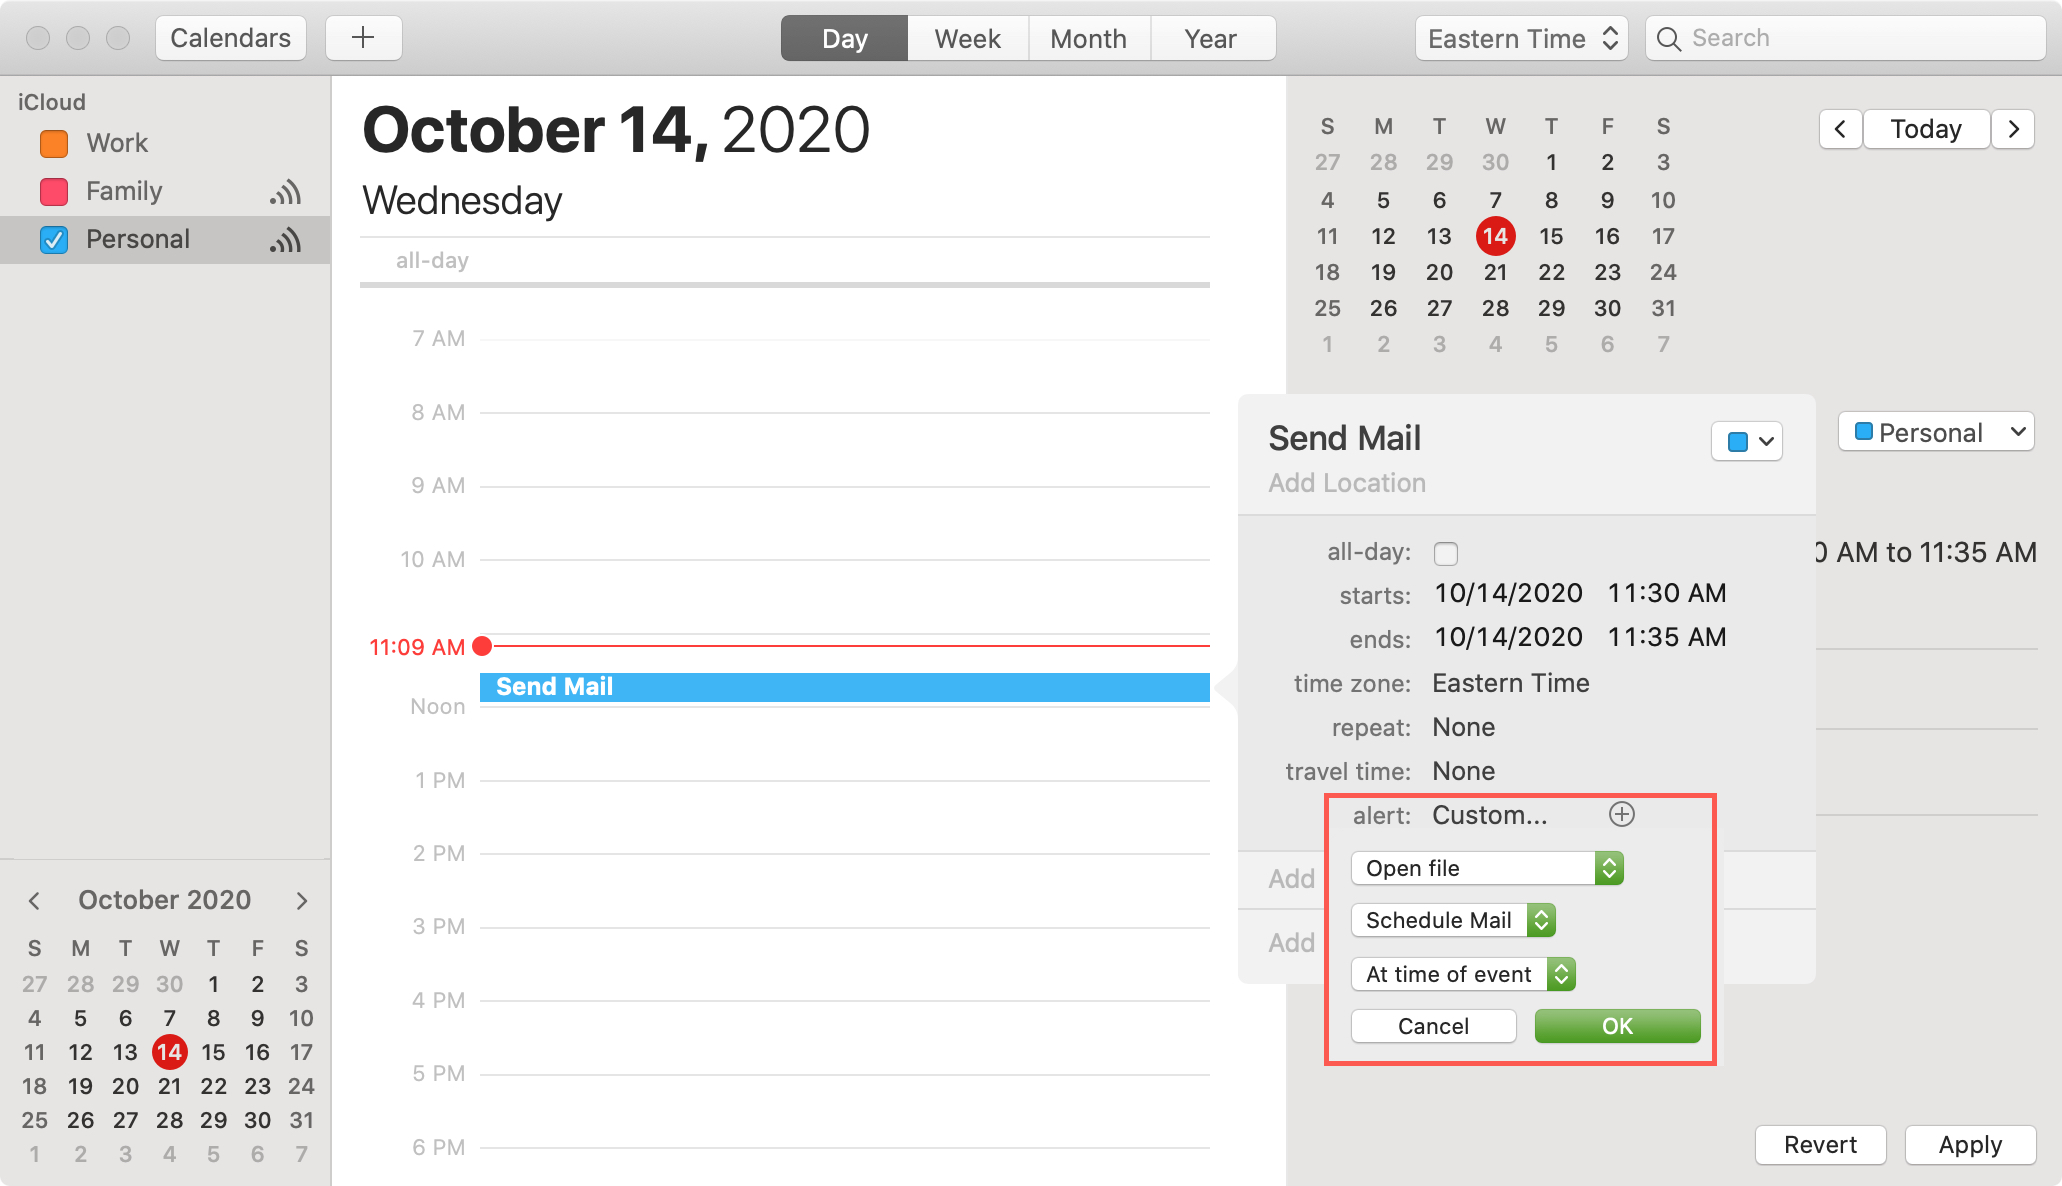
Open Calendar on your Mac and head to the date when you want to send the email(s). Create an event on that date and select the time you’d like. Then, do the following.
1) Under Alert, pick Custom.
2) In the first drop-down box, choose Open File.
3) In the next drop-down box, select the application you created. You’ll likely need to pick Other and navigate to where you saved it.
4) For the Alert timing, choose At Time of Event in the drop-down box.
5) Click OK.
And there you have it! You’ve created an application to send the email you wrote on the date and at the time you want. After the scheduled time, you can head to your Sent folder in the Mail app to double-check that the email was sent as you intended.
The first time the application runs, you will receive a pop-up message asking for your permission. But if you continue to schedule emails with it, you shouldn’t see that message again.
Continue scheduling emails
As mentioned, you can reuse the Automator Application that you created to keep scheduling emails. So although it’s a bit of work upfront, reusing the application is simple.
1) Open Automator and select Open an Existing Document.
2) Locate the application and click Open.
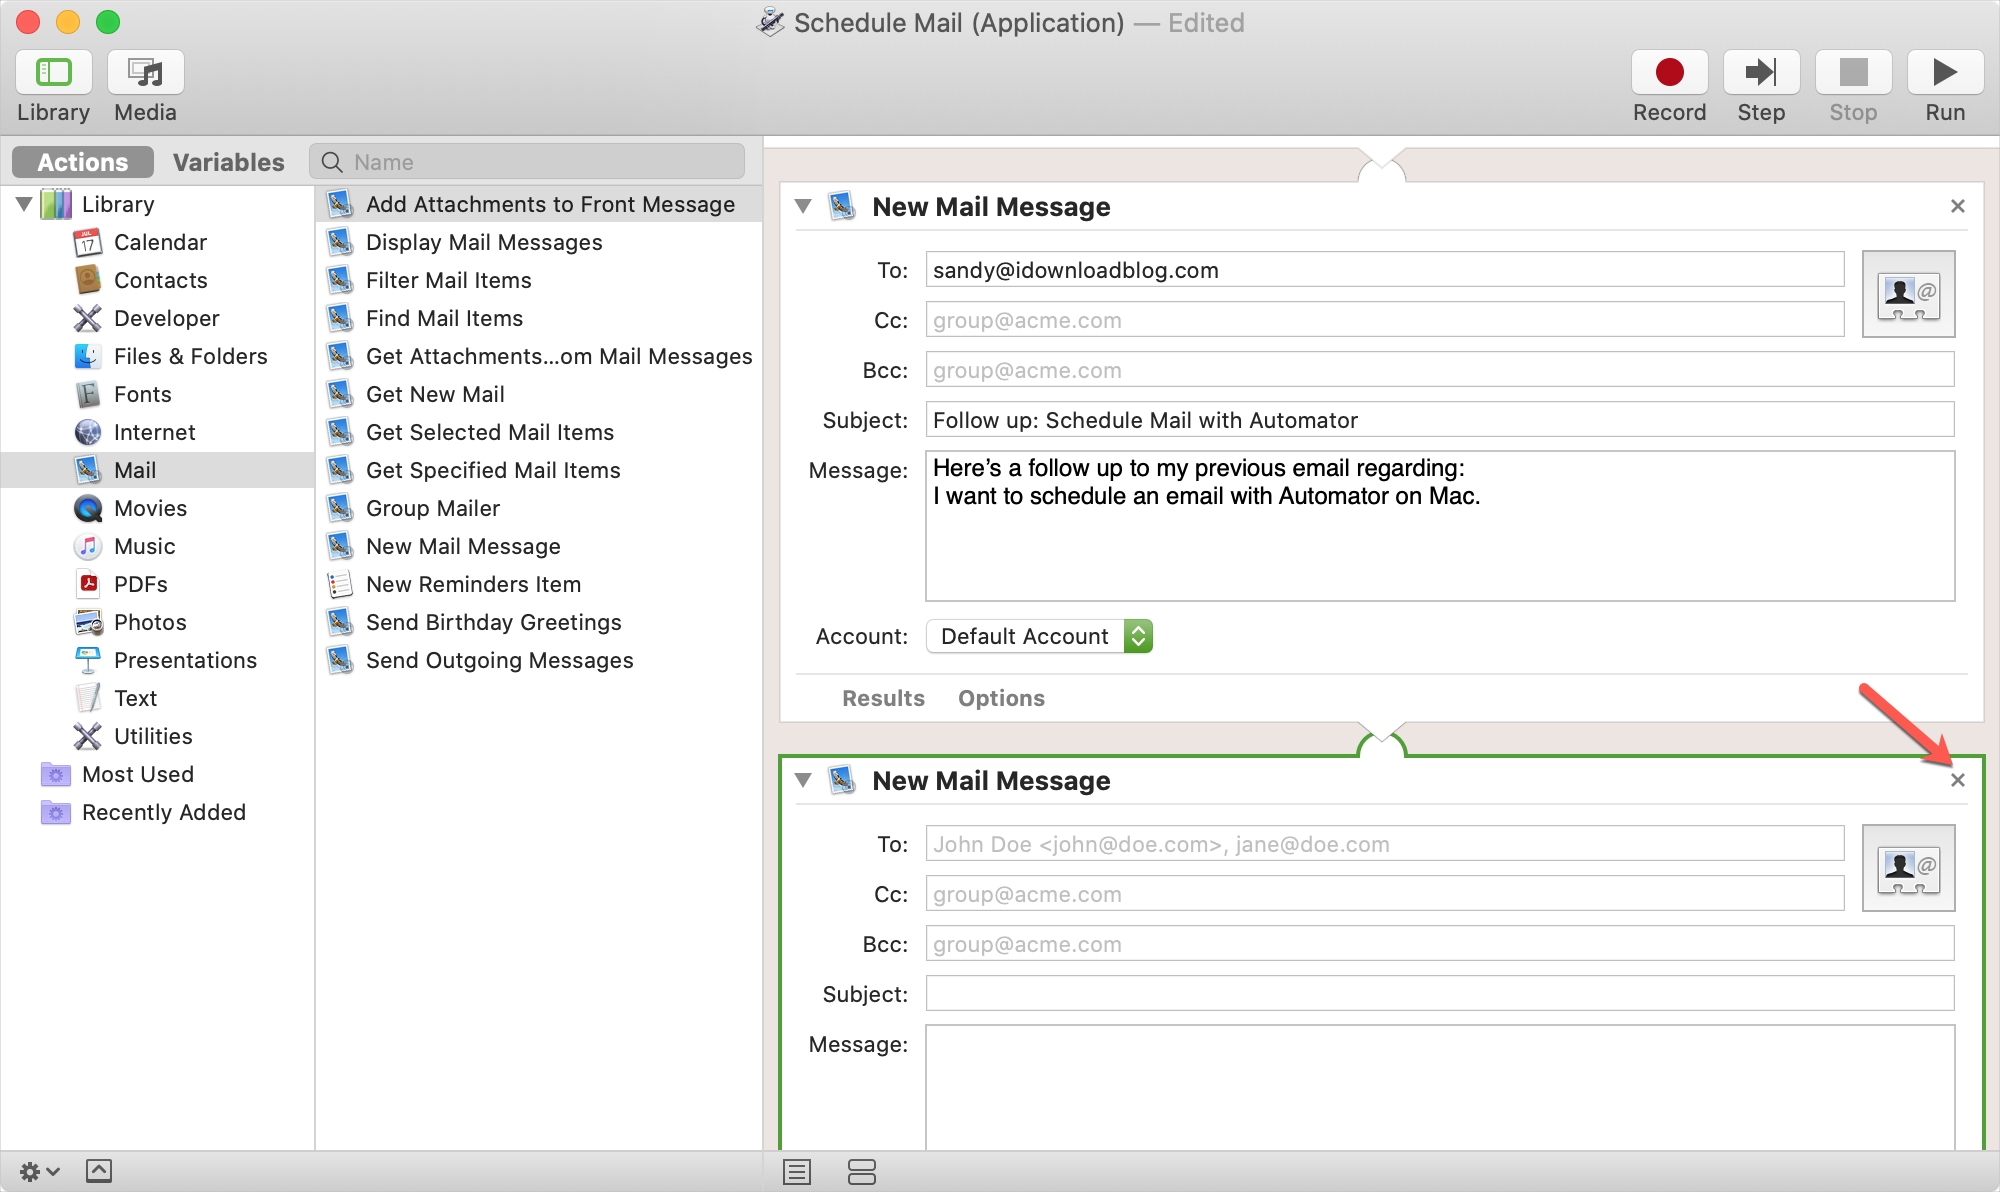
3) Make your changes to the New Mail Message box in the workflow space. If you have more than one, make sure to either edit those for additional emails or remove them by clicking the X in the top right corner.
4) Click File > Save to save the changes you made.
5) Follow the steps to add an event to your Calendar to run the application and schedule your emails to be sent.
Alternatives for scheduling emails on Mac
If you’re not keen on using Automator or don’t plan to schedule emails often, you have a couple of other options.
First, you can use a different email app. Spark Mail is a great option, available across platforms and devices, and offers a scheduling feature. Check out our how-to on using Spark to schedule emails.
Second, you can look at plug-ins for the Mail app. Mailbutler is a popular tool with features for inbox organization, team communication, and yes, email scheduling. The unfortunate part is that you’ll need to pay for the Professional or Business plan to use the feature.
Wrapping it up
Apple gives us the ability to schedule texts in the Messages app, so why not emails in the Mail app? Until a send later feature arrives for Mail, at least you have other options.
Will you schedule Mail with Automator on Mac? Or will you opt for either a different email app or a plug-in? Let us know!
Source link: https://www.idownloadblog.com/2020/10/26/schedule-email-mac-mail-automator/

Leave a Reply